Latency is an issue that every musician who records digitally wrestles with. Most commonly, we think of latency in reference to delays experienced when monitoring during tracking. But it can also be problematic when mixing. Such issues can happen when you have so many plug-ins and virtual instruments open that it overwhelms your available CPU resources and impedes your DAW’s ability to provide delay compensation.
We see a case in point in this excerpt from Start to Finish: Jacquire King - Episode 24 - Automation Part 1, where Jacquire runs into latency issues when automating volume.
Lagging Behind
Checking the System Delay indicator in the Session Setup window in Pro Tools, Jacquire notices that the mix session for “Keep the Light On” by Oak and Ash has a system delay of 15,632 samples—which is a lot. As a result, he’s experiencing latency when writing automation using the Avid Artist Mix, an external mixing controller.
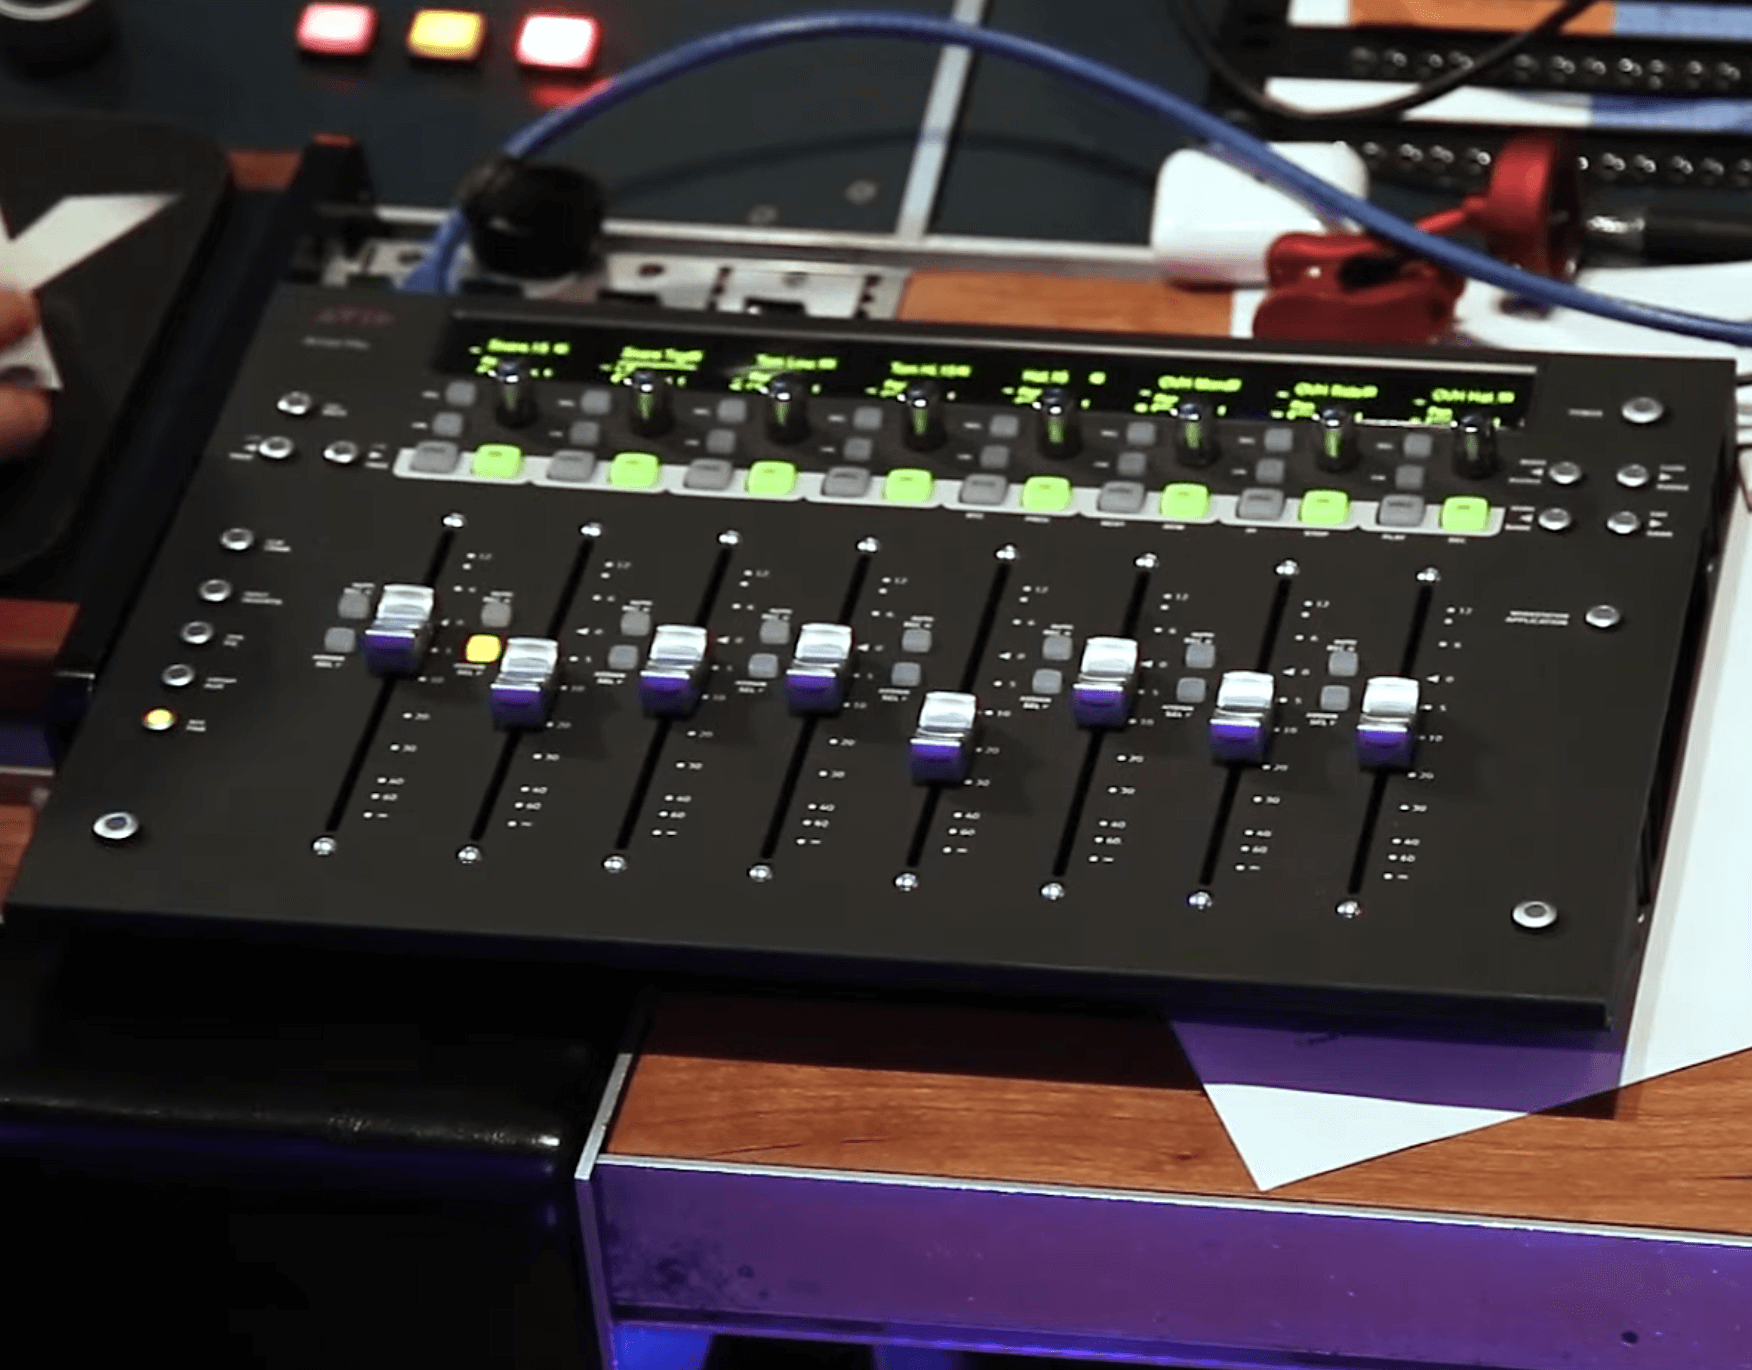
Jacquire uses the faders on an Avid Artist Mix controller like this one to write volume automation.
Even though it connects to the computer over Ethernet, which is even faster than MIDI, there’s so much system delay that his automation moves will be a little late when written to the session.
Showing Up Late
So, what to do? The first step is to determine the length of the delay so that he can compensate for it. To do so, Jacquire tests the delay with the following procedure. With the time format set to milliseconds (he could have chosen samples), he puts the automation to one of the write modes (most likely Touch) and as the song is playing back. Then, he pushes the volume up for each snare drum hit.
Next, he sets the snare track’s display to show volume automation and looks at where the data was written compared to the actual snare drum hits. Because he was moving a fader to write the data, the results aren’t identical for each snare hit, but they’re close. They vary between 207ms on the high side and 183ms on the low.
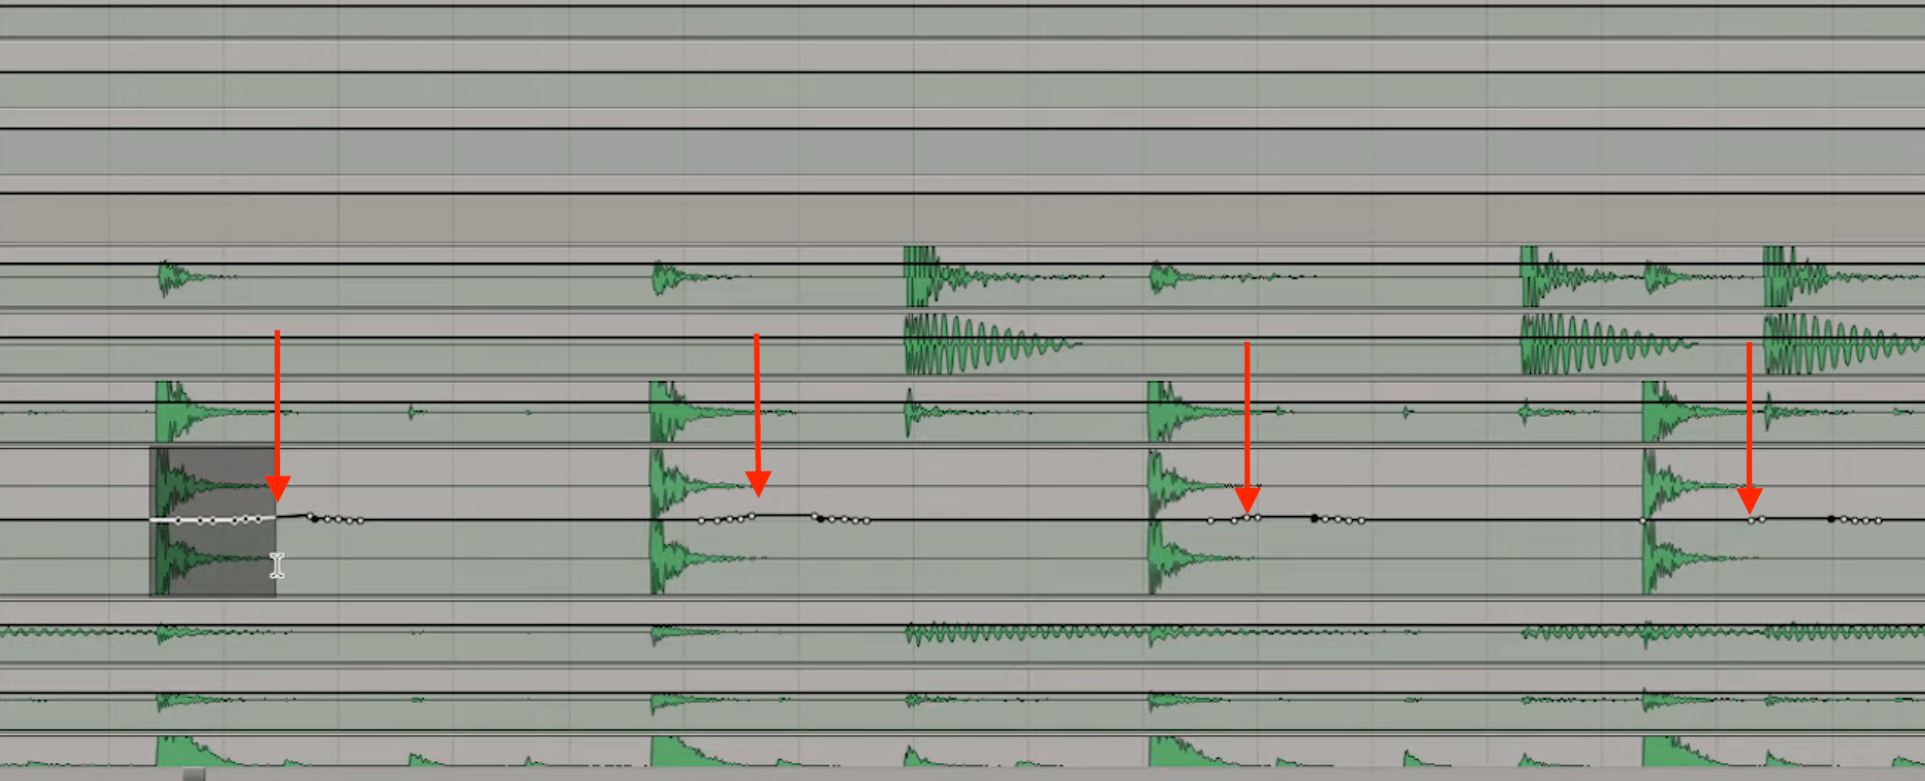
The arrows show how late the automation was written compared to the snare hits.
Because he doesn’t need sample-level precision for this situation, he chooses 200ms as a rough average of the latency. He then explains his clever workaround for the automation latency: the Nudge command. In Pro Tools, after you set the Nudge Value (which you can set in minutes/seconds, samples, timecode or any of the supported time formats), you can move data forward or back in time by that amount, using the plus and minus keys, respectively, on your numeric keypad.
Jacquire sets the Nudge Value to 200ms. With that done, he can start writing any automation he needs for the song and, afterward, manually apply the Nudge command to move the data to compensate.
Fighting Against Time
In just about any DAW, if you’re having problems with the timing of automation or are noticing that timing is suffering in any way when mixing, you have a couple of alternate ways to mitigate the problem.
When you’re tracking, the antidote to latency is to set a lower buffer setting. But in Jacquire’s case, he’s got a large session already in place, and it’s generating massive system delay. As a result, lowering the buffer will likely cause CPU error messages, pops and clicks or other audio-quality issues.
One relatively easy solution would be to freeze a large number of tracks. Track freezing temporarily renders a track with its effects to audio. Most DAWs offer some variation of this feature.
When a track is frozen, its plug-ins are deactivated, thus reducing the CPU load. By freezing enough tracks, you can get the session sample delay back down to levels that your DAW’s automatic delay compensation can handle.
You can’t make any adjustments to the frozen track, although in Pro Tools, you can add inserts in the channel after the last insert. You can also adjust levels and pan, but not automation. And, if you get in a situation where you want to change something that’s frozen, you can always unfreeze the track temporarily.
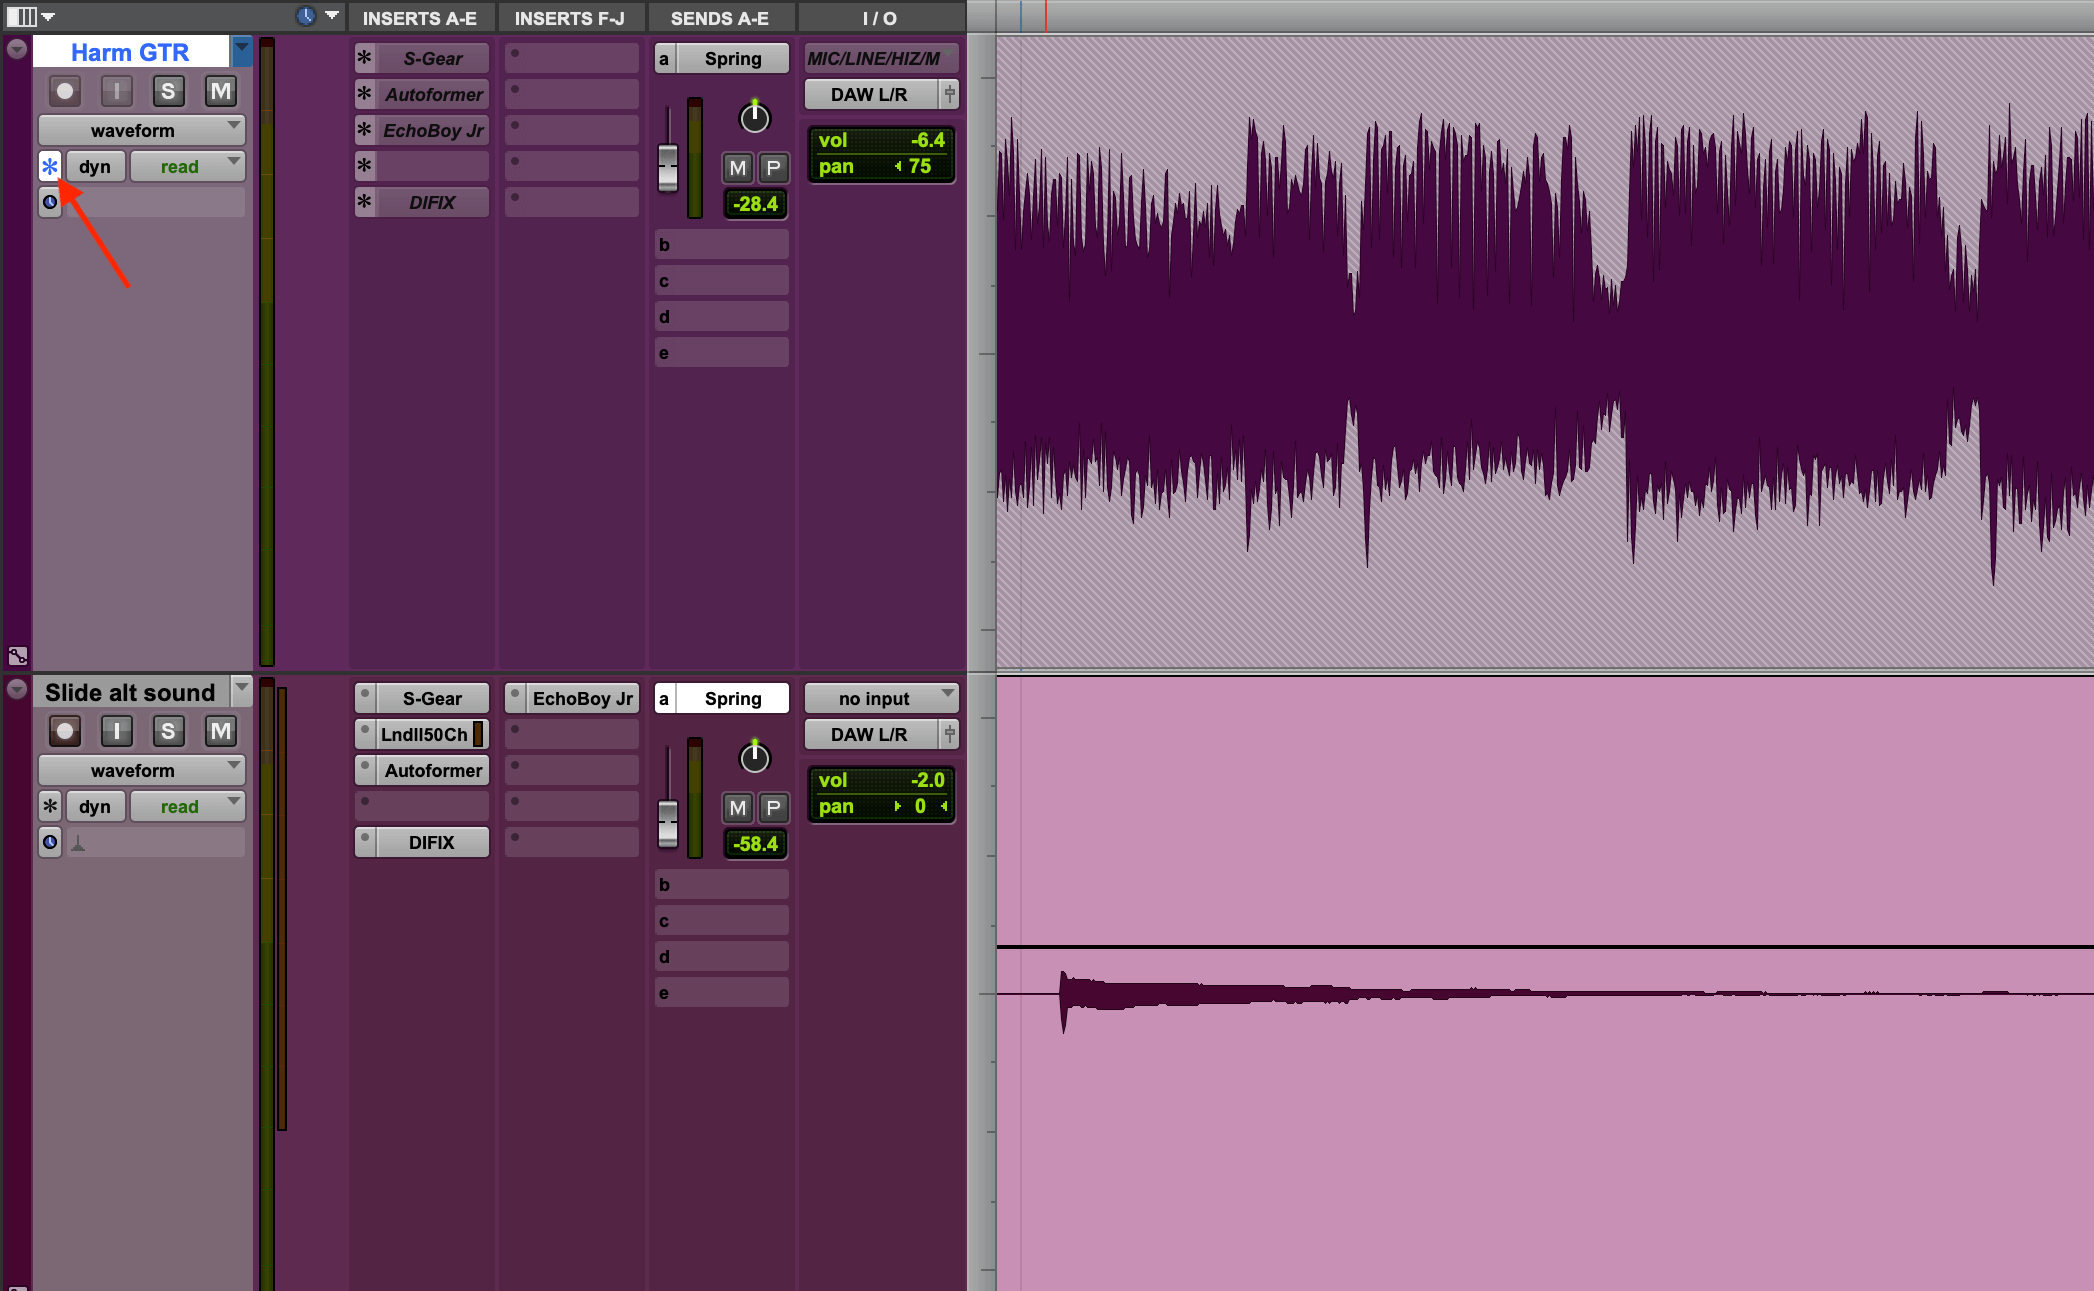
The track at the top is frozen. The arrow shows the freeze button. Note that the plug-ins names are greyed out and italicized.
For convenience sake, it’s easier to freeze tracks that you’re fairly confident you won’t need to work on a lot more. It can take several minutes—or longer, depending on how many tracks you’re freezing—to freeze enough tracks that the timing issues you’re having disappear.
Overdub Dub
Another problem when dealing with a large session with lots of system delay is that if you decide to overdub an existing track or record a new one, your DAW may have trouble keeping it in sync with the existing tracks.
Track freezing would be one solution. Another is to bounce a rough mix of the tracks and then import that bounce into a new session. Do your overdubs there, bounce the new track and import it back into the original session. (One easy way in Pro Tools is to use the Import System Data QQQ function to bring your new track into the system.
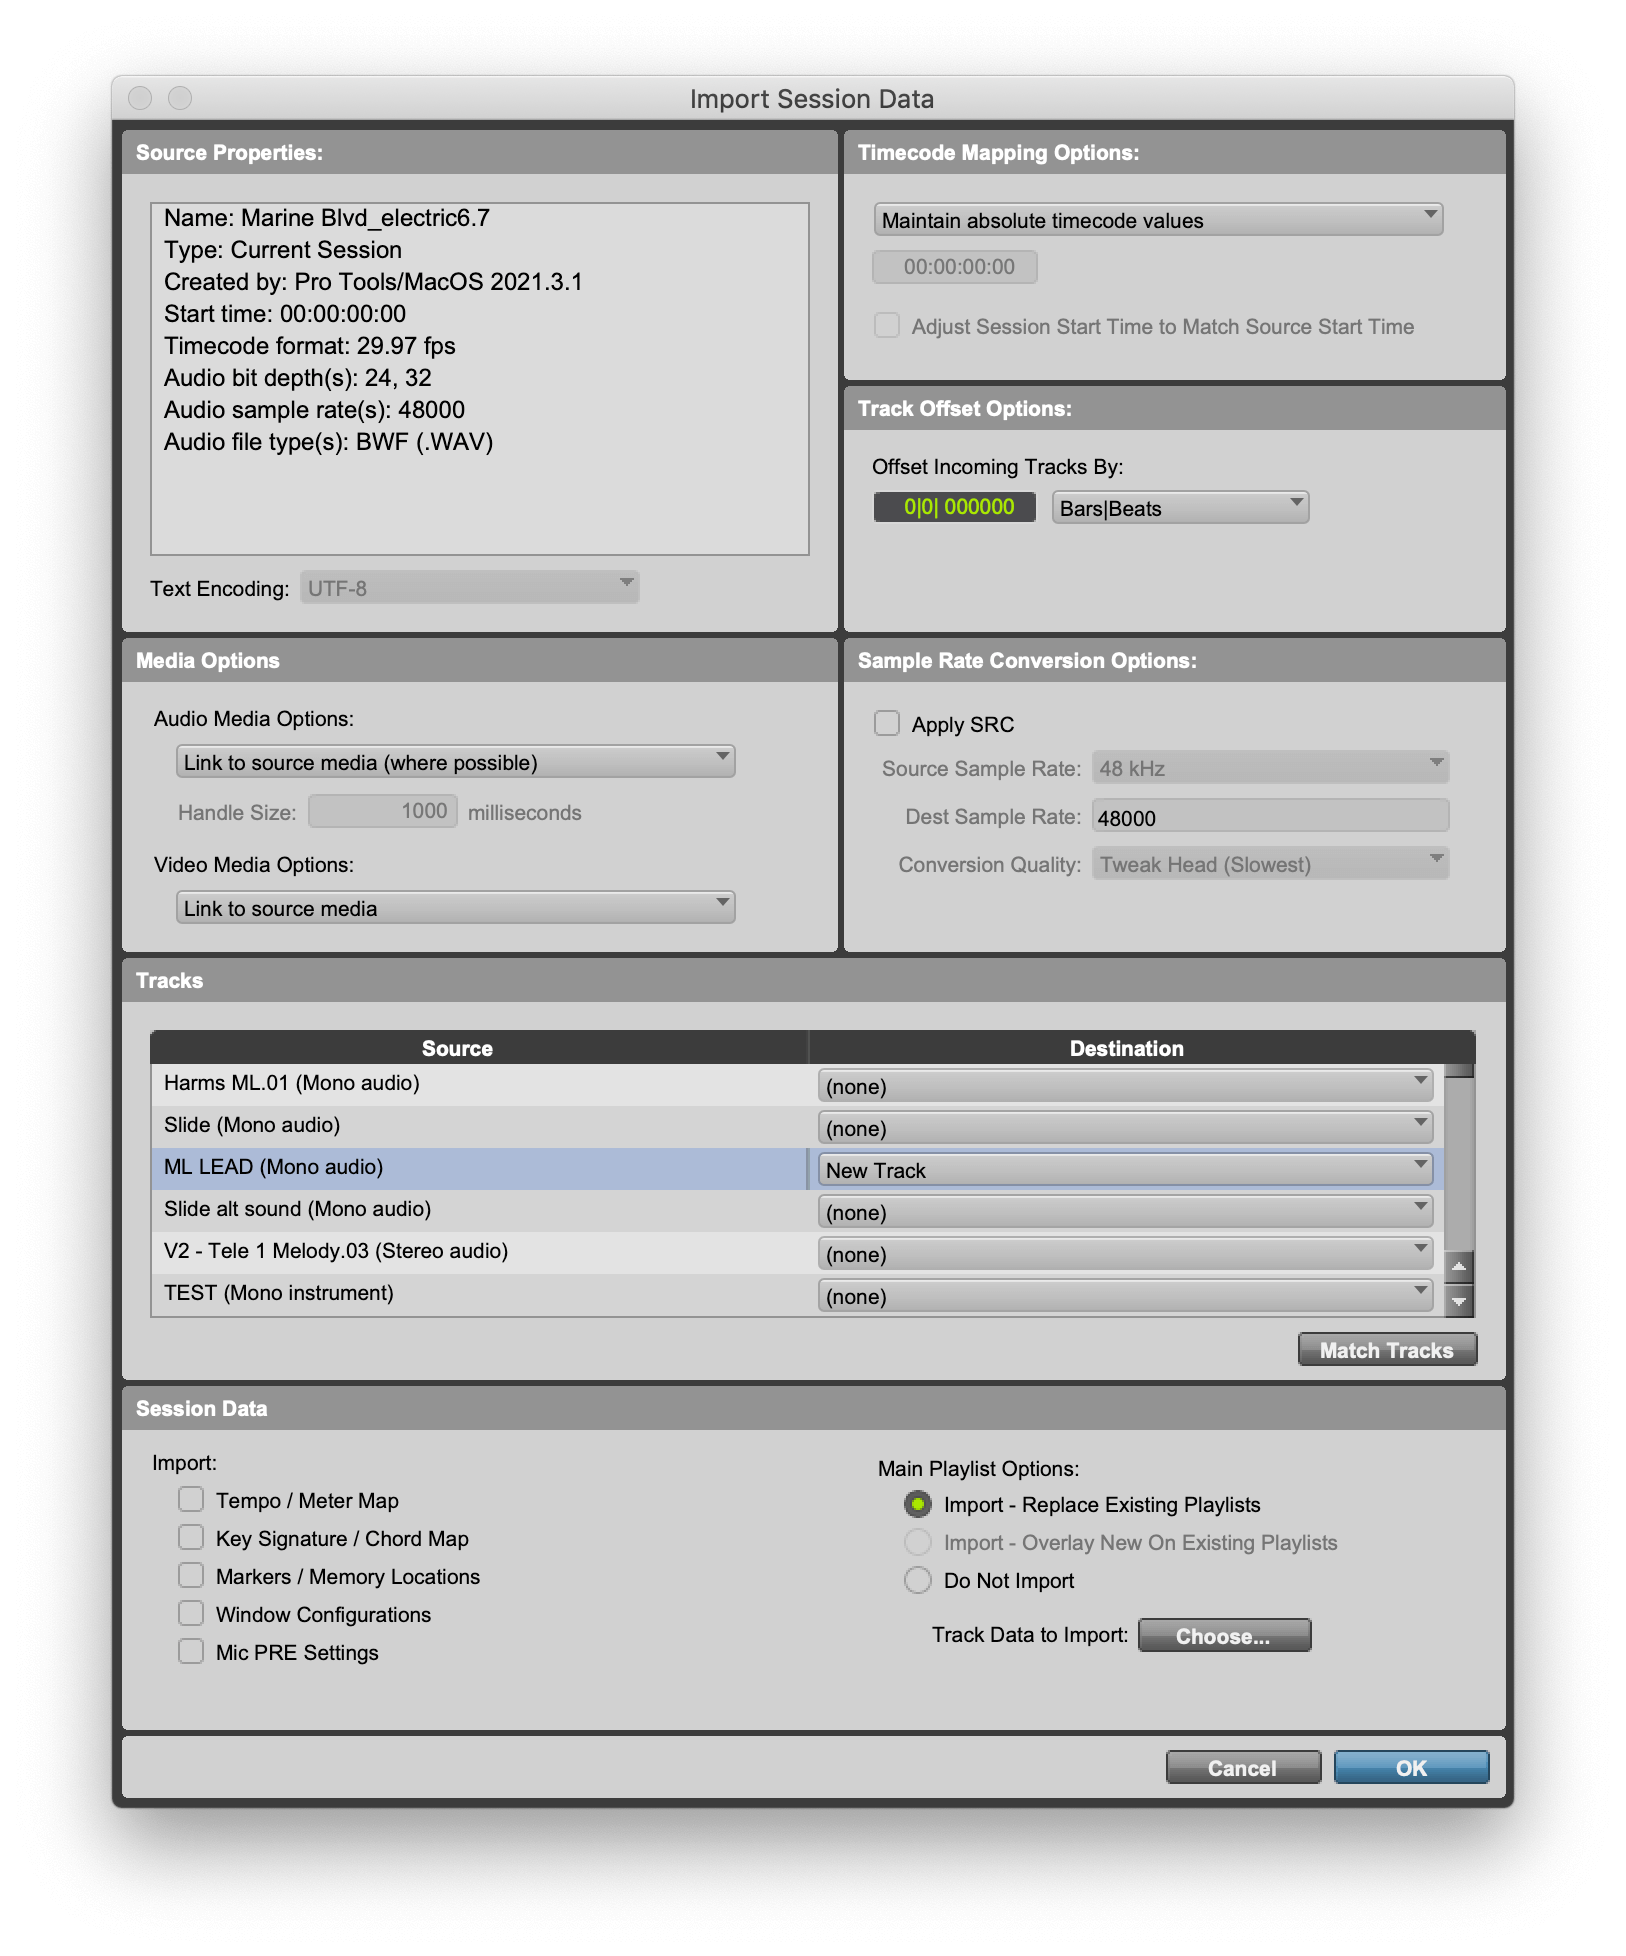
The Import Session Data window lets you bring in track data—including complete tracks—from other sessions.
If you’re bouncing your overdub out as an audio file and then importing it into your session, make sure that the file starts at the very first beat of the session (bar 1, beat, 1, tick 1 or the equivalent). That way you know that it will be in time when you import it.