In this excerpt from "How to Listen SSL Compressor Edition," we pick up the action with Fab talking about the SSL G-Series compressor. He explains that it's coveted in particular for the tone it imparts on the audio. He's getting ready to make a comparison between a hardware G-Series compressor and the (UAD) plug-in version. For the testing, he'll insert the hardware unit onto his master bus using Pro Tools I/O Loop feature.
Back and Forth
Fab will use a standalone rackmount SSL G-Series compressor (as opposed to one that's in a console) for the test. He'll compare it with the plug-in on the master bus of a mix. Master-bus compression is what the G-Series units are especially renowned for.

An SSL 1U G-Series Compressor like the one used by Fab in the video.
He explains how the I/O Loop works: The signal goes out of Pro Tools and through a digital-to-analog converter in the audio interface (in this case, Fab's Avid HD I/O). The stereo analog signal is then routed to the inputs of the G-Series compressor. After passing through its circuitry, the signal appears at its outputs, and then goes back into Pro Tools through the inputs of the same pair of channels on the HD I/O.
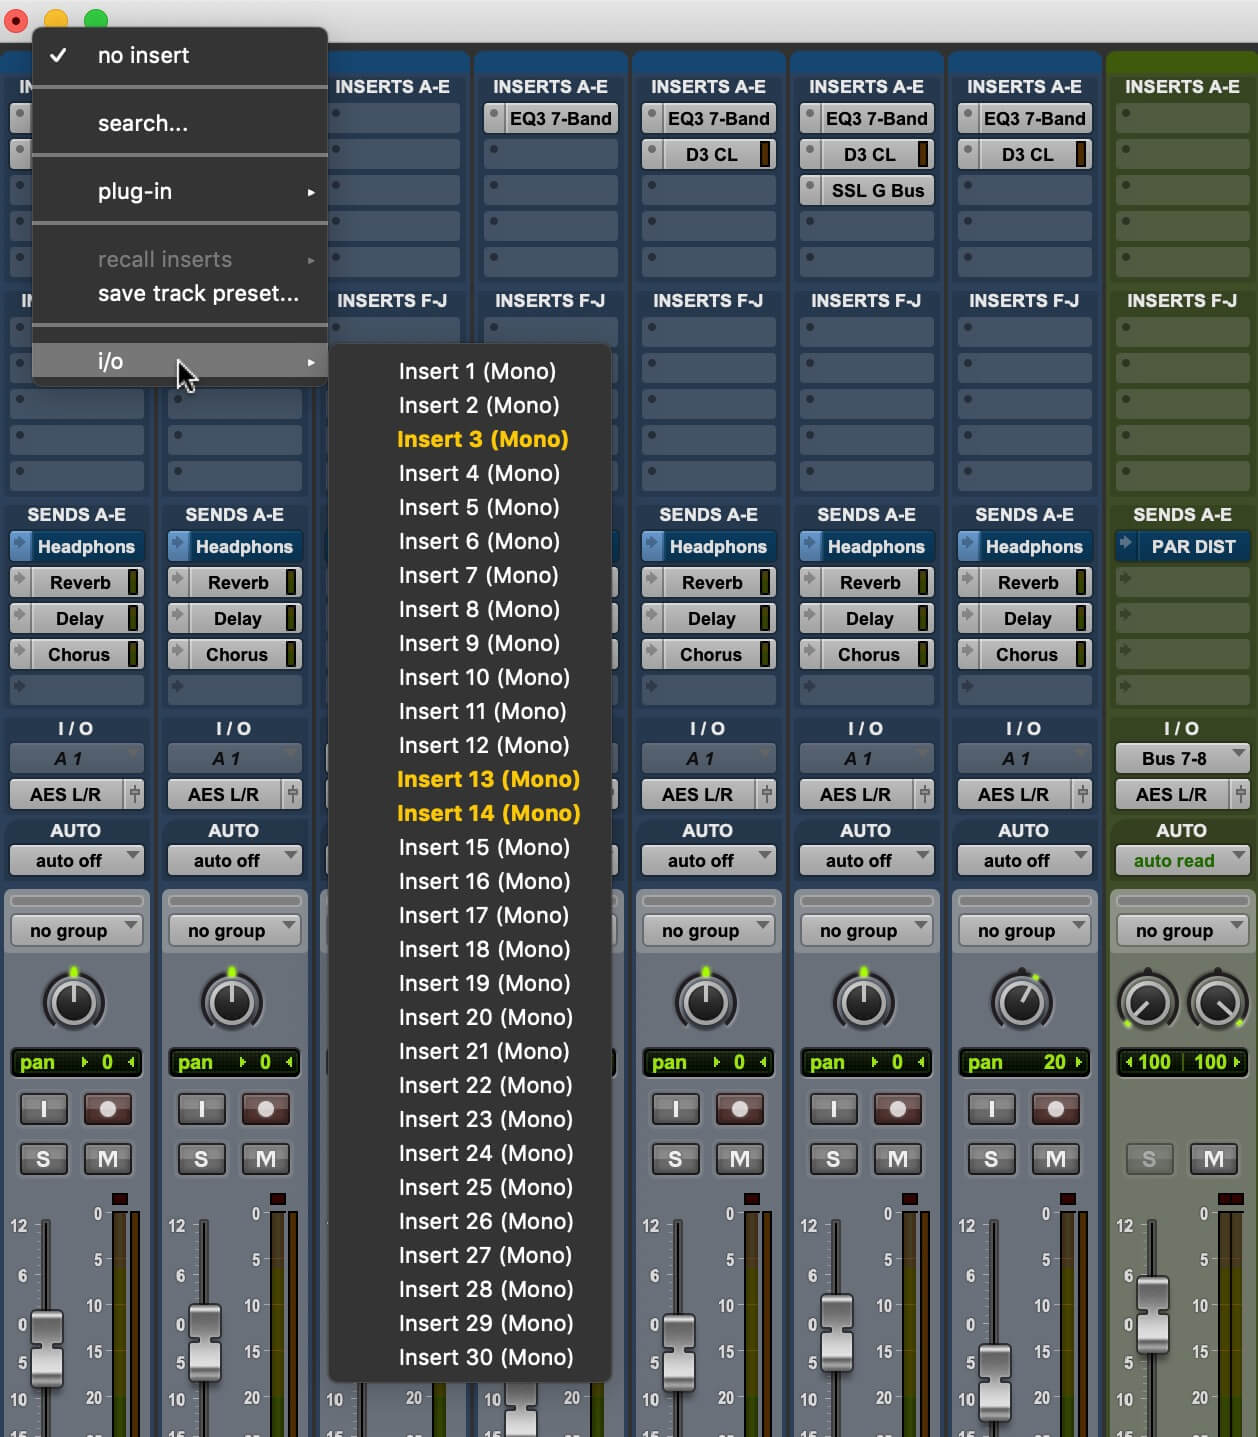
In Pro Tools, the I/O Loop is configured on a track or bus by clicking on an insert slot and then choosing from the i/o menu.
The first test doesn't even use the hardware compressor. Instead, Fab connects the HD I/O's output pair to its own inputs on the same two channels. He's comparing the sound of the mix in the box with how it sounds when he routes it through his interface and back into Pro Tools, using the I/O Loop. The signal is going from digital to analog and back to digital. What he's really checking here is the sound of the HD I/O's converters.
After playing both the in-the-box and I/O-Looped versions a couple of times, Fab says that although the two sound pretty similar, there are subtle differences. He suggests paying attention to the bass drum.
The low mids, he says, are the first thing to listen to when you're checking out converters, and also the area around 3kHz. But in this case, he says to pay attention to the former, where a lot of the beefy part of the bass drum resides. His observation is that it sounds a little leaner when it goes through the extra two conversions required when passing through the I/O Loop.
Flat vs. Flat
Next, he patches the I/O Loop outputs into the inputs of the G-Series compressor and then back into Pro Tools. For this test, he still won't be using any compression. The comparison will be between the sound of the mix entirely in the box and when it goes out through the I/O Loop and through the compressor’s circuitry.
When it's going through the latter, its level is a little lower. Fab explains that for some reason, the hardware, which is well maintained and unmodified from its factory condition, is 0.9 dB softer at the output compared to the input when the compression circuitry is bypassed. Apparently, that's just the way it was designed.
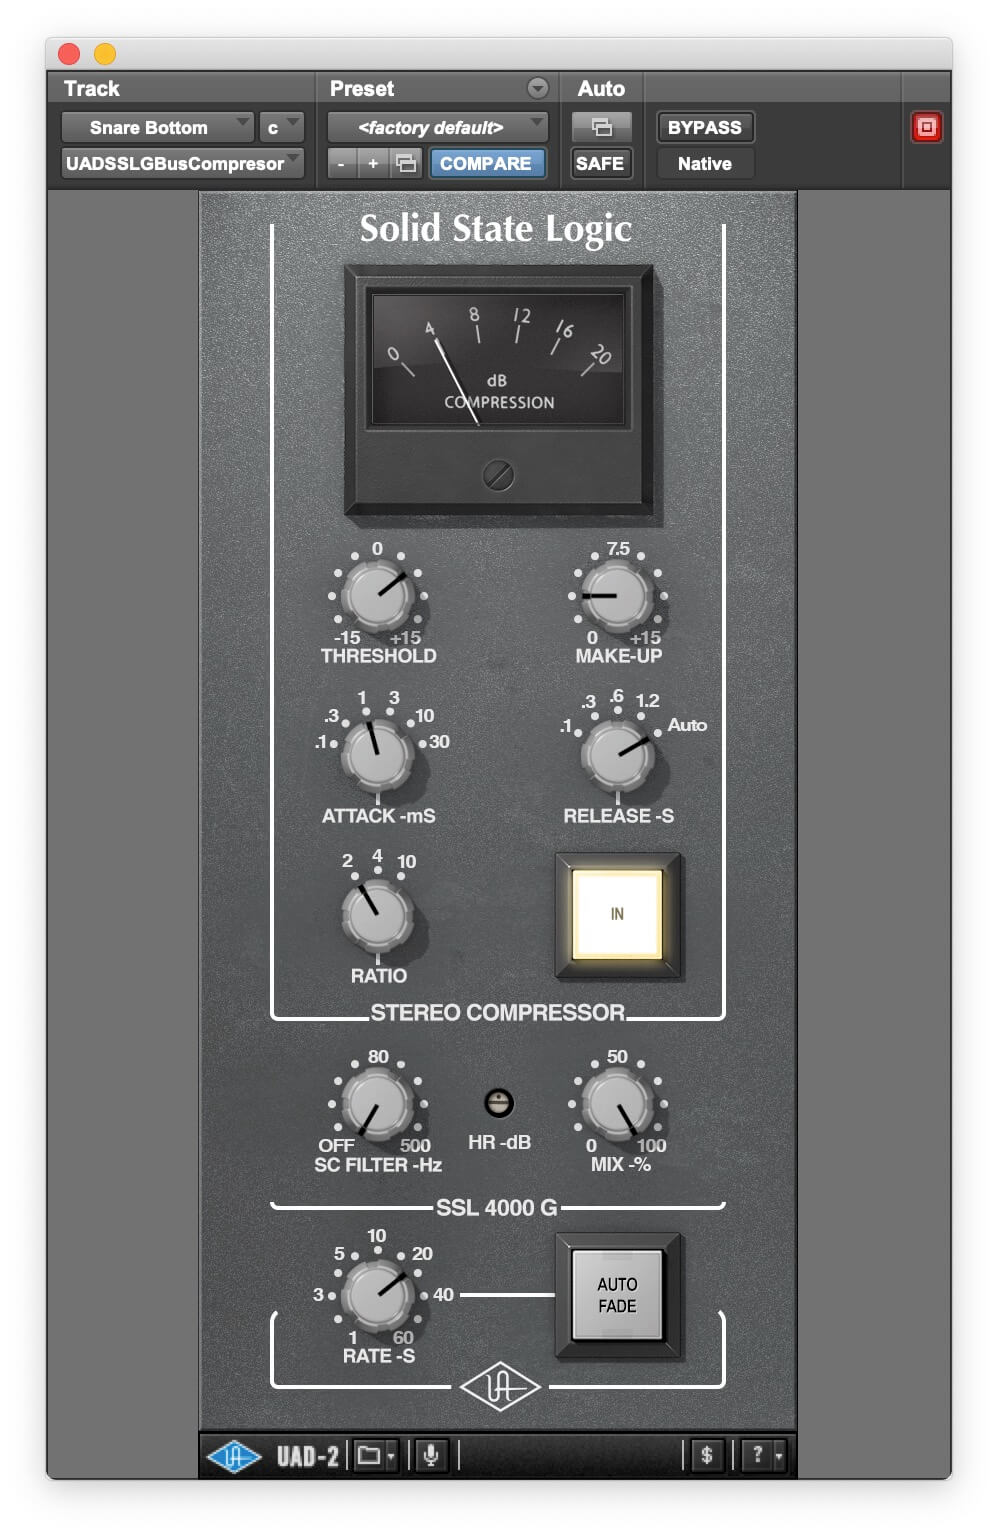
The UAD SSL G-Series compressor plug-in, which Fab compares to the G-Series hardware compressor in the full video.
When you're making comparisons during mixing, level-matching is critical. For example, let's say you've put a compressor on your master bus. You get a setting you like, and as the song plays back, you compare the uncompressed and compressed versions by bypassing and then engaging the compressor. You think to yourself, "Wow, I really improved this."
However, if the compressor is adding level and the compressed version is louder, you may be fooling yourself. That's because our brains perceive more high and low end at louder volumes and more midrange when listening to low levels. You can read more about this phenomenon in this Puremix blog post. Check out the Puremix video "How to Listen-Reference Mixes", for tips from Fab about using referencing plug-ins that provide excellent options for level matching.
Sending Out Signals
Integrating hardware processors into your mixes can be a cool way to get real analog flavoring into your music. If you're not a Pro Tools user, don't worry, many contemporary DAWs offer hardware-insert options.
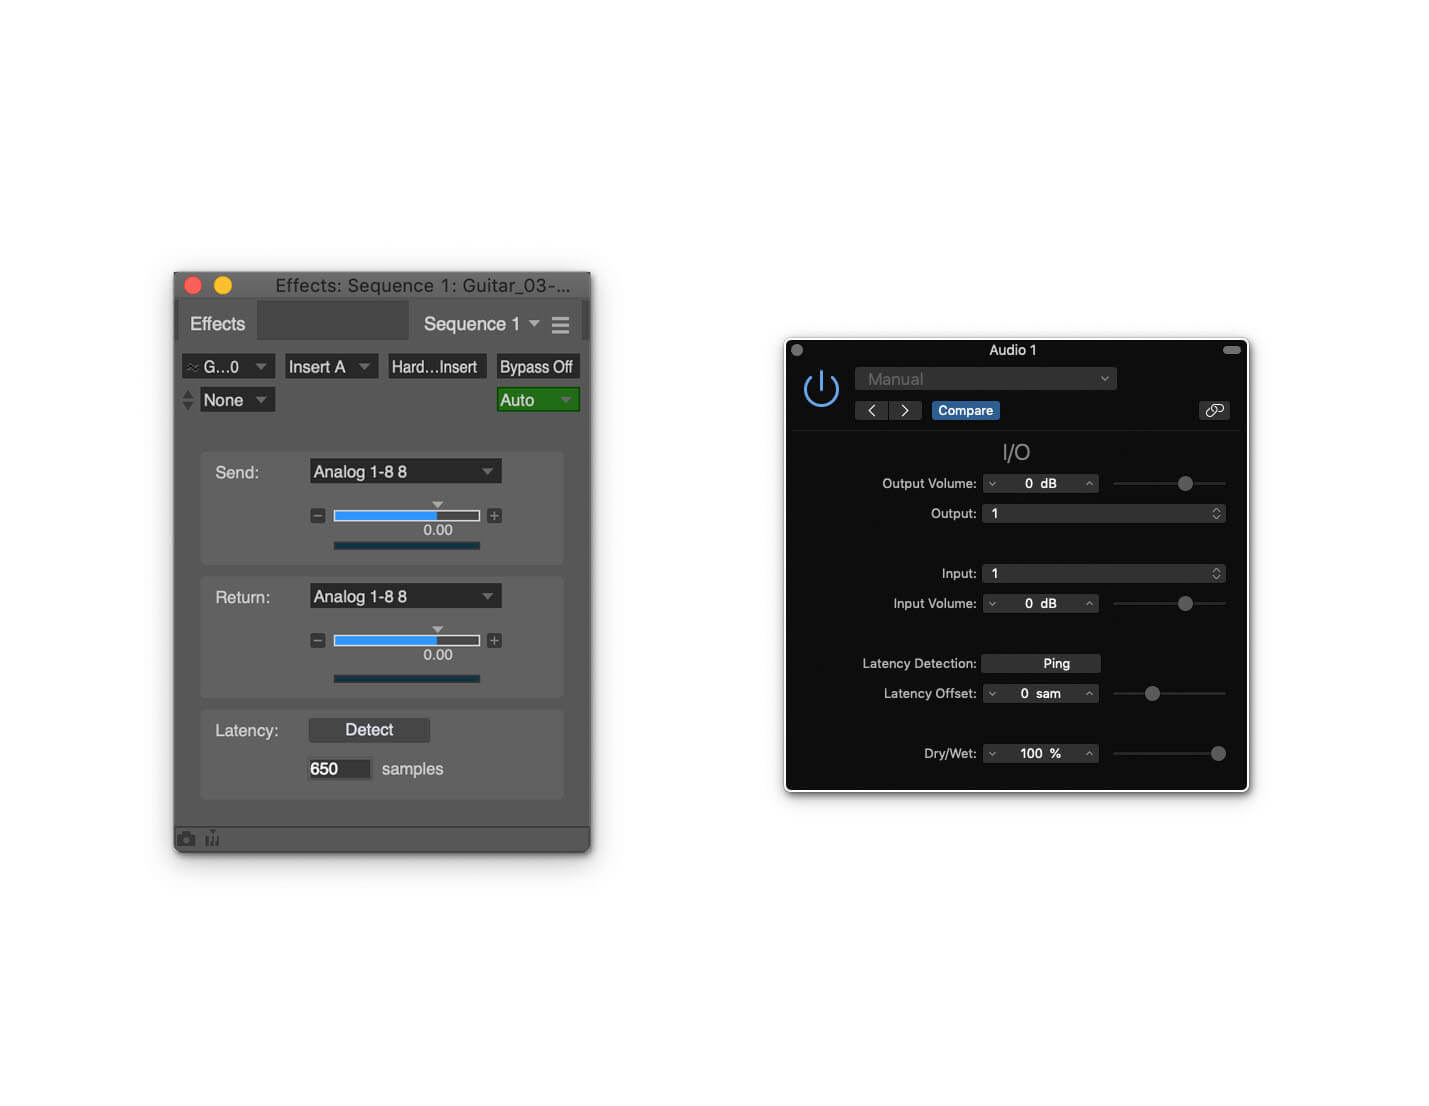
Many DAWs offer hardware insert capabilities. Shown here are insert windows from Digital Performer (left) and Logic Pro X (right). Notice they both have latency detection features built in.
There are some issues to consider before you try inserting hardware. First, does your interface have enough I/O? If you're sending a mono signal from an individual track to a hardware device, you'll need at least one extra input and output beyond the stereo outputs of your interface and their corresponding inputs. For stereo, you'll need an additional two in and two out.
Secondly, you'll be sending your audio through the D/A and A/D converters of your interface, which could potentially negatively impact the sound quality, especially if you're routing the master bus out to get processed. If you're using a budget-priced interface, chances are its converters are decent but not pristine. It's possible that adding the extra conversion stages to the process will have a subtle but negative impact on audio quality. Use your ears to decide.
Also, bear in mind that the timing of the return signal from the hardware won't be completely time-aligned with the original track because of the latency caused by the two conversions. If your insert is on an individual track, make sure your DAW's latency compensation is turned on, and your buffer is as low as your session can tolerate (it will depend on how many tracks and how many plug-ins you have open).
Do You Recall?
Another consideration is that by introducing hardware into your mix, you'll complicate the process of recall. If you work strictly in the box and want to go back to a previous mix or just reopen one that you're still finishing, it's only a matter of opening the session file in your DAW. Everything will be exactly the way it was when you last saved it. But with hardware involved, you have to remember how the outboard processor was set if you want to accurately recall the mix.
Back in the analog days, when all the processors were hardware-based, recalling a mix involved a lot more effort. You had to manually reset the mixer channels, routing and the settings on the outboard gear. The latter was done using "recall sheets," which were paper printouts showing the controls of the various hardware processors in the studio. At the end of a mix, you'd mark the settings on the corresponding sheet. When you recalled the mix, you used the sheets as reference to reset the processors.
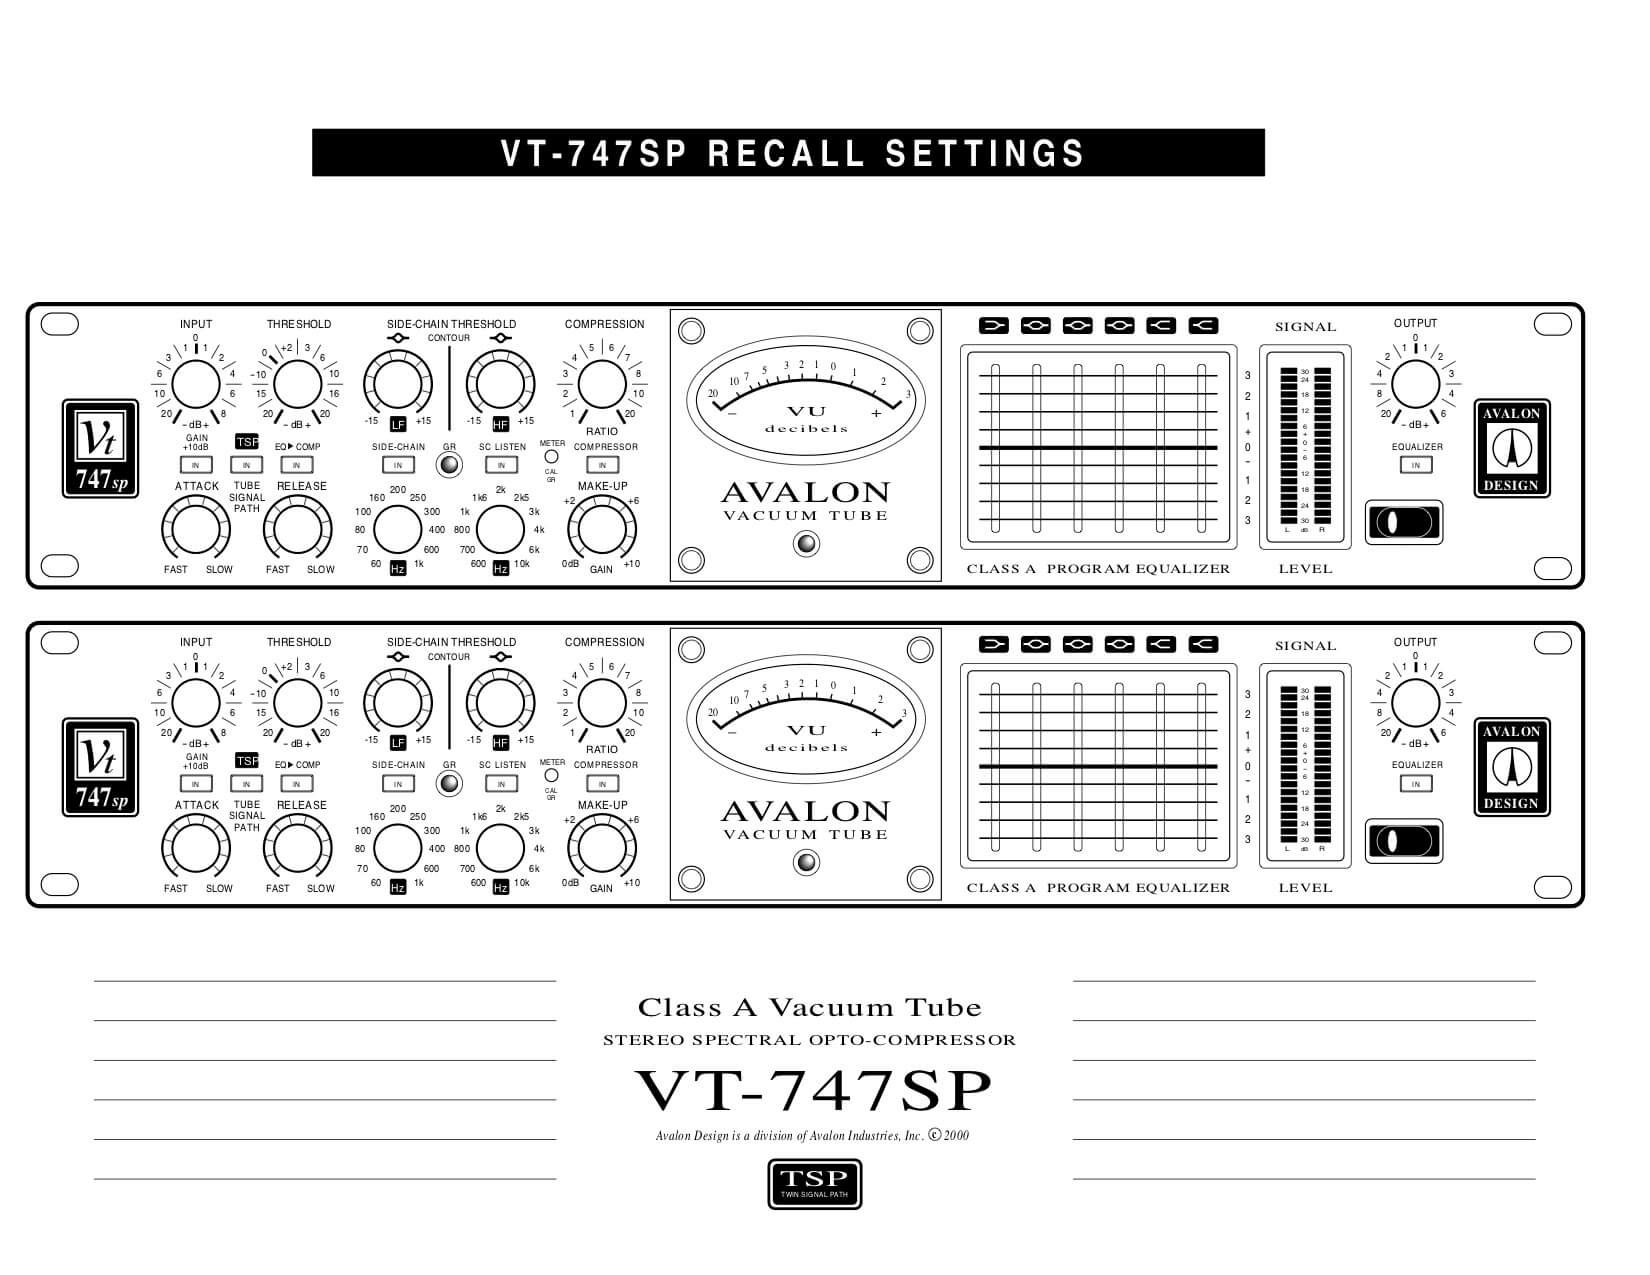
A recall sheet for an Avalon VT-747SP compressor/limiter/EQ.
These days, with the ubiquity of smartphone cameras, you don't necessarily need a recall sheet for hardware, you can just snap a photo of the controls. However, make sure to save the image in your project folder, and label it with the mix version name, so you can find the right settings easily.
If you're adding the hardware to an individual track or bus within a mix (but not on the master), you can avoid recall sheets or photos of settings by rendering your track with the hardware effect on it to a new track (save the unprocessed one, in case). If the hardware insert is on the master bus, you're obviously going to be rendering it as a mix, anyway.
But Wait
So what about that A/B comparison between the hardware SSL G-Series compressor and the UAD plug-in version? Fab does that near the end of the full video, which you can watch right now if you have a Puremix Pro Membership.