Matt Ross-Spang has an original take on virtually every facet of production, including using automation in a mix. In Matt Ross-Spang - Episode 15 - Mixing “Just As Long As You Want Me” Part 3, he is close to finishing the mix. He’s tweaking the automation to make the mix build —as he describes it—in a “cinematic” way.
Got the Touch
Matt has all the tracks in the Pro Tools session set to Touch mode. Touch is the best mode to use when you’re making a brief change but want to leave the surrounding automation intact. When it’s active, and you move a fader or knob or press a button, the automation returns to its previous level as soon as you release it. If you want to, say, pull down a word that’s too loud, you can do so easily. When you let go of the fader, it will return automatically to where it was.
While many engineers and producers use automation to even out the level of tracks, Matt often uses a different tactic. For tracks like vocals especially, he likes to make sure the volume is not static. He feels like if a track’s level periodically moves subtly up or down, it will keep the listeners’ ears more focused on it. “It’s cool to go back and take some things away or bring some things down,” he says. “We’re trying to build the story up.”
On Reed’s nylon-string guitar track, Matt adds volume rides with similar intent. Later he does the same thing with the B3 organ track. He writes the automation with an actual fader on an Avid Artist Mix fader controller unit, so he’s not adjusting it with a mouse. That said, you can certainly make those sorts of fader moves easily enough with a mouse. If the results are not exactly what you want, you can go in and edit the automation with Pro Tools’ drawing tools.
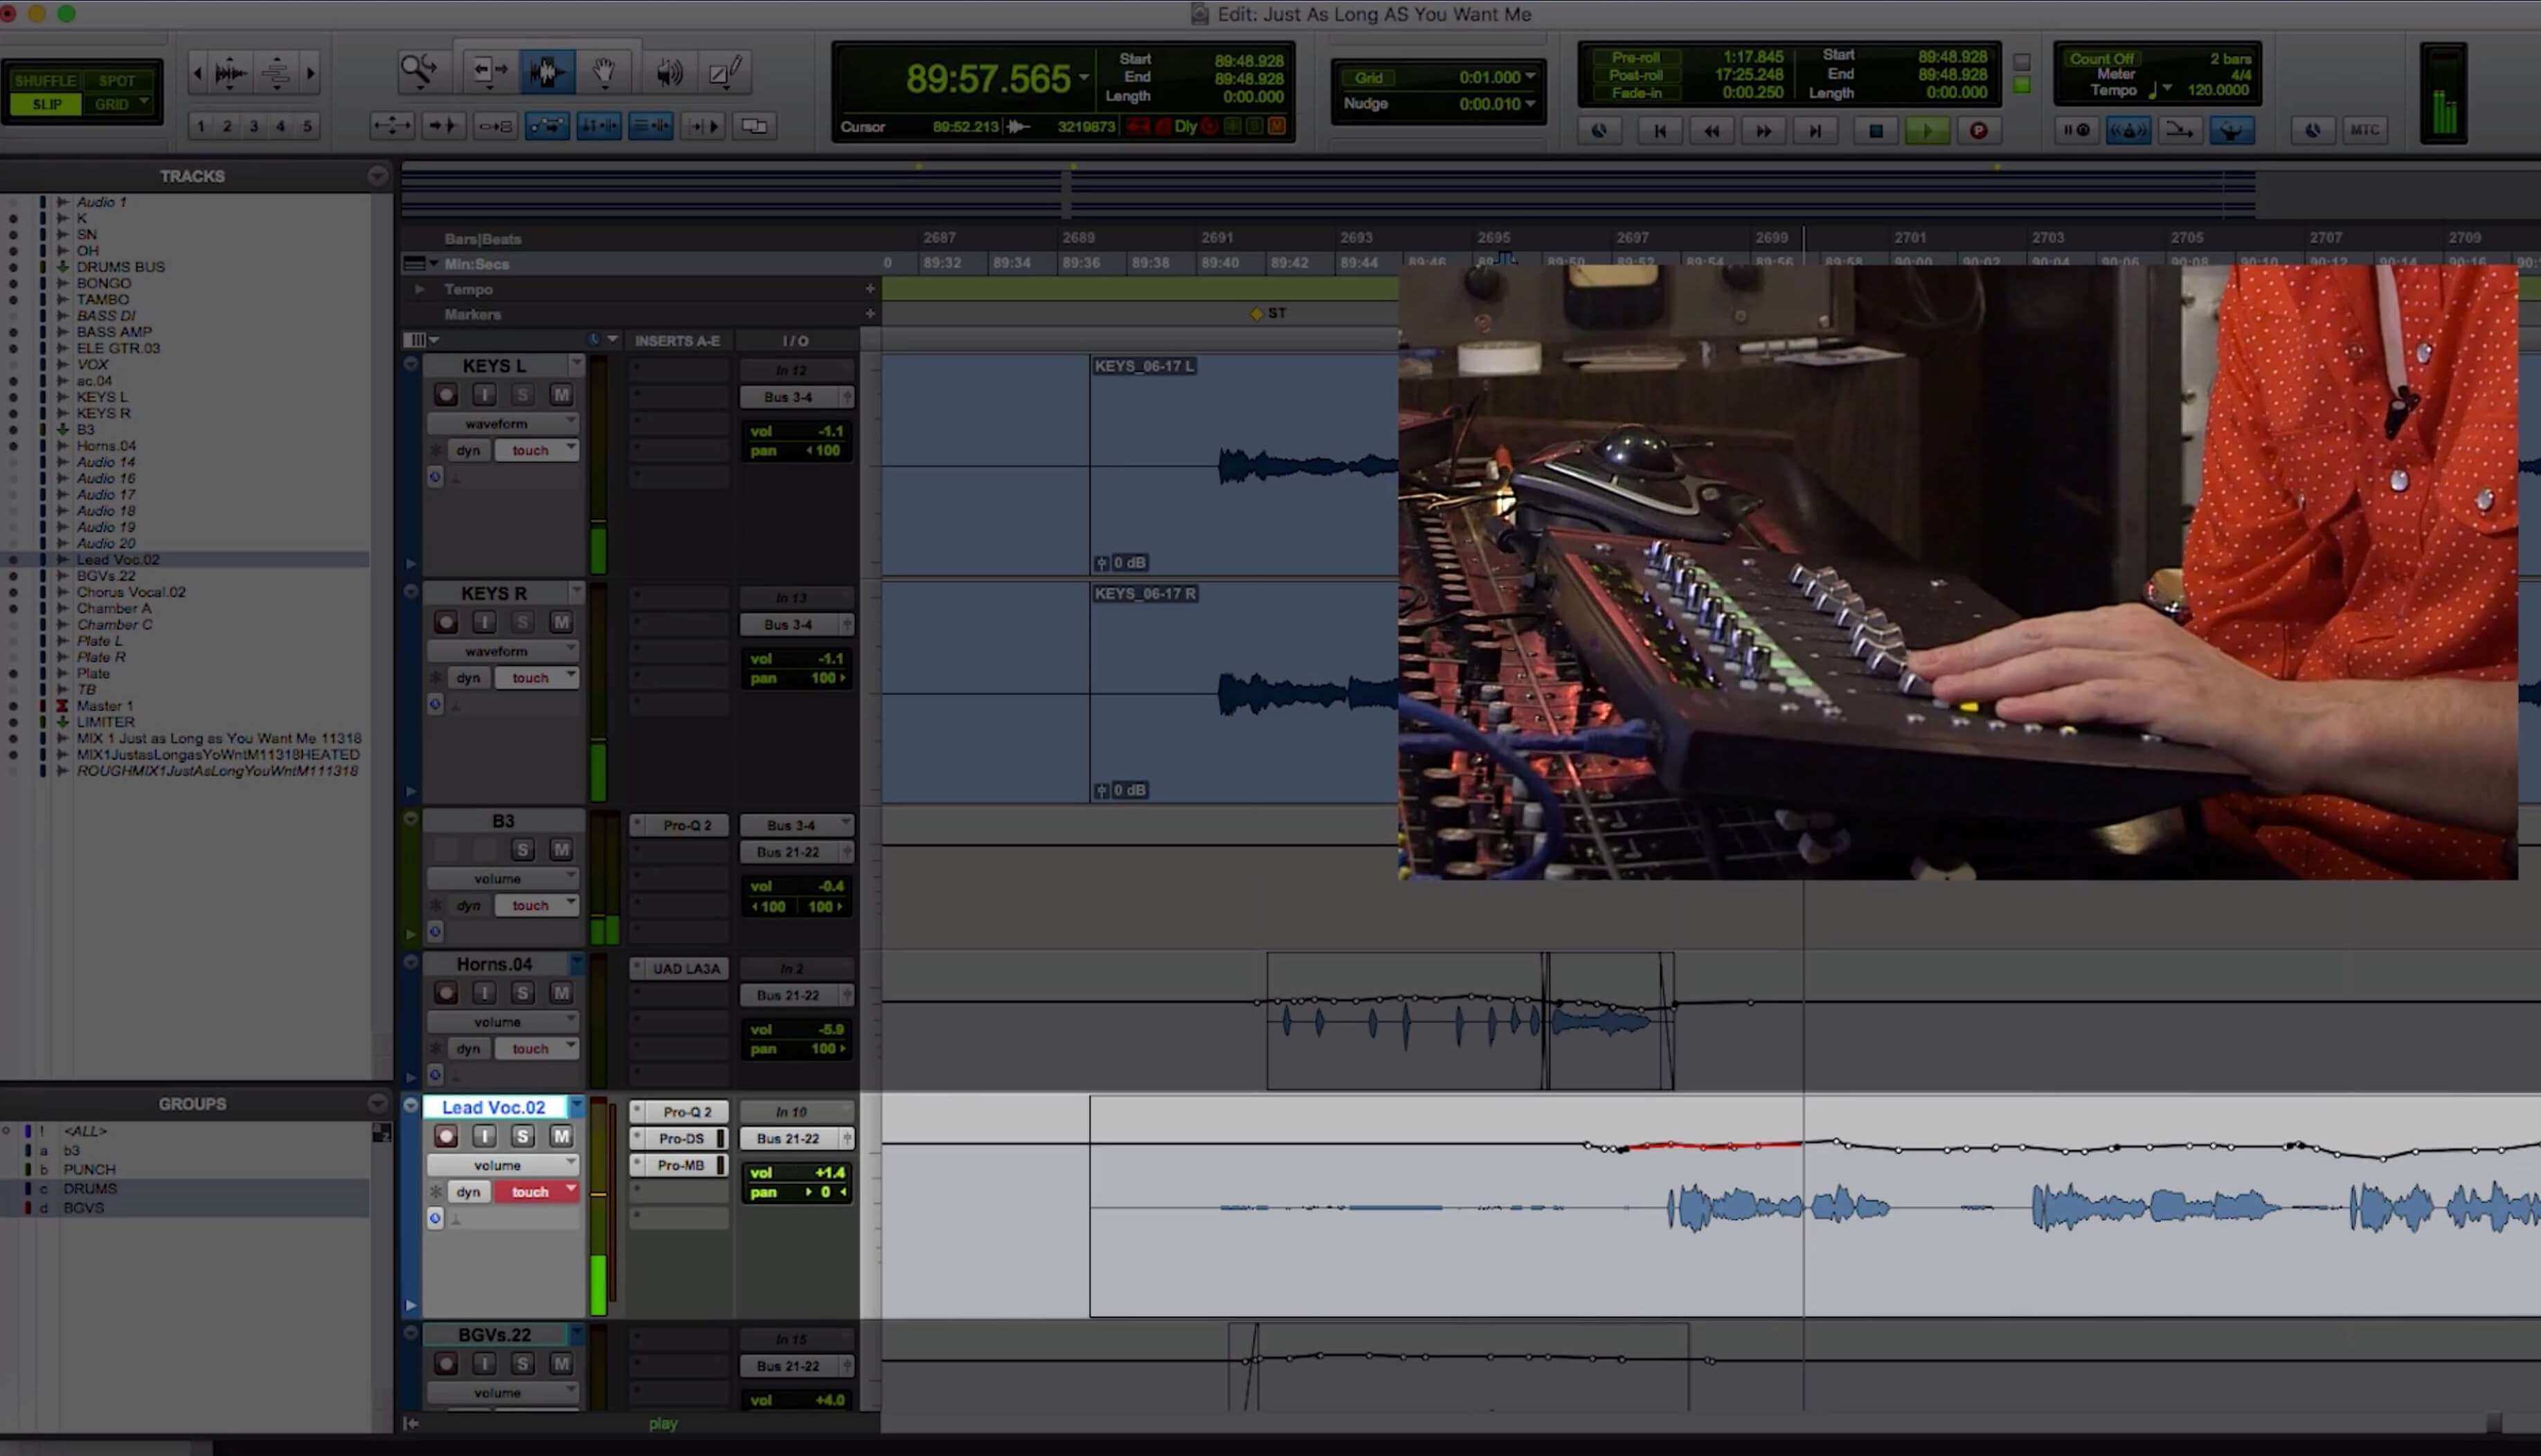
Matt tweaks the vocal automation from an Avid Artist Mix fader controller.
In the scenes in the video where Matt is writing automation, he has every track set to Touch mode. That way he can jump around and adjust different parameters on different tracks without having to constantly turn on and off the automation mode.
As long as you’re careful, having multiple tracks in an automation-ready state is a time saver. That said, you have to make sure to remember that you do because every mix adjustment you make on a track when the automation is in one of its write modes gets recorded.

The Mix window with all the faders in Touch mode.
Tweak It
One type of volume automation adjustment that Matt does to the vocals is to bring down the beginning of words that are too peaky. But he certainly doesn’t want everything even. He says he likes it when some words jump out at you. He even makes some words at the ends of lines trail off, which might seem counterintuitive. Matt says that such variations “pull you in.”
He uses Pro Tools’ Clip Gain feature, which lets you boost or lower the track’s pre-fader level. Clip Gain adjustments have the same effect as if you were riding the input level when recording. When you move the Clip Gain line (which is hidden by default but can be shown by right-clicking on a Clip and choosing Clip Gain/Show Line), you’ll see the waveform for the selected area get bigger or smaller.
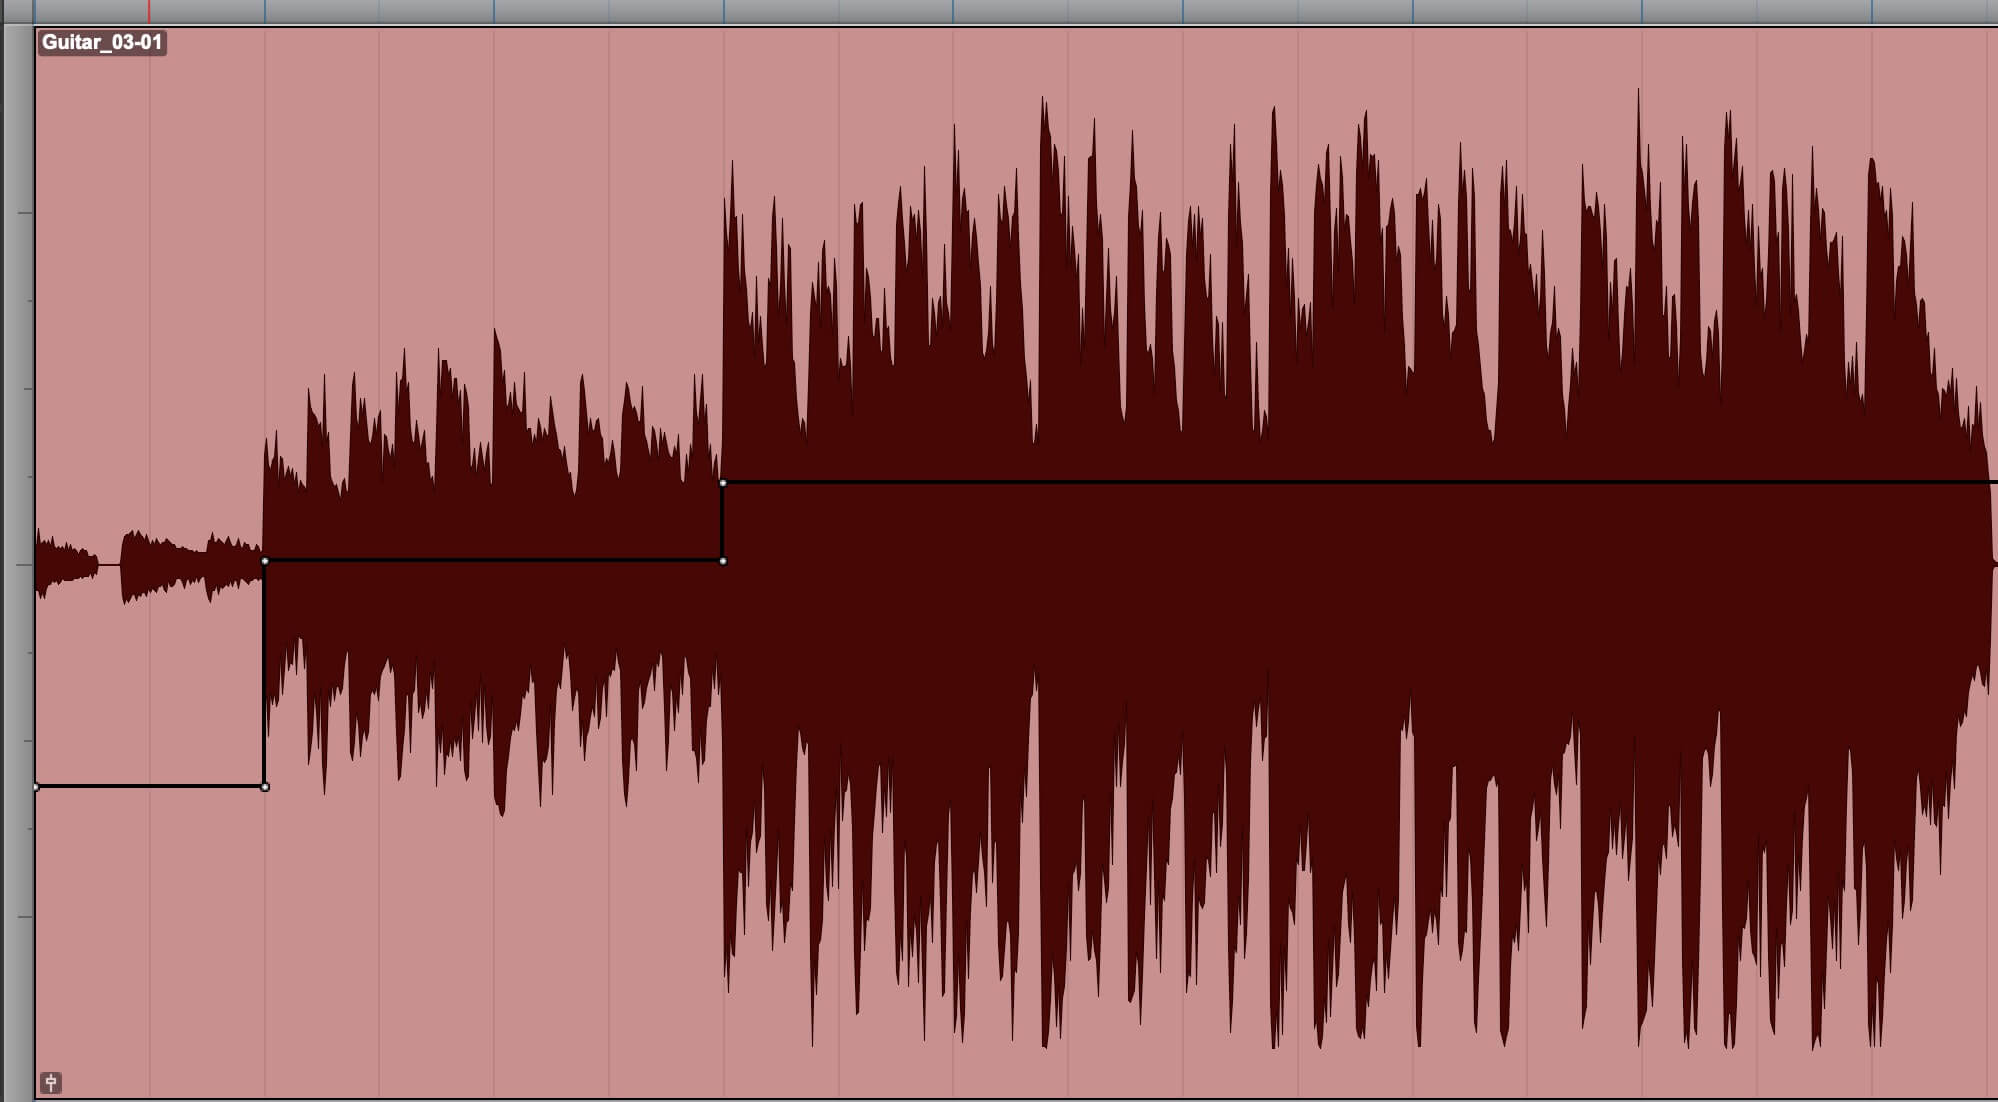
In this exaggerated example, you can clearly see the effects of adjusting the Clip Gain line.
Matt uses Clip Gain to adjust the lead vocal track’s average level to reduce its dynamic range. He does this so that the fader moves that he automates won’t have to travel as far, and therefore won’t be as noticeable.
He says that you have to be careful when you raise and lower Clip Gain because it will impact any compressors you have on the track. The higher the peaks, the more signal will exceed the compressor’s threshold. That will cause heavier compression, which can change the character of the source you’re compressing. Matt is going for a natural sound on this track—other than the reverb. He wants to keep Eli’s voice from getting colored, so he doesn’t use a compressor on the vocal track.
Instead, he draws in automation for some of the peaks. Because volume automation is post-fader, its level changes occur after any plug-ins inserted on the track. If you were using a compressor, adjusting volume automation won’t wouldn't impact the amount of compression.
Another type of automation move Matt does a lot is to adjust the reverb sends. He’ll often bring the send up at the end of a word or phrase on the lead vocal. The idea is to make the reverb more dynamic and exciting. He’s using reverb from the excellent sounding chamber at Sam Phillips Recording Service.
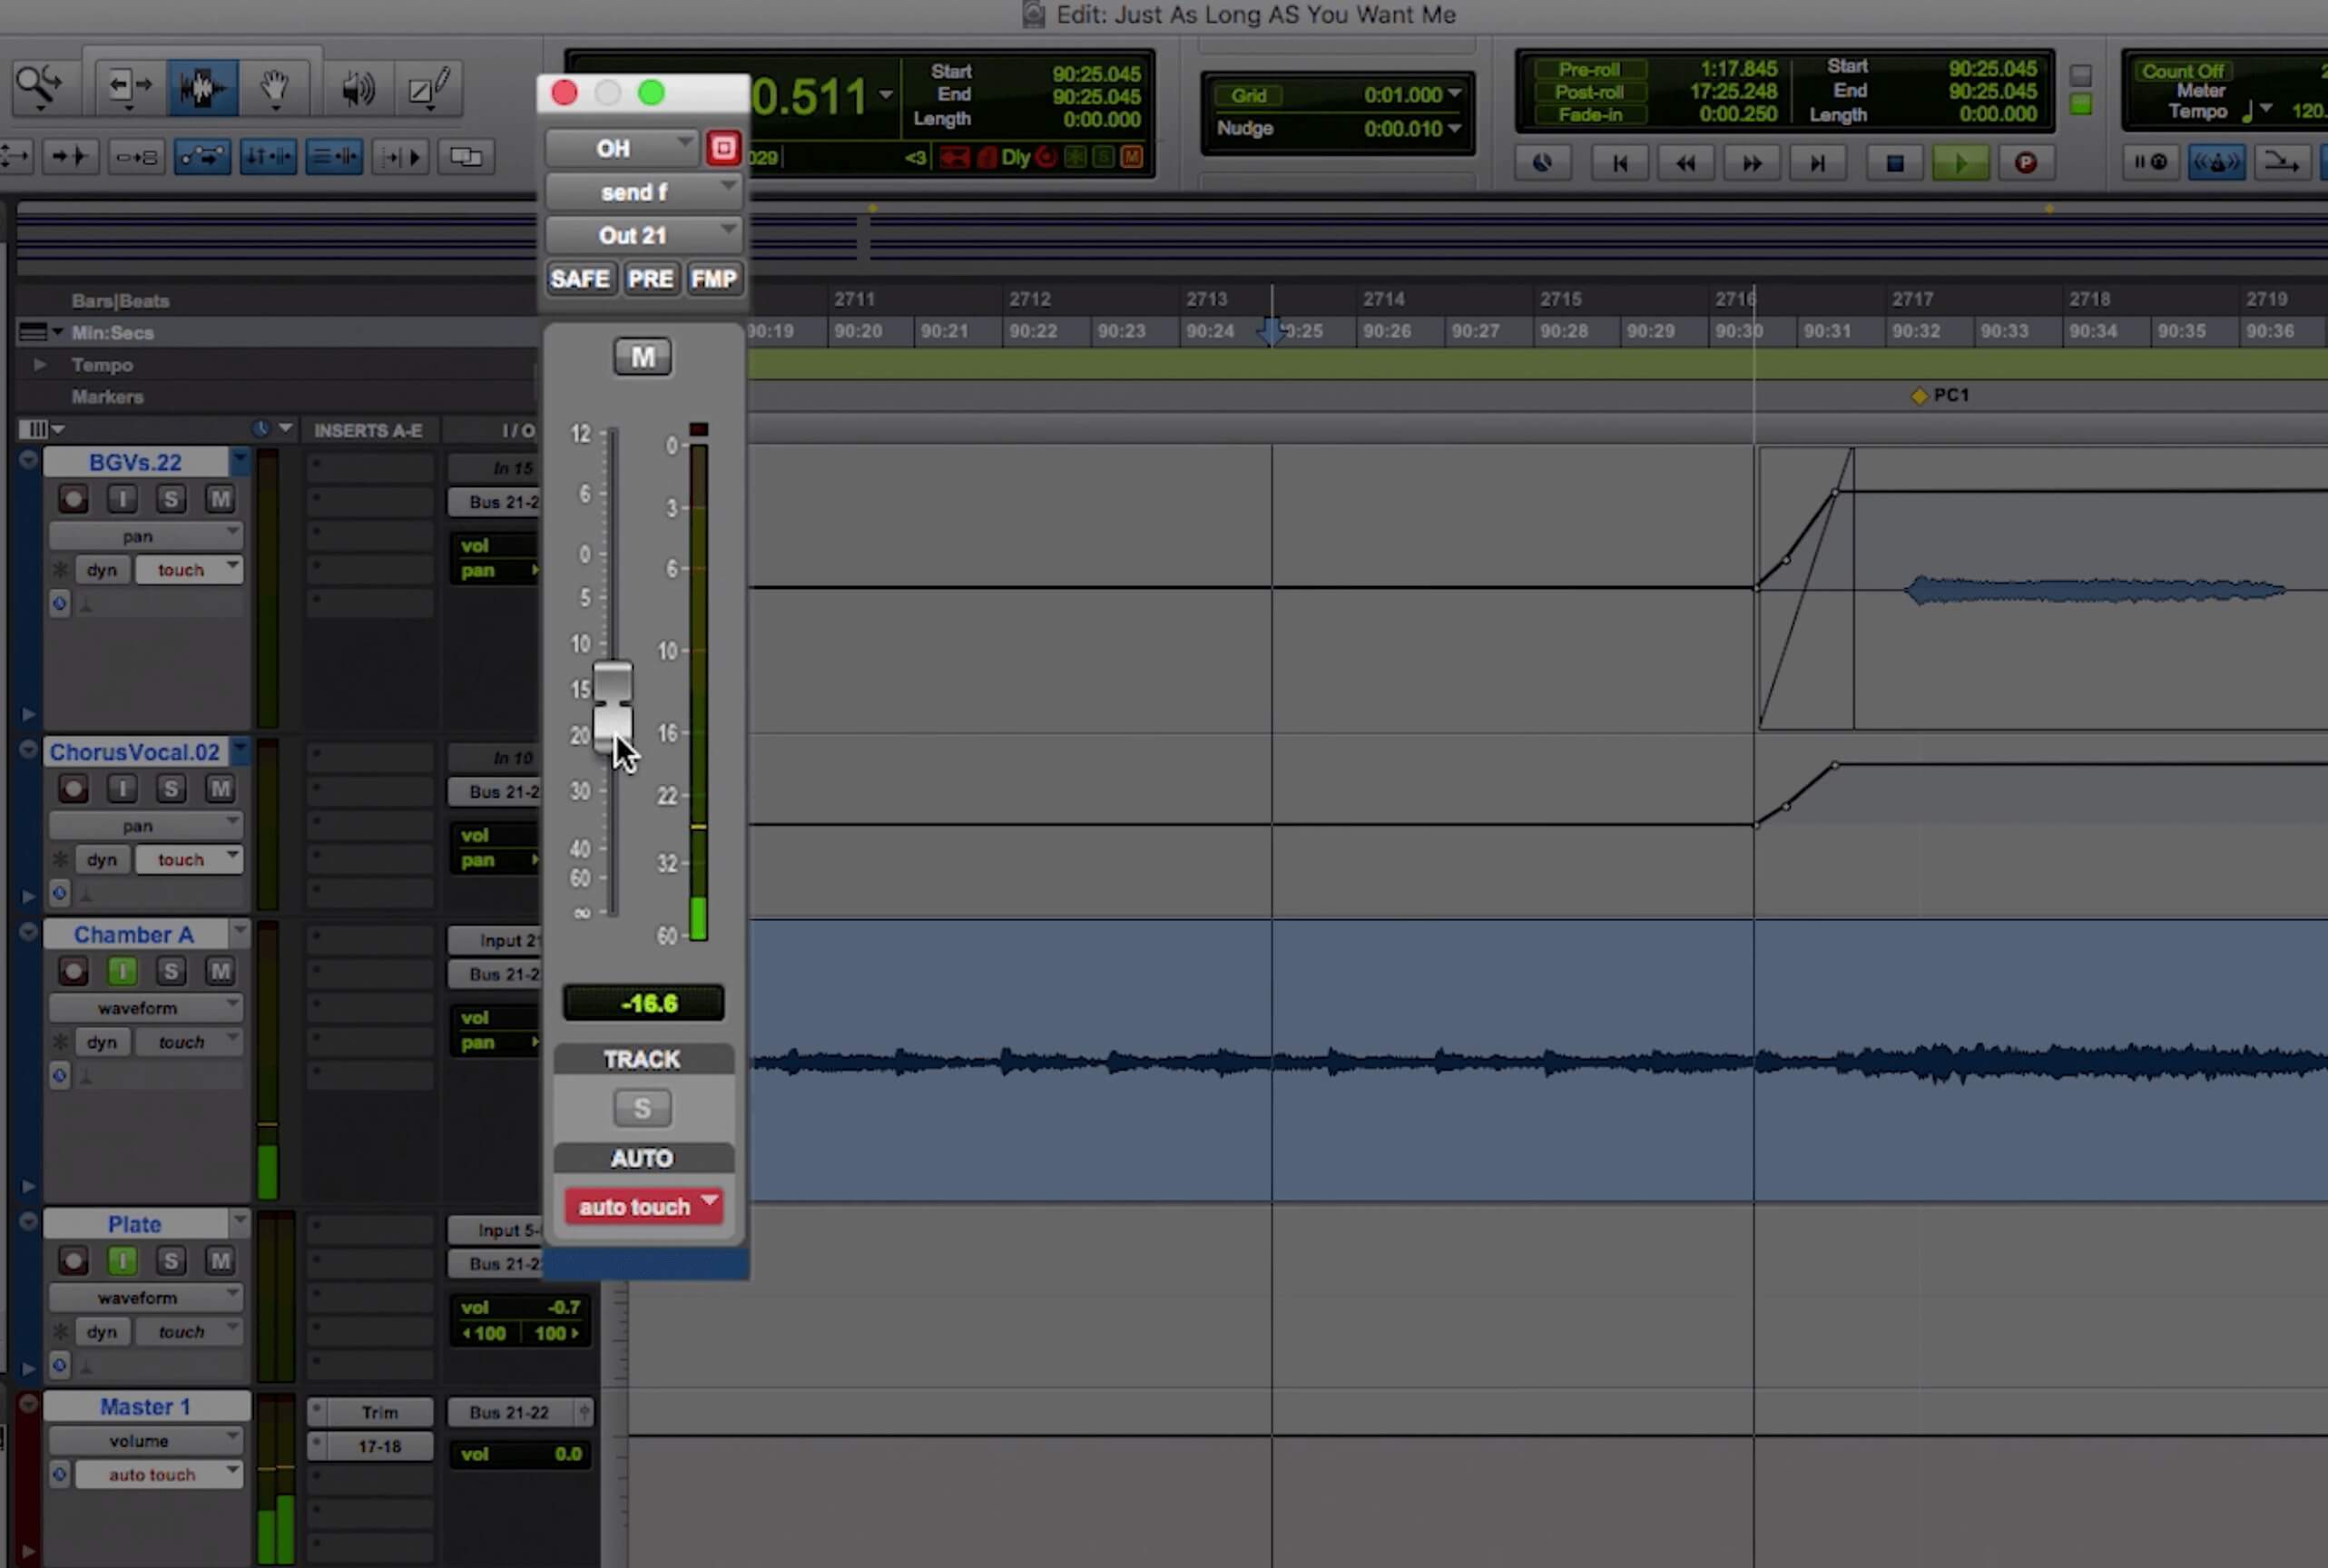
Here’s Matt automating one of the reverb sends for the chorus vocal track. /p>
Pro Modes
As promised, let’s look closer at automation modes in Pro Tools. Read mode reads automation but doesn’t write it. Any track with automation should be in Read mode except when you’re writing to it. If you want to quickly hear the track without its automation, turn Read mode off.
We already discussed Touch mode, which reverts the control to its previous level when you release the mouse. In Latch Mode, which you’ll probably use almost as much as Touch mode, the automation level stays at whatever the setting is when you release the control. That makes it useful when you want to raise or lower a parameter that will stay at the new level.
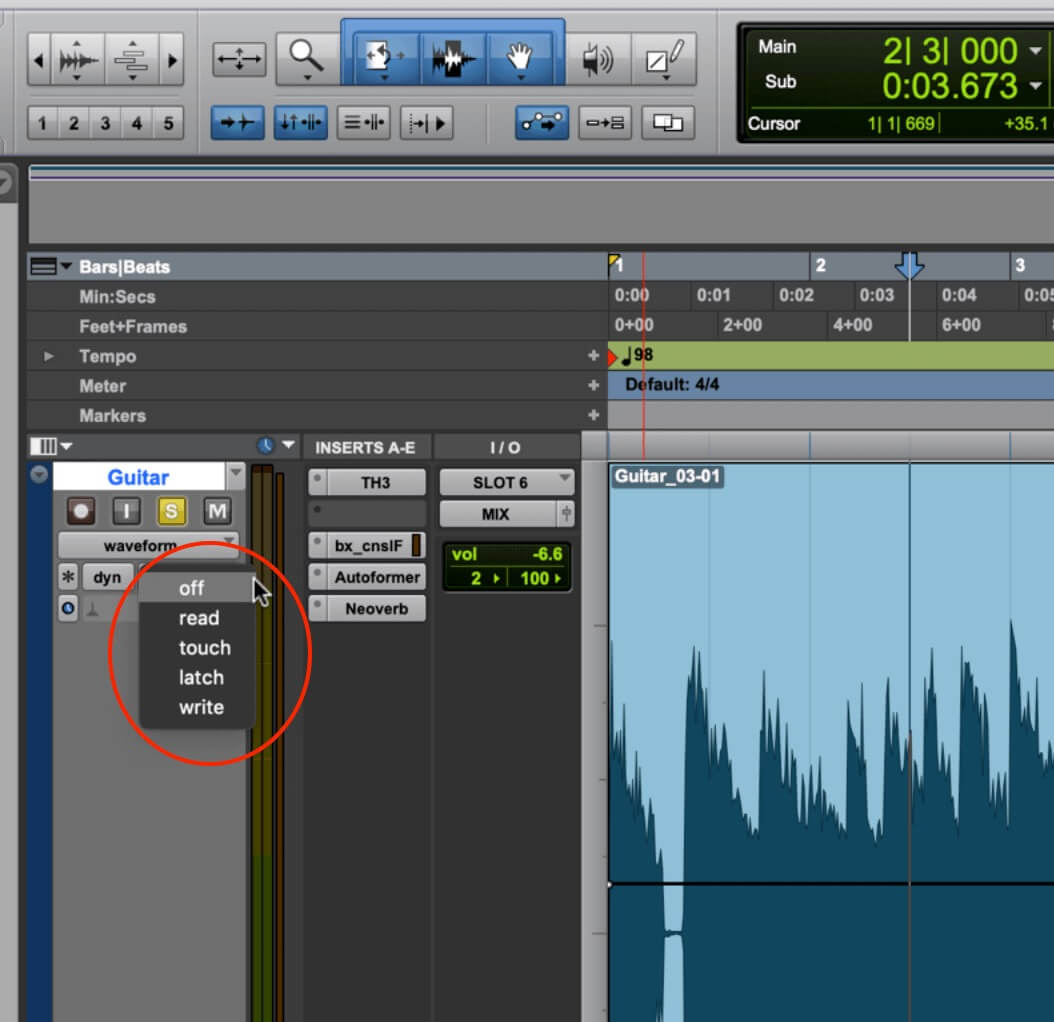
If you want to compare the track without its automation, turn the automation mode to Off.
Another example where you’d want to use Latch mode is if you’re muting tracks for a section to create a breakdown. If you were in Touch mode, you’d have to hold down the mute button for the duration of the breakdown and do so for each track individually. Otherwise, as soon as you released the mouse, the track would unmute.
But in Latch mode, all you’d have to do is mute the tracks you want, and start the transport, letting it run to the end of the section. To get everything back on, place the cursor at the beginning of where you want to unmute everything, turn off the mute buttons for the track and then start the transport briefly. If you’re in Grid mode and set it to Bars, you can be sure to start and stop right at the beginning of a measure.
Write mode will erase and write over existing automation data. It only starts once you grab a fader, knob or button with your mouse, and stops as soon as you release. It won’t overwrite other track parameters, only the one you selected in the Track View Selector.

Write mode will only affect the parameter you’ve selected in the Track View Selector.
You can even set Pro Tools to change from Write mode to Touch, Latch or Read mode by going to the Preferences, which you can access from the Pro Tools or Setup menus. Then go to the Mixing tab, and you’ll see the automation options.
Luck of the Draw
In addition to using one of the automation modes to write your data, Pro Tools gives you many options for drawing it in. Besides the Freehand and Line pencil tools, you also get Triangle, Square and Random shapes. You can use these to create effects by automating volume and pan and any plug-in parameters you activate using the Plug-In Automation Enable button. On MIDI parts, you can automate virtually any parameter to create some cool effects.

The Plug-In Automation enable button opens the Plug-In Automation Dialog, where you can activate parameters to automate.
Autopan is one of the simplest effects to create with automation, particularly on a mono track. Select the Triangle pencil tool and choose a Grid Value. The larger it is, the wider the pan effect will be. Generally, you want autopan to be pretty subtle. If it’s going fully left and back, choose a long duration for the Grid value. If you draw the pans with the Straight Line tool, in which case the Grid Value setting won’t affect what you draw.
Place your pencil tool in the middle of the track and draw out the wave. You’ll quickly get the hang of how to make it taller or shorter. If the track is stereo, it’s more involved to set up this effect because you have to control both the left and right sides and coordinate them.
Here’s an example with a mono rhythm guitar track. The automation for it was drawn with the half-note Grid setting.
First, here’s the guitar without the autopan:
Now with it:
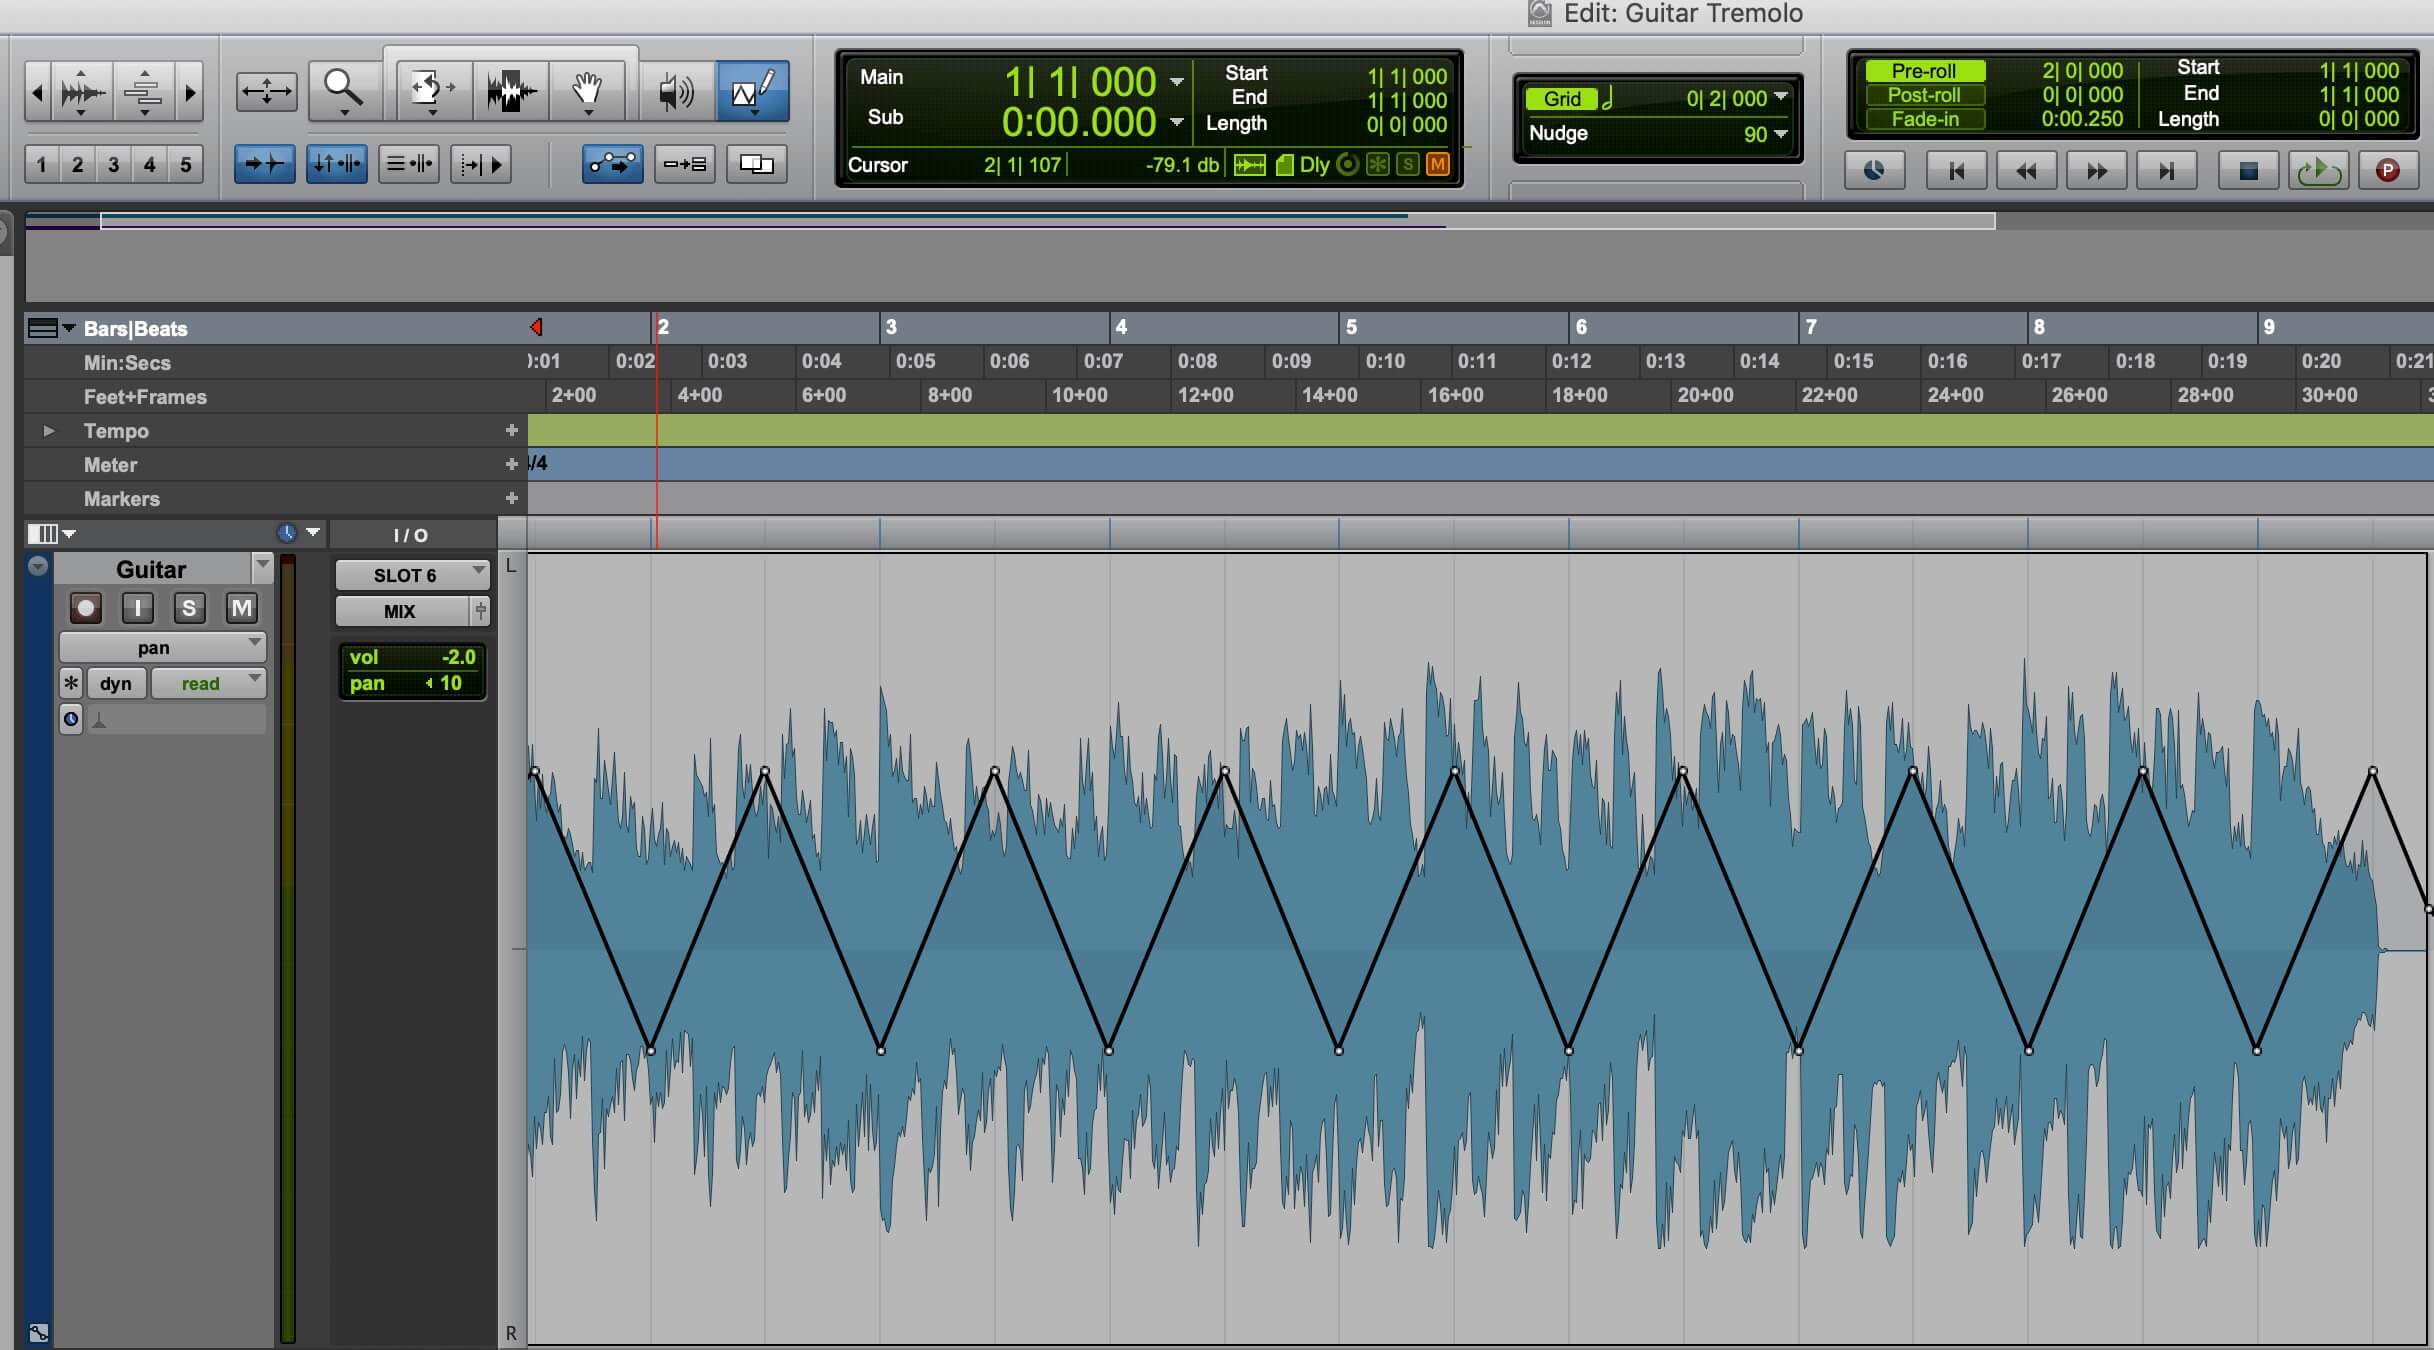
The automation for the previous example.
MIDI Machinations
Another cool thing to do with the Triangle and Square pencil tools is to create parameter change over time to make a track vary or improve sonically. The next example features an arpeggiated sound from Waves Element 2.0 synth along with synth bass, synth pads and drums.
Some automation was drawn in to make the arpeggiated sound a little more interesting. The Resonance parameter of the filter was automated with the Square pencil tool for the first four measures, using the half-note grid setting. The Triangle shape was used to automate the next four measures, with the grid set to eighth notes. In addition, the filter cutoff was automated with a straight line going from 0 to about 25 percent.
First, you’ll hear the example without the automation.
Now with the automation.
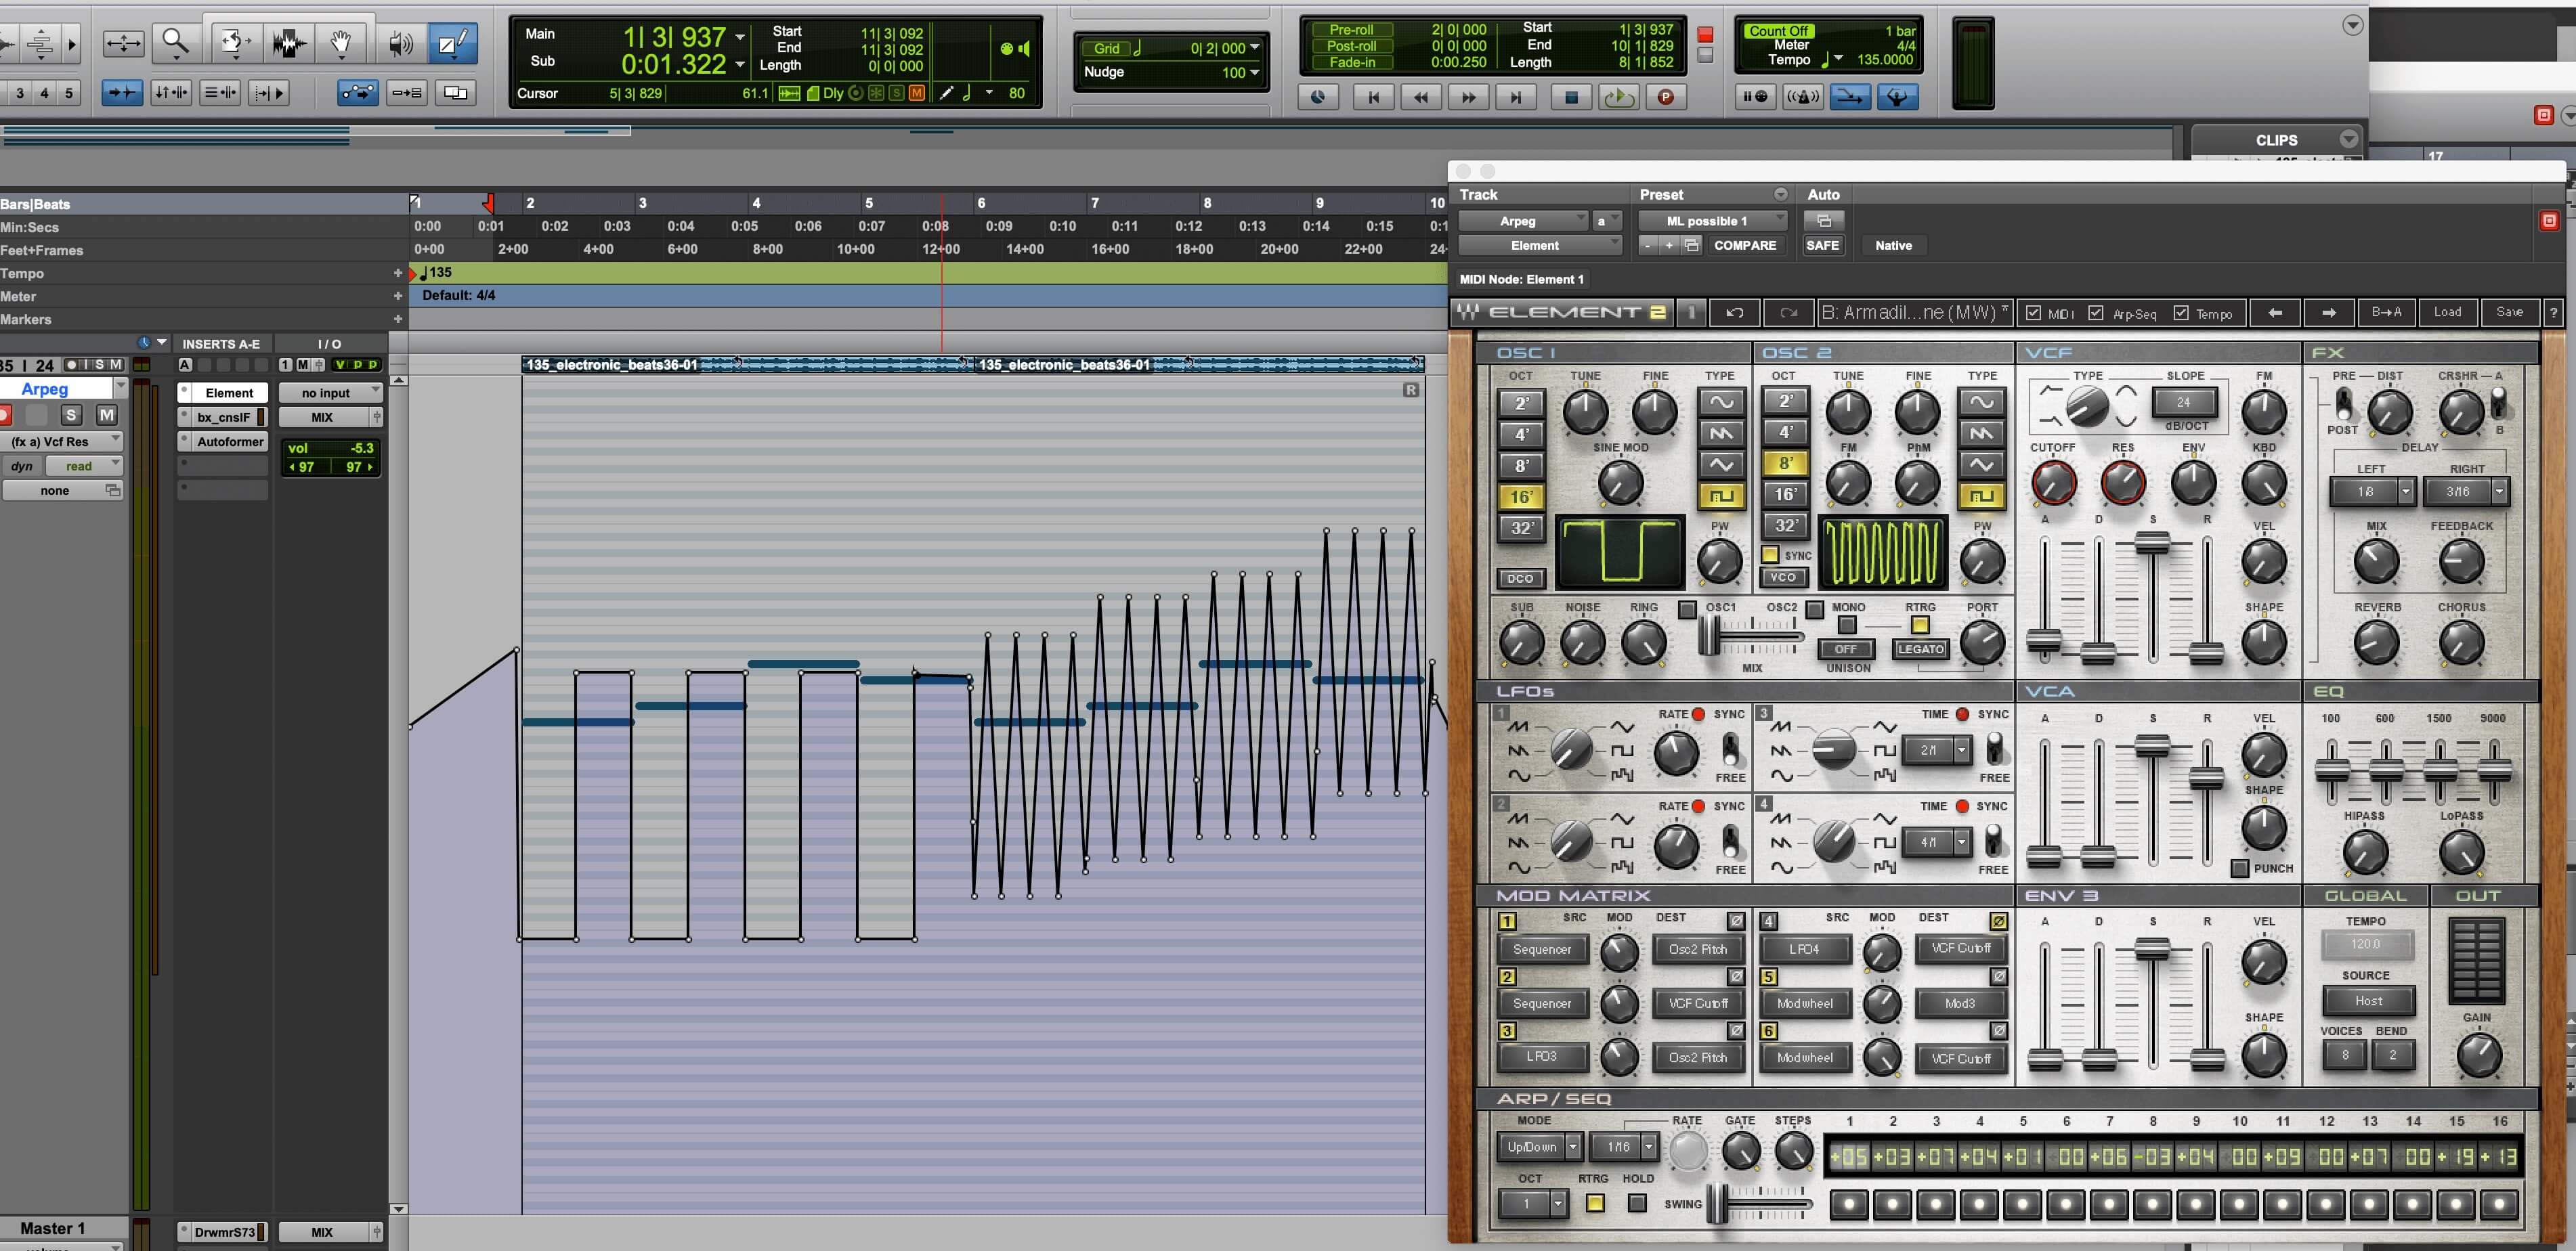
The Triangle and Square shaped automation on the lead synth in the previous example.