Chris Lord-Alge (CLA) begins the latest excerpt from the “Chris Lord-Alge Mixing Daughtry” video by talking about how he sets up parallel compression on the drums. The configuration is pretty simple, he explains. “You send a signal from your drums over to another set of channels, and you can have a stereo compressor there.”
THE LEFT AND RIGHT OF IT
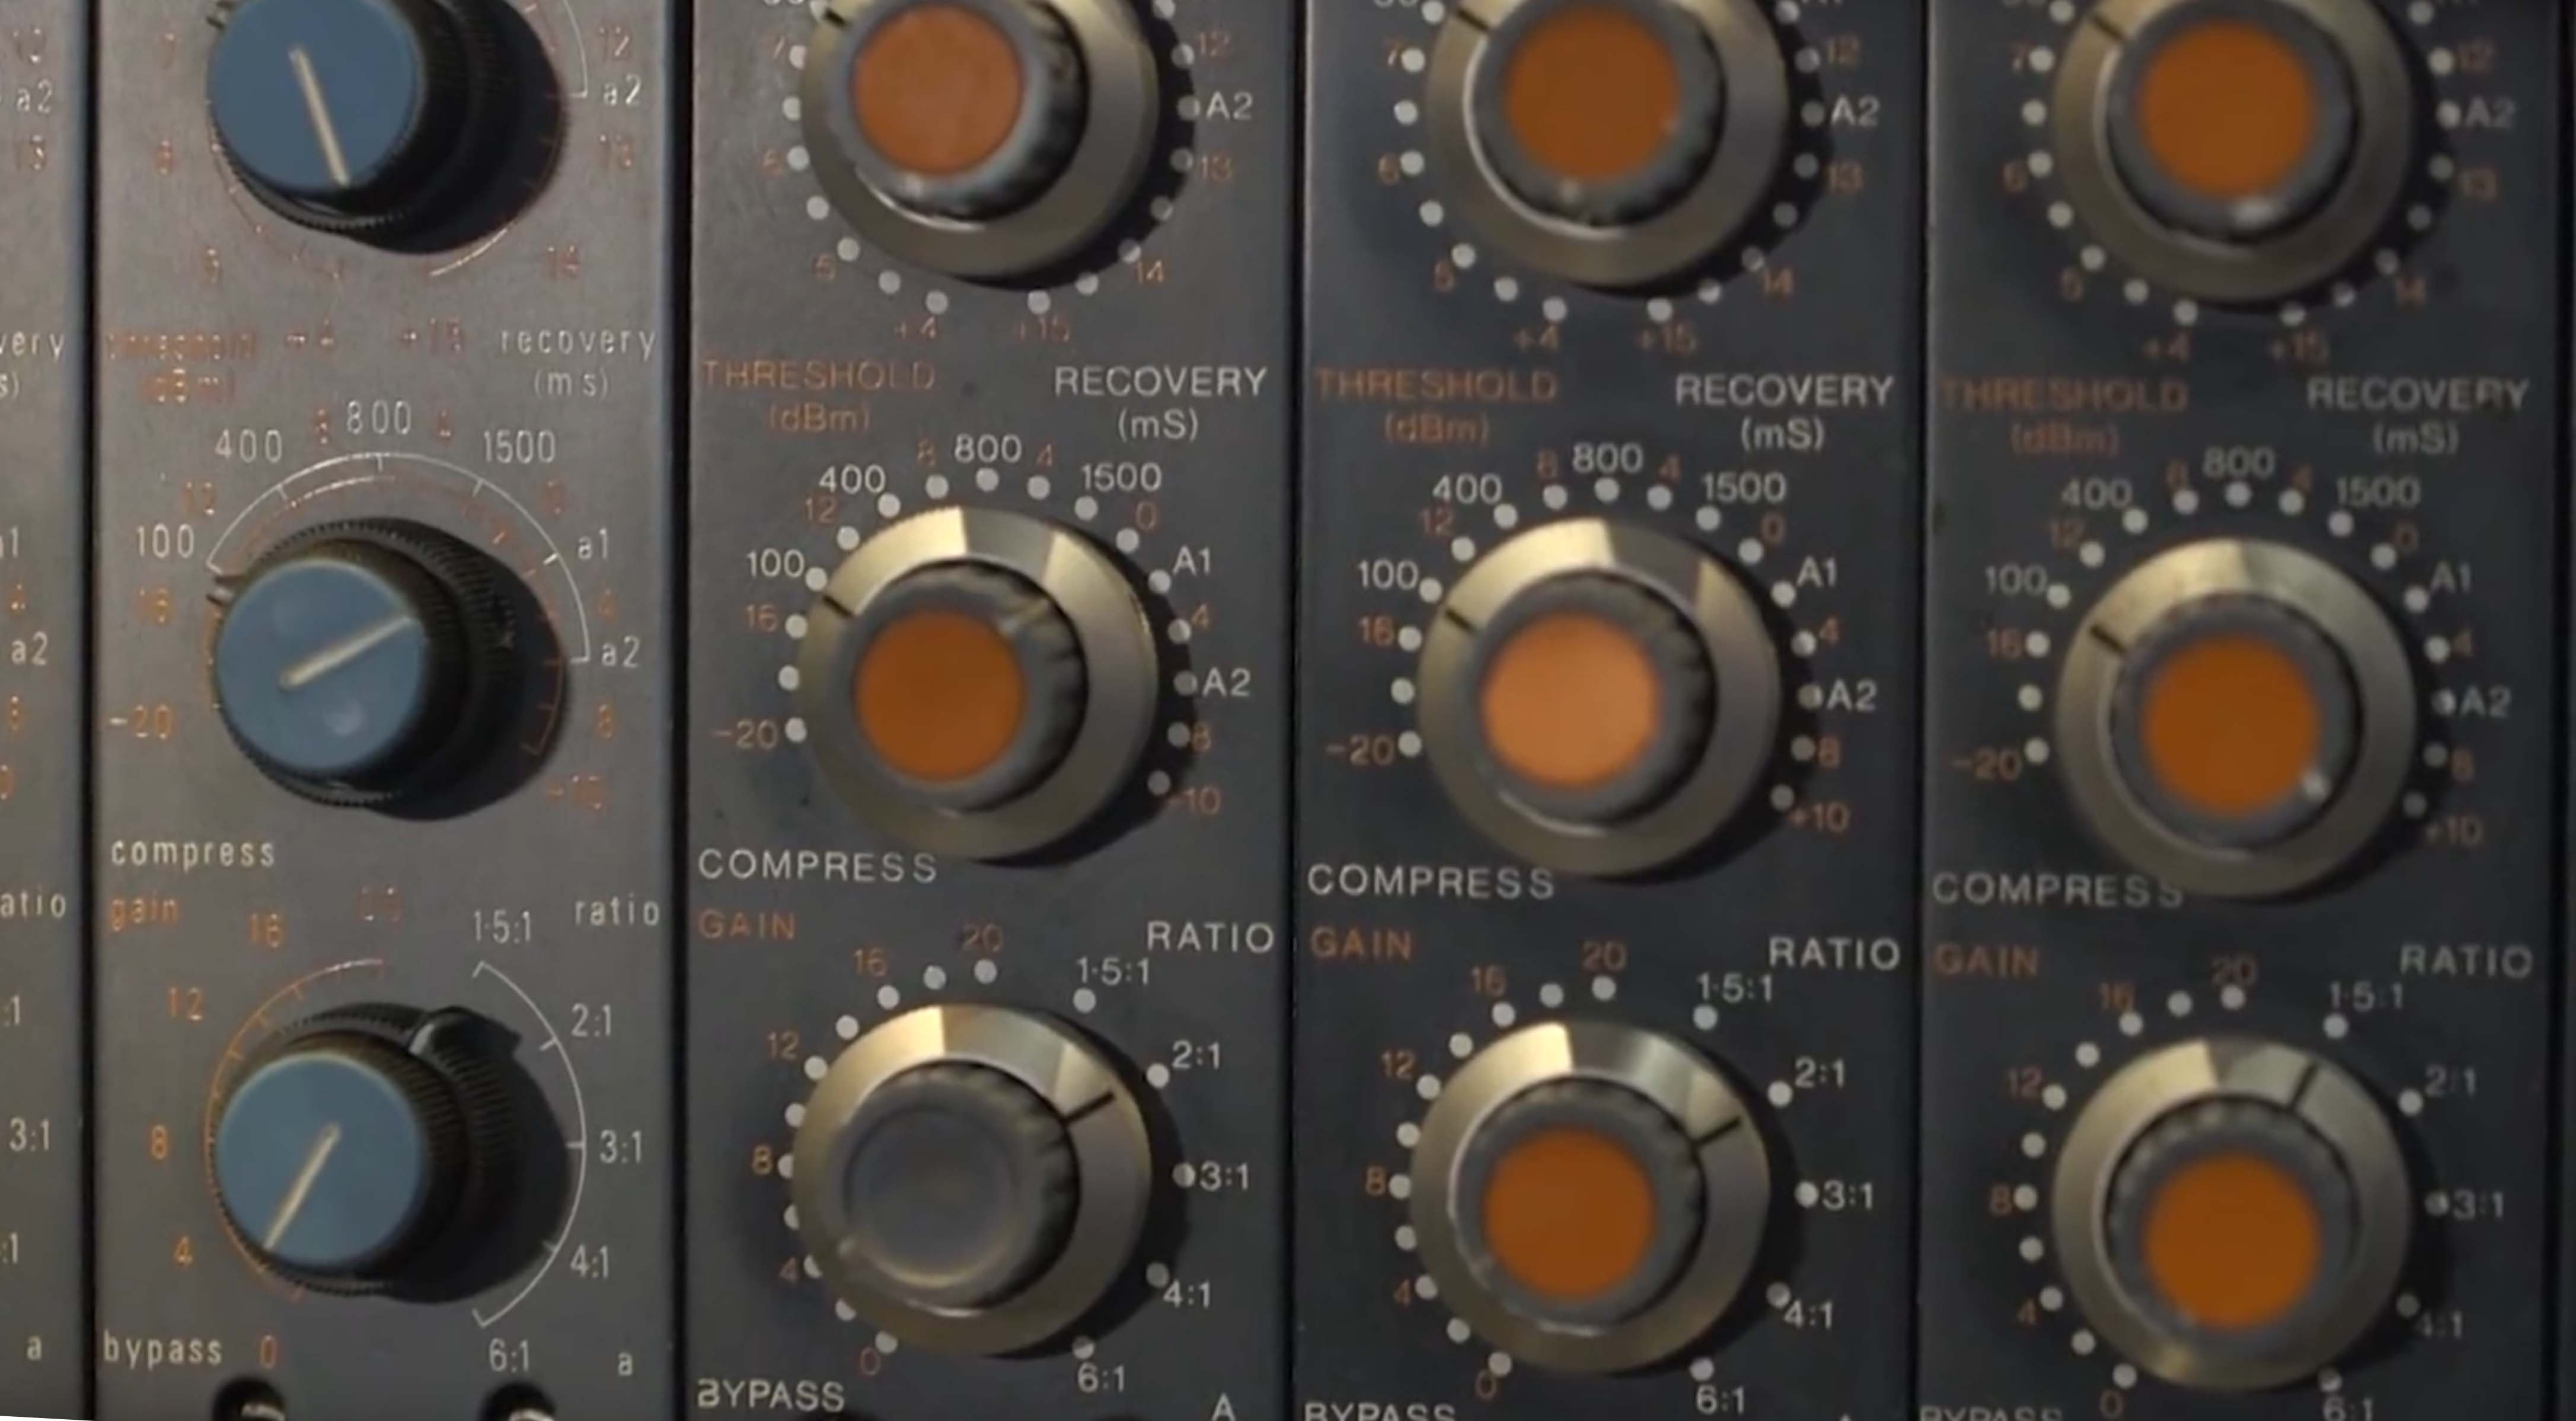
He’s using a pair of mono Neve compressors on the drums, one for the left and one for the right. He says that if you’re using software instead of hardware, he recommends a Neve 33609 plug-in to achieve a similar sound.
CLA uses a pair of individual Neve compressors to create his parallel drum compression.
He's got a hardware 33609 in the same rack and demonstrates his settings on that. Note that the 33609 has both a Limiter and Compressor section, but he’s using the latter. It’s a stereo unit you can set to either Linked or Unlinked mode. The Unlinked setting makes it similar in configuration to the pair of mono compressors he’s using on the drums in the video.
CLA goes on to talk about how he sets the compression parameters. He puts the Threshold at 0, and the Recovery (is another term for “release”) at 100ms, which, on the 33609 is its fastest setting.
The Gain knob on the 33609 controls makeup gain, which adjusts the compressor’ s output level to compensate for the attenuation that occurs. CLA sets the Gain to 8 but explains that's an arbitrary starting point and is session-dependent.
He sets the Ratio at 2:1, which means the compressor will attenuate by 1dB for every 2dB of signal that exceeds the Threshold. As with any compressor, it’s the combination of the Threshold and Ratio settings that govern how much compression you get. Both parameters are equally consequential to the final result.

CLA recommends using a Neve 33609-emulation (UAD Neve 33609 shown here) to get an equivalent sound via a plug-in. This one shows his recommended settings.
TO LINK, OR NOT TO LINK?
Next, CLA explains that when he sets up parallel drum compression with a stereo compressor, he never links the left and right sides. Why? Because that causes any signal that exceeds the threshold, whether it’s coming from the left or the right, to trigger an equal amount of compression on both sides. With CLA’s unlinked setup, a drum that’s off to one side triggers more compression on the side than on the other.
He brings up the argument that some have against unlinking a stereo compressor on drums, which is that it makes the center elements, like the kick and snare, appear to shift in the stereo spectrum when one side gets compressed more than the other. He dismisses this concern out of hand. He says that a linked stereo compressor makes the kit sound more mono, which he obviously thinks is more of a problem than a little bit of movement from the center elements.
ON POINT
The final part of CLA’s parallel compression setup involves adding EQ to the compressor channel. He explains that he likes to boost 3dB at 8kHz and 3dB at 60kHz to add a bit more emphasis to the compressed track.
Because the parallel drum bus is coming up on a separate fader (whether on a console or DAW mixer), he explains that he's able to blend in as much or as little of the effect as he wants. He uses the term “season to taste.”
As CLA plays back the drums in the excerpt, first without and then with parallel compression, he says that he uses it fairly subtly. And you can hear that in the playback, as the drums don’t sound super compressed, just a little meatier.
UP AND DOWN
So now let’s talk about why parallel compression is different from standard compression. If you’re merely inserting a compressor on a particular track (or subgroup of multiple tracks), you’re applying “serial” compression, which gives you a downward compression effect. That is, any audio going above the compressor threshold gets attenuated according to the setting of the ratio parameter.
So at a 2:1 ratio setting, audio will be attenuated by 1dB for every 2dB it goes over. The net effect is lower the peaks of the audio, thus narrowing the dynamic range (the difference between the loudest and softest parts).
Conversely, parallel compression is an approximation of an upward compression effect, in which instead squashing down the peaks so that they're closer in level to the quieter parts, you're pushing up the quieter parts so that they’re closer in level to the peaks. The result is a somewhat different sounding effect, where the peaks come through more.
Although it’s best known for being used on drums, you can apply parallel compression to any source. Is it better than serial compression? It depends on the circumstances and what you’re going for. It’s best to just think of it as another tool at your disposal.
Example 1
Example 2
MIXED UP
Many contemporary compressor plug-ins have mix controls, which the developers tout as being an alternate (and easy) way to create parallel compression. The mix control sets the percentage of compressed versus uncompressed signal that goes to the output. So, if you set it at less than 100%, you’re blending uncompressed and compressed signal together, thereby creating a form of parallel compression. It’s a bit controversial, as some feel that it doesn’t achieve the same effect. You can decide for yourself.
Example 3
Example 4
PARALLEL SETUPS
Let’s quickly look at how to set up parallel compression in a DAW. This method should work in any DAW. First, here’s how to do it if you’re setting it up on multitrack drums.

This screenshot from Pro Tools shows typical mixer settings and signal flow for a parallel compression setup for multitrack drums.
1. Create a stereo auxiliary track in your mixer, which will be your drum sub.
2. Set the outputs of the individual drum tracks to a stereo bus pair that will be the input for the drum sub.
3. Create a second stereo auxiliary track. We’ll call this the "parallel compression track." Set its input to another stereo bus pair.
4. Enable a bus send on your drum sub track that feeds the parallel compression track. Turn the send up so that when your drums are playing, you see a healthy level on the parallel compression track.
5. Insert a compressor on the parallel compression track, with a high ratio and low threshold, so that track is heavily compressed.
6. Bring up its fader to taste, to apply the parallel compression of the drums to your mix.
If your drums are on a stereo track, rather than multiple tracks, just set up a bus send to a new aux track with a compressor on it, which will be your parallel compression track.