Delay is an effect that offers countless creative options. In Start to Finish: Jacquire King - Episode 23 - Mixing Part 5, Jacquire shows an example of using a delay to widen and add extra rhythmic action to a staccato single-note guitar part in the song "Keep the Light On" by Oak and Ask.
Going Primal
Jacquire starts by inserting a stereo instance of Soundtoys Primal Tap plug-in on an aux track. He moves the aux track to the left so that it's next to the guitar track he’s delaying. It's always handy to put the aux close to the source track when working with delay because you might have to adjust both the send level and the delay parameters in the process of getting the sound you want. If the tracks are near each other in the mixer, you won't have to scroll between them.
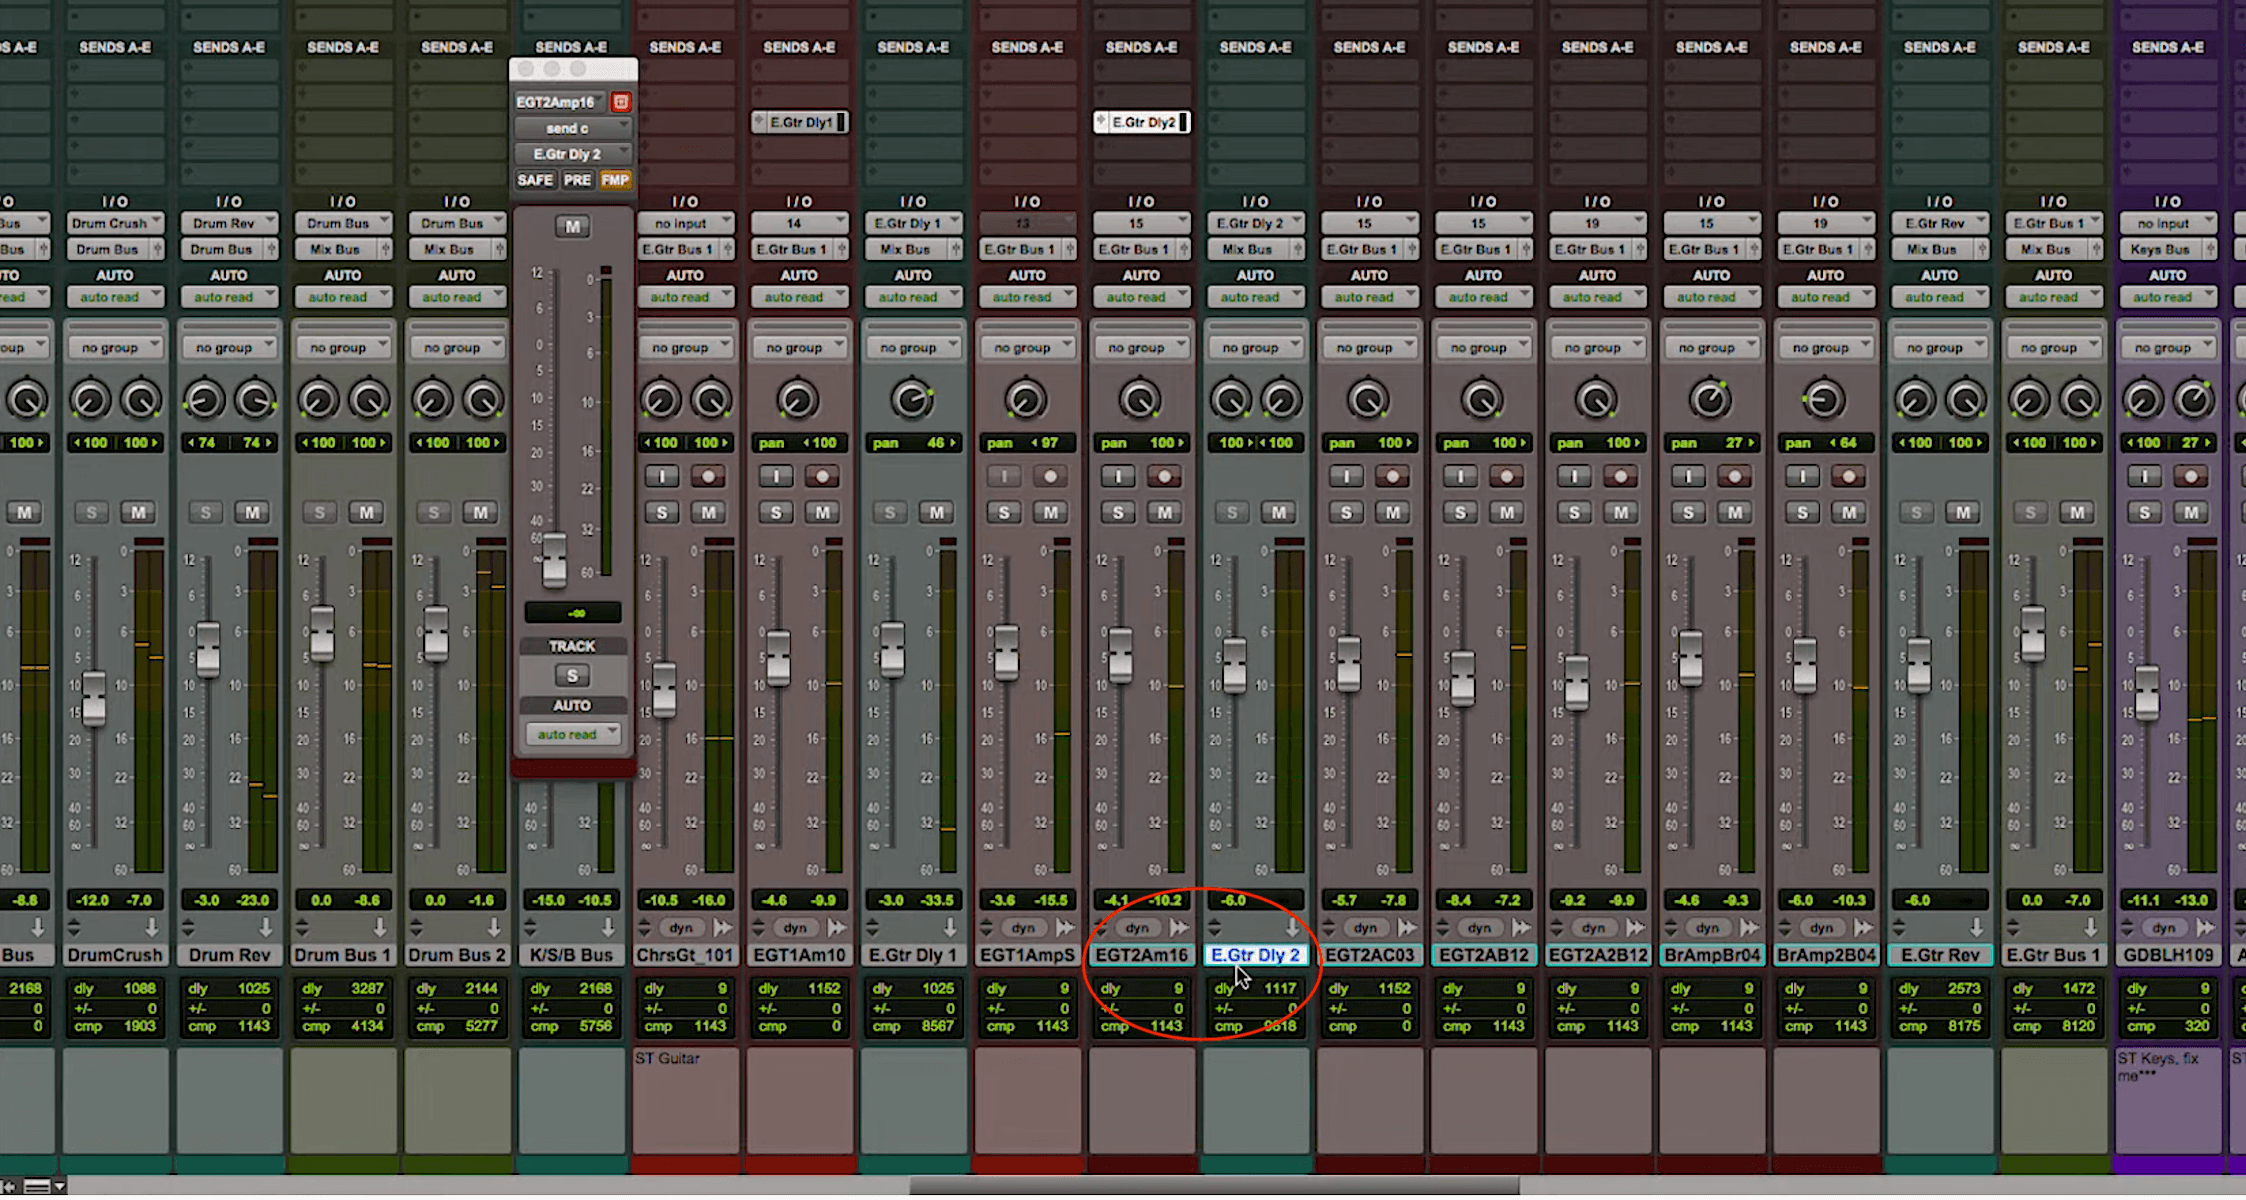
Jacquire puts the aux track with the delay inserted next to the guitar track in the mixer, making it more convenient to switch between channels when creating the setting.
One of the reasons Jacquire likes Primal Tap is that it provides the option to link the critical parameters for left and right—delay time, feedback and output level—or adjust them independently. For this application, he will use the latter to his advantage. He explains that he's setting up a parallel delay, which means both sides receive the same source signal but have separate settings.
He sets the left delay time to a dotted eighth note and the right side to a sixteenth note. He pans the left delay output all the way left and the right side to about 2 o'clock. The result is that a significant portion of the delay, including all the dotted eighth taps and some of the sixteenth note taps, will be heard on the left half of the stereo image, while the guitar itself is panned entirely right. That gives the guitar a wider sound. It still feels right-panned, but it has a subtle presence on the left and sixteenth note taps closer to the center.
Jacquire panned both the left and right delay outputs away from the original guitar signal, which is fully right to give the latter its own space. If the delay taps were on top of it, that could muddy up the part, which is staccato and rhythmic, and reduce its punchiness in the mix.
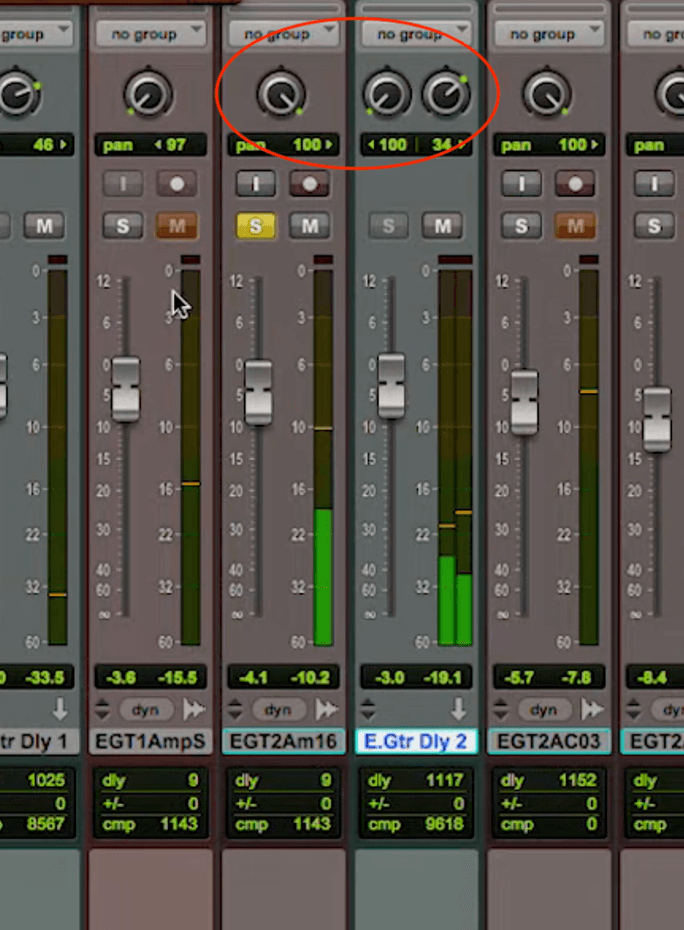
Jacquire’s pan settings on the delay return
And That's Not All
Jacquire also rolls off some high-end using the high-cut filter. Unlike some of the other parameters on Primal Tap, it's a global setting that governs both sides. Reducing the high-end on the delayed signal further accentuates the difference between the original and delayed audio.
For the feedback parameter, he sets the right side, which is the shorter of the two delays, to a higher setting. As a result, it will produce more taps for each delayed note. That means that the right-side delays are shorter than the left, but will repeat more, making them sound similar to reverb. He says that helps them blend with the reverb that's also on the guitar track.
Once Jacquire is happy with the setting, he listens to the soloed guitar, with and without the delay. Then he does the same with the full mix. The differences with the effect on and off are quite noticeable. The part feels wider and more energetic with the delay.
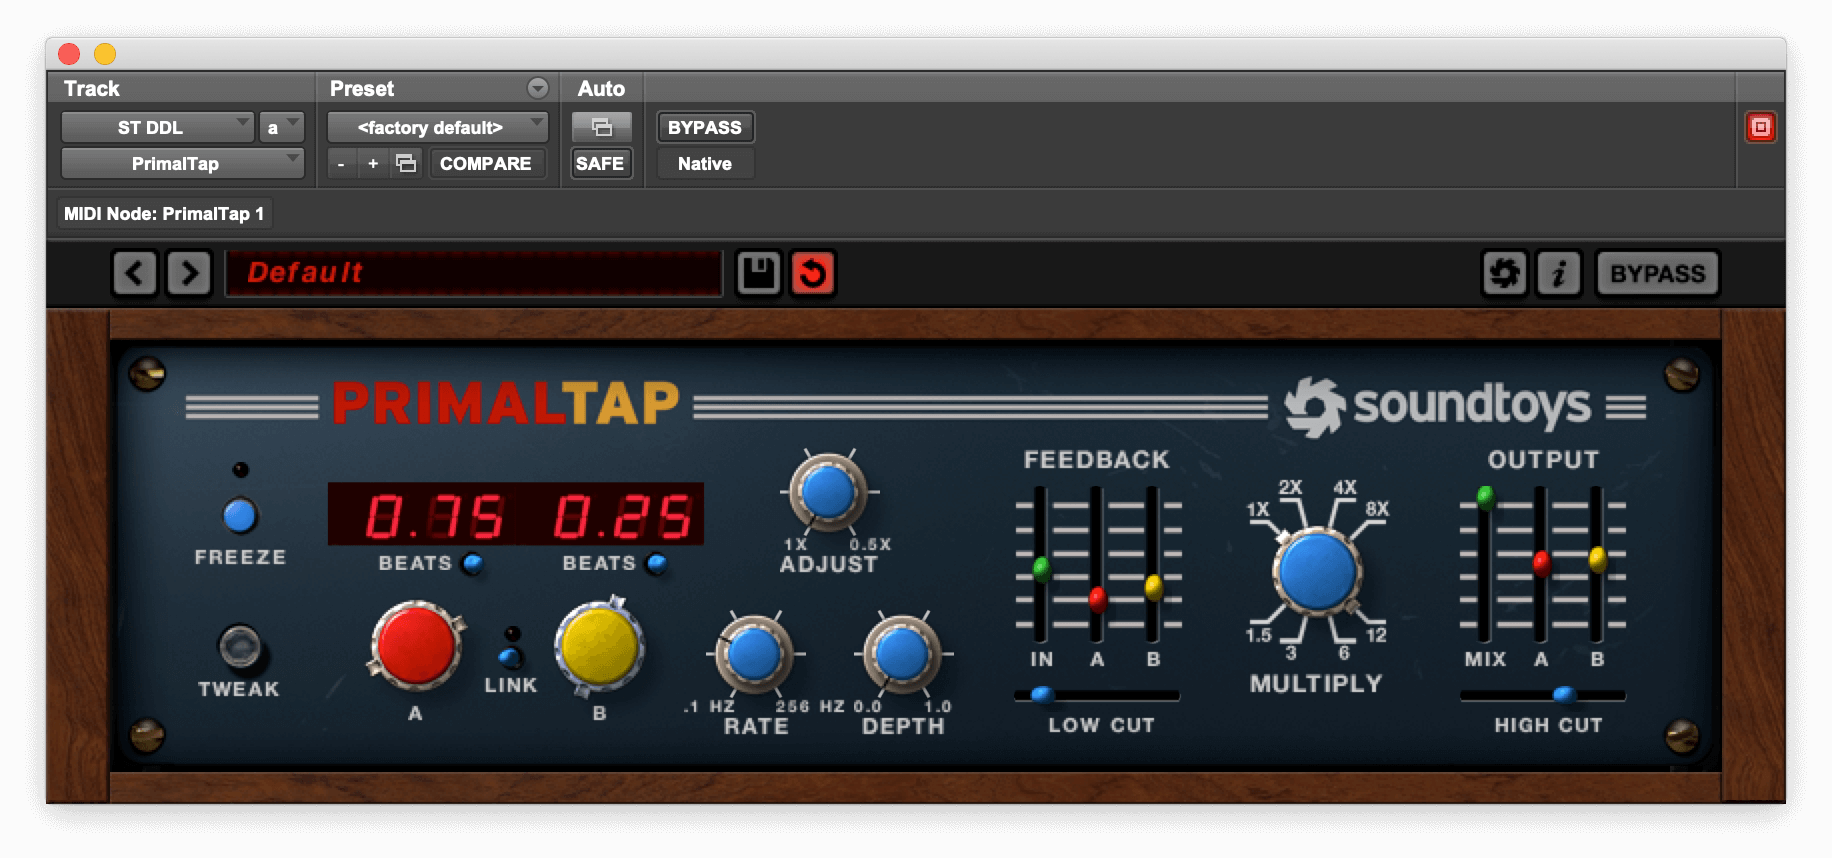
Jacquire’s setting on Soundtoys Primal Tap.
Ghost in the Mix
Here's another delay technique, which is sometimes referred to as a "ghost delay." It has widening qualities similar to the method Jacquire uses in the video but features a mono rather than stereo delay. It's a subtle effect that’s especially handy on lead tracks or percussive rhythmic tracks. The idea is simply to give a track that's panned to one side a presence on the opposite side so that the source track sounds wider. You can pan it either as a mirror image or even further to the opposite side.
The setup is easy. Create a mono aux track and pan it opposite the track you want to delay. Insert a mono delay on it and adjust it in milliseconds rather than synced to tempo. Adjust the delay time knob until it sounds a little wider than a double.
The delay time setting depends somewhat on the tempo of the song. For example, on a song that's 120BPM, you'd probably want the delay time to be somewhere in the 45-70ms range. It should be a tad longer than a doubling delay but not long enough that your ear perceives a distinct space between the original and delayed signal.
Try a feedback setting of about 25%. You don't want too many taps, but a little bit of feedback helps energize it. Set the output level of the delay while listening to the full mix. You want to hear it very subtly on the opposite side. You almost feel it more than hear it, but the source gets a lot wider.
Here's an example on a lead guitar track. The delay used is Soundtoys Echoboy Jr.
For the first example, the guitar is soloed. The delay is bypassed for the first four measures and comes on in measure 5. Without the rest of the instruments, the effect sounds more intense than it will in the context of the mix.
Now here's the same thing but with the rest of the tracks in for context.
If you want to make it sound more pronounced, turn up the output of the delay. In the following example the Saturation control is turned on, adding distortion and gain to the delayed signal. Also, the delay mode is changed from Studio Tape to Memory. The latter emulates a bucket-brigade-style analog delay circuit and differentiates the delay from the source a little more.

The setting for the last audio example includes saturation on the delay taps.
Like with any effects setting, feel free to experiment with the parameters. You never know what you'll come up with.