
Ben Lindell Mixing a Pop Song in Pro Tools
01h 45min
(67)
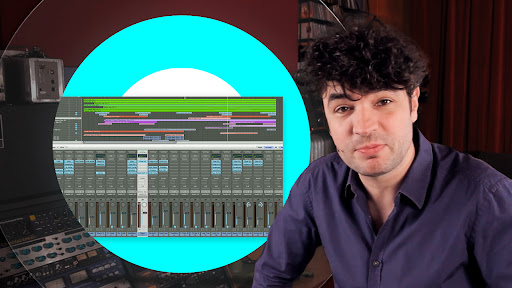
Learn how to implement Ben’s unique approach to routing and his hybrid mixing workflow. He also demonstrates and discusses the importance of working on both the details and the big picture of a mix simultaneously.
This tutorial will teach you how to approach your mixes like a game of chess, starting with a concept and a vision for the final mix and then creatively executing the steps necessary to bring a song to life.
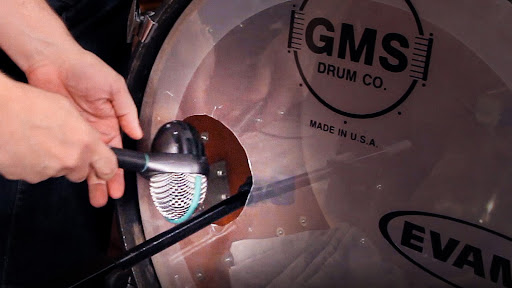
Ben primarily uses plugins by Universal Audio, Sonnox, Softube, Flux and Soundtoys, showing every move and explaining every decision as he builds the mix around Amber’s vocal. Using creative effects and bussing, Ben enhances and develops the sonic “story” of the song while also shaping the overall tone and vibe of his mix.
If you struggle with finding consistency and purpose for your mixes, this tutorial will show you how a world class professional tackles both the problems and opportunities presented by modern pop production.
See Ben's favorite digital and analog processing chains and watch as the song quickly blossoms from a decent sounding rough mix into a final mix before your eyes.
Parts of this site and some files are only accessible to pureMix Pro Members or available to purchase. Please see below our membership plans or add this video to your shopping cart.
Once logged in, you will be able to click on those chapter titles and jump around in the video.
- 00:00 - Start
- 01:57 - Session Routing
- 05:40 - PT 11 Meters
- 09:21 - Vocals (Beginning a mix)
- 10:16 - Vocal Eq
- 16:57 - Vocal De-essing
- 18:46 - Vocal Compression
- 21:21 - Vocal Reverb / Delay
- 26:44 - Pre-chorus Vocals
- 35:28 - Chorus Vocals
- 42:39 - Drums
- 47:20 - Kick Drums
- 51:12 - Snare Drums
- 57:20 - Hi-hats
- 1:01:04 - Parallel Compression
- 1:04:57 - Vocals and Drums
- 1:08:29 - Bass
- 1:12:12 - Acoustic Guitars
- 1:22:57 - Piano
- 1:28:30 - Sweeps & FX
- 1:35:23 - Mix Bus Processing
- 1:41:25 - Hardware Inserts
00:00:09
Hi! I'm Ben Lindell.
00:00:11
Today, I'm gonna be taking you through
my mixing process for a pop song,
mixing inside the box
using Pro Tools 11.
00:00:17
The song is called "Howlin",
by Amber Skye,
which I helped co-write and co-produce
with my team at EMW Music Group.
00:00:23
Before we get started,
let's take a listen to the raw tracks
and see what we're working with.
00:01:43
As you can see and hear, the session
is already in pretty good shape.
00:01:47
The sounds are all there,
pretty well balanced,
a little bit raw sounding,
but that's what we're here for.
00:01:52
But more importantly,
my session is set up.
00:01:54
The tracks are laid out the way I like
them, they're color coded,
and all the routings
are already taken care of.
00:01:58
Before we start digging into this mix,
let me show you briefly how everything
is set up and routed,
so you can follow along
more easily at home.
00:02:05
At the top of my session,
I have all my drum tracks,
colored here in brown.
00:02:10
These are being bussed out,
through the Drum Bus
and fed into 2 Aux tracks:
one I use for my clean drum signal,
and one I use for parallel processing.
00:02:19
We'll get more into that
a little bit later.
00:02:21
Next to that, is my vDrums track.
00:02:23
This is a VCA track that allows me
to control the level of all the drum tracks
and how much they're being fed
into the drum bus tracks.
00:02:31
Next to that, in neon green,
are all my sound effect tracks.
00:02:34
These are anything that isn't
a synthesizer, a drum, a bass or a guitar:
impacts, reverses, risers,
even dog whistles.
00:02:44
Right after the sound effects,
I like to place my bass tracks.
00:02:48
As you can see in this song,
we have 3 different bass tracks.
00:02:50
2 of them are in mono,
and 1 in stereo.
00:02:53
Next, we have all my guitar tracks,
colored in different shades of blue
to help me see which ones
belong together.
00:02:58
And then we have
all the keyboard tracks.
00:03:01
All these instruments are being bussed
together through the Instrument bus,
which is fed into an Aux track
titled mInsts.
00:03:09
It's all for instruments.
00:03:11
Next I have a VCA Master
for all the instruments as well.
00:03:15
Again, I have a fader that I can use
to control the volume
for all my instrument tracks.
00:03:21
I'll show why these are helpful
later on.
00:03:23
Now we're getting
to the second half of the session,
where all the vocals live.
00:03:27
So first up, I have a vVocals track,
which is a VCA Master, again
for all my vocal tracks.
00:03:33
A mVocals, which is an Aux track,
where all my vocal tracks
are being bussed into
before they go to my final mix bus.
00:03:40
And here you'll see: Lead vocals, and then
lots of stacks of harmonies and doubles.
00:03:45
There's about 30 tracks or so
of vocals in the session.
00:03:48
So to help save both my sanity
and also my CPU power,
I like to bus different sections
of vocals together,
so that they can be processed
as one unit.
00:03:57
And following my vocal tracks,
I like to have all my effect returns.
00:04:00
These are all my reverbs, and delays
I'm gonna be using on this session.
00:04:03
And then finally,
I have my last 4 tracks.
00:04:06
These are my main Mix Bus,
my Loud Bus,
and then my 2 audio tracks
for printing my mixes.
00:04:12
As you can see, there's a lot of tracks.
00:04:14
But actually for a pop song,
this is pretty conservative,
meaning it's under 100 tracks.
00:04:18
In my experience, what makes working
on these bigger sessions a lot easier
is to resort to grouping things together,
and working on like-elements,
with like-elements.
00:04:27
So you work on your apples with your
apples, your oranges with your oranges,
the drum tracks with the drum tracks,
your vocals with your vocal tracks...
00:04:33
working on them together as one unit,
as one piece of your mix.
00:04:37
That's how I have my routing set up.
00:04:39
So all my drums are being bussed
to a Drum Group.
00:04:42
Then all the rest
of my instrumental tracks,
the FX, basses, guitars, keyboards,
are all being routed to
an Instrument Bus, along with the drums.
00:04:51
This is where all the music
comes together,
and I can make any adjustments
to all the music,
using the mInsts Aux track.
00:04:59
Still with me? Great!
Now, all my vocal tracks are being
bussed to the mVocals bus.
00:05:06
As you can see, inside the vocals,
there's different stacks,
and different sections of the song,
which are being bussed together
to their own Aux tracks.
00:05:14
This allows me to manipulate
different sections of vocals
independently of each other.
00:05:18
And then, finally, both the instruments
and the vocals,
along with all my reverb
and delay returns,
are getting bussed together
to the Mix Bus track.
00:05:27
This is where I do
all my 2-Bus processing,
which contains an assortment of
compression, EQ, widening,
basically, any sort of adjustments
that help sweeten,
and bring my whole mix together
as a cohesive unit.
00:05:40
So now our session is set up,
routed, and ready to go!
The last thing I wanna show you
is my favorite feature in Pro Tools 11,
which is the new metering options
available.
00:05:50
When you right clic on the meters,
Pro Tools gives you an option
to select different meter scales.
00:05:55
In Pro Tools HD,
you have 17 to choose from.
00:05:59
If you're an old-school guy, you can
just stick with the Pro Tools Classic.
00:06:03
This is the same scale
and same ballistics
that you're used to if you've been
using Pro Tools for the last...
00:06:08
who knows how long?
Some of the other meter scales that
I've found have been very useful,
all ones such as RMS, VU, Digital VU,
the K system,
and also the VENUE Peak and RMS
options.
00:06:22
Let me quickly show you how some
of these different meters look,
and react to sound.
00:06:27
First,
here's the Pro Tools Classic meter.
00:06:39
So the scale in this
goes from -60 to 0 dBFS,
and just shows you the peak output.
00:06:47
Now I'm gonna switch that to RMS,
you're gonna notice
the top and bottom have stayed the same:
0 dB and -16.
00:06:53
But the scale in between has changed.
00:06:55
But also when I play back, you'll notice
that the levels
are moving a little bit slower, and
generally at a little bit lower level.
00:07:02
This is the difference between a peak
and a RMS meter. Check it out.
00:07:14
An RMS meter is helpful to be able
to show you
the average level of what's going out,
and give you a little bit more
realistic idea
of what the loudness of each track is.
00:07:23
Compared to a peak meter, which just
shows you, matter-of-factly,
exactly what level is being
digitally outputed.
00:07:29
Now with 17 different metering options,
how do you choose which one works best?
Well I often choose depending
on what task I'm working on.
00:07:36
When I'm tracking, I like to switch
to the Pro Tools Classic meter,
as it shows me my real peak level,
to make sure I'm not clipping,
and also just based on years
of experience,
I know exactly where I like to hang out
on the Classic meter,
to be in the sweet spot
of my converters.
00:07:51
Now when it comes time to mixing,
I generally like to reference
an RMS meter,
so I can get an idea
more of the loudness of the track.
00:07:58
After working with these meters
for a while,
the one I've actually settled on
that I like the most
is the VENUE RMS meter.
00:08:05
Why is that? Because it changes
its scale to have 0 dB be at -20 dBFS,
right in the sweet spot
on most converters.
00:08:14
And it also shows me both my RMS level,
and a line for the peak level
at the same time.
00:08:20
So it's basically the best
of both worlds. Check it out.
00:08:33
Now I can easily see
the overall loudness of my track
as well as where the peak level is at.
00:08:39
This also gives you a good indication
of your peak/average,
or how transient a track is.
00:08:44
The further away
the bar is from the line,
the more transients are passing
through your signal.
00:08:48
The closer they are together, the less.
00:08:51
A good example to show this
is on the synth bass and drums.
00:08:56
Check out how the synth bass basically
has the line and the bar at the same spot.
00:09:00
Whereas on the drums, the line is
well above the bar.
00:09:14
So by changing the metering options
on my tracks,
I'm now getting more information
from my DAW,
which is gonna help me make
better decisions as I mix.
00:09:22
Whenever I begin a mix, I like to
start from my most important elements
and then work my way backwards.
00:09:27
So for a song like this,
I'm gonna start with the vocal.
00:09:31
Let's start with the lead vocal
over the verse section of the song.
00:09:34
Here's the lead vocal on the verse
by itself, with no processing.
00:09:57
So I happen to know from first-hand
experience
exactly how this vocal was recorded.
00:10:01
We used a Lauten Audio Atlantis
through an Avedis Audio MA5 preamp,
probably into an 1176,
and then into Pro Tools.
00:10:11
But the thing that I'm hearing
the most in this vocal
is some of the resonances from
the small vocal booth that we used.
00:10:16
The first thing I'm gonna do
to this vocal
is EQ out some of those resonances that
are masking the prettiness of her voice.
00:10:23
Let me pull out my standard EQ,
which is the Flux's plug-in Epure.
00:10:26
I like using this EQ,
because it's not very colored,
and it's very precise
for doing surgery like this.
00:10:32
As you can see
when I open up the plug-in,
Pro Tools automatically loads my User
default setting, which is called Ben DEF.
00:10:39
That's not because I can't hear things,
it's because I have a specific setup
I like to use
every time I load this plug-in.
00:10:45
This is a really easy thing to do
and it saves me a lot of repetition.
00:10:48
Every time I open up plug-ins,
I'm generally adjusting them
to a default state
that I like to work from.
00:10:54
For this plug-in, I like to work
with a high-pass filter,
already engaged at 50 Hz.
00:10:59
I like to have 3 bands of parametric EQs
with tight Q factors,
to help isolate and find resonances.
00:11:05
And I also like to have a high-shelf
set up, so I can open up the top end.
00:11:09
Making your own User default presets
is actually super simple.
00:11:13
All you have to do is save your setting
and then select Set As User Default.
00:11:20
And lastly, go under
Settings Preferences...
00:11:24
Set plug-in Default To > User Setting.
00:11:28
Now instead of loading
the factory setting every time,
it's gonna now load my preset, which is
gonna literally save me seconds a day.
00:11:35
The first thing I'm gonna start adjusting
on her vocal is the high-pass filter.
00:11:39
I'm gonna move it up
until it starts taking away too much,
and then back it off just a little bit.
00:11:45
What I'm trying to do with this EQ
is get my vocal into a good spot
where it doesn't sound muddy
or wooly anymore.
00:11:51
Then we can get more creative
with our processing later on.
00:11:55
Now this being a female voice,
there isn't a lot happening
below 150 Hz or so.
00:12:00
So let's listen
as I adjust the high-pass filter,
and see what effect
that has on her vocal.
00:12:23
So you can hear how, as I move
the frequency up and down,
the chest, and just the overall
resonance of her voice changes up.
00:12:31
So let's listen one more time
and hear the difference between having
a high-pass filter set at 200 Hz,
versus 50 Hz.
00:12:40
First... 200 Hz.
00:12:52
And now, back down to 50 Hz.
00:13:03
The only thing that you'll notice when
I leave the high-pass filter down at 50
is there's some kick drum bleed,
either from her headphones,
or through the booth from the speakers.
00:13:11
So let's set my high-pass filter
to just under 200 Hz.
00:13:15
Now I'm gonna use
one of my parametric bands,
with a very high Q of about 40,
and sweep around the different
frequencies,
and see if I can find
some of these other resonances
that were being created by the booth.
00:13:43
So as you can hear as I was sweeping
through the frequency ranges,
certain frequencies will
all of a sudden become very excited,
and some didn't really seem
to have as much of an effect.
00:13:53
What's happening with these resonancies
is the room is activated,
even when she's not singing
that fundamental note.
00:14:00
So let's listen again with
this slightly ridiculous EQ setting.
00:14:03
But listen for how this frequency
activates,
no matter what note she's singing.
00:14:17
As the pitch of her melody is changing,
this frequency is still happening a lot.
00:14:22
Of course,
this is a very ridiculous EQ setting,
but the point is to find
these resonances
that are muddying up
and masking this vocal.
00:14:29
Now that I found
where the problem area is,
let me bring the gain back to zero
and gently walk the gain down
until I remove enough of this resonance
to open up her vocal sound.
00:14:55
Hear how her vocal is starting
to open up
and become brighter and clearer?
Of course, because I'm taking away
some of the low-end energy.
00:15:02
But this frequency in particular was
really muddying up and masking her voice.
00:15:07
So let's take a listen
without that cut.
00:15:21
Now this vocal is starting to take
the right shape for this song.
00:15:25
But as I took that resonance out,
what became more apparent
was another resonance further up.
00:15:31
So let's repeat that process again
of doing a kind of silly boost
with a tight Q, to find
that other offending frequency.
00:15:48
So that's about 450 Hz or so,
which on her voice just adds
this really boxy nasal tone to it.
00:15:55
Again, this is an outrageous
EQ setting that no-one will ever use,
but it's helpful to be able to identify
these problem areas.
00:16:02
Now I bring the gain back down to zero.
00:16:04
I'm gonna gently bring the gain down
and just remove some of that
boxiness from her voice.
00:16:26
This vocal is really starting to take
the shape
and the concept that I have for it
sonically.
00:16:31
Just to check where we're at, let's
listen to the vocal again, unprocessed.
00:16:45
And now with surgery.
00:16:57
Now that I've given her vocal
a little bit of a shaping,
I'm starting to hear a new problem
arise, and that's some S's.
00:17:04
Thank for the people
who invented plug-ins
that fix that exact problem,
called de-essers.
00:17:09
I'm gonna pull out my favorite de-esser,
which is the UAD Precision De-Esser.
00:17:13
Again, as you can see, this plug-in
pulled up a preset called Ben DEF.
00:17:17
For almost everyone of my plug-ins,
I've gone through and found
a general default setting
that I like to start working from.
00:17:22
For my de-esser,
I like to set it to a high-pass,
starting around 7k, fast,
and I just bring the threshold down,
so I have somewhere to start with.
00:17:32
I'm gonna play back her vocal, trying
to find a section that needs de-essing,
so I can dial in the settings.
00:17:42
So here's a spot: "A savage wish".
Lots of S's going on here.
00:17:47
I'm gonna keep coming over that section
until I have the de-esser take care
of just the right amount.
00:17:51
You wanna be careful when
you're de-essing
and not take away too much
and give your signal a lisp.
00:17:56
I'm gonna play it back again and start
dialing in the threshold and frequency.
00:18:14
So as you can hear,
the de-esser only activates
whenever there's
an excessive amount of S's,
which for her vocal is happening
above 5k or so.
00:18:24
Let's take a listen again,
without the de-esser.
00:18:40
So as you can see, I'm not trying
to eliminate the S's,
I'm just trying to lessen them,
so we don't hurt people's ears.
00:18:46
Now is the moment we've all been
waiting for,
time to add a compressor
to this vocal.
00:18:50
Now, listen it back. I haven't heard
a lot of issues with it.
00:18:53
But thinking ahead, I know that
I'm gonna want the vocal
to sit in a very specific spot
in the mix,
and never lose distance.
00:19:00
So I'm gonna use a compressor
to really hold the vocal in one spot,
up in front of all the craziness
that's happening behind it
on the drums and guitars.
So let's check it out!
For this track, I'm gonna use the
Softube Tube-Tech CL 1B compressor.
00:19:14
On a vocal like this where it doesn't
need a lot of compression,
I'm gonna do just that,
not give it a lot of compression...
00:19:21
I'm gonna use it just enough
so that it stays in one spot,
and the vocal never drifts backwards.
00:19:27
So let's take a listen
as I dial in the settings.
00:20:11
What I really like
about the CL 1B compressor
is it can be very smooth,
but it's also very flexible
in terms of attack and release times.
00:20:18
So what I've dialed in here
is a pretty slow attack,
a pretty fast release, so that way
the vocal, whenever it gets too loud,
gets grabbed quickly, but also lets up
to let me hear the details that follow it.
00:20:29
Then I used a lower ratio, which meant
I needed a little bit higher threshold
to be able to hold the vocal
in the right spot.
00:20:35
As you can see, I'm only really doing
at most 3 to 4 dB of compression
on the louder spots,
and on the softer lines, the compressor
doesn't even have to work at all.
00:20:46
Let's take a listen to the beginning
of the verse,
first, without compression.
00:21:10
So as you can hear, this compressor
is adding just a little bit of color,
but it's mainly just holding
the vocal in a nice spot.
00:21:16
It's gonna allow me to fill in behind
and to the sides of the vocal,
with the rest of the instrumentation.
00:21:21
Now that my lead vocal
is starting to sound good,
I wanna add some dimension, some space,
and some color to it.
00:21:27
So I'm gonna use reverbs and delays
to start defining
the character of my lead vocal.
00:21:31
Again, just like the EQ
and compressor settings,
these may change as my mix evolves,
but I want to give myself
a good starting point to work from.
00:21:39
As you noticed
when I opened up my session,
I already had most of my reverbs
and delays sends set up.
00:21:44
I use a session template with all these
reverbs and delays already set up, bussed,
and with some default settings
that are generally helpful
and close to the sound I'm usually
looking for.
00:21:54
This way, I can spend less time
thinking about the logistics,
and more time being creative
with my sound.
00:21:59
I'm gonna go to my lead vocal track
and add some plate reverb.
00:22:21
It's a pretty nice sounding plate!
All my reverbs and delays come preset
with a basic setting that I generally
like to use.
00:22:28
But from song to song,
I'll go in and tweak it to taste.
00:22:32
For this plate reverb for instance,
I don't need it to be so long
and expansive.
00:22:37
I want it to be a little bit shorter,
and a tiny bit brighter.
00:22:41
In this instance, I'm using
the Plug & Mix Digital Plate plug-in.
00:22:45
So I'm going to dial down
the Time a little bit...
00:22:48
and brighten up the Color.
00:22:51
Let's see what difference that made.
00:23:01
So shortening and brightening up
the plate just a little bit
helps tighten the sound and focus it,
but still gives me that nice and
pretty space that I was looking for.
00:23:10
Next, I'm gonna add
a little bit of 1/8th note delay.
00:23:33
The main thing
I'm looking to get out of this delay
is adding some color and character
to the vocal.
00:23:38
I'm gonna play it again and really
exaggerate the send to this delay,
so you can hear the color
that it's adding.
00:24:00
As you can hear, that's a very
effected sounding delay.
00:24:04
I'm using the EchoBoy
Memory Main preset,
which is one of my favorite colors
for delays.
00:24:08
It has a medium amount of feedback,
so it's not too long,
but it's also not too short.
00:24:13
What I'm looking to do with this delay
is just make a nice rhythmic bed
for the vocal to sit on top of,
and something that helps the blending
with the instruments all around it.
00:24:21
The last thing I wanna try with
this vocal before moving on
is just a little bit of Hall reverb,
to add a little bit deeper and darker
of a color to it.
00:24:47
So let's take a listen to the vocal
with no sends.
00:24:59
And now with all the sends.
00:25:19
By simply giving myself a starting point
with reverbs and delays,
my vocal now has a sound, a character,
a vibe to it,
that I feel is probably gonna fit
really well with the rest of the song.
00:25:30
It remains to be seen of course,
but that's what the mixing process is.
00:25:34
You set some stuff up,
you add some more stuff to it,
you go back and you adjust, and you
rinse and repeat, until you have a song.
00:25:41
You may be interested as to why I used both
a plate reverb, and also a hall reverb.
00:25:46
The plate reverb is more of a nebulous
space behind the vocal,
and I wanted a fairly bit shorter
and brighter tone to it.
00:25:54
The hall reverb on the other hand
has this real defined walls.
00:25:58
You can hear the sides, you can hear
the ceiling, you can hear the backwall,
and it's big space which fits
the vibe of the song,
but it's very different from the plate.
00:26:06
So what I'm doing is I'm placing
this vocal in a 3D space.
00:26:09
I have this big hall,
I have this plate inside the hall
that just brightens it up
and adds some presence,
and I have this 1/8th note delay
that helps to fill it out
and give it a nice bed
to sit on top of.
00:26:20
Now I'm gonna move on to the next
section of vocals, which is the pre-chorus.
00:26:23
I have a stack of 6 vocals which have
already been routed to an Aux track,
so I can work on all 6 of them together.
00:26:30
By working on the vocal sound
section by section,
rather than track by track,
I'm setting myself up to be able
to tell a song like it's a story.
00:26:37
My verse vocal has one character,
for the pre-chorus, it travels
to a different place,
and then finally,
we arrive at the chorus.
00:26:44
By using different processing
and effects on each section,
I'm gonna be telling a story.
00:26:49
So let's start working
on the pre-chorus vocals.
00:26:51
I'm going to start by listening to
just the raw pre-chorus vocals.
00:27:06
So again, if you're as lucky as I am
to have a great assistant,
your sessions will already come
pretty well balanced
and panned out for you. I like how
these tracks are already blended together.
00:27:15
There's 4 tracks for the lead melody,
and 2 tracks for the harmony.
00:27:19
Now they were all recorded
in the same space.
00:27:21
So just like with the lead vocal,
you can hear this masking occurring.
00:27:25
In fact, that actually gets worse,
because now there's 6 tracks
of that same mask all adding up.
00:27:30
Again, I'm gonna start with
some substractive EQ,
to try to unmuddy these vocals,
make them sound nice and clear,
and all work together.
00:27:37
So I pull up again my standard EQ,
which is the Epure,
I'm going to bring up
the high-pass filter,
again, to around 150 or 200 Hz.
00:27:57
There we go. Now the high-pass filter
is working on the kick drum bleed,
and also removing all the kind of junk
that's down there that I don't need.
00:28:05
Now I need to find these resonances that
are masking the rest of my vocal sound.
00:28:09
Odds-on, they're in about the same places
they were on the lead vocal,
but you never know.
So it's worth investigating,
rather than copying and pasting.
00:28:35
So on the pre-chorus,
at around 325 Hz or so
is where I can really hear
the vocals bunching up.
00:28:42
So I'm gonna bring the gain
back down to zero
and gently roll it back until I remove
all the masking that I don't want.
00:28:59
Since there's 6 vocals all stacked,
all recorded in the same booth,
with the same microphone
in the same position,
the masking was a lot more apparent,
and I needed to take
a bit of a deeper cut out of it.
00:29:10
The other thing I was hearing
is that the Q factor
was maybe a little too focused,
a little too narrow.
00:29:14
By opening that up, I'm affecting
a wider range of frequencies
in that low-mid area.
00:29:19
Let's listen without the EQ.
00:29:27
And again, with the EQ.
00:29:33
I've made these vocals
a little bit on the thin side,
which I think is fine.
From a storytelling perspective,
I want the pre-chorus to be
a little bit more mysterious,
a little bit more effected sounding,
before it finally opens up
and has impact again on the chorus.
00:29:47
So the side effect of going
with a thinner vocal like this
is now the S's are more apparent,
just like they were with the lead vocal.
00:29:53
So again, I'm gonna pull up
the Precision De-Esser,
and find a spot that's
particularly "S-y"...
00:30:02
such as "Sun breaks slowly".
00:30:04
Now let's dial in the settings.
00:30:25
That takes care of that problem.
00:30:27
Let's take a listen to the pre-chorus
one more time,
this time listening
and asking ourselves,
do these vocals need a compressor?
Or can they live without it?
So these vocals do need a compressor.
00:30:47
But there's no need to choke them
with that compressor.
00:30:50
All I want to do is even out the lines,
and hold the vocals in one spot,
particularly when it gets to
that last line,
and she finally says, "We are."
I like the intensity of that line,
but I don't want the vocal to jump
so far forward when she gets there.
00:31:02
So for this track, I'm gonna use
a Summit Audio TLA-100 plug-in.
00:31:06
So just like the CL 1B, this compressor
can be very gentle and transparent.
00:31:10
But it also adds a hint of color
to the vocals,
which is what I'm looking for.
00:31:14
So let's listen back as I dial in
the compressor.
00:31:28
That's a very conservative
amount of compression.
00:31:30
Now just for fun, let's see what this
sounds like with a lot of compression.
00:31:44
So as you can hear when I add
a lot of compression to the vocal,
it really starts exposing the color
of this compressor, which is very cool,
but in this case, it might be
a little too heavy-handed.
00:31:55
I'm thinking somewhere in between
these two will sound pretty nice.
00:31:59
Let's try and dial that in.
00:32:10
Great! The compressor is reacting
exactly how I'm looking for
and the vocals are staying
in a very consistent spot.
00:32:16
I'm gonna just adjust the gain and play
around with the attack and release times
to really dial this in.
00:32:31
By increasing the attack time,
I just brought the presence of the vocals
a little bit more forward,
which I think will be nice
for this section.
00:32:39
So let's take a listen to this vocal
with no compression.
00:32:52
And with compression...
00:33:04
Sounds like this compressor is doing
exactly what I want it to do.
00:33:07
It's holding the vocal
in a very specific spot
and only adding a little bit of color
when she gets a little bit more intense.
00:33:13
Now I just like the lead vocal
on the verse,
I'm gonna add some reverbs and delays
to this pre-chorus
to give it some more character and
shape, as well as some extra rhythm.
00:33:22
I'm gonna start off by adding
a little bit of that plate reverb.
00:33:35
Again, I really like how this plate
adds some presence
and weightlessness to the vocal.
00:33:40
Now for this pre-chorus vocals, I think
I'm gonna start with a 1/4 note delay.
00:33:44
This part of the song opens up
and has a little more space for interaction
between the vocal and the delays.
00:33:50
Let's hear what this sounds like.
00:34:04
So as you can hear, this 1/4 note delay
isn't so much a bed
for the vocals to sit on, like
the 8th note delay was for the verse,
as it's waves for them to ride on,
to add interest,
and fill in the gaps in the melody.
00:34:15
The last thing I think I want
on this pre-chorus
is a little bit of that hall reverb.
00:34:19
To save myself a couple of mouse clicks,
I'm gonna copy over the whole send
from my lead vocal on the verse,
to give myself a good starting point.
00:34:38
So again, that hall gives me a really
nice, defined space around the vocals.
00:34:42
Let's hear what this sounds like going
from the verse, into the pre-chorus.
00:34:46
See if you can hear this shifting
character from one to the other.
00:35:15
That's a really nice shifting character,
and you can easily tell
that we've moved on from a verse
to a pre-chorus.
00:35:21
The only thing I would adjust there now
is just the overall level of the pre-chorus,
maybe bring that up a bit,
and then we're free to move on.
00:35:28
Now we're at the chorus. As you can see,
the tracks are separated into 2 groups.
00:35:33
There's the howling melody, and then
there is the in between leads.
00:35:36
Let's take a listen at what these sound
like, without any processing or effects.
00:35:56
Both sets of these vocals are experiencing
some of the same clarity problems
that our lead and pre-chorus vocals
were having.
00:36:03
So instead of repeating myself,
I'm just gonna copy over
my substractive EQ as a starting point.
00:36:08
And then same thing for the de-esser,
except for the howling melodies
which have no S's in them,
so there's no need for a de-esser.
00:36:14
Let's see what difference
just the EQ and de-esser have made.
00:36:33
So now that all of my chorus vocals
are starting to be in a good spot,
I'm gonna start adding some effects
and character to the howling melody.
00:36:40
The first thing that comes to mind
actually for the howling melody
is to add some space to it.
So I'm gonna start with my hall reverb.
00:36:57
This hall reverb, and the character
that it adds
is working really great
for a lot of these vocal tracks.
00:37:02
But for these howls, I'm gonna add
something a little bit different to them.
00:37:05
I'm gonna give them another space
to be inside of that hall.
00:37:07
So I'm gonna start with a smaller
studio sized room reverb.
00:37:11
Let's check it out.
00:37:24
So what that studio reverb send
is doing
is it's adding some side walls,
and giving me more definition.
00:37:30
That isn't further away,
it's actually closer to me.
00:37:33
Let's take a listen again
without the studio reverb.
00:37:41
And now with.
00:37:47
I like to really hear the character
of the walls around the vocal.
00:37:52
For everyone who likes details,
let me show you what I'm doing
with these two reverbs.
This is my studio reverb...
00:37:58
and this is my hall reverb.
00:38:01
So as you can see the studio, I'm using
a medium, natural studio emulation
with about 1 second reverb time.
00:38:08
Whereas for my hall,
I'm using a longer...
00:38:12
3.5 second long reverb,
and a medium size room
with a pretty dark tone to it.
00:38:18
Now the only other thing I think
might be cool for this howling melody
is to add a little bit more
of rhythmic interest to it.
00:38:24
It's a very long and legato melody line,
and especially for this style of music,
what could really help
with that rhythmic interest
is to add a little bit
of a side-chain effect to it.
00:38:32
When I'm using side-chain compression
as a creative rhythmic tool like this,
actually I have a different way
of setting it up
than using the standard kick
and compressor combination.
00:38:40
What I'm gonna use instead
is the Soundtoys Tremolator plug-in.
00:38:44
For all of you guys that thought that
Tremolator was only for guitar amps,
I'm gonna show you how you can set up
Tremolator to act like a side-chain,
except that you can dial in the exact
groove and depth that you want out of it.
00:38:54
So I start by syncing it
to the MIDI clock,
setting the Rhythm to a 1/4 note,
and select the RampUp shape.
00:39:02
Let's take a listen to how that sounds.
00:39:09
It's starting to sound a little bit
like a side-chain, no?
But we can make it even better.
00:39:14
Let's edit the Tremolo shape.
00:39:17
And make it a little more defined
around the half-beat.
00:39:38
So you can hear something
kind of like a side-chain,
except right now it's really taking
a big bite out of the vocal.
00:39:44
So to fix that, I just dial the Depth
back for a more subtle effect.
00:39:54
That's what I'm looking for.
00:39:55
So this feels like a good starting point
for this howling melody.
00:39:58
But without the rest
of the instruments in,
it's gonna be difficult to dial it in
precisely.
00:40:02
So I'll leave this alone for now and
move on to the lead vocals on the chorus.
00:40:05
Since I already cheated
on the EQ and de-essing,
let's take a listen to this vocal and
see if it needs any compression as well.
00:40:21
These vocals are very borderline.
They almost don't need compression.
00:40:25
But thinking ahead to how much music
I know is going to be going on
behind these vocals, I really need them
to be in a very tight spot.
00:40:32
So I'm gonna compress them.
00:40:34
Again, to save myself
a few mouse clicks,
I'm just gonna copy over my compressor
from the pre-chorus vocals...
00:40:40
and adjust.
00:40:51
Again this compressor is doing
exactly what I want it to do,
holding the vocals in a spot,
that can sit in front of the music.
00:40:58
So now that I have the basic sound
of my lead vocal,
again I want to add some character to it
and start giving it a part to play
in the story.
00:41:06
So again I'm gonna start
with a little bit of a plate reverb,
stolen from the pre-chorus.
00:41:11
A little bit of a hall reverb,
stolen from the pre-chorus.
00:41:15
And...
00:41:17
let's steal that 1/8th note delay.
00:41:19
Let's hear what this vocal sounds like
with the added reverb and delays.
00:41:27
Maybe a little bit too much
on the reverb and delay!
Let's dial that back a little bit.
00:41:32
Again, we want the howls to be
in one space,
and these lead vocals to be in another,
we want them to complement each other.
00:41:38
I want some of this color and character,
but I don't want these vocals to sound
like they're in the back of a church.
00:41:44
Let's check this out again
with a little bit less plate,
a little bit less delay,
and a lot less hall.
00:41:53
I think these vocals could use
even less hall reverb on them.
00:42:00
It actually feels about the right amount
of character for these vocals.
00:42:04
Let's check it out in context
with the howling melody.
00:42:24
They're starting to work
really well together,
but they still have a good contrast
to them as well.
00:42:29
So I've set myself up with a good
starting point on my vocal sound.
00:42:32
I fixed all the major issues
that I was hearing,
and I started adding some character
and some storytelling
to my overall effects and processing
for the vocals.
00:42:40
Now it's time to move on and explore
some other elements of the song,
and start giving these vocals
some context to live in.
00:42:45
The next element I'm gonna start
tackling are the drums.
00:42:48
So let's get to it.
00:42:49
To get started, let's take a listen
to what all the drums sound like
with no processing.
00:43:11
So as you can see, there's several
layers of each drum element.
00:43:14
I have 3 kicks, 3 snares,
3 hi-hats, and a loop.
00:43:20
All these sounds are fake, but I need
them to work together to form a groove.
00:43:23
By massaging each one of them
individually,
I can make them all serve a certain
purpose inside of that groove.
00:43:29
I'm gonna start off by examining
my kick drum situation.
00:43:37
It sounds like a kick drum...
00:43:43
That's a slightly heavier and thicker
kick drum.
00:43:51
And that sounds like a kick drum
on the other side of the room.
00:43:54
How do all 3 of these sound like
together with no EQ or compression?
Actually not too bad!
Let's check out our snare situation.
00:44:12
It sounds like a drum machine snare.
00:44:23
So that's a combination
of a couple of different snares.
00:44:26
Different textures, different tones,
and there's also some variety
in which ones are playing
depending on where they are in the beat.
And the third snare drum...
00:44:38
That's a snare
that's not only doing the backbeats,
but also adding an element
to the groove.
00:44:43
Let's hear how all 3 of these
snare drums sound like together.
00:44:56
Again, those are kind of
working together,
but there's certainly a lot more clashing
going on there.
00:45:00
Let's check out what our hi-hats
sound like.
00:45:09
So we have a repetitive
1/16th note hi-hat.
00:45:17
An almost open sounding hi-hat,
but still definitely a drum machine.
00:45:24
And a slightly brighter
kind of in between rhythm.
00:45:27
Let's hear all the hi-hats together.
00:45:33
Those 3 hi-hat parts
work really well together.
00:45:36
But I'm definitely gonna need
to tweak them
to be able to sit better together
sonically.
00:45:40
Now let's check out
what this loop sounds like.
00:45:51
So that's a very open and roomy
sounding drum loop.
00:45:54
When I hear a nice, roomy and open
sounding drum,
that I want to use to define some color
and character, especially in a pop song,
usually the first thing I want to
reach for is a heavy-handed compression
to add saturation and character
to the sound.
00:46:06
So for this track to get
a lot of color and character,
I'm gonna use the Slate VBC plug-in.
00:46:12
And instead of being nice and gentle
like I was on the vocals,
I'm gonna do the exact opposite,
and really overdo
with the compression on this drum track.
00:46:19
Let's take a listen while I dial it in.
00:47:03
So there I'm hitting the compressor
really hard
both on the input side,
and also on the threshold.
00:47:08
By cranking up the input, and turning
the threshold down a little bit,
I'm able to hit the transformer and tube
emulations built into this plug-in
a little bit harder,
which actually gives it a punchier,
more saturated character,
which I really like.
00:47:21
So now that I have a starting point
for the character on the drum loop,
I'm gonna start adding in
some of my other layers of drums
and get them to work together.
00:47:28
Let's hear what this sounds like to add
one of the kick tracks to that loop.
00:47:39
So just adding that one kick drum
to the drum loop
already adds some depth and punchiness
to the drums.
00:47:45
What happens when we add
the second kick drum?
Let's find out!
Adding that second kick drum
adds even more depth to the kick.
00:48:02
But it's now also adding
a little bit of muddiness in there.
00:48:06
So again, I'm gonna reach for
my Epure EQ,
and see if I can remove that.
00:48:11
Since this is a kick drum track
where I do want low-end,
I'm going to turn off
the high-pass filter...
00:48:17
Crank up the gain
on one of my parametric EQs,
and sweep around the frequency now
to find the offending frequency.
00:48:32
So again, I'm giving an unnatural boost
to a single frequency
with a very narrow Q.
Of course it's gonna sound weird.
00:48:38
That's not the point. I'm looking for
a frequency that doesn't quite fit
with the rest of the tone of the drums.
00:48:43
Which in this case is at about 140 Hz.
00:48:45
Let's hear what this sounds like when
I start substracting at that frequency.
00:49:01
So by taking away about 5 dB at 140 Hz,
I'm opening up the kick drum sound
just a touch.
00:49:07
I still have all the lows that I want,
but I don't have that muddy area
in the low-mids.
00:49:12
And also I'm leaving myself a little bit
of space for the bass later on.
00:49:15
So now let's blend in
the third kick drum track,
which I remember is just a isolated
kick that's also in the loop.
00:49:22
By having this kick drum by itself
as well as inside the loop,
I can really manipulate
both the distance and the width on it.
00:49:28
Let's take a listen to all 3 kicks
and the loop together.
00:49:40
The third kick drum track works
but it doesn't quite sit in
as nice as the first two did.
00:49:45
So the first thing
that comes to mind for me
is to add a little bit of extra
saturation to that kick drum.
00:49:50
And for this type of saturation, I really
like to use the Soundtoys Decapitator.
00:49:54
Let's listen back
while I dial in the settings.
00:50:14
Let's listen to that third kick drum
track by itself
so you can hear the difference
Decapitator is making to it.
00:50:19
First without.
00:50:29
Decapitator is taking away
a little bit of the transient
and is overall shifting the tone
a little bit downwards
so it's a little thicker and richer.
00:50:37
I already have all the high-end I need
from the loop track,
so I really need this individual track
to add that lower, warm character to it.
00:50:45
Now let's listen to all 3 kick drums
with no EQ or Decapitator.
00:50:56
And now with the EQ and Decapitator.
00:51:05
Notice how all 3 kicks
with just a little EQ and saturation
work together as one unit now.
00:51:11
That's exactly what I was looking for.
00:51:13
So now that the drum loop
and the kick drums are all in order,
let's hear how the individual snare drum
tracks fit into this picture.
00:51:29
So this first snare drum track
is interesting.
00:51:32
Because it doesn't really sit
with the rest of the vibe on the drums.
00:51:36
As the producer of this track, I can
tell you that's slighlty on purpose,
but that may be a little too far away
for what I'm looking for.
00:51:43
But luckily I'm also the guy
mixing this track,
so there's still time to save it.
00:51:47
Let me pull that snare drum out
on its own.
00:51:54
You can hear there's a lower
frequency component to that snare drum
that's just being masked
by all the snap above it.
00:52:01
So I'm gonna use the UAD SSL Channel
and as a starting point,
I'm gonna crank the low-end.
00:52:13
So this gives me a lot of low-end
for the snare drum,
so now it's a snappy but muddy sounding
snare drum.
00:52:19
Now I could just undo that EQ.
00:52:21
But first, let me try adding
some high-pass,
so I can maintain the thickness that
that EQ is adding,
but lose all the mud below it.
Let's try it out!
Let's listen with the plug-in bypassed.
00:52:52
It's a subtle difference.
But now with this setting,
I'm starting to have a little bit more
impact, it's not all snap.
00:52:57
So now let's me try exaggerating that
by using some compression.
00:53:12
Let's listen in bypass.
00:53:20
And with the EQ and compression.
00:53:26
That's a nice character shift. Let's see
how that works with the drum loop.
00:53:40
Now I'm starting to feel
like it's part of this drum groove.
00:53:43
Let's listen to those two together
with no EQ and compression.
00:53:53
And now with.
00:54:01
That fits the vibe way better.
00:54:03
Let's add the next snare drum track
to that.
00:54:18
The second sounds of snare drums
actually work pretty well already tonally
but they pop out every once in a while.
00:54:25
I'm just gonna add a touch of compression
just like with the vocals
to help holding them in one spot,
and I'll add a little bit of reverb
to them
to give them some space
and extra character.
00:54:34
So considering all of these snare drums,
I don't want to use the same gentle
compressors as I was using for the vocal.
00:54:39
Those might be too slow
to actually help me out.
00:54:41
I'm gonna go with something
a little bit faster,
but still allows me to dial in
just a hint of compression.
00:54:48
For that, I'm going to be using
the Slate Digital VBC Red compressor.
00:54:52
I'm gonna set my ratio to 2:1...
00:54:56
a medium/fast attack, fast release...
00:55:00
Let's listen back
as I dial in the threshold.
00:55:28
So I've got the compressor doing
exactly what I want it to do,
but now the snares are all
seemingly a little too forward.
00:55:34
I need to leave room there
for the vocals.
00:55:36
So I'm gonna add a hint of studio reverb
to that snare drum,
just to set it back a little ways.
00:55:57
So that sets the snare back
just a little bit.
00:55:59
Not too far away that you think
it's in another room,
but it's also not so upfront anymore.
00:56:05
We have one more snare track to add
to this pile, and see how it works.
00:56:21
That snare drum actually works as is.
00:56:24
Maybe I'll copy over the Studio send to it
just to see if that adds a nice depth.
00:56:41
Great!
Let's listen to the snare drums,
and the kick drums,
and the drum loop all together now.
00:57:05
Now character wise, all the kicks
and snares are working together,
rather than fighting each other.
00:57:09
So now I just need to get the hi-hats
to sit in there as well,
and we're in good shape.
00:57:13
Let's check out that first hi-hat track
again, with the drum loop.
00:57:23
So here we have an issue with the snare
drum and the loop, and the hi-hat.
00:57:27
They're kind of competing
against each other.
00:57:29
What I'm gonna do is give the hi-hat
a little shift upwards
to help delineate it
against the drum loop.
00:57:34
And again, my favorite tool
for shifting around the tone
of an individual track
is the Soundtoys Decapitator.
00:57:40
I'm gonna add a little bit of Drive
to add some more upper harmonics
and then shift the tone upwards.
00:57:45
Let's listen back while I dial it in.
00:58:05
Hear how the hi-hat just became
easier to hear,
even though it didn't change the level?
Let's listen again
with Decapitator bypassed.
00:58:17
And now with.
00:58:23
Exactly what I was looking to accomplish.
00:58:26
Let's add in the second hi-hat track.
00:58:44
Again the second hi-hat track
was experiencing
a similar problem to the first hi-hat.
00:58:48
This time instead of decapitating it
to bring out the tone,
I used the pan pots.
00:58:52
By swinging it a little bit to the left,
I was able to give the hi-hat
its own space in the mix.
00:58:57
Let's check out what this sounds like
with the third hi-hat track.
00:59:18
That third hi-hat track kind of threw
us a wrench in this whole blend.
00:59:21
The first two were working fine.
00:59:23
When I add the third one,
I like the rhythm of it,
but now I can't quite tell
what all is happening there anymore.
00:59:29
There's a couple of possible
solutions to this.
00:59:31
One, I can turn the track off, which
I don't really want to do, I like that part,
or I can make something
move out of the way,
which is exactly what I want to do.
I'm gonna go back to the first hi-hat part
and give it more movement,
so it gets out of the way
of the second two hi-hat parts.
00:59:45
For doing something like that,
I like to use the Soundtoys PanMan.
00:59:49
I set it to go both left and right,
and be tied to the MIDI.
00:59:58
And sync it to MIDI...
01:00:00
Could make the Rhythm a bar...
01:00:03
Make it a nice smooth back and forth.
01:00:06
So this plug-in is gonna pan
pan that faster 1/16th note hi-hat
from left to right, left to right.
Let's check it out.
01:00:38
I shortened the Rhythm down to
a half note
so it's going back and forth left to right,
left to right, twice per measure.
01:00:44
Now all 3 hi-hat parts are working
together in concert.
01:00:47
Let's listen to all the drums
together now.
01:01:02
Sounds like a drum groove to me!
Now, on to the fun part:
parallel compression for drums.
01:01:08
As you can see, I have two drum Auxes:
one called mDrums,
and one called mDrumCrush.
01:01:14
The idea behind having 2 drum Auxes
is I can leave one untouched
and then process heavily
on the second one,
and blend it up underneath
the unprocessed drums.
01:01:23
I'm gonna start by bringing
the fader up to zero.
01:01:26
Usually, what I'm looking to achieve
by crushing the drums
is adding punchiness,
and also extra presence.
01:01:32
The first thing I add is a high-pass
and low-pass filter
to get rid of all the extra fat
and all of the offensive bright stuff
that I don't want to be compressed.
01:01:42
For that, I'm just gonna use
the UAD SSL Channel Strip.
01:01:46
I'm gonna dial in the high-pass
and low-pass filters
to just focus the compression
on a certain frequency range
that I want to bring out.
01:02:11
What I've dialed in here
is a high-pass filter at about 250 Hz,
and a low-pass filter at about 6 kHz.
01:02:19
What I'm doing is I'm substracting
the fat from the bottom
and preventing the compressor
from sounding harsh.
01:02:24
The SSL Channel Strip also has a really
great and punchy compressor built into it.
01:02:29
So let's experiment with that one first.
01:02:56
So by switching on a fast attack,
a fast release,
a super high ratio
and a really low threshold,
I'm making that compressor really work
and really destroy those drums.
01:03:06
Which is fine, because we still have
the untouched drum bus
that's gonna be added to the signal.
01:03:11
Now that I've found a cool character
for my crushed bus,
let me bring the volume back down,
unmute my clean, untouched drums...
01:03:18
I'm gonna gradually blend in
the crushed drums.
01:03:41
So you can hear how quickly when
you're bringing up this very processed
very chocked sounding drums,
they can take over and dominate
the character of the drums.
01:03:51
The idea behind the crushed bus is
to just add extra presence and punch,
not overtake the overall drum character.
01:03:57
So let me blend it up again,
and instead of going too far,
I'm gonna bring it up just enough
to add the character I'm looking for.
01:04:21
It sounds great!
Let's listen to it again
without the parallel processing.
01:04:34
And with...
01:04:43
So now all my drum tracks
are starting to work together
to form one cohesive groove.
01:04:47
They have a great tone to them,
a lot of fatness,
a lot of nice prettiness to it,
just some overall width,
and good color and character.
01:04:54
But none of this matters if it doesn't
work with anything else.
01:04:57
So now, let's bring back the vocal
and see how the vocal and the drums
work together.
01:05:01
Using the VCA tracks,
I'm gonna solo the drums,
and also solo the vocals.
01:05:07
Now let's listen to the chorus
and see how everything works together.
01:05:45
Things are starting to fit together
really nicely.
01:05:48
I like how the howling melody sounds
with the drums,
but when it switches over
to the lead vocal,
it's disappearing a little bit.
01:05:54
There's a couple of different
solutions to this.
01:05:56
The first and most obvious one
is to use the fader.
01:05:59
But for a song like this,
I actually think I could give it
a little bit more character
and give it a little bit more width
and spread to it.
01:06:06
To do that, I'm gonna use
the Plug & Mix Dimension 3D.
01:06:10
I'm gonna start with no Detune,
and I'll try the D3 mode.
01:06:15
Let's listen back as I dial in
the amount of Detune.
01:06:39
This adds a subtle chorusing effect
that fills out the chorus and makes it
sound a little bit larger.
01:06:44
Check it out with the Dimension 3D
bypassed.
01:06:52
And with.
01:06:59
Just a little bit of detuning
helped the vocals jump out of the mix
in a cool way.
01:07:04
Let's go back and check out
how the drums and the vocals work
over the verse and pre-chorus.
01:07:35
So just like the chorus vocals,
I actually set myself up pretty well here.
01:07:39
The vocals and the drums are working
really well on the verse,
I can hear every word that she sang
nice and clearly,
her vocals are never falling
too far away.
01:07:47
But in the pre-chorus, I feel I need
even more of a character shift now.
01:07:52
A lot of the subtle character
that I added
with the Plate, 1/4 note delay,
and Hall reverbs,
are getting lost now that the drums
are added in there.
01:07:59
So I'm gonna exaggerate those
a little bit more.
01:08:01
I really want the pre-chorus to stand out
sonically from the rest of the vocals.
01:08:05
Let's start by adding
some more Hall reverb.
01:08:24
That worked out great.
01:08:26
Now I have a great progression from
the verse, pre-chorus, and the chorus.
01:08:30
The third most important element
to this mix in my mind,
after the vocals and the drums,
is gonna be the bass,
and making sure that all 3 of those
really sit together well.
01:08:39
Let's start by just adding the bass
to our drum and vocal mix.
01:09:01
So as you can hear, we're dealing
with a analog synth bass,
and the cutoff filter is moving
through the part.
01:09:07
It's a cool sound, but right now,
it's getting a little bit lost
against the really present drums,
and really present vocals.
01:09:13
So it feels like this bass needs
a little bit more fullness.
01:09:16
I also need to accentuate the character
to help it stand out
next to these drums and vocals.
01:09:21
To do that, I'm gonna pull up
the Summit Audio Grand Channel by Softube.
01:09:25
One of my favorite ways to add presence
to synth tracks
is to actually add more harmonics
by adding more saturation.
01:09:31
One of the easiest places to find
saturation is in the compressor.
01:09:35
I'm gonna add compression
to the synth track,
which actually doesn't need
any compression,
just for its color and its character.
01:09:42
And then finally I'll EQ it
to give it a shape.
01:10:07
Let's listen without compression
on the synth bass.
01:10:15
And now with.
01:10:22
It's starting to gain the edge
that I'm looking for,
but I've lost a little bit
of the low-end I like.
01:10:28
So, that's where the EQ comes in handy.
01:10:49
So now that I've added back
some meat to that bass,
the very bottom end of it is clashing
just a little bit with the kick drum.
01:10:56
So just like with the snare drum track
where I left the boosted bass end,
and then just applied a high-pass filter,
I'm gonna try the same trick
with this synth bass.
01:11:23
Let's listen to the bass
with no compression and EQ.
01:11:37
And now with.
01:11:55
So now I have a good start and
the 3 most important elements of my song:
the vocals, drums and bass.
01:12:01
They're all working pretty well together
and they have a character
and they're starting to tell
the story of the song.
01:12:06
So now I need to start filling it up
with the guitars, pianos,
other keyboards, sound effects, etc.
So let's get to it.
01:12:12
The next element of the chorus I want to
try to stand out are the acoustic guitars.
01:12:16
Let's take a listen to the drums,
bass, vocals,
and add the acoustic guitars as well.
01:12:40
So as you can see in here, I have 2
guitar tracks playing the same exact part,
one panned hard left
and one panned hard right.
01:12:47
They're already coming through pretty clear
because there's not much obstructing them.
01:12:50
They're playing a nice part, but they're
not really in the same attitude
as everything else. So let's fix that.
01:12:56
I'm gonna start by dialing in a little
bit more aggressive sound
on one of the guitars.
01:13:00
To do that, I'm gonna use the built-in
Channel Strip included with Pro Tools 11.
01:13:04
Let's take a listen to the track
by itself.
01:13:15
So as you can hear, it's experiencing
one of the same problems
as the vocal tracks.
01:13:19
It might have something to do with it
being recorded in the same vocal booth.
01:13:22
So to fix that,
I'm first gonna use a high-pass filter.
01:13:26
I'm gonna set my high-pass filter
as high as I can
before I start losing information
that I want to keep.
01:13:31
Let's check it out.
01:13:48
Let's listen with the high-pass filter
bypassed.
01:13:56
And now with the high-pass filter engaged.
01:14:03
So as you can hear, I'm filtering out
all of the low resonances
and rumble that were in there
and I'm left with just the notes
that I was looking for.
01:14:11
I'm gonna engage some compression
to really force that guitar
into a very small spot
that's very easy and clear to hear,
and that also has the nice side effect
of adding attitude.
01:14:21
I'm gonna start with a 4:1 ratio.
01:14:25
I'm gonna open up the attack to allow
through some more of the transient...
01:14:29
anywhere around there, 10 ms is fine.
01:14:32
I'm gonna shorten the release, so I can
capture all the detail
in between the compression.
01:14:37
Now let's take a listen.
01:14:55
So as you can hear, I'm doing
the exact opposite
of what I wanted to do with the vocal.
01:14:59
I want to make this guitar in a very,
very small and kind of choked spot.
01:15:03
This will give me a lot of attitude
and a lot of character,
so it really stands out and jumps out
of the speakers at you.
01:15:08
I'm gonna copy these settings to the left
guitar, which is the double of this one,
and listen to the 2 together.
01:15:24
It's pretty close
to what I was looking for.
01:15:25
But I can still hear on the left side
a little bit of bunching up in the low-mids.
01:15:29
So I'm gonna go back into the EQ
on that channel
and just... chip away a little bit
around... 200 to 300.
01:15:38
Let's check this out.
01:15:48
That sounds about right. But let's see
how they sound in relation with the drums.
01:16:09
Now let's hear with the EQ and
compression bypassed on the guitars...
01:16:21
So you can tell not every note
is evenly played,
and there's muddiness to them when
I disengage the compression and EQ.
01:16:28
I'm gonna reengage the Channel Strip,
and you'll hear the guitars
just jump out of the speakers at you.
01:16:50
The next element I want to fit
into this chorus is the Vibe Guitar.
01:16:54
Let's check that out.
01:17:16
So as you can hear, this guitar
already has plenty of effects,
and space, and distance on it.
01:17:21
So what do I need to do to it?
It could use a little bit more shape
with the EQ,
but more importantly, this is also
one of the elements of my mix
that I can use to help establish
3 dimensions.
01:17:32
So to contrast
with the extremely upfront,
and somewhat aggressive sounding
acoustic guitars,
I have this Vibe Guitar track
that already has a lot of effects, delays,
reverbs, and tremolo baked into it
when I played the part...
01:17:44
That can actually serve as a element
to help me establish the back of the room.
01:17:48
It's elements like these that help
establish depth,
and 3 dimensional space
in my mixes and productions.
01:17:53
I can place this Vibe Guitar
way in the back of the room,
showing you that there's this.
01:17:59
And then you have the vocal way up here.
01:18:01
You have these acoustic guitars
over here.
01:18:03
You have the drums
somewhere in the middle.
01:18:05
The idea is you're giving the listener
something 3D to listen to,
something that they can look in
and not just see everything up here,
and over here, and over here,
but also front and back.
01:18:14
The only shaping I really want to do
to this guitar
is just thin out the low-end a little bit.
01:18:19
So I'm gonna adjust
my high-pass filter again,
until I take away just a little too much
of the bottom end.
01:18:36
That works great!
Adding a high-pass filter focuses
the energy upwards a little bit.
01:18:40
And now I can go crazy with reverb to
really set this in the back of the room.
01:18:44
I'm gonna start by adding
some Hall reverb to it.
01:19:03
So now that element sounds like it's
at the very end of a very long hallway,
which is exactly where I want it to be.
01:19:09
Let's check out what that sounds like
with the drums.
01:19:31
So that guitar is serving its purpose
beautifully.
01:19:34
It sounds like I have a guitar player
at the very end of the hall.
01:19:36
Now let's bring in the acoustic guitars
for some foreground.
01:19:58
Now with both the guitar
placed in there,
I'm getting a really good sense
of front and back to my mix.
01:20:03
So now that I've found the depth and
vibe I was looking for in the chorus,
there's also 3 more
of these Vibe Guitar tracks that,
as you can see in the arrangement,
only play there in the verses.
01:20:35
As you can hear, these Vibe Guitars
have the same effects baked into them.
01:20:38
There's just 3 parts of them now,
and there's some cool interaction between
the left and right and center ones.
01:20:44
Just like I used the Vibe Guitar
in the chorus,
I'm gonna use these to establish
the depth to my mix.
01:20:49
So I'm just gonna copy over
the whole Send.
01:20:52
And then now these ones are ebbing
and flowing a little bit more
than the chorus one did.
They're fading in and fading out.
01:20:59
So to exaggerate that, I'm gonna
put a little bit of compression on them.
01:21:03
To do that, I'm gonna use
the UAD SSL Channel again.
01:21:06
Very simple compressor.
Dial in like a 3:1 Ratio...
01:21:11
I'm actually gonna open up the Release
a little bit,
because I don't need these sounds
to have more edge to them.
01:21:15
Let's check it out.
01:21:54
So as we were listening back,
you noticed I engaged the high-pass filter
to clean up the mud, but then I also
lessened the Hall reverb a little bit.
01:22:01
Thinking from the dynamic of my mix,
that'd be great if the chorus Vibe Guitar
actually was a little bit further back
than these ones,
especially since the verse
has less going on in it.
01:22:11
It would be cool to hear these a little
bit closer to us
than the chorus Vibe Guitar.
01:22:15
So let's check these out without
any EQ, compression or reverb again.
01:22:34
And now with EQ, compression,
and reverb.
01:22:53
It's got ten times more haunting,
which is exactly what I was going for.
01:22:57
One of the last major elements that
now needs to stand out on this track
is the piano.
Let's take a listen to it, dry.
01:23:19
And let's hear what it sounds like
on the chorus...
01:23:39
As you can hear, this piano is printed
with a heavy saturation
and filtered effects, as well as being
an overall soft sounding piano.
01:23:46
Let's listen to the piano, drums,
guitars and bass in the chorus,
and see if we can still hear it.
01:24:12
As we were playing back, I was adjusting
the fader level of the piano
to bring it up, so I could hear it
at the volume I want to hear it.
01:24:19
By the time I got there though,
I got this really blaring,
not-fun-to-listen-to piano sound.
01:24:26
So we definitely have our work cut out
for us here.
01:24:28
So now that my mix has so many
established elements to it,
EQing the piano is gonna be
a little bit more difficult.
01:24:34
And it's gonna be a lot harder to do
in isolation.
01:24:36
To change things up, I'm gonna be
EQing the piano
while all the other elements
are still playing.
01:24:41
This is going to force me to be
a little bit more bold,
and decisive with my EQ moves.
Let's check it out.
01:24:47
To start off with, I'm gonna use
the SSL Channel Strip EQ.
01:24:51
If you can't tell already, the SSL Channel
is one of my favorite plug-ins to default to.
01:24:55
It has everything I'm looking for,
and adds just a little bit of color
that generally matches well
with this type of music.
01:25:00
So let's make this piano fit.
01:26:00
So as you can hear, I did some pretty
extreme EQ settings
to get this piano to speak out without
overwhelming the rest of the track.
01:26:07
Let's listen to this piano in solo, and see
if you can hear how it transformed it.
01:26:12
With no EQ...
01:26:21
And now with EQ.
01:26:32
So now the piano has
a lot more life and edge,
and it's definitely fitting in better
with the mix.
01:26:37
Let's listen to it again
with the drums, and guitars, and bass.
01:26:40
First, without EQ.
01:26:51
And now with.
01:27:10
The piano's starting to work really well.
01:27:12
There's still a little bit of the high-end
that I think I can open up a little bit more.
01:27:15
And to do that,
I'm gonna use the Pultec EQ.
01:27:18
I'm gonna give the piano a little boost
up around 10k, and see how this sounds.
01:27:43
So you can hear that little 10 k lift
opens up the piano,
and lets it get a little bit above
the guitars,
which is exactly
what I was looking to do.
01:27:50
Let's listen to the chorus again
with all the elements that we've added,
plus the vocals.
01:28:30
Everything's starting to fit together
in a pretty nice way.
01:28:33
But as you can see, I've got a lot more
tracks that I haven't touched yet.
01:28:36
A lot of these tracks are just ear candy
and special effects.
01:28:41
Let's start bringing those in
and making sure that their balance
fits with the rest of our mix.
01:28:45
Let's try to add in the FX tracks,
these are all reverses,
and cymbal crashes, and impacts, etc.
01:29:09
All those FX tracks are already
pretty well balanced from the rough mix.
01:29:13
I'm gonna leave them as is for now, and
continue adding in elements to my mix.
01:29:17
Let's start with the second bass track.
01:29:32
Did you hear it? I'm gonna show you
what this part's doing.
01:29:34
This is just a little extra filler
on the bass track.
01:29:41
Let's hear that
along with the regular bass.
01:29:46
The only thing I hear that needing
is a little bit of a high-pass filter,
so it doesn't get in the way
of the fatness of the original bass.
01:30:04
Perfect! That sound isn't a major part
of the chorus,
I'm not gonna worry too much about it
right now.
01:30:09
In the chorus, there's 2 more keyboard
elements for us to check out.
01:30:11
Let's take a listen.
01:30:17
Does that sound familiar?
Does it possibly sound
something like this?
As you can hear, the synthesizer is
playing the same part
as the acoustic guitars.
01:30:31
So now, I have to make a choice.
Which one of my children do I love more?
The guitars, or the synthesizer?
Tough to say...
01:30:37
I hate to have to pick one or the other,
but if I was gonna pick,
I would have to pick the guitars.
01:30:41
So, when I balance these, I'm gonna
bring the synth up
so it's reinforcing that part,
but not overshadowing the guitar line.
01:30:48
And again, I'm gonna do this in context
with the drums and bass.
01:31:09
That synth double of the guitar line
adds just a little bit of a edge
and consistency to the sound, but doesn't
overtake the tone of the guitars.
01:31:17
All that's left is this arpeggiator
through the chorus.
01:31:20
Let's check out what that sounds like.
01:31:31
So that is by definition ear candy.
01:31:33
Lots of high frequency content, and not
an essential element to the music.
01:31:37
Let's listen to all the music tracks
together, and I'll blend this in.
01:32:07
Now all that's left is to do
the same process to the verse parts,
which include the verse guitars,
and arpeggiator.
01:32:14
For the verse guitars, let's check out
the verse with the new elements added,
and I'll balance them
as we listen through.
01:33:12
So as you noticed, I spend a lot of time
on my mixes
establishing the character
of the essential elements:
the vocals, the drums, the bass,
the guitars, the pianos,
the things that I really need to have
attitude and character.
01:33:24
Now all the ear candy and fun stuff
generally just mixes itself,
and you just blend them in
to the right amounts,
various degrees of EQ and compression,
and reverbs as needed,
but in general, as long as all your
essential elements are there and strong,
your mix is gonna sound great.
01:33:40
The only thing that's already happening
nicely is the progression
from a soft, viby opening
to a nice verse,
to a different pre-chorus space,
and then finally arriving at the chorus.
01:33:50
Now let's blend in all of our vocals
with all of our musical elements,
and see how they're working together.
01:35:14
That actually worked out pretty well.
01:35:16
The music and the vocals are already
working together.
01:35:18
There's some good dimension
and depth to the mix.
01:35:21
Overall, there's a pretty nice balance.
01:35:23
So I've got the mix to the point
where I want to switch gears,
zoom out, and start thinking about
my mix bus processing.
01:35:29
I want to start giving the song
its overall sonic shape and character.
01:35:34
A lot of it's there already,
but with 2-Bus processing,
I can really start honing in on that,
and then it's gonna give me clues
as to what I need to continue
to work on inside my mix.
01:35:43
Now I'm gonna look at my mix bus track.
01:35:45
As you can see when we imported
my template,
I already have all my inserts set up.
01:35:50
I generally operate with the same inserts
on about 90% of my mixes,
tweaking the settings and occasionally
swapping one out here and there if need be.
01:35:58
But by working with a consistent
mix bus chain,
it helps give me consistency
in all my mixes.
01:36:03
So as you can see, only one
of the plug-ins right now is active.
01:36:06
That's my Oxford Limiter.
01:36:08
We've actually been listening
through this the entire time.
01:36:10
I always use the Oxford Limiter
as my last mix bus insert.
01:36:13
This guarantees me a consistent output
volume of -2.44 dB,
which gives me headroom
when it comes to mastering.
01:36:21
But that also lets me transparently
change the gain.
01:36:24
Now I'm not looking to do
any gain reduction with this limiter.
01:36:27
I'm simply using it to ensure that
all my mixes are at a consistent volume.
01:36:31
And I'll trim the input gain
up and down if need be.
01:36:33
So let's take a listen and see what
this limiter is doing to my signal.
01:36:43
Absolutely nothing! Which is exactly
what I want it to do.
01:36:46
The only thing this limiter is doing
is taking off 2.4 dB,
leaving me some headroom
when it comes to mastering.
01:36:52
Now let's get back to the beginning
of my mix bus chain,
and start tweaking
my VBC Compressor Rack.
01:36:58
I take it out of bypass,
and as you can see,
my default setting is with
all the compressors turned off.
01:37:04
On a modern pop mix like this,
I need to be really careful
about what color of compressor
I choose for my mix bus.
01:37:09
Too colored of a compressor,
and for the rest of this mix,
I'm just gonna be fighting
against it the whole time,
and then when I turn it off, I'll be like
"Oh! That's where the problem was.
01:37:17
It wasn't any of my tracks,
it was the mix bus!"
So for a mix like this, the FG-Grey,
which is a SSL emulation,
should be just the right color.
01:37:25
What I like about using the Slate VBC
is that there's still a Wet/Dry mix knob,
as well as a high-pass filter.
01:37:32
So let's listen back
while I adjust the settings.
01:38:04
So let's listen without...
01:38:12
And with...
01:38:20
The compressor is adding
just the right amount of color,
and pushing my mix
a little bit more together.
01:38:26
Again, my goal of mix bus processing
is to make the rest of my mixing process
a little bit easier on myself.
Any work that I can do on the mix bus
is work that I don't have to do
to the individual tracks.
01:38:37
Next on my mix bus processing
is the Brainworx bx Digital V2 equalizer.
01:38:41
This is a really great M/S EQ
that not only lets me widen my mixes,
but also lets me independently
EQ the middle and the sides of my mix.
01:38:50
Let's listen back while I dial in
some settings.
01:40:41
So as you can see, I'm doing a mixture
of gentle cuts and boosts,
independently between
the mid and side channels,
and also adding a little bit
of stereo width.
01:40:50
Let's listen with this in bypass.
01:41:01
And now with.
01:41:12
What this EQ is doing is
it's adding a little finishing touch,
and giving me a little bit more openness
overall with my mix.
01:41:18
Exactly what I'm looking to do
with my 2-Bus processing.
01:41:21
Nothing drastic, just things that are
gonna make my life easier
as this mix moves on.
01:41:25
Next on my mix bus chain is
my favorite step - the hardware insert.
01:41:29
This is where I go out of Pro Tools,
through a couple of my analog
compressors and EQs
and then back into Pro Tools.
01:41:35
My hardware signal path travels through
a 5-band analog EQ,
into an SSL compressor clone,
into another VCA compressor,
and then finally into a shelving EQ.
01:41:47
This is basically
my "sounds better chain."
As soon as I insert it onto my mix,
generally things sound better.
01:41:53
First, without the analog processing...
01:42:04
And now with.
01:42:24
Let's listen again
without the analog processing.
01:42:35
And now with.
01:42:55
It sounds better, right?
Since I'm operating on my entire mix,
I don't need to make any big moves here.
01:43:00
My parametric EQ is set to flat,
my SSL compressor is taking off
a dB or two,
and has a Wet/Dry, which I have at 50%,
going into my other VCA compressor,
which is operating at a 1.1:1 Ratio,
taking off 1 dB here and there,
and then finally, into my shelving EQ,
adding 1.5 dB
to the top and bottom of my signal.
01:43:22
Really small moves, but applied
to the entire mix,
again will save me a lot of processing
when I zoom back
and I start working on individual
tracks and groups of instruments again.
01:43:30
The last EQ I like to use on my chain
is the Eiosis Air EQ.
01:43:34
That's one of the most flexible EQs
that I have,
and it allows me to gently cut
or boost,
or very narrowly make fine adjustments.
01:43:41
Generally, I leave this one alone
until later on in my mixing process.
01:43:45
So for fun, let's listen to what my mix
sounds like without my mix bus inserts.
01:43:50
Again, leaving the limiter on,
so we're at the same headroom.
01:44:02
And now with the 2-Bus processing.
01:44:15
So as you can hear, by zooming out
and working on my mix as one whole unit,
I've actually accomplished a lot
of the things I wanted to go back
and do on the individual tracks.
01:44:23
The acoustic guitars are popping out more
and have a brightness
that they don't have to them.
01:44:27
The vocals are more present,
the drums are punching a little bit harder.
01:44:31
All good things! So from now, I'm gonna
be making all my mixing decisions
going through my 2-Bus processing,
hopefully making my job a lot easier.
01:44:38
Today I took you through my process
of mixing a pop track
in the box using Pro Tools 11.
01:44:43
A lot of these techniques are actually
very applicable to other genres
and also can be pulled off in any DAW.
01:44:48
What I really want you to take away
from this video
is that as a mixer, it's a hard job
to both be zooming in,
and also zooming out,
looking at the song as a whole,
giving it a character, giving it
a song structure,
and helping accentuate the good things
about a mix.
01:45:02
I hope you enjoyed... and 'til next time.
I'm Ben Lindell.
Once logged in, you will be able to read all the transcripts jump around in the video.
- Eiosis: Eiosis AirEQ
- Sonnox: Sonnox Oxford Limiter
- Flux::: Flux Epure v3
- Plug & Mix: Dimension 3D, Digital Plate Reverb
- Slate digital: Slate VBC Rack, Slate VBC FG-Red
- Softube: Summit Audio TLA-100A, TSAR-1 Reverb, Summit Audio Grand Channel, Tube-Tech CL 1B Compressor
- Soundtoys: PanMan, Tremolator, EchoBoy, Decapitator
- Avid: ReVibe II, Channel Strip
- Universal Audio: UAD SSL E Channel Strip, UAD Pultec EQP-1A, UAD Brainworx bx_digital V2, UAD Precision De-Esser
- GML 8200 Parametric EQ clone
- SB4001 Stereo Bus Compressor (SSL clone)
- Stereo Pico VCA Compressor
- Stereo 169 Shelving EQ
- Here is the video of the song

Ben is a NYC based producer/engineer who has worked with artists from MGMT to Soulja Boy, Bebel Giberto to Lloyd Banks, Ryan Leslie, Olivia, Tony Yayo, Red Cafe, Edie Brickell, Carole Pope and hundreds of other artists from around the world. He grew up in Iowa and then attended the University of Miami.
In addition to being a fantastic musician he is also a tremendous geek when it comes to anything technical, be it software, plug-ins, microphones or outboard gear. It's this marriage of musical creativity and technical know-how that makes him an in demand producer/engineer.
50 Cent
Soulja Boy
Wale
Kelly Rowland
Chromeo
MGMT
Parts of this site and some files are only accessible to pureMix Pro Members or available to purchase. Please see below our membership plans or add this video to your shopping cart.