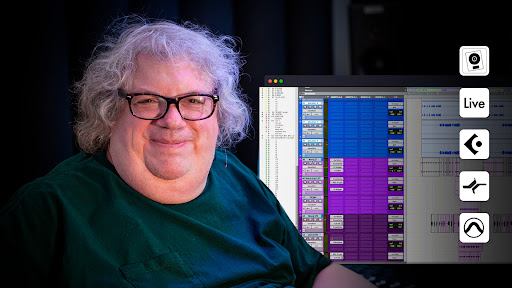
Brian Lucey Mastering Royal Blood
01h 13min
(56)
In this pureMix Exclusive tutorial, Grammy Award Winning Mastering Engineer, Brian Lucey, opens the original mastering session for Royal Blood's hit record, "How Did We Get So Dark?" and re-masters it from start to finish; discussing every step of the process from both technical and philosophical points of view, breaking down his workflow in Sequoia, as well as his carefully curated collection of analog mastering gear.
Learn how Brian:
- Edits the heads and tails of tracks.
- Treats the record as a body of work, creating cohesion from the first track to the last.
- Uses corrective linear phase EQ to shape mixes in relation to each other across the span of the record.
- Gain stages his analog chain.
- Determines the proper balance of low end between Mid and Side information.
- Uses his modified Focusrite Blue 315 MkII EQ, Fairman TMEQ (Tube EQ), Elysia Compressor, and Crane Song Hedd to create the tone of the record.
- Adds limiting and saturation to add dimension and character to the master.
- Establishes artistic consistency both in tone and volume throughout the record.
- Compares the demonstrated masters in the video to the original record.
This is a unique chance to learn Brian's personal mastering techniques and watch him work in the flow as he masters one of rock's largest records in the past decade.
Want to learn more with Brian? Check out his Mastering Philosophy And Techniques video
Once logged in, you will be able to click on those chapter titles and jump around in the video.
- 00:00 - Start
- 01:02 - Preparing The Session
- 01:44 - Clean Up Tips And Tails
- 06:40 - Track Markers
- 07:09 - Adding Digital EQ
- 08:02 - Initial Volume And EQ
- 20:48 - Comparing Vocal Levels
- 22:15 - EQ Sections
- 00:00 - Start
- 00:0 - Analog Processing
- 00:52 - Adjusting The Gain in Analog
- 02:30 - Mid-Side Energy
- 06:28 - Mid Range
- 11:31 - High Shelf
- 15:41 - Low and High Cut
- 17:13 - Review Work At This Stage
- 21:15 - Checking The Flow
- 25:15 - Don't Be Afraid
- 26:17 - Limiting And Saturation
- 29:32 - Comparing Tracks
- 37:28 - Listening Outside the Room
Part 1 | Part 2 |
00:00:00
Hi, this is Brian Lucey and you are at
Magic Garden Mastering in Los Angeles
where we're going to do
a run-through of a mastering session.
00:00:10
And today we're going to do
a reenactment of Royal Blood,
a great record.
00:00:24
At this stage in the process
I'm expecting that mixes are approved,
I'm expecting that clients are happy
and excited with what they've sent.
00:00:32
Mastering is not a fixing step,
it's an enhancing step.
00:00:37
Judgment in this part of the
process is, to me, a fatal mistake.
00:00:42
I am not looking at it
like a mixer or a producer,
I'm looking at it
like a mastering engineer,
which is the mindset of
overview enhancement,
singles and the whole record
being as awesome as they can be
in a musical sense,
continuing forward the vision
of the creative team.
00:01:03
How do we do it? Well,
we start by pulling up
the tracks off to the side.
00:01:07
This is the full track with the bleed
at the top and the bottom,
the 24-Bit / 44.1 kHz files.
00:01:14
If they happen to be 96 kHz coming in
then I would use dB Power Amp.
00:01:21
So, I would be making them into 44.1,
which I do because
the software is great
and it gives consistency through the chain
where I end up printing at 44.1 kHz
because I like the density of the low end
and I like only chopping 8 Bits
and not having to do sample rate
conversion to my work.
00:01:42
So, here are the files in order.
00:01:44
The first thing I'm going to do
is just listen to the digital files
and do a quick cleanup of tips and tails.
00:01:58
And while I'm doing tips and tails
I'm listening to the style
and getting a sense of the quality
of the mixes, etc.
00:02:20
You can see at the bottom
of the screen the actual session.
00:02:23
We'll come back to that
as an interesting kind of comparison.
00:02:27
Mastering for me is about musicality,
it's in the moment, it's a performance.
00:02:31
It's not about perfectionisms.
00:02:33
I would do this record a little
differently on any given day,
and that's okay as long as it's awesome
and it makes the client happy.
00:02:42
That's what we're going for.
00:02:48
And...
00:02:50
let's see.
00:02:51
These little bits here...
00:02:57
It's not much, but when
you do this for a bit of time
you get a lot out of analyzing
the mixes just from tips and tails.
00:03:10
This is very quiet, we already know.
00:03:12
I'm going to jack that up
because that's step two,
and we might as well do a little
of that while we are waiting.
00:03:19
This is Sequoia 12.
00:03:22
A really nice software for mastering.
00:03:26
I like it.
00:03:28
It seems kind of long.
00:03:33
The flow of the record is
a cocktail of what the songs are like
with the fades and the spacing,
so, the mastering process is a
expectation countering process,
we're winning people over.
00:03:48
I might go 1 to 2 kind of tight,
and 2 to 3 might stay tight
if 3 is aggressive,
or if 3 is more of a ballad,
then there might be a little space.
00:03:56
So, we'll come back to the fades
and spacing later in the process,
but even in the beginning
I'm getting a sense
just by listening to these little snippets
of some kind of flow things.
00:04:08
Sequencing also is huge.
00:04:10
It's generally not my job,
but sequencing is a big deal.
00:04:14
I accept the sequence I'm given,
and then I'm going to do fades
and spacing to enhance that.
00:04:27
That felt pretty good.
00:04:35
Nice little space there because that one
has a little slower thing
after the busy thing.
00:05:01
It seems a little late.
00:05:10
Maybe it's still a little late,
let's just trim this.
00:05:13
160 ms is a good number here.
00:05:16
I need to get the range and time markers
in there so we can talk about times.
00:05:21
So here they are, let's pop them
right into place.
00:05:25
I read somewhere someday
that 160 was an industry standard.
00:05:29
I don't adhere to industry standards,
but I refer to them.
00:05:34
I kind of like that one at 160.
00:05:35
Sometimes less, sometimes more,
sometimes you want to hit
the start and have a breath
that's a bit longer before the music,
sometimes you hit the start
and it kind of takes you by surprise.
00:05:45
So I look at 160 as an average.
00:06:00
Maybe something like that.
00:06:04
General rule again.
Usually it is a little longer.
00:06:10
A longer space before something
a little more mellow,
and again, the click to the start.
00:06:17
Maybe it's a little long.
00:06:20
And this is just musical taste, it's feel.
00:06:24
The number there happens to be 350.
00:06:26
That's thousandths of a second,
if that was unclear.
00:06:32
I'll zoom it up, let's see what we got.
00:06:34
A nice, long fade,
trim, zoom back down.
00:06:38
Now we grab there.
00:06:40
Shift + Click to grab here, go up
and do this auto-marker dilly.
00:06:45
There's our track markers.
Now, sometimes
we would go in
and if I had put some
spaces here, like so,
this might be here
and I would want it here,
so I would come back and do that.
00:07:00
In this case, it's not.
00:07:02
All the markers went exactly
on the front edge of the next file in,
which is where we want them to be.
00:07:10
Now what we're going to do
is go into each of these and insert
this EQ which really changed my life.
00:07:17
This is just the internal
Linear Phase Sequoia 12 EQ.
00:07:22
I think it started maybe in 10
where I liked it, or maybe it was 9.
00:07:25
And this was a game changer
because I could actually use
a modern digital tool.
00:07:30
What I have is a template,
'AAA',
which is basically 4,
2 —a little wider—,
4,
and then
this corresponds to this one,
it's at 1.5, wider.
00:07:44
1.1, wider...
00:07:46
I mean, 1.0 and 1.0.
00:07:48
So these two are very wide,
this one is kind of wide,
this one is a little tighter,
and this one is not quite
as tight, but still.
00:07:56
So this is my
6-band digital EQ template per track.
00:08:02
What we're going to do now
is pull these up
and line these up
so that they're not stacked,
which is what Sequoia wants to do,
but instead they're
kind of spread out nicely.
00:08:15
So now we're going to go
through the tracks, one at a time,
listen to the loudest bit, which is
probably somewhere at the back end
where the visual is pretty obvious.
00:08:26
We'll have a listen to the style,
have a listen to the loudness,
and go through it track by track
and do a quick adjustment on volume.
00:08:36
If something is really hitting me
like, "That's a problem,"
I'm going to grab an EQ,
but this stage is really about
some kind of gross volume moves.
00:08:50
I'm listening at around 85 dBA
in the room.
00:09:01
That one is a little louder
and there's a little 500 Hz thing here,
so I'm going to do a little of both.
00:09:13
And that makes me think this one
has a little 200 thing,
so we're going to grab
the slightly wider one there.
00:09:29
Now on to this one.
00:09:34
The level is pretty good,
it's a little brighter shape overall.
00:09:38
I'll do a little sub bump here
down at 50 Hz.
00:09:47
The place to cut or to boost
is usually never where you see the peak,
it's on either side.
00:09:53
In this case I'm going to boost a little
below where it's already doing its thing.
00:10:01
And that's a little kick enhancement.
If we take that out...
00:10:10
So that's a 1 dB pop at 40 Hz,
which again, compared to the visual,
it's below where the bump already is,
extending the kick drum
down a little bit.
00:10:21
Let's check this one.
00:10:27
Okay, so that's kind of a nasal...
lots of low mid kind of thing there.
00:10:31
Overall, the volume is a little low
because it's lacking a little brightness
that makes things seem louder,
so we'll do just a broad, little
kind of cut here at 200, 300,
and a broad boost here, like at 3 kHz.
00:10:47
I'm going to move this down
closer to 1.5 kHz
to give it a little more vocal pop.
00:10:55
I'll compare that to the first track.
00:11:00
And the second.
00:11:03
Third.
00:11:06
That one seems a little low in volume,
I'm going to bring that up just a touch.
00:11:12
Also, it needs a little bit here
down in the low mids,
a little bit of rumbly business
down there.
00:11:20
It's nice.
00:11:25
And on this one we're going to do
a little more down here.
00:11:29
100, 200 range.
00:11:38
Let's pop it a little more
up here at 7 kHz.
00:11:49
So that's a dB at 6 kHz,
a dB at 1.4 kHz,
-1.7 at 300 Hz,
-1.7 at 144 Hz,
so we did quite a bit to that one.
00:12:01
Now let's compare that one
volume-wise and tone-wise.
00:12:16
This is a little low still.
00:12:18
I'm moving things in hundredths
of a dB there by holding the Shift key.
00:12:27
Still too much low end.
00:12:37
And with these low end cuts
we don't want to kill the mojo.
00:12:41
I'm just looking for places to steal out
a little energy that will
balance it out and clean it up a bit
without affecting
what's musically important.
00:12:54
This is a 2, let's make it 2.5.
That's a little sharper Q.
00:13:03
I'll compare it to number 1.
00:13:07
That's a lot louder, isn't it?
4 is a lot louder, I think.
00:13:15
Yeah, I'll back it down.
00:13:26
Suddenly that one
doesn't seem bright enough
compared to the new kind of standard
that we're setting.
00:13:31
This is a work in progress,
it's a sculptural thing.
00:13:35
There's not like a moment where you're,
like, "Okay, we're going to make it this."
As it goes, as it evolves,
each track informs the other tracks
and we're trying to elevate
the whole project
to a sonic space that's awesome.
00:13:50
So, my mindset isn't about homogeneous,
it's about a musical exploitation
of the singles
and the record at the same time,
in balance.
00:14:00
The first track, when we started it,
it seemed like the top end was cool.
00:14:03
But as we go along, I'm seeing that the
average frequency balance for these mixes
is a brighter sound,
so now I'm going to bring
that one up with this little
1.3 dB grab at 3.6 kHz.
00:14:18
I'm going to bring that up to get it
to play nicer with its friends.
00:14:38
There's still something down here
that's honky, a little mid messy thing.
00:14:45
And maybe it needs a little
of this little 2.1 kHz thing.
00:14:51
That's too nasal, let's go up to 5 kHz.
00:14:57
A little more boost.
00:15:04
This is too loud.
00:15:14
It's still too much, a lot of sub there,
so I pulled down a little at 60 Hz.
00:15:19
I'm going to bring the volume up a little.
00:15:24
This is all going to happen again
once we bring in the analog chain,
so just keep it moving, keep improving,
keep flowing through it.
00:15:37
So that one sounds not so exciting.
00:15:47
Not enough top end. The vocal is good,
so we'll go up here to 6 kHz.
00:15:56
That's better. Now let's go through
the others and come back to it.
00:16:19
EQ is good, the level is a little low.
Let's bring this up a little more.
00:16:25
You can see this file
is not as densely mixed,
so it would make sense
that we're having to push it.
00:16:37
And as I'm listening here I'm turned
to the speakers with one ear,
that's very much on purpose.
00:16:43
I'm trying to not get caught up in the
3D Mid-Side spatial element at all.
00:16:48
This is just levels and EQ.
00:16:50
On paper this is my better ear,
but musically speaking
this is the ear that I use.
00:16:54
When I was a musician, I would always turn
that ear to the band or what have you.
00:16:58
So I use my left ear
putting this into mono
without having to actually
crash the image down to mono
and get the artifacts of that.
00:17:08
It just simplifies it for me
and that's why I have
this computer here to the side.
00:17:13
Also because I don't want screens
and nonsense in front of me,
so this serves two purposes.
00:17:24
Maybe it's a little too loud.
Let's move on.
00:17:29
If it's feeling good and it's feeling
musical, you're doing great.
00:17:32
If you start to get caught up and worry,
then come back to it.
00:17:37
It's fine.
00:17:45
So that is a fat low end,
low mid track.
00:17:48
Musically speaking
it should be fat low end and low mids.
00:17:55
It's a little too much,
so again we're going to go in
and clean out a little without losing
the inherent musicality of that kind of
big sound that they want.
00:18:10
Obviously what's happening here
is there's a musical evaluation
happening of the track
to do these EQ things.
00:18:16
It's not just a technical
mindset where we're
"Make it even, make it even,
make it even."
I want to pull out a little 120 Hz,
and maybe we'll go in here broad
and cut out some 450, 500 Hz, wide.
00:18:39
Back to the first one.
00:18:48
A little loud.
00:19:00
I'm not attached to anything I'm doing
because once we bring in the analog chain
it's all going to sound better,
I'm going to reshape everything,
we're going to have
different issues at that time.
00:19:20
We're discovering the template.
00:19:22
We're not creating the template,
we're sort of discovering
what the record wants to be
by balancing things out
and seeing kind of where it wants to go.
00:19:31
And I'm referring to 1 and 2 and 3
and 4 and 5 as I go to 6,
and we're going to continue on
through the record that way.
00:20:02
It's very low volume even though
I pushed it, which means that it wasn't
heavily compressed or limited in mixing.
00:20:09
But the vocal isn't popping
quite like the others,
it's a bit of a buried vocal, so I'm
going to go in here with some midrange
on 1.2 kHz and then a little follow-up
here up around 4 kHz.
00:20:26
If we took all this out...
00:20:33
I can hear that.
00:20:34
Now let's compare here.
00:20:47
I'm only listening to where the vocal
is sitting in relation to the music,
so I'm going to find pieces of the vocal
in louder sections where the music
is really pushing against the vocal.
00:20:59
I'm going to find pieces
of vocal in each one
and then start to calculate
a little bit of a template in my mind
about where the vocals are
track to track,
and see if I need to do
anything to... let it be
because it doesn't have to be even.
00:21:14
Maybe it's cool that it flows,
or maybe I do need to go in
and adjust something to help it out.
00:21:32
So those three are, like,
a classic rock vocal.
00:21:34
It's clean enough to hear the vocal,
but there's a ton of music around it.
00:21:38
They're good rock mixes
in terms of the vocal level,
very consistent.
00:21:46
Same. Good.
00:21:54
If I take out what I've done...
00:22:04
Yeah, the vocal is good.
It's just the overall shape.
00:22:06
This is still quite...
00:22:09
...messy down here.
00:22:11
100...
00:22:13
I tend to think of this
entire frequency range
in some sections.
00:22:19
I'm going to say, like, 50 and under
is a section,
and 50 to 100 is a section,
and then 100 to maybe 200 is a section.
00:22:32
200 to 500 is a section,
500 to 1 kHz is a section,
1 to 3 kHz,
and above 3 kHz.
00:22:42
500 Hz to 1 kHz,
from a mastering standpoint,
is a place I'm very unlikely
to do much with.
00:22:49
I would never go in to, say,
from 400 Hz to 1 kHz
and do any kind of a peaky boost
or anything like that.
00:22:57
There's so much crucial energy in there
that no matter who the mixer is,
no matter what the mix is,
that is the sacred part of the process.
00:23:08
And if I get in there,
it's going to have a negative impact
and people will notice.
00:23:14
There may be a cut
that is a wide cut,
that is 500 Hz or under.
00:23:20
And that cut may find its way up into the
600, 700, 800, 1 kHz range,
but I'm still going to hedge
towards the lower frequencies
because I just don't like to
mess with that.
00:23:30
I don't want to step on anybody's work
here, that's not what we're doing.
00:23:34
And playing in that range
with something steep
or getting too Q'ed would be heard
as playing in that range in the wrong way.
00:23:42
Let's come back to this one.
The vocal sounds cool in the mix,
it's a little messy there.
00:23:52
I'm going to come back to it.
Let's move on.
00:23:57
I'm going to click back quickly
through the first four
just to get the template
back in my head.
00:24:01
And when I say template
I'm listening with my whole body,
I'm listening to the whole
frequency range.
00:24:05
It's not a mental exercise,
it's, how is the energy hitting me?
Low end, midrange, high end.
00:24:13
I'm a physical listener,
so I'm listening to that
and I'm feeling that with one ear,
so it's kind of...
00:24:19
this half of my body is getting the energy
coming out of the speakers.
00:24:22
That's what I mean by checking the
template and referencing where we're at.
00:24:26
It's just to get a feeling from each song
in terms of the shape.
00:24:41
So I just made a little move on 3,
it's just a little loud.
00:24:45
The frequency balance was cool but I just
pulled the whole thing down 0.05 dB
or something like that.
00:24:51
I'm going through the songs,
getting the feeling,
and making sure the shape is not
too perfect but consistent enough.
00:24:57
And then let's apply that template further
down the line to the other tracks.
00:25:21
This one is still bothering me.
00:25:22
I'm going to do a steep cut
somewhere in the 400, 500 range.
00:25:27
Let's go back and get a feel
for the energy of the tracks
and keep moving on.
00:25:51
It's still a little low,
it's still a little weird.
00:25:53
I'm not going to spend too much time
on it because it's going to get tweaked
by what happens in the analog world,
so I'm going to move on from that one.
00:26:08
I raised the volume a little there.
00:26:23
Same kind of midrange thing.
00:26:39
It's obviously very low,
you can see it before you hear it.
00:26:53
A little hot, let me pull it down.
00:27:00
Still low.
00:27:05
Still lacking up here.
00:27:13
A little low.
00:27:21
Down here, somewhere in the 100 Hz range.
00:27:44
A little loud.
00:27:53
This has a really pronounced
kick frequency happening.
00:27:58
That's obviously intentional
because everything is intentional
in terms of a musical choice,
that's my assumption.
00:28:08
I happen to know that my analog chain
is going to bump that
and it's going to be a little much,
so I'm going to sort of pre-cut something
that is going to end up being big.
00:28:21
Just a little dip here.
00:28:25
Here's the before.
00:28:30
And...
00:28:36
And track 10.
00:28:44
A lot of low mid kind of buildup there,
something kind of big.
00:28:57
The thing I'm listening for
with these cuts is, again,
I am not actually looking to
even things out.
00:29:04
I'm trying to keep the musical
component of each track
vibey and energetic,
so at no time am I actually comparing
track to track to track
with an even mindset of frequencies
because every track is different
and every track
needs to have its exciting energetic parts
maintained.
00:29:28
As I go through it one more time,
what I'm really looking for is just
kind of a quick broad stroke treatment
of each track
never doing harm to what seems to me
musically important
in each single,
but making adjustments
for a cohesive whole.
00:30:08
It's still a little fat
and a little dark.
00:30:15
The levels per track,
we're not looking to make them even.
00:30:19
A louder track needs to be
a little louder.
00:30:22
A more dynamic song
needs to come in dynamically
and it needs to build to a loudest moment
which isn't as loud as the loudest moment
in the hottest track on the record.
00:30:36
So, that fine-tuning
is going to happen later
and it's going to be easier
once we get the analog chain involved
and we're really getting down
to the end of the process,
but we're still beginning to incorporate
that thinking with these volume moves.
00:31:00
So let's go through them one last time.
00:31:02
Again, I'm not looking for
perfection here,
I'm just looking for a relatively
good consistent flow
that's respecting each track.
00:31:19
I just cannot decide
what to do with that one,
probably because the frequency balance
needs another look,
but let's take a look again.
00:31:40
And let's do it again.
00:32:28
That little move where I went from 9
back to 1, or 9 back to 1, 2, 3,
in my mind I'm pretending,
"Can these be interchanged?"
Of course they're not interchangeable
because the flow really matters,
but just as a way to check the levels
because as you flow through
from track to track
you can get on a journey of
maybe making the whole thing
brighter as it goes,
or you can get on a journey of making
the whole thing louder as it goes.
00:32:53
You can lose perspective
with the overview,
so I'm going back to the beginning,
always flowing back to the beginning,
getting the sense of overview.
00:33:02
Pretending that they were all
interchangeable, even though they're not,
is just a good way to make sure that
your subjective self didn't push,
push, push, push, push
brightness or volume or something
as humans are inclined to do.
00:33:16
We like it brighter, we like it louder,
so you might find yourself
pushing the record up as it goes
and that would be a mistake.
00:33:32
I use the Linear Phase EQ
to do primarily cutting.
00:33:37
A couple of little boosts here and there,
but mostly cutting.
00:33:40
And we've done some volume moves,
we've got tips and tails
kind of roughed in.
00:00:00
Now we're going to move over
to the analog desk
which is zeroed out.
00:00:06
We're going to come up with,
for this record,
one analog setting
that can apply to everything.
00:00:22
The first thing I'm going to do
is bring up the volume.
00:00:24
The thought process here is,
I've got the monitoring at -1.
00:00:29
This changes from day to day, you know?
I might be down here at -5,
I might be up here at 0.
00:00:37
I'm going to be in this kind of range.
00:00:40
I might work on this record
between this volume...
00:00:44
and...
00:00:48
Somewhere in there.
We're here.
00:00:53
The first thing we're going to do
with the analog is bring up the gain.
00:00:57
I'll get the meters playing between
loud enough and too loud,
and we're going to do that
with the Focusrite.
00:01:05
So here we have the file
and here we have post-chain.
00:01:18
Pretty close to flat there.
00:01:20
I'm listening to post-chain,
let's bring up some gain.
00:01:45
I'm going to want a little more gain
but I'm noticing that I'm getting
a lot of overload.
00:01:51
These light up a little occasionally,
but when they're pushed too hard
it's not cool,
so I actually like to raise the gain here
using the beautiful EF86 tubes
in the Fairman, so let's click this up
another 0.75 dB.
00:02:12
That's a little much,
let's back it down one.
00:02:21
The other place that I just gained
is at the Input stage
to the A/D converter.
00:02:27
I think right now this is that 1.5.
00:02:30
The next thing I'm going to look at
is the Mid-Side energy.
00:02:42
I'm listening to the impact of the center
and listening to how much
low end is on the sides.
00:02:47
This is a kind of music that
wants to be beefy and cool
on guitars at all times,
and so you're going to have some
panned guitars that are pretty fat,
so what I'm doing here is bringing up
low end that keeps the low end intact
for the center channel
while cutting out side low end
that's getting in the way.
00:03:10
So we want to cut the guitar range
up into the place where it's still
connected to the bass
in the way that the mind
perceives the sound,
but not pass that line and not...
00:03:22
You know, below that line it's too fat
and it's getting in the way of the punch.
00:03:25
We want to maximize the punch
while not losing the
psychoacoustic glue
between the fat guitar,
the bass, and the kick drum.
00:03:51
I did a little couple of
Shelf boosts here,
like two thirds of a dB at 150.
00:03:58
This is a little 0.75 dB at 80.
00:04:01
And at the same time
a Mid-Side Side-only EQ cut.
00:04:06
I have a center frequency going of 250.
00:04:10
For me, doing this kind of a move
which happens fairly often,
that is going to be set
between, like, 170 and 500 Hz.
00:04:20
That would be my center frequency,
and then I will cut below 170 to 500
and boost above 170 to 500
at the same time
by moving this knob
in the positive.
00:04:34
I've raised the low end
of an already fat record
and
cut out some of the side low end,
boosting some of the side high end,
in, again, a subtle and respectful way
to accentuate the punch of everything
and to get a little more space in the mix.
00:05:10
So we did that to track 8.
Now let's see how that
little move
plays across the board
with low end punch
and side guitar fatness.
00:06:22
I like that. That's going to be
part of the global template.
00:06:26
The other thing this chain allows me
to do is to have midrange boost
and high frequency boost
that are
never getting to be harsh.
00:06:35
Right now in both EQs
there's no boosting of any kind,
and there was very little done digitally.
00:06:44
I was thinking,
"Let's leave the boosting for later.
00:06:48
Let's get a global boost from the
analog gear that's got the juice."
I'm going to do it here
with a Bell in the mids
and a Shelf on the top.
00:06:58
And the Shelf point
is going to range from
13 kHz up to 18 kHz.
00:07:05
And the Shelf amount for my work
is going to range between
number 1, which in this EQ
is 0.75 dB, hypothetically,
up to maybe 1.5,
which would be 1.5 dB.
00:07:18
But that 1.5 is almost never.
00:07:21
So the main decision for me is just
where to put the Shelf, 13 to 18 kHz.
00:07:27
Most records are 14 to 16 kHz.
00:07:30
When I did the work here
it was mostly low end work
and there wasn't a lot of mid boosting
and there wasn't a lot of mid cutting
because it wasn't necessary.
00:07:40
But if this was a really bright record,
if this was a bright record
or a bright and thin record,
and bright not just top end
but midrange bright,
1 kHz to 7 kHz,
2 kHz to 7 kHz, 3 kHz to 7 kHz,
I might have gone in
and cleaned up, meaning cut,
to prepare
the digital files
for the analog juice.
00:08:06
We'll just turn this on.
The first step here
is 0.75 dB and it goes up by 0.75.
00:08:12
For me the choice is between 1 and 1.5,
which is a 0.75 dB boost
and a 1.5 dB boost.
00:08:19
And then the more interesting
choices down here
may be
2.5 kHz to 5 kHz.
00:08:28
That's the range
that I'm going to work in.
00:08:30
It's a subtle boost range,
but meaningful.
00:08:35
For this record I'm going to set it
at 3.5 kHz.
00:08:39
Well, 5 kHz is going to, like,
audibly
make the record more pop.
00:08:45
It's broader than 5 kHz, right?
It's a medium Q.
00:08:50
We've got narrow Q,
medium Q, and wide Q.
00:08:53
This is a medium Q boost
so it's wider than 5 kHz.
00:08:58
A 5 kHz boost would be
overly shaping this record.
00:09:03
I know from experience in a pop direction
that it doesn't necessarily need...
00:09:08
If you get down to 2 kHz,
you're bringing up kind of the
Americana, country,
hillbilly telephone frequency range.
00:09:17
If it was a country record
and it sounded like a Pro Tools pancake
that had no life,
I might go down to 2.5 kHz
and bring up a pretty big boost
to give it some authentic
Americana
kind of tonal shape.
00:09:33
The basis for this thinking is that
the recorded history of music has given
a template
to all of us subconsciously
where we listen to things
and instantly judge
what style is it,
what era is it from, etc.
00:09:50
Things we don't really think about.
00:09:53
So I'm in the process of sort of
if you will, positive manipulation.
I'm trying to get
people to feel, hear and connect
to the music by accentuating
the right kind of frequencies
for the style
which puts it in a place in time,
in its own moment in the
recorded history of music.
00:10:14
So,
5 kHz is going to make it too pop,
2 kHz is going to make it too honky.
00:10:20
In between that, like 3.5 kHz,
is just going to further accentuate
the kind of vibe
that's built into the tracks.
00:10:28
Let's listen to no boost at all
at 3.5 kHz.
00:10:38
And I'm going to gain it down.
00:10:40
It's a little much
so I'll just gain it down a bit.
00:10:47
Let's go with a little more.
00:11:00
0.75 dB up at 3.5 kHz.
00:11:10
Let's go with one more.
00:11:29
That was good! I like that.
00:11:32
We didn't touch the Shelf.
00:11:34
We talked about it but didn't do it,
so I'm going to turn the Shelf on.
00:11:37
And my starting point is usually 16 kHz.
00:11:41
Now, that number doesn't apply to you,
it applies to this EQ,
so don't get caught up in the number.
But what you're looking for is a place
which is kind of like a euphonic thing
which isn't in the way,
and 16 is a good neutral place to start.
00:11:57
If it's a really bright project
I might take that up to 18 kHz
and just put some tube harmonic air
that's not actually perceivable
as a Shelf.
00:12:08
It's more perceivable in a
psychoacoustic way as a little bit of
soft kind of fuzz
and sweetness.
00:12:16
We'll start at 16.
00:12:18
My sense says that's where it's
going to end up, but I'll take it down.
00:12:21
We will run it down to 13 kHz
and you can hear what it does.
00:12:30
Let's take it out.
00:12:40
Back in, 16 kHz.
00:12:58
Okay, and now let's just make
the extreme move down to 12 kHz.
00:13:27
I'll take it out.
00:13:44
Back in at 16 kHz.
00:13:58
The beauty of this EQ is that
even down at 12 kHz,
which I actually never do,
is okay.
00:14:04
I'm going to set it at 14 kHz,
let's try this.
00:14:12
That's a little harsh,
let's go to 15 kHz.
00:14:21
So this is a moment where
being intuitive
and/or having communicated with the
artist or producer comes in handy.
00:14:30
I'm going to tend to hedge
on the side of conservatism here.
00:14:34
I like it at 16 kHz, I like it at 12 kHz.
00:14:37
I'm just going to leave it up at 16 kHz
because I don't want to get into
going too far with this thing
in the first pass.
00:14:44
If they come back and say
they want it brighter, fine.
00:14:47
Let's take out this boost at 80,
and let's take out this boost at 3.5 kHz,
and let's take out this boost at 16 kHz.
00:15:04
Alpha in.
00:15:24
1.5 dB at 3.5 kHz.
00:15:32
16 kHz.
00:15:40
And finally,
I'm going to go over the Focusrite here
and I'll do a little High-Cut at 22 kHz,
and I'm going to do
a little High-Pass at 33 Hz.
00:16:04
So let's take it out and let's listen
again. This is no Low or High-Pass.
00:16:25
The low end is still there
but it's not really destroying
down below 30,
it's rolling off a little bit.
00:16:35
Most of what we experience as sub-harmonic
frequencies aren't below 30.
00:16:40
The first step on this thing is 33 Hz.
That's the least...
00:16:43
that's the least I could do.
If you have something that cuts at 25
or at 30 Hz, that's fine.
00:16:49
This is fairly shallow.
00:16:51
And at 22, again.
00:16:52
There's tube high frequency boost,
there's high frequency information
in digital audio
that only dogs can hear
and none of us need.
00:17:01
So it's just a little bit of a cut up top
and a little bit of a cut at the bottom.
00:17:06
That's just packaging it a little bit
and making it...
00:17:10
...a little sweeter,
a little more palatable.
00:17:12
So let's pop through
and hear what we've got.
00:17:28
The vocal is a little back.
00:17:33
There's a lot of meat in that guitar.
I'm going to pull these down a little bit
at wherever they are, 150, 400 Hz.
00:17:53
So this one was really fat
when it was digital only,
but now that we have the Mid-Side going on
where the Sides are getting cut
I'm actually going to bring
some of the low end back up into it...
00:18:08
...so that those guitars stay
just as juicy as they were in the mix.
00:18:19
The vocal is a little buried there still
so I'm going to bring this back in,
a little 1.5 kHz, wide.
00:18:32
A little boost to get 'essing'
up a little bit.
00:18:35
There's a natural sweet spot
of sibilance for every artist.
00:18:39
Obviously that's a production thing,
but when it gets to my chair
I'm listening to that.
00:18:44
I want to keep that vocal
to be present
and
emotionally impactful,
and part of that is the intimacy that
happens with high end and sibilance.
00:18:56
So in this track I'm doing
a pretty good boost here,
I've got 2.26 and I've got 2.08 dB.
00:19:02
This is 1.6 kHz and this is 5 kHz.
00:19:12
That 'essing' is right here in this 5 kHz,
I'm going to bring it down a little bit.
00:19:20
So the 'S' doesn't go
above and beyond the music,
but it just goes
above and beyond the vocal
and stays parallel with the music.
00:19:44
More mids here.
I resisted before because of
the plan to use the analog,
but we need a little more.
00:20:12
Too much midrange,
we need a little top end.
00:20:15
We'll go wide at the top, we cut
some narrow things in the low end.
00:20:24
A little more level.
00:20:32
There's still some kind of honk
in the mids.
00:20:36
A little bit of a buried vocal,
let's do another little at 1.5 kHz
with another little top end.
00:20:48
This is a fairly wide cut at...
whatever, 400.
00:20:54
I'll kind of replace this with a deep cut.
00:21:14
Okay, so I'm going to check,
I'll go back to the notion
of tips and tails.
00:21:18
But first I just want to check the flow
of the tracks from the beginning.
00:21:43
I feel like I overboosted my midrange
and my top midrange.
00:22:17
It's a pretty loud start. Let's see
if the dynamics of the song
continue at that level
or if they go up towards the end.
00:22:27
They go up, so let's bring this back.
00:22:34
Okay, back to the top.
00:23:08
It sounds a little low
so let's turn it up.
00:23:15
And again, this is whole-body listening,
listening to the whole frequency range
and the vocal if it comes in soon.
00:23:22
I'm looking for good momentum
track to track.
00:23:36
That's pretty loud,
it's got a lot of mids in it.
00:23:47
I'll bring it down a little bit.
00:23:57
A little more cut there at 400 Hz.
00:24:06
I want that a little louder.
00:24:08
First track.
00:24:23
I'll take that down.
00:24:25
Be careful not to push the volume
track to track as you go.
00:24:29
That's kind of the tendency
so that you feel like you're doing
something right
because it's, like,
"Oh! It's getting louder!"
and it's a strange human thing.
00:24:38
I pulled this one down, track 7.
I reset a little bit.
00:24:41
That's a very consistent track,
it doesn't really go anywhere dynamically
and it's a good place to kind of reset
a dynamic level for the
second half of the record.
00:25:15
I'm not afraid to make a mistake.
00:25:18
What I'm afraid about is being afraid.
00:25:21
I don't want to act from a fearful place.
00:25:24
It's okay to
have a basically cool-sounding record
that needs a couple of things
to be tweaked.
00:25:32
That is the response that we want, so,
I think that's on the line,
but it was on the line in the mix
and the mix was approved,
so let's just let that pass
and let's let them decide.
00:25:45
I'm not going to neuter things
that were approved
unless I'm asked to do so.
00:25:51
The only other digital processing I might
ever do for anything is a de-esser,
and I might de-ess a section
or I might de-ess a song.
00:26:00
And then that's going to
go out through the chain
and it's going to come back,
and then, if we need to do a revision,
we're going to run it again.
00:26:08
There's no revisions in my world
that happen digitally after the fact.
00:26:12
Other elements that we're
playing with here,
we have the L2.
00:26:17
So, the L2 sucks over 1.5 dB,
but it has a nice midrange pop
from 0.5 to 1.5 dB.
00:26:24
So I have it set pretty much
permanently at 1.4
with a fast unlinked Release.
00:26:32
And the conversion is happening
with a Pacific Microsonics,
it's clipping.
00:26:37
High headroom, great converter.
00:26:39
And then we're getting
1.4 dB out of the L2,
and then we're going digitally
to the Crane Song HEDD
where
I have kind of a standard setting
that I might play with,
but usually not too much,
of 1, 1, 0,
where it's literally just as barely on
as the thing can be,
giving some musical tube-like
roundness to the square waves
that have been clipped and clipped again,
or clipped and limited,
so we've got some pretty flat stuff.
00:27:13
And we can pop that in and out one time.
00:27:15
It's pretty subtle,
but hopefully you'll hear it.
00:27:55
So it's subtle,
but it helps. It gets the music jumping
out of the speakers a little bit with...
00:28:04
I use it sort of as an equivalent
of a tube device
but it's in the digital domain.
00:28:10
So that's the last thing that happens
before the file comes back to Sequoia.
00:28:15
On this track we're not compressing,
and on this record we're not compressing.
00:28:22
That's because
it's a nice mix with
good dynamics control,
and my default choice is to not compress.
00:28:32
I don't need compression for volume.
00:28:35
Volume for me is a cocktail
of frequency balance
and limiting,
so the default is no compression
and we're doing none here.
00:28:44
Now, if we were going to do
some compression,
then I like to run in the Mid-Side mode.
00:28:50
The Mid triggers the action and
helps sort of keep me in check,
and I wouldn't do a lot of compression
on a heavily compressed record.
00:28:59
For me, it's 1.5 dB.
00:29:02
That's a lot.
00:29:04
So, limiting is more the issue
for volume, frequency balance,
and the transient balance is,
in this case, great in the mixes.
00:29:13
No need to compress.
00:29:15
The principle is really
'do as little as you can',
but not in a fearful way.
00:29:20
It's do as little as you can
and do as much as is necessary
to make it as awesome as you can.
00:29:26
And how that line is defined
for every mastering engineer
is going to be different.
00:29:32
I've got "Dark" and "Lights Out."
These are the raw mixes here.
00:29:36
No digital EQ, no nothing.
00:29:38
We've got these two,
and then, this was what I did today
with their digital EQ.
00:29:45
Down here, this is actually the record,
these are the final approved singles
of the record.
00:29:51
So this is "Dark" on the release
and this is "Lights Out" on the release.
00:29:55
These are the raw mixes
with the digital EQ
added at the time.
00:30:02
So, let's just look at "Dark"
and "Lights Out."
"Lights Out". No EQ.
00:30:07
"Dark". A little bump here at 2 kHz
and a little bump at 7.5 kHz.
00:30:16
And what did I do today?
Well, something very different.
00:30:21
I have a cut at 200 and a bump here
instead of 2 kHz.
00:30:26
A bump at 3.6 kHz.
00:30:28
So, actually, that bump bit
falls in between.
00:30:32
This one and this one
today was this one at 3.6 kHz.
00:30:36
That's very different.
00:30:38
Then today we did "Lights Out"
and "Lights Out" looked like so.
00:30:44
We added just a little cut at 400.
00:30:48
This one from when I actually
did the record, no EQ.
00:30:52
No EQ versus
flat, Linear Phase.
00:30:58
In this software there's a difference.
00:31:00
This flat is an option that I will use
where I simply insert the EQ
but don't touch it.
00:31:06
This will thin the low end a bit
and brighten the top end a bit
as if it's kind of a teeter-totter
double Shelf situation,
but in this case I didn't do that.
00:31:16
I kept the mix 100%.
That's a rare day.
00:31:20
I'm not someone that believes that
there is some purity to mixes.
00:31:24
I'm someone who's looking for
a musical result
which is captivating and engaging.
00:31:29
I respect the mixes
as much as I can at all times,
but I don't over respect them to the point
where I'm afraid to play with them.
00:31:38
So if that one didn't get any digital EQ,
it just got the analog
treatment of the day,
then, cool.
00:31:45
So let's have a listen to kind of
show the difference between
where the mix was
and where we ended up today.
00:31:54
And then let's look at where we
ended up today versus the actual record
done on a different day
with maybe some feedback
or just me being in a different place.
00:32:05
Okay, so here's where we ended up today.
00:32:13
And the mix gained up 3.7 dB.
00:32:22
Now I'm just going to click
between the two.
00:33:03
So it's very subtle
and
we've clarified some things,
there's a little more vocal pop,
there's a little more low end clarity.
00:33:12
There's also a little more punch.
00:33:14
There's more punch in what comes
out of my work than what came in,
which is a key component to my work.
00:33:21
We managed to increase
the size and the space
while respecting everything
that was important,
upgrade the punch,
and get it to be louder.
00:33:29
That's a lot of positives
without a lot of negatives.
00:33:34
So let's look now at
where we are today
versus this file here
which is actually the released file.
00:33:44
Let's take it to the top.
00:34:02
The other thing about what
we've done today is it's
a lot brighter in that midrange area.
00:34:10
I did the kind of larger gain boost
that I would normally do,
I did two clicks instead of one,
which is 1.5 dB.
00:34:19
And my notes say that it was just
the 80 Hz Shelf,
the 3.5 kHz, 1 click, and the 16 kHz.
00:34:27
Let's take that down.
00:34:33
That's the file that's released,
and here's us.
00:34:42
Let's go to the chorus.
00:34:54
It's super-close.
So the only difference there
is the two digital EQs
on the two different days.
00:35:00
The point being: this record can sound
great a bunch of different ways.
00:35:05
I am not under any pressure
to make one result,
I'm under pressure to respect what's there
and to enhance what's there
in a way that is in line with the artist.
00:35:16
And thinking back on this record, I recall
that they were thrilled with the mixes,
thrilled, thrilled, thrilled,
so that meant that at the time
I would have been much more conservative
about what I was doing than I did today.
00:35:31
Today I've got
'lights, camera, action'
and it's morning, I don't normally
work at this time of the day,
so I'm brightening and I'm pushing
and I'm putting lipstick on the pig,
and it wasn't really necessary.
00:35:45
And when it comes to "Dark",
loud was necessary, but closer to
the mixes is actually what went out.
00:35:53
Let's just listen quickly
with this gain up to "Lights Out".
00:35:57
Here's today.
00:36:02
And the release.
00:36:08
So, if we go back, we remember that
I just said this EQ was inserted
and there was a cut in the low mids,
and the insertion
actually brightens and thins.
00:36:19
If we take that out we're probably
going to be a whole lot closer.
00:36:34
Loud, respecting the mixes,
not too pop, you know?
Really juicy and fat in the bottom,
but a punchier result.
00:36:43
So, when you can make something
louder and more punchy,
and respect what's there, that's a winner.
00:36:49
Let's just compare "Lights Out"
to the mix.
00:36:52
Let's go with the mix with +3.7,
which might need to be adjusted,
and then we'll just go
between that and the product
because we're now pretty close.
00:37:04
Here's the mix.
00:37:21
What went out was a beefier result,
and I forget if there was
a conversation about that,
or if that was just what I felt
was appropriate at the time.
00:37:28
Years and years ago when I
would spend time as a musician
in recording studios
that were proper studios,
you would be in the
control room, of course,
and then you would be in the live room,
and then you would go and get coffee
or water or a snack.
00:37:41
And when you walked down the hallway,
you would hear what was playing
with the door open or closed.
00:37:48
But you would often be able to hear
what was playing in the hallway,
and as most people who have been
doing this for some time know,
but you may not know,
that's a really great place
to listen to music;
in the hallway while you're doing
something else.
00:38:05
Your brain goes to
a totally different place.
00:38:08
It's a much freer place,
you're not caught up
in details and imaging
and a bunch of bullsh*t
that you thought was important.
00:38:16
You just hear music down the hall.
00:38:19
You hear it like you've heard music
down the hall your whole life,
and so what I like to do at this stage
is print the record
and
go watch TV
and leave the sound off,
or go make a sandwich.
00:38:36
And this structure allows me to do that
because I can go outside of the room
and the sound is going up
through the whole building.
00:38:44
And then once it's printed,
I'm going to come back down
and I'm going to do this all again.
00:38:49
I'm going to go through the tracks,
1, 2, 3,
I'm going to listen to the loud bits,
and I'm going to make sure
that it's right.
00:38:56
And I might do it a day later,
I might do it six hours later.
00:39:00
I want to do it from a different moment.
00:39:04
I want to get out of this moment,
I want to reset myself.
00:39:08
I want to come back in fresh
and I want to listen
the way that you're going to listen,
which is for the first time,
and I want to have that perspective.
00:39:16
So my day isn't hours and hours
of drudgery, it's in and out,
fresh perspective,
and when I feel like I've got it
to where I'm comfortable,
off it goes, I get some revisions,
and we go from there.
00:39:31
So that's the process
and
I hope that was helpful.
Once logged in, you will be able to read all the transcripts jump around in the video.
Hardware
- Mytek 8x192 DA
- Focusrite Blue 315 MkII
- Elysia Alpha
- Fairman TMEQ
- Pacific Microsonics AD
- Waves L2 Limiter
- Crane Song HEDD
- Bricasti M1
Software
- Sequoia

Award-winning Mastering Engineer Brian Lucey is one of the most prominent Industry Engineers and has worked with renowned artists such as Depeche Mode, The Black Keys, Arctic Monkeys Liam Gallagher, Royal Blood, Marilyn Manson, “The Greatest Showman” and more.
He is well-known for his philosophical approach to mastering, mainly focusing on emotions, feelings and how your body responds to the sound.
Brian believes that mastering is an important part of the music creating process and that it should have an immediate impact on the listener while also maintain a timelessness aspect, that "the world will judge us by forever".
If you've watched Brian's video on pureMix, you will understand that a great mastering engineer knows how to combine subtle technical moves in order to deliver the artist's music to the world in the best possible format.
The Black Keys
Liam Gallagher
Shania Twain
Depeche Mode
Lucinda Williams
Parts of this site and some files are only accessible to pureMix Pro Members or available to purchase. Please see below our membership plans or add this video to your shopping cart.