
F. Reid Shippen Mixing Dierks Bentley
02h 18min
(49)
Grammy Award Winning Engineer, Mixer, and Producer, F. Reid Shippen, has made a name for himself in the mixing world through working with some of the world’s most respected artists across a wide variety of genres.
You can hear his work on records from Death Cab For Cutie, Cage The Elephant, Neil Young, The Jonas Brothers, Backstreet Boys, Eric Church, Johnny Lang, Chris Tomlin, Dierks Bentley, and the list goes on.
In this pureMix.net Exclusive, F. Reid Shippen opens the multitrack of Dierks Bentley’s “Drunk On A Plane” to dissect the choices he and the producers made during the production and remixes the song in front of you to explain his thought process, workflow, and techniques that have helped him achieve success as a first call mixing engineer.
Learn how Reid:
- Sets up his sessions before he starts mixing
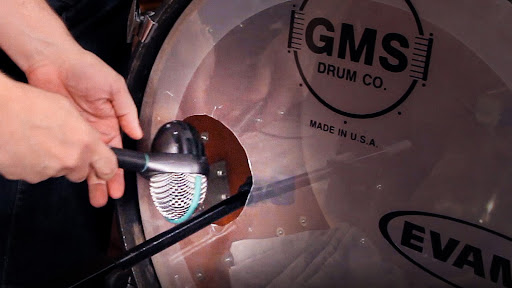
- Engineered the drum session
- Turns a single shout vocal into a crowd chant
- Adds multiple layers of drum samples to create powerful tones that cut through the mix
- Uses the Haas effect and spatial processors like Crystalizer and the Cooper Time Cube to extend guitar elements outside of the speakers
- Creates Ambience using Drum Room Mics and Drum Samples
- Sidechains Background vocal effects to the dry send to avoid masking the dry signal.
And learn his philosophies on work hours and working with assistants.
Watch F. Reid Shippen mix Dierks Bentley’s “Drunk On A Plane”. Only on pureMix.net
Parts of this site and some files are only accessible to pureMix Pro Members or available to purchase. Please see below our membership plans or add this video to your shopping cart.
Once logged in, you will be able to click on those chapter titles and jump around in the video.
- 00:00 - Start
- 00:19 - The Song
- 01:54 - Reid's Setup
- 04:35 - The Rough Mix
- 09:04 - Clean Up And Organize The Tracks
- 11:52 - Listen To The Vocal
- 12:45 - Combing Compressors
- 13:34 - Vocals
- 21:20 - Analog Vs Digital Tools
- 22:52 - Drums
- 23:16 - Overheads
- 25:00 - Room Mics
- 28:53 - Kick
- 34:44 - Snare
- 39:31 - Toms
- 40:56 - Outboard Gear
- 43:39 - Color And Strip Silence
- 45:08 - Drum Loops
- 45:39 - Bass
- 50:55 - Parallel Compression
- 00:00 - Start
- 02:25 - The Signature Riff
- 07:49 - Rock Guitar
- 12:25 - Acoustics
- 18:01 - Stereo Bus
- 19:23 - Getting The Vocal To Fit
- 21:02 - Dynamic Shifts
- 24:39 - A New Point Of View
- 25:21 - Effects
- 26:59 - Create Reverb With Samples
- 28:20 - Printing The Vocal
- 29:18 - Vocal Chain
- 34:25 - Printing Analog Returns
- 35:00 - Additional 2 Bus Processing
- 38:13 - Listen For Problems
- 40:52 - Background Vocals
- 48:56 - Sidechain Vocal And Effects
- 00:00 - Start
- 00:0 - Automation
- 05:43 - Happy Accidents
- 08:25 - Subtle Differences
- 11:10 - Panning
- 11:59 - Vintage Warmer
- 13:02 - More Automation
- 14:11 - Edit Drum Transition
- 16:34 - Back To Automation
- 17:41 - Guitar Solo
- 22:35 - Fiddle
- 24:28 - Work Hours
- 25:06 - Working With Assistants
- 27:11 - Print Process
- 29:17 - Printing The Mix
Part 1 | Part 2 | Part 3 |
00:00:07
Welcome! My name is F. Reid Shippen.
00:00:09
This is my private mix room
in Nashville, Tennessee,
called Robot Lemon.
00:00:14
We're working on a track today
for an artist called Dierks Bentley.
The song is "Drunk on a Plane."
We cut this song on one of Dierks' records
a couple of years ago actually.
00:00:26
It was recorded at Ocean Way Studios
in Nashville, with a live band.
00:00:30
It was an interesting track.
00:00:32
I actually recall...
00:00:34
And Dierks will probably deny this,
but he probably won't see this video.
00:00:37
I recall having a bit of an argument
in the studio right here with Dierks
and the producer, Ross.
00:00:45
Ross and I thought that this song was a...
00:00:47
like, a total hit, and Dierks
didn't even want it on the record.
00:00:50
And we had to kind of fight him on that,
which was probably a good idea
because it turned into
maybe one of his biggest hits.
00:00:56
It's a multi-platinum single
and it has become a mainstay in his shows
and it's a really great, fun song
that we all love now.
00:01:03
Dierks, you should listen to
your creative team!
But it was a really fun song.
00:01:10
I mean, it's a tongue-in-cheek,
just a blast song to listen to,
and it was a fun song to mix,
and we got to do
a bunch of fun stuff on it,
so I'm going to walk through some of that
and try and recreate what I did
a couple of years ago on this mix.
00:01:25
We recorded this, like I said,
at Ocean Way Studios in Nashville,
which is a really fun place to work.
00:01:30
A big church with a massive...
00:01:32
I think it's maybe actually
the largest Neve in existence.
00:01:35
100 channels? 96 channels?
It's large! It's a big Neve 8068.
00:01:40
We cut to Pro Tools
through Burl converters.
00:01:42
The producer, Ross,
also has Pro Tools at his place,
so I think what we ended up doing
was cutting in the studio, editing.
00:01:49
He added some stuff,
some programming he brought here.
00:01:51
Maybe I added some stuff
as I was doing it.
00:01:54
My playback system
is Pro Tools HDX.
00:01:58
My console is an SSL,
an old SSL 4000 born in 1984,
which is before pretty much everybody
that's watching this video!
But it's still going strong, relatively.
00:02:12
And as you can see, there is
a fair amount of outboard gear.
00:02:16
I'm kind of a weirdo.
00:02:17
I grew up using a lot of outboard gear,
and as I progressed
through the way I like to work,
I tried to figure out a hybrid workflow
that allows me to use the computer
and the console and the outboard gear
to maximize the best advantages
of each, I think,
while minimizing the problems,
so, my setup is a little bit bizarre.
00:02:39
I'm going to try and explain
how that works.
00:02:42
All the playback comes from the computer.
00:02:44
There are certain chains
that I use that are...
00:02:49
Let's call them analog plug-ins, right?
There's an analog plug-in chain
on the console
for snare drums
and for overheads
and for bass and for vocals.
00:02:59
I have the option, if I want to,
to run, you know, my overheads
through a pair of 1178s and some SSL EQ,
or I have the option to run my snares
through multiple compressors,
and I like to run vocals through a bunch
of different compressors
and combine them to get the timbre
that I want on the vocals.
00:03:15
And then, that all
goes back into Pro Tools
and will eventually get printed
into Pro Tools.
00:03:20
And the Outputs of Pro Tools
come back into the SSL
for some parallel compression
and some Mix Bus compression
that also ensures that as I work
I'm listening through the path,
through the converters.
00:03:33
It's going through the converters
sometimes twice,
and I'm listening to
the end result of that,
so anything that the conversion
would've done to the audio
is getting corrected by me
just naturally as I mix.
00:03:43
I'm making the decisions
based on the final sound of it,
and that's actually something
that I think is really important.
00:03:49
I print to a Lavry Gold converter
and I make sure that I monitor
through my Dangerous D/A
what's coming off the Lavry.
00:03:56
I'm always listening to the final product
because I want to make sure
that any decisions I make
are exactly what I'm hearing.
00:04:02
When I get happy with the mix,
we will stop and do something
that we call rendering,
which is essentially printing
a lot of the outboard stuff into Pro Tools
so that it exists In The Box.
00:04:16
If analog gear goes haywire,
or if we have to recall a song
four years later,
we've got most of that stuff
printed into The Box.
00:04:24
And then it plays back through
a couple of parallel compressors
and some Dangerous stuff on the 2-Bus,
and then it gets printed high-res
to another computer.
00:04:34
The first thing I do when I start mixing
is listen to the rough mix,
because even though I tracked this
and I knew what was on there,
it had gone out of my hands and had gone
around to a million different people,
and you never really know
what someone is listening to,
but you do know that whatever
they're listening to, they're used to.
00:04:50
I wanted to make sure
I was back on the same page
as everyone in the production process,
and the way to ensure that
is to listen to the rough mix
that everyone's been listening to.
00:04:57
Also, I always listen to the rough mix
because it's the only way to ensure
that you've got all the tracks
that you were supposed to get.
00:05:05
Sometimes I get tracks from people
and I can hear something
on the rough mix that was missing
and I want to make sure
that they took that out on purpose,
or whether somebody just forgot to send me
an acoustic guitar or something.
00:05:15
So, my first pass is always
listening to the rough mix.
00:06:51
Let's talk about rough mixes.
00:06:53
Especially in Nashville
a lot of the producers are songwriters,
and what songwriters want to do
is they want to make their song
sound as exciting as possible,
and they want to crank the vocal up
because, especially in country music,
the lyrics are very important.
00:07:06
When you're doing a Foo Fighters record,
you can tuck the vocal
and it still rocks and it's still fine,
and you if you missed a couple words,
you just read the lyric sheet.
00:07:13
But when you're trying to get a song cut,
you want the vocal to be really loud
so that the artist can hear
all of the lyrics,
because they're paying
attention to the lyrics.
00:07:21
And what happens is everybody starts to
listen to that and fall in love with it,
and it goes around for,
like, six or nine months,
and then when it's time to cut the song,
everybody is in love with this rough mix
that is horribly distorted
with an incredibly loud vocal,
and that's what passes as "exciting."
So sometimes it's a real challenge
to take something that somebody hands you
that everyone is in love with
because it's a great song,
or because it's a great artist,
and not necessarily a great mix.
00:07:47
But they're used to it, and now all
of a sudden you got to deliver something
that's going to pass
your quality control muster,
and it's got to be okay with the labels
and the streaming services
as far as distortion and volume
and all of that stuff.
00:08:01
But it's still going to try
and be as exciting as the rough mix
that everybody's been listening to,
even though the rough mix sounds
like it's been through a Ratt pedal.
00:08:07
As a plea for all the mixers out there,
don't over-crank your rough mixes.
00:08:13
Like, they're still going to
love the song.
00:08:15
Just do us a favor and give us
a little bit of room to work.
00:08:18
As we heard on this song,
this rough mix is really good.
00:08:21
We're really fortunate in Nashville
to have amazing players.
00:08:24
These guys played this live on the floor.
00:08:26
It probably got a little bit of editing,
it got a little bit of programming.
00:08:29
Dierks is a great singer,
and the song is pretty much together,
so then the trick for me becomes, like,
"How do I make it? How do I focus on
the interesting parts of it?
How do I make it emotional?
How do I make it feel really good?"
And then keep it in the spirit
of the rough mix,
because I know it's going to get
compared to the rough mix.
00:08:46
You get any group of mix engineers
together and give them alcohol
and they'll end up complaining
about rough mixes,
but, to Ross's credit,
this rough mix is really good!
So it lets me know what's going on
in the song and what's important,
and then I can kind of decide
where I want to start.
00:09:04
I've worked with Dierks for a long time
so I kind of know his vocal,
but I'll almost always
start with the vocal first
just to make sure that it's cool,
that there's no big problems.
00:09:16
I should tell a secret.
00:09:18
One of our secrets is I have
an amazing assistant, Dan Bacigalupi,
and he will pull in the tracks
from the producer
before I get to them,
and one of the things that he does
is he goes through the vocals
and uses iZotope RX
to make sure that any stray sounds
or weirdnesses or bad cross-fades
or anything like that
get obliterated from the vocal,
like, you know...
00:09:39
It's fairly painstaking work,
but it ends up being worth it
because if you have a vocal
and in the first verse the artist hears
a bad edit or some kind of weirdness,
they won't hear anything about the mix
for the rest of the song.
00:09:53
All they're going to freak out about
is the vocal is not right.
00:09:56
It's definitely not worth it,
and especially when you're crushing
some vocal compression on something,
it brings up all these artifacts
and it brings up noise floors,
and it's just something to look out for.
00:10:06
So Dan does me the favor of
what we call setting up the song,
and he'll go through and he'll color-code
all of the different elements of the mix
so they're really easy to tell.
00:10:17
And he'll clean up tracks,
and he'll clean up the vocal
and make sure that everything
is ready to go.
00:10:21
So the beauty about that for me
as I get to just walk in
and hit Play and be in a creative
mindset instantly
instead of being in a
maintenance mindset first,
and then having to switch over
to creative.
00:10:32
I feel like I'm really, really fortunate
to have that.
00:10:35
If I didn't have Dan, I would possibly
consider separating those things.
00:10:41
Maybe coming in and setting up
a couple of songs and getting them ready,
and then going to have lunch
or going to have coffee
or doing some email or doing something
that just kind of separates my brain
from the technicality of that,
so when I come back in I can listen to
the song, I can listen to the music,
and not be listening to individual tracks
or individual pieces.
00:11:00
I used to waste a lot of time
in the studio,
like, trying to get
everything cleaned up,
and I realized that I got used to
the way stuff sounded
when I wasn't even listening to
the music and it would hurt the mix.
00:11:12
So if you can't have somebody
help you set your tracks up,
which I know is, like, a huge,
awesome thing that I get to do,
at the very least try and separate
the setup part of it,
the housecleaning part of it
from the actual creative mixing
part of it.
00:11:28
Put it in a palate cleanser,
listen to some music that you love
before you start mixing,
just anything to snap your brain out of
left brain mode into right brain mode.
00:11:36
I find that to be very helpful.
00:11:38
And while you're mixing too, honestly.
00:11:40
We might as well talk about that,
like, take some breaks,
try and vary some stuff,
and try to distract yourself
every once in a while
so that you can notice
the stuff that's important
and not hyperfocus
on the stuff that isn't.
00:11:50
The first thing I'll do
is take a listen to the vocal
just to kind of get the general
character of it, see where it is,
see if there are any major problems
that I have to fix,
any noises, any distortions
that I have to hide,
anything like that.
00:12:12
Artists love it when you just solo
their vocal and play it for people,
so don't tell him I did that.
00:12:17
Another thing is I notice that this vocal
is cut in verses and choruses.
00:12:20
That can sometimes mean that
they cut the verse in the studio
and they cut the chorus
in a hotel room, on tour,
because they didn't write
the lyric until later, and vice versa,
so I make sure I go through and check.
00:12:42
It sounds pretty even.
00:12:44
Weird thing Reid does #1:
one of the things that I've done
for a really long time
that is incredibly inconvenient
but I really, really like
is I love the way different compressors
sound on different vocals.
00:12:57
I'm fortunate enough to have
a handful of really cool compressors
that I use on vocals:
1176 Blue Stripes,
an old Langevin compressor,
a Retro 176.
00:13:09
I split the vocal out
to multiple compressors
and then I listen to them individually
and find a combination of them
that I think works.
00:13:19
Some of them are dark,
some of them are bright,
some of them are really spitty
and compressed,
some of them aren't.
00:13:25
Like, I just find that
when I combine those
I get more character out of the vocal
than if I'm just using one preset
or if I'm just using a plug-in.
00:13:34
However, sometimes
that doesn't work at all,
and sometimes the best way to do it
is to put a plug-in on the vocal
and skip all of that stuff,
and sometimes it is.
00:13:43
Fortunately, I got this room
set up in a way that I can do either.
00:13:46
What I do is I will audition
different vocal compressors.
00:13:51
So what's happening now
is the lead vocal is coming out
of Pro Tools.
00:13:55
I will filter, you know,
some basic stuff in Pro Tools;
low end, I'll make sure
there's no rumble in it,
like, any EQ into the compressors
that I want to do,
and then it breaks out onto the console.
00:14:07
I get to pick between a couple
of different compressors
and see how they combine
and see which one works.
00:14:12
I've also got some Maselec EQ in my SSL
that I can use on the vocal,
and I have two EQs over here that I use.
00:14:19
One is an old Pultec and one is a Retro.
00:14:22
The vocal actually also goes through
a Millennia Origin
for a little bit of tube color
and a little bit of EQ as well.
00:14:28
What I'll do is I'll listen to
a couple of different compressors,
find the combination of compressors
that works for me,
tweak the EQ a little bit.
00:14:35
Air and body on the Pultec, on the Retro,
and some more surgical stuff in here.
00:14:39
And then I'll print the vocal
back into Pro Tools
to keep the sound the way I want it.
00:15:13
Basically all that is is me listening to
four, five different compressors,
seeing what they do to the voice.
00:15:19
Sometimes, you know,
one has got a little distortion,
one has got more attack,
one is a little rounder, a little fuller.
00:15:25
I combine those like you would combine
multiple microphones on a source
to bring, like, the best parts
of each of them,
and I find that it gives you
a really cool character on the vocal.
00:15:35
The first thing I usually do with
the vocal is do a general pre-EQ,
is what I call it, it gets rid of rumble.
00:15:40
Let's look for some problem frequencies.
00:15:58
This vocal is really good,
Dierks is a great singer
and he knows how to control himself.
00:16:03
Sometimes, if I have some problems,
I find that this plug-in is super-useful
for getting rid of crazy
frequencies in vocals,
especially up in the high midrange.
00:16:28
Whoever designed this plug-in is a hero!
It's a great, great tool.
00:16:32
It's a great tool.
00:16:33
Actually, nobody should know about it.
00:16:35
Cut this from the video.
00:16:37
This is only mine!
Thank you, Chris,
for turning me on to this plug-in.
00:16:42
Soothe is really useful.
00:16:44
It's basically a million
multiband compressor
that you can use to fix problems
on just about anything,
but I find it really useful on vocals.
00:16:51
After that, the vocal goes out
and into the SSL.
00:16:55
It gets split into a bunch
of different parts.
00:16:58
It's coming back through
four compressors right now.
00:17:00
Two Blue Stripe 1176s;
one is really dark
and his name is Darth,
one is really bright
and his name is Obi Wan.
00:17:08
A Retro 176,
which I love because it's kind of, like,
just full and super-high quality.
00:17:13
An old AM7A, a Langevin compressor
that just has, like,
a really interesting character.
00:17:17
So what I'm going to do is I'm going to
just play through all of these
and then we'll listen to them together.
00:17:23
So the first is going to be Darth,
the 1176.
00:17:35
What I really like about this one
is it has a really nice attack to it,
it really puts the vocal upfront.
00:17:40
Most of my vocal compressors
almost never move.
00:17:43
If I don't like the way one sounds,
I'll use a different one.
00:17:45
These settings have just been...
00:17:47
Over the years, it seems to
just keep coming back
to the same setting over and over.
00:17:52
We did a few weird modifications
to the 1176s.
00:17:57
It has a little switch that...
00:17:58
I don't even know
what the modification is,
it just makes it sound, like, super-crazy,
so sometimes I'll switch that on and off.
00:18:05
I use them more for just the character
of the Blue Stripes.
00:18:08
They sound unique and different.
00:18:10
The second compressor is a Retro 176.
00:18:23
What I really love
about the Retro compressor
is it has kind of like an open,
honest quality to it.
00:18:30
It just has a really high-quality thing,
and then this is the other 1176.
00:18:39
So that one, as you can tell,
it doesn't have a lot of attack.
00:18:43
It's got a fair amount of compression,
so the attack is going to come
from one of the other compressors
and then this is going to fill in
and put some body in it.
00:18:50
And then this is the Langevin.
00:19:00
I don't know how to describe that one.
00:19:02
It's got a weirder,
different response to it.
00:19:04
Like, it's kind of
medium-fast, it sounds different.
00:19:08
And it's got a little bit of clipping
on it too, to give it a little character.
00:19:11
So what I end up doing is blending
a couple of those compressors together
and get something like this.
00:19:25
Now is when things get even crazier,
like, my full insanity comes to light.
00:19:31
These compressors sum,
they go through a Pultec, the 2A3 EQ,
the Millennia Origin.
00:19:38
Then back into the console
through the console compressor and EQ,
which is, in this case, for the vocal
channel, a Maselec EQ card
that was custom-made for the SSL.
00:19:48
It lets me have, like, 30 kHz on top,
and it lets me do
a little bit of surgical EQ.
00:19:52
Then it goes back into Pro Tools.
00:19:55
When it goes back into Pro Tools,
it passes through a few plug-ins.
00:19:59
On this one it actually
was going through a little bit of EQ
with the Trident plug-in from UAD.
00:20:06
It's coming back in
from the SSL right here
and it's getting
a little bit of limiting on...
00:20:12
A little more than a little bit
of limiting.
00:20:14
L1 limiter and RVox.
00:20:16
As you can tell,
they're not hitting it very hard.
00:20:24
If you listen as I bypass these,
you'll see it's more
of a character difference
— at least for the L1 —
than it is anything else.
00:20:39
There's no attenuation going on.
00:20:41
The L1 changes the way it sounds.
00:20:43
We've all figured out that a lot of these
plug-ins change the way things sound,
and it just sounds cool,
so that's why it's on the vocal.
00:20:49
What I do at this point is
I shut the vocal off.
00:20:52
I have an idea of where
it's going to be,
and now I need to go
and work on the track.
00:20:57
I generally know where he's going to sit.
00:21:00
For the time being
I'm going to shut the vocal off,
and then I will go do some work
on some other parts of the tracks.
00:21:05
And as I go through the song,
I will continually come back and forth
checking the vocal,
especially when you're putting in
midrange instruments
to see if you can make room for it.
00:21:15
But because I started really
as a drummer back in the day,
I'll start with drums.
00:21:22
If you're curious why I have
a UAD Trident EQ In The Box
when I have all these other EQs
available to me,
it's basically because I can.
00:21:32
One of the things that I really like
about using digital stuff
is that, in my opinion,
the best digital stuff
brings out the coolest vibes,
the coolest character
of the analog stuff.
00:21:44
I don't really care if I go through one EQ
or I go through twenty EQs,
I just keep messing around with it
until it sounds right to me.
00:21:51
I suppose that if I wanted to
get out of the creative space
and start thinking technically,
I could look at what this EQ is doing,
and I could turn it off, and I could go
over there and I can mess with that,
but I'm just doing it
the way it feels good.
00:22:03
If it feels good to put some air
on the Pultec
and it feels good to put some low end
and maybe a little midrange on the Retro,
and then I felt like I needed
something else at, like, 100 Hz,
if turning the knob on the SSL
doesn't do it, I'll throw a plug-in on it.
00:22:18
And again, the L1 limiter,
it's not really doing any limiting,
but putting like a low midrange thickness
into the vocal that I really kind of like.
00:22:25
These are all just tools.
Everything is just a tool.
00:22:27
It's how you use it, and as long as
it gets you to the result that you want,
it doesn't particularly matter what it is.
00:22:32
I'm really lucky to have access to some
stuff that has some really cool character,
but I don't think that not having that
is going to limit you.
00:22:39
The big thing is just keep experimenting
until you get it right.
00:22:42
I think the worst thing you can do
is be, like, "That's good enough."
You have to keep trying
and keep trying and keep trying
until it's really, really great, you know?
Just don't stop until it's great.
00:22:52
Drum mixing.
00:22:53
I cut these drums.
00:22:55
I'm pretty familiar with how they sound
and I did some things on purpose.
00:23:00
And again, bear with me.
00:23:02
This was a long time ago, so I may
discover stuff as we go through it.
00:23:06
I'm going to contradict myself
in a minute, but bear with me.
00:23:08
I like to consider the drum kit
an entire instrument,
like you consider a symphony orchestra
an entire instrument,
and it's not just a collection
of separate instruments.
00:23:16
The first place I always start with drums
is the overheads.
00:23:20
I want to try and...
00:23:21
When I'm recording,
I want to try and get a picture
of the entire drum set
in the overheads
as much as humanly possible,
not just cymbals.
00:23:28
And whenever I mix,
I'll always start with the overheads.
00:23:31
On this song I cut
stereo overheads and a mono overhead,
which was probably a U47,
and a hi-hat mic,
just because every time
I don't cut hi-hat mics I regret it.
00:23:42
And then every time I do cut
hi-hat mics I never use them.
00:23:45
We'll take a listen to these
and see what's up.
00:24:08
A couple of important points:
when I cut overheads
I make sure that I measure them.
00:24:13
They're all equidistant
from the center of the snare drum,
that kind of centers the snare.
00:24:17
Another thing that's really important,
and I do this when I track,
but I also do it every time that I mix,
is you have to check polarity
on everything.
00:24:25
Especially if you're combining stuff.
00:24:26
So we've got a mono overhead
and a stereo overhead.
00:24:31
It never hurts to just throw a plug-in up,
flip the phase...
or flip the polarity, rather.
00:24:45
I like the way the snare sounds
when it's this way
as opposed to the other way,
so that's fine.
00:24:50
That's something that's really crucial,
and I actually look at that
when we get down to
fooling around with kick drums.
00:24:56
That's super, super-crucial.
00:24:57
That's about it for overheads.
So then, generally what I'll do after that
is just dig through the million
different room mics that I cut
and see what kind of combination
I want to do on those.
00:25:48
Well, I know
that that Massenburg plug-in,
which is not coming up,
was fixing this Left-Right balance,
so I'll do that right here.
00:26:03
Normally I would go through all of these
and double-check the polarity on these.
00:26:06
I'm not going to do that right now
because I did it while I was tracking
and I know that they all match.
00:26:12
I'll go through these mics.
There's a bunch of weird mics,
so let's listen to these real quick.
00:26:15
The 'Crotch' mic is a mic
basically in the drummer's crotch
between the snare drum
and the kick drum.
00:26:25
The 'Bullet' mic is a Green Bullet
that's taped to the mic stand
where the mono overhead is.
00:26:38
The 'Close Rooms' are Coles microphones
out about 6 feet from the drum kit,
going through a Chandler TG1
and an Elysia Nvelope 500 series.
00:26:53
It's a really great way to get, like,
really big rooms or really small rooms.
00:26:57
You can change it on the fly and it really
gets the drummer amped-up too.
00:27:00
The 'Mono Room' is just... I think it's
a U48 about 12 feet up from the drum kit.
00:27:11
It was being obliterated
through something, probably an 1176.
00:27:15
The 'Hot Carl'.
00:27:17
Do not Google that!
Actually, you can Google it
if you want to,
but the track names are not
necessarily endorsed by pureMix.
00:27:25
The 'Hot Carl' is an old Ampex
mono High-Z mic
running through a guitar pedal
for distortion.
00:27:39
And the 'Far Room', because we were
at Ocean Way and we could,
is pair of M50s
out in that amazing room.
00:27:50
Great room, and some of the best
drum room mics on the planet.
00:27:53
M50s are just beautiful.
00:27:54
I cut all this crazy stuff.
00:27:56
Most of the time I don't use it.
00:27:58
Again, because I cut this
and we got used to the way
the drums sound
and they sounded
really cool on the rough,
and this was kind of about
the blend that we used,
I just left it alone.
00:28:07
All of the room mics
go through a path right here,
and that path is going out to my SSL
and it's going through a little bit of EQ
and a pair of PIE limiters
that just sound really great on rooms.
00:28:20
It kind of packages
the whole thing together,
and then I noticed that
coming back through here
I also started hitting it with a Fatso.
00:28:40
And that just kind of amped up
the gain a little bit,
kind of brought the character forward.
00:28:44
I'm guessing that I probably
added that later as I was mixing,
when I wanted to push the drum rooms
forward a little bit.
00:28:50
The rooms sound decent,
the overheads sound decent.
00:28:53
A lot of times what I'll do
is I'll take the overheads
and kick in the kick drum
and kick in the snare drum
to check the polarity.
00:29:00
I'll run you through the chains on those.
00:29:02
On this song I'm actually just using
some plug-ins on the kick drum,
so let's check that out.
00:29:19
Part of the vibe on this song
was that it's a little cleaner
than just a rock song,
so a lot of the drums
ended up being drum samples.
00:29:30
Now, like everything else I do,
this thing is weird.
00:29:33
This is how I do drum samples:
we print a trigger,
which is basically just a spike
on the kick drum.
00:29:45
It's just a generic kick drum sample.
00:29:47
I will duplicate that a bunch of times.
00:29:50
What I like to do is go through
and just try a bunch
of different drum samples.
00:29:54
I can sometimes spend
a fair amount of time doing that.
00:29:57
This is what I use
for drum replacement,
this is the SPL DrumXchanger.
00:30:02
This is the piece of gear I use
for triggering drum samples,
and the reason why I love this thing
is this section right here.
00:30:09
It lets me check my phase or polarity
on every drum sample
and it lets me change
the start time of the sample.
00:30:16
So I can sit here and listen to
the real kick drum versus the sample
and make sure that they line up.
00:30:28
Pretty subtle.
You will not hear it in this song
because I'm mainly using samples.
00:30:32
It makes all the difference in the world
when you're using multiple drum samples
to make sure that everything
is hitting at the same time
and that their polarities are corrected.
00:30:40
It's all the difference between
big, tight low end,
and stuff that's phasey
or washy or strange.
00:30:46
The way I use drum samples normally
is to never really replace
a kick drum or a snare drum,
but just to augment certain things
that I want to bring out in the mix.
00:30:56
On this song, because we wanted it
to be a little cleaner than normal,
I leaned more on the drum samples
than I leaned on the actual kick drum.
00:31:04
We will go through the drum samples.
00:31:22
You see there's different characters.
00:31:24
Some have air, some have tap,
some have, like, just low end thud,
and then I combine all of those
with the actual kick drum...
00:31:42
...to get an overall kind of
crazy-sounding kick drum sound,
but when you kick in
the overheads and the rooms...
00:31:59
It kind of starts to fit together.
00:32:01
When the rooms are off,
it sounds ridiculous.
00:32:03
It's like an overwhelming kick sound,
but when you put it all together
it starts to make sense.
00:32:07
What I'm trying to do on this song
is go through a process
where I'm looking for
the right combination.
00:32:12
It's a little bit difficult to
show it here
because what I would end up doing
is just cycling a part of the song,
kicking all the mics on.
00:32:19
You know, just messing with levels
and messing with different stuff.
00:32:22
If I'm going to lean on samples, what I
like to get out of the real kick drum
is the actual attack of it
so you can hear the articulation
of what he was playing.
00:32:31
I went through the real kick drum...
00:32:37
I took that kick drum...
It was a little bit fat and boomy,
so I gated it.
00:32:46
Which actually just put
a little bit of tap on it.
00:32:48
I took some of the sustain off of it.
00:32:56
And then CLA'ed it.
00:33:02
So basically that's just the tap of it.
00:33:04
I wanted the body
of the kick drum in this song
to be fairly consistent,
so I leaned on the samples for that.
00:33:10
And if you look here,
you can see that there are
different kick sounds for the verse.
00:33:21
And that is because the verse
is mainly programming,
which I added one kick sound to,
and
then it switches
to the real drums in the chorus.
00:33:36
Let's see what this is.
00:33:48
That's just a kick drum
that's augmenting this guy.
00:34:04
And a lot of times,
to get a different character,
I'm seeing right here
that in the second verse
I added a sample
to the snare drum in the loop
just to make the excitement build
a little bit more into the second verse
because two verses
before a chorus is a lot, so...
00:34:27
So when we hit the second verse
it picked up with that clap sound
and a little bit of percussion,
and it just kind of got the track
going a little bit more.
00:34:34
The kick drum and the samples
are all actually
just going straight out
to the analog summing.
00:34:38
That's it.
00:34:39
There's no parallels on that,
it's just a straight kick drum,
mainly, again, because
it's mostly samples.
00:34:44
Snare drum.
00:34:46
Let's hear it.
00:35:01
Actually, we cut the real
snare drum with two mics:
one fairly bright,
and one kind of dull,
but when you combine them together
you kind of get the snap
and you get the body.
00:35:12
The main snare is going through
a little bit of Transient Designer
and a little bit of Neve EQ,
and then it's going out a Bus.
00:35:21
The Bus comes back here,
and the Insert is three channels
on the SSL.
00:35:27
Again, this is kind of like
the parallel compression thing.
00:35:29
The first channel on the SSL
is a Neve 33609 with the limiter in
and a Drawmer gate in front of it,
and what it basically does is...
00:35:37
is just get the attack of the snare drum.
00:35:41
The second one is a Manley EQ
and a Distressor,
and that's kind of, like,
the full snare sound.
00:35:47
And the third one is an Inovonics 201,
which is an old kind of weird limiter,
and for whatever reason it kind of
brings out the ghost strokes
and some of the articulations
that the drummer plays.
00:35:56
All of these are getting SSL EQ,
and to be completely honest,
they're getting a fairly extreme
amount of SSL EQ.
00:36:02
Dimed. 15 dB cranked on multiple bands.
00:36:06
It sounds horrible sometimes
when you solo it,
but it sounds great
when you get it into the track.
00:36:12
I'm going to just cycle
through those three
different snare sounds.
00:36:37
Again, what you just heard
was the attack,
the main full snare sound,
and the ghost stroke
kind of articulations.
00:36:44
I blend those on the console
with compression and EQ,
and then it goes back
into Pro Tools right here.
00:36:52
And then through
a little bit of a secret weapon.
00:36:55
This Send
goes to something called a Boom Box.
00:36:59
It is a dbx "Disco" Boom Box.
00:37:03
It's a subharmonic synthesizer.
00:37:05
The subharmonic synthesizer
comes back into this.
00:37:08
Now we'll have some fun
with some snare samples as well.
00:37:11
Here's a really fun trick
that I use a lot.
00:37:14
So
here we have the snare drum,
and right underneath it,
feeding through exactly the same chain,
is an '808 Clackkkk' impact.
00:37:27
It sounds like this.
00:37:32
And when you blend it in
with the snare drum...
00:37:39
It just gives it a really nice attack that
cuts through mixes really, really well.
00:37:42
You can just blend that to taste
once you get it going.
00:37:45
Again, same with the kick drums.
00:37:46
I'll throw up a bunch
of different snare drums
and just kind of mix and match
until I get something that I like.
00:37:51
Usually, again, it's different parts
of the snare drum,
and again, on this song,
because we wanted it to be
a little bit cleaner
and a little bit more "sample-sounding"
as far as the drums go
to match the loops in the verses,
I leaned on the samples
more than I usually do.
00:38:04
But let's see what we've got.
00:38:19
So essentially we've got
four radically different
kind of snare samples.
00:38:24
One of them is a bizarre room sound.
00:38:29
One of them is a thud.
00:38:35
One of them is like a high paper-like
kind of cut-through thing.
00:38:43
And one of them is a ring.
00:38:49
So when you combine all of them...
00:38:52
...you get this package.
00:39:02
And we'll listen to all that
in a second.
00:39:04
Another thing that I will always do
is I will always put crash samples
where the drummer hits crashes.
00:39:14
These will get barely used,
but again, sometimes when you
really need to make a chorus hit
or you need to accent something,
it's better to just push a crash sample
a little bit because you want the crash
but you don't want to feel the whole
drum kit jump up and come back down.
00:39:28
So I love having those in there all the
time. If I need them, I'll turn them on.
00:39:31
The toms were edited down
to just have the tom hit.
00:39:34
There's a lot of stuff
going on in this track
and I wanted to clean up
the in-betweens as much as possible,
so we're just using the actual tom hits.
00:39:42
The toms are going through my SSL,
and what I've got on the SSL
is I've got some EQ.
00:39:48
And I'll tweak this from song to song.
00:39:50
Right now on the toms
on the SSL we've got...
00:39:54
...a little bit of boost at 100 Hz,
a little bit of boost
down here at 200 Hz,
a little bit of attack up here,
around 4.5 kHz.
00:40:02
Actually nothing on the top,
and basically everything under 50
is gone on the filter.
00:40:09
That's got a little bit of...
00:40:11
a little bit of gating
and a little bit of compression too,
and the Insert has the Aphex.
00:40:15
There's an Insert with Aphex 204s on it.
00:40:18
Ryan Hewitt turned me on to those.
00:40:19
They've got the big bottom thing,
and they do a really cool thing to toms.
00:40:23
So, when I put that Insert in
they sound like this.
00:40:29
Way more attack, a little bit more low,
like, a little bit more curved.
00:40:33
I've also got a DaD Valve plug-in on these
just to add a little more character.
00:40:39
And then right beneath these
I've got some tom samples too,
which sometimes I use
and sometimes I don't use.
00:40:45
I just use them to kind of augment
the sound of the toms
and sometimes the sustain.
00:40:54
That's it for all the tom stuff.
00:40:56
To talk about outboard gear a little bit,
when I started assisting in this business,
you know, Pro Tools
was pretty much in its early form.
00:41:05
Everything we were doing was outboard,
so I got used to the way certain things
worked and certain thing sounded,
and then I got into a pattern
where I was just really curious, like,
"What would be the best on everything?"
So I essentially tried everything
and bought every piece of gear,
and, you know, tried this on that
and tried this on that,
and over the years
certain things just
seemed to, like, graduate.
00:41:25
1176s are great on almost anything.
00:41:28
They're fantastic on acoustics
and they're fantastic on vocals,
and they're ridiculous on bass.
00:41:32
I ended up with one particular 1176
that I always really liked on bass
and I realized that over the years
the setting that I kept
coming back to 99% of the time
was the setting
that's on the 1176 right now,
because it always worked great on bass.
00:41:47
Because I was fortunate enough
to be able to acquire
some of this analog outboard gear,
and I was fortunate enough
to be mixing most of my time,
I started to realize, "Well, I use this
on bass almost all the time,
and I never change the setting really."
It always kind of is in the same thing,
so now when I can put it on an Insert,
my console strip with the 1176
on an Insert,
if I need to change the way
the 1176 reacts on the bass,
I can just back the Send
coming out of Pro Tools to it,
or push it up,
or I can give it a little EQ,
or I can give it a little compression,
and I can shape the way
the analog gear reacts that way.
00:42:22
And I don't have to change or touch
the analog gear much
because I know that 99 times out of 100
it's going to be that setting anyway.
00:42:29
CLA is one of my heroes,
I know that he uses this workflow too.
00:42:33
He has found the things.
00:42:34
You just kind of find the pieces of gear
that work really, really great for stuff
and you kind of leave them on that stuff.
00:42:39
If you don't have a ton of analog gear
that you can do that with, that's fine.
00:42:44
The beautiful thing about Pro Tools
is now you can get a really cool
sound and commit it,
and then you can move that 1176
to a vocal and commit that,
and then you can move it over
to something else.
00:42:53
But if you're lucky enough to have
some of the pieces that I do,
most of them, in the outboards,
just stay stuck where they are
and I use them for what they are best at.
00:43:01
Those are a lot of drums,
so let's just take a random gander
at how everything seems to be working
as far as the live drums on the chorus.
00:43:28
Relatively bombastic,
somewhat sample-heavy,
and
kind of
great for this song, as it turns out.
00:43:35
At that point I look through
whatever else is going on here.
00:43:38
A lot of times
one of the tricks that I use
is we color-code everything.
00:43:43
If you can notice,
drums are blue,
percussion is brown,
bass is pink,
guitars are orange.
00:43:49
These guitars are weird.
00:43:52
Acoustics are blue,
keyboards are yellow,
vocals are dark blue.
00:43:57
That lets you hop around
and see exactly what's happening
in any given section of the song.
00:44:02
Something that really helps
when you have a lot of tracks
is seeing where the different parts
happen in the arrangement.
00:44:07
What I like to do is just use
Strip Silence real quick.
00:44:10
Cmd + U.
00:44:11
To Strip Silence on something like this,
the easiest way to do it
is just to zoom into this,
select,
and then you mess with these guys.
00:44:21
I give it a little bit of Start Pad.
00:44:23
I don't want to cut off any transients.
00:44:25
And a little bit of End Pad because
you don't want to cut off any tails.
00:44:29
Your Duration will determine...
00:44:31
well, you know, it doesn't actually
change anything.
00:44:34
And then this, the Threshold
determines what gets cut
or what doesn't get cut.
00:44:38
Because I'm just using this
for arrangement stuff,
I just want it in blocks.
00:44:43
I just want to see where the blocks
of action happen.
00:44:45
Now, if there is garbage in-between that,
maybe we'll go in and clean that out too,
but generally, I'm just using this
to see how the arrangement goes.
00:44:53
So we'll Strip Silence on everything
so that you can see,
"Okay, I can see real quickly
that these guys
are happening in this point
in the arrangement."
It allows me to jump around
and make sure I'm not missing something,
and just see where our dynamic
changes are happening.
00:45:15
There are some drum loops.
00:45:18
If memory serves, we actually cut that
on the tracking date,
with the drummer playing something.
00:45:23
Bounced it all down on the tracking date
and threw it into some programming.
00:45:28
I'm gating it just to make it sound
a little tighter.
00:45:39
Bass.
00:45:40
The bass runs through a chain
of stuff that I use.
00:45:43
First it's going to go through
two channels on the SSL,
two completely different vibes.
00:45:49
One of them is SSL EQ, compression,
and an 1176.
00:45:55
That will get attack
and some articulation.
00:45:57
The second one is an old
UTC passive EQ
with the low end dimed,
and a dbx 160 compressor
just to bring the gain back up.
00:46:05
And that gives you kind of like
a warm, round, full low end.
00:46:09
When I combine them,
I kind of get a really cool bass sound.
00:46:12
So I'm going to play the 1176 one first
and then the UTC,
and then both of them together.
00:46:28
As far as EQ,
the EQ is always feeding
into the compression.
00:46:32
Almost always is EQ
feeding into compression,
especially for instruments.
00:46:36
On the 1176 channel
we got a little bit of 100 Hz,
taking out a little bit of 800 Hz.
00:46:42
1.5 kHz, which is almost always
the attack on a bass.
00:46:47
A tiny bit more 1.5
up here in the top end.
00:46:50
And you'll notice on
just about everything that I do,
whether it's In The Box
or whether it's on the SSL,
there's going to be a low end filter
taking muck out.
00:46:57
Pretty much anything that's...
00:46:58
On the bass it's 20 and below,
but pretty much anything
that's 50 and below.
00:47:02
If you don't...
00:47:03
Especially when you're recording digital,
if you don't get rid of the muck low end,
it builds up really, really fast.
00:47:10
It messes with your headroom,
it messes with your compressors,
it does all kinds of stuff, so just,
you know, anytime you bring
something up, just solo it,
take your filter up until it affects the
sound and back it back a little bit,
and then let all that garbage go away.
00:47:25
So these EQs
are pretty much similar.
00:47:28
This one over here
has got a little less low end,
a little more low mid,
and a little less high end because
I'm getting the attack from the 1176
and just kind of, like, the bloom,
the low end thickness from the UA.
00:47:41
When you combine them, you get this.
00:47:50
I want more articulation out of that
and I want a little bit more control,
so what I'm going to add here
is this EchoBoy running with no delay.
00:47:58
It's basically just low end,
Saturation, using Cheap Tape,
and
a little bit of weird EQ down here
and some Saturation. The Output
Saturation, as you notice, is cranked.
00:48:18
And then I'm going to add a little
SansAmp for some growl.
00:48:32
And then just for fun
a little bit of Vintage Warmer,
which is a tiny bit of character
and a lot of gain.
00:48:45
And then, just because we can,
what I did on the bass down here
is I copied the bass channel that I had
and I put an Insert on it
that has a bass pedal
called Maleko B:ASSMASTER.
00:49:01
And it's almost kind of fuzz
and kind of dirty,
and it's kind of really radical.
00:49:05
So what I did was I recorded that
back into Pro Tools and got this.
00:49:14
So, when you combine those
you can kind of be able to blend
some of the attitude and some of the...
00:49:21
It lets it cut through a track
with the regular bass sound.
00:49:34
Now, it sounds radical,
and a lot of this stuff
probably sounds radical,
but the real trick is
I don't mix with everything soloed.
00:49:41
When you add this in to the track,
with everything else going on,
the radical moves are what
make things stand out.
00:49:46
Otherwise, if you're just trying to
make all of your instruments
sound great on their own
and you try and combine them,
they won't combine. You have to do
radical stuff to make them fit.
00:49:55
I mean, that's the whole key to mixing.
00:49:58
So you'll find yourself
doing really crazy EQ
that when you solo it
doesn't make any sense,
but when you put it in the track
it feels great.
00:50:04
The last thing I do on the bass
is this Send right here
is a parallel to an old RCA BA-25A.
00:50:11
It's a tube limiter.
It's right here, the 'Bass Parallel'.
00:50:14
I'll turn it on and off
for you to let you see.
00:50:17
It basically is just some
parallel compression
that just gives it a little more drama.
00:50:32
I like the way that brings out
just some, like, low end authority,
and some high end definition.
00:50:37
I found that a long time ago.
It's been a favorite.
00:50:39
Again, it's another thing
where the settings don't move.
00:50:42
I just control how much of it
I want from the Send.
00:50:45
That's it for bass.
00:50:56
And speaking of parallel compression,
I use parallel compression
on a lot of stuff:
drums, bass, vocals, all the time.
00:51:03
Sometimes on other stuff
depending on whether you need it.
00:51:05
On the drums, what happens is...
00:51:07
The drums, after we've done
all the processing,
all the samples and everything
that we've seen,
it comes back into the SSL
and it gets summed in the SSL.
00:51:15
So what it will get in the SSL
is it will get the 2-Bus compression
of the SSL,
and it also gets assigned to a second Bus
on the SSL called the Back Bus.
00:51:23
The Back Bus has a pair
of Distressors across it.
00:51:26
The Distressors are, again,
set in a setting that never changes.
00:51:30
In fact, I think that setting
came from Michael Brauer years ago
and it's fantastic.
00:51:34
That kind of smashes the drums
and then blends back in
to give me a unique sound on the drums,
and that Back Bus also goes through
the Stereo Bus compressor on the SSL.
00:51:43
So when you think about it, it's getting
compressed a couple of different times.
00:51:47
We'll listen to the drums with
and without Stereo Bus compression.
00:51:50
It makes a pretty big difference.
00:52:06
The parallel compression
makes a huge difference.
00:52:08
Now, I always use this.
00:52:10
If I don't want parallel compression
on some parts of the drums,
I just won't assign the Outputs
to my console.
00:52:16
I'll assign them to the Dangerous
and it will skip the console,
and just not bother playing
with the parallel compression.
00:52:22
As we look up here,
we'll see that all
of the kick drum samples
are skipping the parallel compression
and all of the snare drum samples
are skipping the parallel compression.
00:52:34
Not the real kick drum,
not the real snare drum.
00:52:36
Again, it's a hybrid approach.
00:52:38
Some of it gets it
and some of it doesn't,
and the way I like having this set up
is if I feel like it needs it, I assign
it, and if I feel like I don't, I don't.
00:52:44
Drums, bass...
00:52:46
And by drums I mean the live drums.
00:52:47
Live drums, live bass,
they both get parallel compression.
00:53:01
So that's the basics
of the rhythm section.
00:00:00
The next place I'll go is guitars,
but on this song
there was something special,
and the something special was this riff.
00:00:17
And I noticed actually
as I played that riff
that I left some
of the drum rooms open
just for the beginning of the song
because he was playing something
that goes along with the drum loop.
00:00:29
That riff is kind of a signature thing
and we worked in the studio
to get a couple of different sounds on it.
00:00:35
What I want to do is make sure
that that thing sounds weird enough.
00:00:38
I want it to jump out.
00:00:40
So we've got guitars playing it,
and as I look through here
we've got a steel guitar playing it
and we've got fiddle playing it,
which is violin, for those
who don't live in Nashville.
00:00:53
We actually had Mickey Raphael
come in and play harp on it too.
00:00:57
So, all of those things...
00:01:08
All of that stuff combines
to make that signature riff.
00:01:11
So,
before I dig into anything else
on the track,
I'm going to make sure
that that stuff sounds great,
so let's see what's going on here.
00:01:20
Jedd playing a guitar.
00:01:24
I gave it a little bit of EQ too.
00:01:33
Because I wanted it to stand out...
00:01:42
This is another weird thing,
this is a Send to my Cooper Time Cube,
which is an old-school,
bizarre, ersatz delay device
which is essentially
four SM57s working as...
00:01:55
two working as speakers
and two working as microphones,
and a length of garden hose in a box
that's hidden behind
the couch over there.
00:02:03
And what it basically is
is it's a box that has 14 ms
of delay on one side
and 16 ms of delay on the other side.
00:02:09
I don't know who came up with it.
00:02:11
It's crazy and it sounds like
it doesn't make any sense,
but it sounds awesome on guitars.
00:02:16
What I do is I use that to move
the guitars outside of the speakers
or outside of the middle
of the stereo spectrum.
00:02:22
You can hear as I move it
that it kind of just throws guitars
to one side or the other.
00:02:34
Strangely, it leaves
the guitar mainly left
but then all of a sudden
it puts something over here on the right
that makes it sound wider.
00:02:41
And because I wanted this riff
to stand out, I did it on both sides.
00:02:55
That's him playing an octave up,
and then there's a third one.
00:03:05
And that's just got
a little bit of Crystallizer on it
just to give it a little bit of floating.
00:03:09
So, all three of these guys...
00:03:23
Pop down to the steel.
00:03:25
Dan Dugmore was on the session.
00:03:27
He's an absolutely incredible
steel player,
so we've got him playing this.
00:03:35
Not the most exciting thing
in the world,
so we're going to give it
a little bit of high end distortion.
00:03:43
A little bit of sauce.
00:03:50
And then I've got
an Imager plug-in on this
because I want him to live
over on one side of the stereo field.
00:04:01
So he's playing that riff too.
00:04:04
And then,
I also wanted to incorporate this fiddle,
which apparently
had an older plug-in on it.
00:04:26
I wonder if I still have the preset.
00:04:39
We didn't want it to sound
too backwood,
so the fiddle is just in there
for some articulation.
00:04:45
And then...
00:04:48
...Mickey came in
and played some harmonica.
00:04:54
The harmonica gets a little compression
and some distortion.
00:05:01
And a little bit of a spring.
00:05:12
When we did that, we actually...
00:05:14
I actually added that later in the song.
00:05:16
I felt like we needed something extra
and Mickey happened to be in town,
so I asked him if he could run over
and we used a microphone
in the back of the mix studio
and he threw some harmonica on it.
00:05:27
So that's all the elements of that hook.
00:05:40
On Jedd's guitar I've got a Helios EQ.
00:05:43
There's a couple tricks to this plug-in,
there's a little bit of a secret.
00:05:47
One of the coolest things
on the Helios EQ plug-in
is what happens when this gain
gets between 10 and 15.
00:05:54
All of a sudden
it gets a lot of character.
00:05:56
I'm just going to loop this
and mess around with it.
00:06:07
One of the other cool things,
and this is something that I think
Richard Dodd helped out with UAD,
is when you use this EQ
in the real world,
as soon as you turn on
the low end right here,
it adds bottom to the signal
even if you don't turn the gain up.
00:06:22
The first iteration of this plug-in
didn't do that
because it didn't make sense to them
to add low end
when you weren't putting any gain,
but the actual module does that
and it sounds really cool.
I use it all the time on guitars.
00:06:32
It may be subtle on this,
but check it out.
00:06:37
It just puts a little thickness
into the guitar.
00:06:39
It's a super-useful way to just add
a little fullness to guitars,
a secret that Helios
was always good at.
00:07:00
Also on this little riff...
00:07:07
Just a little sauce.
00:07:09
I like using Crystallizer
for a different kind of...
00:07:12
Something that's not really delay
or not really reverb.
00:07:14
No Pitch Shift. A little bit of Delay
and the Recycle up here,
and it just gives it a nice tail.
00:07:29
It's also a little weird.
There's a little weirdness there,
which, I like trying to use different
ambiences on different things
so that you're not putting everything
into the same two reverbs
and it just kind of blends out
into something generic.
00:07:40
So, on individual tracks like that
I'll add a little mono reverb
and throw it over on one side
instead of just sending it
to a stereo reverb
and just letting it wash over wherever.
00:07:49
Now we get to some
of the fun stuff: rock guitar.
00:07:53
That would be these guys.
00:07:55
So, again,
the way I do this
is similar to some of the other stuff.
00:08:00
The guitars are getting
a little bit of EQ,
and if you look,
it's the Helios low end trick again
and the Helios high end trick again.
That's it.
00:08:08
I took the gain down a little bit.
00:08:10
They're being fed into a Bus.
00:08:11
That Bus goes to another SSL Insert.
00:08:14
That SSL Insert is over here.
00:08:16
A little bit of EQ: some low end,
some low mid,
some bite at around 6 or 7 kHz
on the guitars.
00:08:24
Same up here.
00:08:26
There's no rhyme or reason to this,
I just turn it until it sounds good.
00:08:29
And then the Inserts
are a pair of Urei LA-3As.
00:08:32
LA-3As have a certain edge to them,
a certain, like, forwardness
that sounds really great on guitars.
00:08:39
So I'll show you what the difference is
between those on and those off.
00:08:43
This is what we got from Jedd
on tape, two passes.
00:08:54
Panned left and right.
00:08:55
We'll put it through the SSL.
00:09:05
It's pretty amazing how the LA-3A is just,
like, waking those things up, man.
00:09:09
Just, like, stand them up.
00:09:10
And then I wanted to get
a little more bite out of them,
so I'm adding a little bit of that Helios.
00:09:23
In context
you can hear obviously
there's a volume difference,
but you can hear the difference on this
with and without the SSL EQ
and the LA-3As.
00:09:48
I just love the way those things
wake up guitars.
00:09:51
I've tried to find ways to do that
that aren't outboard
and I still always
keep coming back to that.
00:09:57
There's just some kind of character.
00:09:59
I don't know whether it's the transformers
or whatever in the LA-3As,
they just make guitars sound great.
And you know what?
If you have one and you're cutting
and you don't need to...
00:10:06
You never need to really limit or compress
electrics when you're cutting.
00:10:10
I mean, a tube amp will do that.
00:10:11
Just turn the Gain Reduction off,
run it through an LA-3A,
and just give it a little bit of that
character. It sounds amazing.
00:10:16
What else do we have?
An extra rock guitar here.
00:10:24
Some of this stuff is in stereo because
it got added later
and the producer who was playing it,
these are Ross's,
he cut them in stereo.
I don't know why.
00:10:34
It's not up to me to figure that out,
why it's in stereo,
but if you'll see this guitar,
that descending line guitar,
it's panned all the way left.
00:10:43
It's basically just mono.
00:10:44
This one is a stereo pass.
00:10:50
But what I really wanted to do
is for this to jump out,
because this is a big chorus,
so, once again, I'm adding a little bit
of high frequency distortion mainly
and some Drive to it
with the Vintage Warmer.
00:11:06
And then this is another fun trick.
00:11:08
This is actually a setting
that I keep called '10ms',
and what this is is it's a delay.
00:11:14
One side of the delay has no delay
and one side of the delay has 10 ms.
00:11:19
If you went to recording school,
this invokes something
called the Haas effect,
which tricks your ears into localization.
00:11:25
What I use it for
is for taking stereo sources
like keyboards, or sometimes guitars,
and widening them outside the speakers.
00:11:32
So on this guy I'm giving it
10 ms on one side
and I'm checking the polarity in and out
to see which one sounds the best.
00:11:48
That one sounds wider
so I'm going to leave it there,
and that helps me get that guitar
out of the middle,
let it lift over the chorus a little bit.
00:12:06
That's a fun trick. I use that
all the time on keyboard stuff,
I use it maybe on some loops sometimes,
although it can get phasey.
00:12:13
On guitars, stuff like that.
00:12:14
Generally anything that's not really
tightly rhythmic
you can mess around with that on.
00:12:18
At this point in the song
we've got most of the major
rhythm stuff rocking
and we can go down.
00:12:25
These are acoustics.
00:12:26
Let's see what we've got.
00:12:38
Brian Sutton plays things
incredibly tight and really great,
so generally I only have to do
some housekeeping on this.
00:12:43
What I usually do with acoustics
is I bus them all together and they go
through an acoustic Bus right here.
00:12:49
On the Bus that all the acoustics
are going through...
00:12:52
Low frequency!
It's 110 Hz on the low end,
I kind of pushed that.
00:12:57
This is bite, 4.8 kHz.
00:13:00
I pushed the bite a little bit.
00:13:01
I think I didn't want
the guitars so bright,
so I brought a little bit of
top end back.
00:13:07
And
then we go to this plug-in.
00:13:12
I love this plug-in, especially
with this setting on acoustic guitars.
00:13:17
This emulates a weird quirk
of the Neve VR console,
which is,
when you roll off the top end,
and then add it back in,
it makes a really interesting sheen.
00:13:30
So, check this out.
00:13:39
What's happening here is this roll-off
is all the way down at, like, 8.5 kHz,
cutting off the top end.
00:13:48
So if you open that up...
00:13:51
This is up here at 11.5 kHz,
or something.
00:13:55
Almost dimed.
00:14:01
But for some reason, when you cut the top
and then add it back in...
00:14:08
I don't know why, but it tames
the extreme top end
but lets the articulation come out.
00:14:14
It kind of opens up the guitar
without it getting
too much buzzy on the top end.
00:14:18
It leaves some room for stuff
in the vocal and in the drums.
00:14:21
It's an old trick that came off of the way
the console used to work,
and I use that on acoustics all the time.
00:14:28
So, essentially,
this setting is nothing on the Dynamics,
very little to nothing
on the rest of the EQ.
00:14:35
The high-cut is say 8.5 kHz,
and then you just take
wherever the high end sounds good
between 8 and 12
and just keep turning it up.
00:14:56
And it really puts some nice
articulation on the guitar.
00:14:59
Also on these guitars
I added a little bit of Decapitator.
00:15:12
I added a little bit of Decapitator
just to give it a little more body.
00:15:16
Mandolins can be difficult.
They can be kind of really light and airy,
and this one I wanted to drive
a little bit more.
00:15:22
You can hear the difference.
00:15:23
With a little bit of distortion on it,
it just feels a little fuller.
00:15:36
This is a great plug-in.
00:15:37
By the way, the SoundToys guys
make insanely cool gear.
00:15:40
I love it.
00:15:42
And this is a regular guitar.
00:15:49
And you'll notice on both of these,
the mando and the acoustic,
there are two separate mics
but it's one guitar pass,
so they're basically
being treated as mono.
00:16:06
If memory serves, one of those
is a KM54 tube mic
or a KM56 tube mic
for the bright, airy thing.
00:16:17
And the other one is an RCA 77 ribbon.
00:16:23
And when you combine them
you get a really cool sound.
00:16:28
One of the things that you have to be
careful of on regular acoustics
is almost everybody cuts them
with a cardioid,
and almost everybody puts the cardioid
too close to the acoustic
and you get proximity boost.
00:16:39
So the first thing I do
on almost every acoustic is
I open this guy
and get rid of all the low end.
00:17:03
That really helps kind of clean it up.
00:17:05
The boomy acoustic guitars
can get really, really muddy,
really, really fast, and you don't
really want that in your mix.
00:17:11
So once again, like we were
talking about before on the console,
anything that doesn't need
the low end gets filtered out.
00:17:16
That's why I put it in there.
00:17:18
It's a game of inches, and if you let it
all build up, it's going to make muck.
00:17:22
That's how you get some clarity
in some stuff.
00:17:24
So here's all of our acoustics.
00:17:37
The finishing touch
on the acoustics for me
is a really cool plug-in
called MixTreble.
00:17:43
It's, again, made by PSP.
00:17:45
Again, it's another character plug-in.
00:17:54
It helps it spread out,
kind of gives it some body,
brings it forward.
00:17:57
On this song the acoustics
are going out into the console
and going through the Stereo Bus,
which now maybe as good a time
as any to mention
that there is also some analog gear
on the Stereo Bus of the SSL.
00:18:08
On the Output of the SSL
is a pair of Pultecs
that are adding some low end
and some high end.
00:18:13
Another trick that I
was trying to steal from CLA.
00:18:16
There is a Focusrite Red 3 compressor
which is barely doing anything,
but it just has...
00:18:22
It mates with the SSL really well.
00:18:24
It has just an amazing, like,
creamy consistency to it,
and there is also an Avalon 747
that's giving it a little bit of EQ.
00:18:32
It's a tube circuit.
There's a strange...
00:18:36
I haven't looked at this button in years.
00:18:41
TSP.
00:18:42
Tube Signal Path.
00:18:44
Whatever that means,
it sounds really good.
00:18:46
That stays on the Output
of my SSL all the time.
00:18:50
I honestly haven't changed
those boxes in years.
00:18:54
This is the SSL Master Bus compressor,
it's the heart and soul of the SSL.
00:18:58
Everybody loves this thing.
00:18:59
It's definitely got a sound and you've
heard it on hundreds of records.
00:19:03
The setting pretty much stays the same.
00:19:06
Really slow Attack, really fast Release,
which I really love on Stereo Bus stuff.
00:19:10
It lets the transients through
and then it picks up the rest of it.
00:19:13
4:1 for the Ratio,
and this pretty much
stays set on the console.
00:19:17
I can vary how much action it gets
by how much gain I put
into the faders of the console
or how much I pull back.
00:19:24
We'll take another look at the vocal,
so let's just hit Play.
00:19:39
If you can turn the chorus on
and it's pretty rocking,
and you can turn the vocal on and you
can still hear everything he's singing,
then you're pretty much assured
that you don't have something
stepping all over the vocal.
00:19:51
Now, this was done by an experienced
producer with really great players.
00:19:54
These guys know what they're doing
and they'll avoid doing that.
00:19:57
Sometimes when you work with somebody
who doesn't have this much experience
you're going to find out that there's
a lot of things in the vocal range.
00:20:04
You got to take care
of those things pretty early,
because if you don't
you will find yourself fighting to get the
vocal to come over the top of the track.
00:20:11
Some of the stuff that we talked about
was doing some weird EQ
on stuff like the bass.
00:20:16
For instance, when I printed
that fuzz thing on the bass,
if you listen to it, I will play it
without it and then I'll play it with it.
00:20:34
I used the fuzz part of the bass
to kind of just lift
the bass a little bit,
make it cut through the mix,
make it sound a little more articulate,
even though when you solo it
it sounds weird.
00:20:47
But in the track, it sounds huge,
which is why you can't trust
soloing stuff.
00:20:57
You have to work with it
within the confines of the track.
00:20:59
So at this point the other thing
I'm looking for
is dynamic shifts.
00:21:03
When the chorus hits
you really want to feel it hit,
and so I'll do that through
a couple of different things.
00:21:12
Some of it is using the crash samples
that we talked about,
some of it is doing
some rides sometimes.
00:21:17
Just pushing the drums a little bit,
pushing the guitars a little bit,
but I like to get the mix
as close as I can
without doing a ton of rides
so that it's still hitting.
00:21:42
So there's a perfect example
of something that's not going to work.
00:21:45
The fuzz bass, I'm going to
get rid of it until the chorus.
00:21:48
It's overkill.
00:22:11
Here's another example
that we talked about earlier.
00:22:14
The drum loop starts off pretty mellow,
but once the bass and the riff
picks back up
you can't hear the snare drum,
so I added a sample to lift that up.
00:22:47
It does not need to be in there.
00:22:50
At this point you're going
through the track
and you're just looking for stuff
that just doesn't belong.
00:23:19
One of the things that I wanted
is I wanted that snare hit
to really go 'boom!'
I cheated
and I put an 808 kick drum
under the snare.
00:23:31
It just kind of puts low end emphasis
on that whole hit.
00:23:46
It's kind of a fun way to do it.
00:23:47
It's more subtle than you would think,
but it really does make a difference.
00:24:38
At this point it's actually not a bad idea
to switch to a different set of speakers,
turn the volume down,
and listen kind of off-axis.
00:24:58
For a different perspective
I'll switch to different sets of speakers.
00:25:01
One of them is these old Rogers BBC
speakers from the '60s.
00:25:05
They just give me a nice,
low level perspective
and just a different way
to listen to stuff.
00:25:09
And sometimes it's great
just to turn the volume down
and listen over there.
00:25:13
Like, get your head out of
the middle of the speakers,
stop focusing on everything
and listen to it as, like, an overall mix
instead of disparate little pieces.
00:25:21
We should talk about effects,
we should talk about spatial reverb stuff.
00:25:25
With a song like this where there's
so much information
and where there is already
a lot of ambience,
either from stuff that was already
on the guitars,
or the drum room,
or something like that,
as I look through this, I actually
didn't end up using much reverb at all.
00:25:42
The only reverb I'm using on this
is an old Sony DRE 2000,
and the only thing I'm using it on
are these samples right here,
the loop samples in the verse.
00:26:01
And it sounds like there's a lot
of reverb on everything else,
but there actually isn't.
00:26:06
If you remember, there's a little bit
of ambience directly on the steel,
a little bit of ambience
on one or two of those guitars.
00:26:11
And I think some of the guitars
had some effects on them when he cut them.
00:26:14
Yeah, and if you recall,
we had a little bit of this
PSP spring reverb
on the harmonica hook,
on the riff part of the harmonica,
which gave it a little bit of...
00:26:27
...old-school, versus...
00:26:32
A really cool plug-in from those guys.
00:26:34
It's weird-sounding,
like a spring reverb should be.
00:26:38
Almost all of the rest of the ambience
is coming from the drum rooms,
which is fine because the drum room at
Ocean Way is a super-cool drum room,
so if you've got a great drum ambience,
why not use it?
Another thing to remember
is you can create reverbs using samples.
00:27:04
At least two of the samples that I'm
using—one on the snare, one on the kick—
have a really long tail.
00:27:10
I'm using those to create
a reverb space just for those sounds
that you wouldn't get
by putting it into a reverb.
00:27:18
You know, just because reverbs exist
doesn't mean you have to use them.
00:27:23
That sample is almost all room.
00:27:25
It's all room reverb,
and I believe that there's a snare
doing something very similar.
00:27:39
So when we go back
and listen to all this snare stuff
you can hear that the samples
are giving the snare
the illusion of ambience,
but I'm not actually using
any reverb on it.
00:27:55
And then, when you combine that
with the room sound
from the overheads and the room...
00:28:05
When you listen to that, it actually
sounds like there's way too much,
but when you put it in context
with the rest of the instruments...
00:28:17
It blends really nicely,
and sounds really good.
00:28:21
Here we go into another really
bizarre part of my system.
00:28:25
Because I use a bunch of
outboard stuff on the vocal,
when I get the vocal
sounding the way I want it,
I will print the vocal
back into Pro Tools.
00:28:36
I do this because I want to
make sure that I have it
so that something doesn't get changed
inadvertently on the vocal.
00:28:44
I also like the way it sounds
so I want to commit to it,
and I also don't necessarily trust
Pro Tools delay compensation,
so I render the vocal into Pro Tools
and then I visually check to make sure
that it's lined up correctly.
00:28:55
Nothing bums a track out faster
than a vocal pocket moving
because a plug-in or some delay
compensation is a little bit squirrelly.
00:29:04
I print the vocals back into Pro Tools
and turn these guys off
because we don't need them anymore.
00:29:12
I created two copies of this
because I wanted to play around
with some character stuff on the vocal.
00:29:18
Here's our clean vocal.
00:29:27
We should talk about what's going on
with this thing now.
00:29:30
The vocal is coming out into the console,
going through the Stereo Bus.
00:29:35
It's also being split to a parallel.
00:29:39
That parallel is going to
a couple of pieces of outboard,
some really weird stuff.
00:29:46
So,
one thing it's going to
is to a mono Calrec compressor
for some parallel compression.
00:29:52
It's also going to a thing called
Bedini Audio Spacial Environment.
00:29:58
It's a box that some crazy person
made back in the day
that spatializes stuff.
00:30:03
In the case of the vocals,
it actually just kind of brings
the vocal out in front of the speakers,
puts it right in front
of your face a little bit.
00:30:09
It's going to a little bit of
a Dolby A system
for a little bit of air
on top of the vocal.
00:30:14
And it's going a little bit
to a Roland Dimension D,
which is a really cool, old chorus,
like the chorus in a Juno 106,
for just a little bit of effect.
00:30:24
This is what it sounds like
without the vocal parallel,
or those spatial effects
that I told you about.
00:30:38
And then here it is
with the parallel processing,
which is going to increase the volume
and the spatialization,
which is going to kind of move
the vocal out towards you.
00:30:55
Again, that's something
that I've learned over the years
that just really works for me
on a lot of vocals and I like it.
00:31:02
Those things stay set-and-forget
and they just get a parallel
from the vocal fed into them,
but,
when I listened to Dierks
in the track on this,
it sounded like it needed
a little bit of attitude.
00:31:24
What I did was
I started experimenting
with some sonic stuff.
00:31:28
I gave him a little bit of compression.
00:31:33
Just a tiny bit.
00:31:41
Not a whole lot going on
as far as compressions,
and then there's a little bit of
an Echoplex plug-in from UA on it.
00:31:55
But I don't know that that's enough,
so what I did was I duplicated the vocal
exactly the same as the one on top,
and on that I added some Devil-Loc.
00:32:16
And if you look at it,
there is barely any...
00:32:21
I mean, there is barely any gain on that.
00:32:23
It's not even up at 1.
00:32:25
Same with the Crunch, but it puts
a really interesting, like,
forward kind of feel on the vocal.
00:32:36
So you have the plain vocal here,
and then you have the Devil-Loc.
00:32:46
Then I just combine them.
00:33:02
At that point we start looking at
a little bit of effects,
and it's got a little bit of slap
on it now with the Echoplex plug-in.
00:33:09
And it's mono, so I wanted to
move it outside the speakers a little bit
and give it some extra...
00:33:16
Boom.
00:33:25
Again, I don't think this song
needs reverb,
but some really cool slap will work,
so I'm using an Electrix Mo-Fx
which is an older analog slap delay.
00:33:34
And I'm adding that
to both of those vocal tracks.
00:33:55
Now I realize that I forgot this.
What is this?
Strings!
I forgot about those, mainly because
the guitars are rocking in the chorus
and we will probably not even hear them.
00:34:08
But I'm sure the producer
put them in there for a reason
so let's put a little distortion on them.
00:34:25
I should also mention
that because I'm paranoid,
all of the analog outboard
effects that I use,
all of the... the Cooper Time Cube,
the Sony, the Mo-Fx,
they're all returned
into Pro Tools on faders
and we print all of those things
into the session.
00:34:41
So, if lightning hits the studio
and blows out a reverb,
when I need to recall the song
I've already got it printed.
00:34:47
Better safe than sorry.
00:34:48
It's nice to print it in there,
and sometimes it's really fun
because after you print
a reverb or a delay
you can go in and you can gate it,
you can stretch it,
you can stop it at the end of the song,
you can do stuff that's easy to do when
it's printed audio than when it's not.
00:35:00
2-Bus processing.
So once we get over here,
the Liaison is the coolest thing ever
because it just lets you put a bunch
of different options into your 2-Bus.
00:35:10
I have four or five things plugged into
the Liaison, and we'll go through that.
00:35:14
The first one is my normal 2-Bus chain,
which is a little bit of Maag EQ4s,
no phase shift.
00:35:21
You know, Air band, Sub band,
amazingly great-sounding EQs.
00:35:24
There's a tiny bit of EQ on those,
and then they're feeding into
a pair of CAPI VP28s,
which are at unity.
I'm just using them
for the really cool transformer
coloration that they have.
00:35:36
That's then feeding into
a Dangerous BAX EQ,
which is just one of the coolest,
most open-sounding EQs around
and it also has a really, really great
high-pass filter in it, like, fantastic.
00:35:49
Again, back to what we were
talking about earlier,
like, scooping all that grunge out,
getting more headroom in your mixes.
00:35:55
Especially with a lot of digital
sources, that really helps.
00:35:59
Then we go through something
really weird.
00:36:01
It's called a DAV electronics SIPP.
00:36:03
It's made by a gentleman in England
who is super-cool.
00:36:06
He actually especially
modified this for me,
and what it essentially does
is it's a very little bit
of stereo width
that it adds to the 2-Mix.
00:36:18
He was kind enough to make
a few mods for me,
for, like, bypass stuff,
and ripped some of the knobs off
that I didn't want changed,
and so now I have this thing
that just puts a really nice, little...
00:36:29
just a little bit of stereo love
on the 2-Bus.
00:36:31
That's in the first Insert of the Liaison.
00:36:35
The second Insert right after that
is the Dangerous Compressor,
like, one of the coolest 1 dB
of compression that you'll ever hear.
00:36:42
It really kind of just packages stuff.
00:36:44
After that we've got some fun stuff.
00:36:45
I use a parallel that's an old
1970s Ampex mixer
that I use for a little bit of distortion.
00:36:52
I use the Liaison to blend that in
as a parallel
just to give it a little excitement,
a little harmonic interest.
00:36:59
I also have a pair of old transformers.
00:37:01
I actually have a bunch
of transformers on pigtails,
and if we need to change color
on something,
sometimes I'll just insert a transformer
on a vocal, or on a guitar,
or throw them across the Mix Bus and just
see how that changes the character.
00:37:13
There's also another piece
that's not up here right now.
00:37:15
It's a Fairchild 602,
which is a high frequency limiter.
00:37:18
Sometimes that gives
a really cool vibe on something.
00:37:21
I was doing a Motown-type record,
and that on it kind of gave it
that old-school Motown sort of feel.
00:37:26
So the Liaison is great because
it lets me just pop back and forth
and audition all these
things out really easily,
and it's really easy to recall.
00:37:32
You can save the preset or you can just
take a picture of the front panel
and it's super-easy to recall.
00:37:39
That's about it. That goes to
a Lavry AD122 MkIII converter
running at high resolution.
00:37:45
Everything in this room
is clocked off the A/D.
00:37:47
I think that's the best way to do it.
00:37:49
I've tried a couple of different ways
and that one seems to work out the best,
so the entire room clocks off the Lavry.
00:37:54
Then we print the stuff at hi-res to a
second Pro Tools system in the other room.
00:37:59
For this song, what's on the 2-Bus
is actually just Preset 1 on the Liaison,
which is the Maag EQ, the CAPI VP28s,
the Dangerous BAX EQ,
and the SIPP stereo box.
00:38:13
At this point I actually just need to
sit down and listen to the song.
00:38:16
Maybe over here, maybe down here
at really low volume.
00:38:19
Just a different perspective.
See what jumps out, see what sounds weird,
catch those things as they go.
00:38:24
One thing that I've learned...
00:38:26
And this was a hard lesson for me
to learn, it was very valuable,
that one of my mentors taught me is:
when you hear a problem, fix it.
00:38:33
As soon as you hear an issue,
stop and fix it,
because you think you're going to
remember it, and you're not.
00:38:39
You will go by it,
and you'll go by it three times,
and then you'll get used to it,
and you won't hear it until the client
comes in and sits down and you hit Play,
and then you'll be like,
"Why the hell is that guitar so loud?"
So I'm just going to sit here
and listen and try and see...
00:38:52
make sure that I didn't do
anything stupid
or that something is not on
or something shouldn't be on
or something like that.
00:40:52
Background vocals.
00:40:54
I bus them all together
into one mega Background Buss.
00:41:00
Again, forgive me as I figure this out
because this is an older session.
00:41:04
Some of this stuff doesn't exist anymore.
00:41:07
Well, actually, let's just mix them.
00:41:25
That's the artist and the producer
just singing some backgrounds.
00:41:38
Here is another one of those instances
where we use that 10ms thing.
00:41:42
This is a stereo background thing,
I kind of wanted to get it out of the way
and make it sound larger.
00:41:47
I used the 10ms Haas delay.
00:41:53
Outside of the speakers.
00:41:55
I threw a little EQ on it.
00:41:59
Softube makes this really cool EQ
called Focusing Equalizer.
00:42:03
It kind of works in-between these bands,
so what I did was I took some low end off
and I took a little high end off too
because it's a crowd.
00:42:11
Added some high and some midrange.
00:42:15
And then this is the Saturation,
so you can dial where
the Saturation Type is.
00:42:19
This happens to be High Saturation.
00:42:21
I don't know what that means,
it just sounds cool on backgrounds.
00:42:24
I added a little distortion.
00:42:27
And this was an old plug-in
that I use up here now.
00:42:34
I'm going to show you
all my secrets, okay?
This is a really cool plug-in
that nobody knows about.
00:42:41
It's called Crowd Chamber.
00:42:43
It's a VST plug-in
and it has little guys that wave at you,
but that's not important right now.
00:42:49
What's important is it takes background
vocals and turns them into a crowd.
00:42:55
It uses, like,
a frequency-shifted chorus,
and it's got a little bit
of a reverb on it
and some filters,
and it literally turns this
into this.
00:43:10
And when you hear it in the track,
it sounds like a bunch of people
shouting in, like, a club or a stadium.
00:43:24
Super-cool plug-in!
Awesome!
I love the guy who made this thing.
It's VST only, so I have to use a wrapper.
00:43:32
I use Blue Cat's PatchWork
to wrap it and work on this system,
but for a certain chance
and for certain stuff like that,
it's literally the only thing I've ever
found that makes it sound like that.
00:43:42
It's easy to overuse and kind of
sometimes gets me in trouble,
but it's a really, really cool tool.
00:44:06
I should mention
that on background vocals
what I do is I take them all and I bus
them down to a background vocal Bus
that has some starting stuff on it.
00:44:15
I'll show you what those are
and then mess around with them.
00:44:18
I don't always use everything.
00:44:19
First is the Eiosis EQ,
mainly because it's got
this amazing Air EQ on it.
00:44:25
I love the FabFilter stuff.
I think the FabFilter stuff is great,
and easily one of the best interfaces.
00:44:32
Nah, the best interface.
Period. For an EQ.
00:44:35
However,
on certain things
like background vocals,
this Air band thing
that Eiosis does is killer.
00:44:42
I also really like the Strength meter,
which is kind of like a mix.
00:44:47
But I add a little bit of Air,
take a little bit of low mids out,
depending.
00:44:51
I don't even know
what frequency that is. 400 Hz.
00:44:53
And then of course, again,
get rid of the muck.
00:44:56
Next.
00:44:58
A Shadow Hills Industries.
00:45:00
This thing looks badass.
I have no idea how to use it.
00:45:06
As you can tell, there's not a whole lot
of compression going on.
00:45:09
I'm sure someone
who is way smarter than me
can look at this and figure out
how I'm using it.
00:45:13
I just like the way it sounds,
so it stays there.
00:45:16
This is DMG's de-esser.
00:45:18
It's a really great de-esser.
00:45:25
Most of the time it's not even on.
00:45:26
It's only going to be on if the 'esses'
in the backgrounds get to be too much,
or especially if they build up
with the lead vocal 'esses'
and it's just hurting you too much.
00:45:34
Here is another kind of secret
weird weapon I use:
the Eventide UltraChannel for vocals.
00:45:42
And mostly what I use it for
is this button, the Xformer,
the transformer button.
00:45:49
I just like what it does
to background vocals.
00:45:54
And, again, it's pretty subtle, but...
00:46:07
It puts some kind of presence
on the vocal,
and it's a different kind of presence
than I usually use for the lead.
00:46:15
There's a slight bit of EQ here,
no compression,
no gating, no Omnipressor.
00:46:22
All I'm using is
a minuscule amount of EQ.
00:46:28
1 dB of Peak at 9.4,
and a tiny bit of Shelf at 5,
but mostly it's this Xformer button.
00:46:34
I don't even know what it does.
00:46:36
I'm sure it's some sort of emulation
that just sounds cool on backgrounds.
00:46:40
This Time Adjuster here is just...
00:46:42
Sometimes, if something
is not quite Left/Right,
I'll just use that to even it out.
00:46:47
Soothe again. I'm actually
not going to use that on this,
but this kind of helps even out
some, like, crazy peaks in vocals.
00:46:53
And then, back to the Focusing EQ.
00:46:56
This is actually
a fair amount of crank on here,
and just because this song
is really rocking
and there's a lot of guitars and a lot
of drum energy and stuff like that,
I'm adding some of this distortion
to make the backgrounds cut through.
00:47:09
It's actually a little bit too much
on this section now.
00:47:30
It puts a really interesting, like,
a little bit of distortion
character on it,
and I like to open up the top
and push the Mid Gain
a little bit on this.
00:47:38
And again, as always,
even taking more stuff
off of the low end
just to make sure
the muck gets out.
00:48:00
I'm sending the backgrounds
through some effects.
00:48:03
This is a Cooper Time Cube
plug-in from UA,
and what that's doing is providing
a little bit of stereo spread
to the background vocals.
00:48:15
Let's see what that sounds like.
00:48:30
Just a little bit of 'stereoization'
to push the backgrounds
out of the middle
where the kick and the snare
and the vocal live,
and kind of get a little excitement
on the edges.
00:48:40
And then this is a little bit of delay.
00:48:43
Another plug-in that I don't really know
how to use, but I think it sounds awesome.
00:48:51
I'm just using it for a little bit
of slap on this.
00:48:54
And then,
this is a good trick.
00:48:57
You can take a Compressor/Limiter and...
00:49:12
What I do sometimes is
I'll take the Send that's going
from a lead vocal or background vocal
to the effects
and I'll put it through
a Compressor/Limiter
and I'll key it from the actual Send,
which means that while they are singing
it turns down the delay effect,
and then when they stop,
it brings it back up.
00:49:50
So you can see right here
that as they sing
the compressor turns what is basically
the Return of the delay down,
and then when they stop singing
it lets it up,
so it lets the vocals
come through clearly
and then lets you hear
the effects in the gaps.
00:00:01
The SSL faders don't move.
00:00:03
I don't move the SSL faders.
00:00:05
I do all of my automation In The Box.
00:00:07
I want the fast recall, and the
nice thing about this system is
once I get a song done and once we
get it printed into the system,
we can literally just open and go.
00:00:15
You know, I've done 10 songs,
close to an entire record in a day.
00:00:19
That's a huge advantage
because a lot of people use to think,
"You're still using a console,
you're still using outboard gear,
recalls will take forever."
No, recalls take as long as it takes
the Pro Tools session to open.
00:00:28
It's kind of a huge deal. It changes
your workflow in a good way too,
because it allows me to
work on something
and then go home and come in the next
morning and have a fresh listen,
or even start another song and then
go back and make a little tweaking.
00:00:42
You know, it's the way
that we have to work today.
00:00:44
It bears mentioning
that all of my rides,
which I'm going to go in
and do some rides now,
are going to happen on the FaderPort.
00:00:52
I mostly work in Trim,
and mainly just because of, like,
fader resolution, right?
So, when I'm doing minute
fader rides, like right now,
because I'm using two vocal channels
with two different sounds on it,
they're down 10 dB, so I can put it
in Trim and work around zero.
00:01:10
I can also go back really quickly
and keep adding to it, you know?
I played through the first chorus,
but as I was playing that
I realized that in the second verse that
guitar hook was a little bit too loud,
so, in keeping with the philosophy of,
"When you hear it, fix it,"
I'll go back and fix that right now
because I don't want to forget about it.
00:04:56
I don't want it to muck me later.
00:05:30
At this point I'll probably
get a little schizophrenic
and just jump around to
a couple other sections,
sometimes just looking at parts.
00:05:36
If I just rode that guitar, I'll go back
and check it here and check it there,
and then I'll work my way back to the
vocal and keep moving along the song.
00:05:55
It's never a good sign
when a track is labeled 'tune me'.
00:06:07
So that thing...
00:06:14
Here is another example
of something that I'm just abusing
to get it to do what I want.
00:06:18
This was probably just the fiddle player
fooling around as the track played,
and it looks like either Ross or I
just took it and made it into something
repetitive, and then abused it.
00:06:31
I abused it through this guy again.
00:06:37
A bunch of gain-limiting
on the Fairchild plug-in.
00:06:43
And a little bit of slap
just to turn it into
a little rhythmic part.
00:06:54
Doubling on the other side. This guy.
00:07:05
And again, sometimes it's little things
like this where you're looking at,
"Okay, I want verse 1
and I want something to amp up,
and then I want verse 2 to amp up,"
so we added the sample in the loop
and we added the little
percussion thing,
and then I wanted the chorus to hit.
00:07:18
These are just little, subtle things
that you can fly into or create.
00:07:22
Or in this case, just look for something
that was essentially just a mistake,
someone fiddling around,
and turn it into a part.
00:08:25
Here is another example
of how subtle stuff makes a difference.
00:08:29
The chorus is linear.
00:08:30
It needed something to change
in the second half,
so we put in this drum comp.
00:08:35
When you listen to it soloed...
00:08:42
Pretty simple.
00:08:43
When you hear it in the track,
you don't really hear it all that much.
00:08:51
But when you take it out
of the track as it's playing,
there's a definite loss of energy.
00:09:05
It brings that other rhythm,
that 'doon-ka doon-ka'
into the back half of that chorus.
00:09:11
It's subtle, but it kind of keeps
the energy kind of going.
00:09:13
That stuff is really easy to ignore,
but it makes a huge difference, I think.
00:09:17
It's a subtle one, but big.
00:09:42
This is something that I do
an awful lot when I'm mixing,
which is I'll add percussion a lot.
00:09:49
I'll add shakers, tambourines,
anything that kind of
amps up the energy.
00:09:53
This was a tambourine loop
that I had on my sample drive at...
00:10:00
It was 127 BPM
and I brought it into the session
and time-stretched it
down to where we were
just to kind of give a little extra
something on the back of this chorus.
00:10:20
And as always, distortion sounds
awesome on tambourines,
so there's actually a preset
called TAMBO on my Radiator,
which is my favorite
tambourine distortion.
00:10:31
Just give it a little Treble,
dime the Input,
and just distort your tambourine.
00:10:36
It makes it sound a lot more exciting.
00:10:43
This brings up the in-between jingles,
and I'm pretty sure that Ross Hogarth
showed me that trick.
00:10:48
It's a fun trick.
Distort your tambourines.
00:11:10
By and large, I believe that there are
really three pan positions:
left, right and middle.
00:11:17
And everything else
is kind of a waste of time.
00:11:19
Now, that's oversimplifying it,
but for a part like this...
00:11:28
To even hope to be able to hear that
in the slam of everything
that's going on in this chorus,
the easiest thing to do is just throw it
all the way over on one side.
00:11:36
I love extreme panning.
00:11:38
I really do try and avoid
the middle stuff
unless it's, like, percussion where
I don't want it in the middle, you know?
If there's a hi-hat on the left
I'm going to kind of throw a tambourine
over on the right to kind of offset that.
00:11:51
Almost all of my panning
is one of three places.
00:11:54
It just seems to make for wider mixes
and, you know, more exciting stuff.
00:12:09
Vintage Warmer is a really cool plug-in
because what it lets you do is
add some Drive, add some distortion,
but it lets you add Low or High.
00:12:17
So,
right here...
00:12:28
I wanted the thickness of that chunk,
but I didn't want the clicky thing.
00:12:32
Vintage Warmer lets me add distortion
to the low end instead of the high end
and bring that out without it getting
too bright or clicky.
00:13:05
And now I'll jump around a little bit
and then go back to the vocal.
00:14:19
I don't like the way that sounds.
00:14:35
Where is that coming from?
I don't like the way
that transition sounds,
so I am going to change it.
00:15:10
I'm going to change it.
00:15:13
Let's...
00:15:35
So let's add
the kick drum back in.
00:15:44
By the way, I apologize for my editing.
It drives everybody crazy.
00:15:47
I still haven't read the Pro Tools manual.
00:17:40
Let's play with the guitar solo
a little bit.
00:17:53
The first plug-in is a tiny bit of EQ.
00:17:56
A little bit of low end,
a little bit of 8 kHz for bite.
00:18:00
Then the Vintage Warmer.
00:18:02
I'm turning the high end down
a little bit,
but then going back and adding
some extra distortion.
00:18:29
It's purposefully
not in time with the track
because I think sometimes it's a lot more
fun to have delays that aren't in time.
00:18:35
And then I actually
duplicated this track,
and instead of adding
the slap at the end
I added some little whacked-out
Crystallizer delay.
00:18:53
Which is super-crazy,
but when you combine them...
00:19:02
It's another example of something
that if you listen to it soloed
you'd be like, "That's never going to fly,
that's way too much effect."
But when you put it in...
00:21:56
Now is a good time to ignore the vocal
and look around for
some other stuff to fix.
00:22:04
I want that distorted bass to be out,
except in the choruses.
00:22:46
I'm going to get this fiddle
to cut through.
00:22:50
I duplicated it.
00:22:55
And ran it through a virtual amp room.
00:22:57
Softube Vintage Amp Room.
00:23:03
You don't necessarily run violins
through an amplifier. Well, I do.
00:23:07
It needed to have character
that would cut through the track,
but it didn't necessarily
have to be a pure fiddle,
so I combined the amp thing
with a little bit of echo on the fiddle.
00:23:25
Which I think stood out better.
00:23:33
I mean, everybody knows
that that's a violin, but sometimes
when you're listening to the song
it doesn't really matter.
00:23:39
You listen to the part, you aren't
necessarily listening to the instrument.
00:23:42
It's like, yeah, that's
a strange tone on a violin,
but if the part works, which I think it
does in this context, it really doesn't...
00:23:48
Nobody really cares if it's...
00:23:50
"You're not supposed to do that,"
or, "That sounds different or strange."
It's another hook that picks up your ear
and helps move the song along.
00:24:28
It bears mentioning work hours.
00:24:30
I used to work until four in the morning
on a regular basis.
00:24:34
I was spending a long time
between 10 o'clock at night
and 4 o'clock in the morning
doing a lot of stuff that didn't end up
being good the next day,
so I figured out that, you know,
the earlier I get to the studio,
the more disciplined I am about it.
00:24:48
I get better stuff done
between early in the day than...
00:24:51
the longer you go,
the more you listen,
the longer it takes to make decisions,
and you make more bad decisions,
so I try and keep it fairly reasonable,
the amount of time.
00:25:02
You just can't listen forever.
Your ears get tired.
00:25:05
Especially if you're cranking it.
00:25:06
One of the things that I try and do
is be good to my assistants.
00:25:14
It can be a brutal job sometimes,
and it can be really long.
00:25:18
The beauty about this system is,
if I have to work late,
or I'm hammering on a song
and he's sitting around
doing nothing, that sucks,
so he gets to go home and hang out
with his wife and have a life,
or work on other stuff because
he's a mastering engineer,
so he'll do other stuff.
00:25:34
When I finish, I can just text him
and say, "Hey, I'm done."
He'll call in from his home computer
and print this session
and do all of it through TeamViewer,
which is super-awesome
because then I don't feel like
someone is sitting around
waiting on my ass to get
something done.
00:25:52
He can go have a life, and then,
when we do need to work late, it's cool,
because you're not...
00:25:57
I mean, you know. How many times
have you sat around in the studio
just waiting for someone just hours
and hours and hours of your life.
00:26:03
It's not cool,
so it's lovely that the technology
now allows us to skip that whole step
because it just makes everything
work a lot easier, you know?
I love that.
00:26:14
So this would be a point now
where I'm pretty much happy
with everything that I've got in the mix.
00:26:21
I'll go ahead and send this out
to the powers that be.
00:26:25
I mean, in this particular instance
it would be Ross, the producer,
who would want to take a listen.
00:26:30
I always send it to the producer first
just to make sure
I'm not missing something
or I'm not missing the vision
that he's got.
00:26:36
Once he gets to speak into it,
I probably do maybe one round of tweaks
and mess around with some things.
00:26:41
He will forward it on to the artist
and the management
and the record label
and the various sundry parties,
and then we will all collaborate
and probably just do...
00:26:51
You know, get a list of tweaks,
and if anything needs to change
then we'll have something to change.
00:26:55
Sometimes the artist comes in and
we'll mess around with some vocal stuff
or just some really tweaky stuff,
or try some experiments.
00:27:02
And sometimes they can't do it,
and I will just do it over email.
00:27:07
This mix is probably at a point where
we're ready to send it out.
00:27:11
What I get to do now is
grab Dan and say, "Okay, man.
00:27:18
Go ahead and render it."
We'll print a lot of the
outboard stuff that's running
back into Pro Tools.
00:27:25
They're committed.
00:27:28
The tracks that were feeding it
go inactive,
all of the processing that I was doing,
outboard here or here,
gets rendered into Pro Tools.
00:27:37
That way, when we open
the session the next time,
it's already there,
it's ready to go, it's editable.
00:27:42
We'll print a pass of the mix
over to the other system.
00:27:47
And a lot of times
we'll put a little showbiz on it,
check the level
that the rough came in at,
throw maybe a little bit of iZotope Ozone.
00:27:57
Just limiting, just gain,
to give it a little bit of boost
just so they are comparing
apples to apples, or close enough,
because obviously a lot of times
people are listening to mastered mixes
and comparing it to an unmastered mix,
so you want at least the level
to be kind of in the ballpark
of what they are used to listening to.
00:28:16
But iZotope does it really well
where it doesn't do very much
damage to the mix at all.
00:28:20
And we don't really put
that much gain into it, right?
1 dB, maybe.
00:28:25
The level is pretty good going in,
so we don't have to do a whole lot to it.
00:28:28
You saw that I do mix through
some Mix Bus processing,
but the amount of Bus compression is...
There's not a ton.
00:28:39
There are definitely
no mastering plug-ins,
there are no multiband plug-ins,
there are no limiters
on anything that I do ever.
00:28:45
I know that all of this stuff
is going to a great mastering engineer
so I don't need to bother
with any of that,
which is nice.
00:28:54
Plus it helps keep all the micro-dynamics
and all the fun stuff in there.
00:28:59
At this point it's like, "Okay.
We print it, we save it, we send it."
We see what everybody says about it,
and hopefully they'll like it.
00:29:07
So my name is Daniel Bacigalupi,
I assist Reid Shippen
here at Robot Lemon.
00:29:13
So at this point in the process
is when I jump in.
00:29:16
What I do first is check out
Reid's session,
just give it one quick once-over,
make sure that nothing seems like
it accidentally got muted,
that something is not missing,
anything like that.
00:29:25
Then I jump on TeamViewer.
00:29:28
And this is a VNC software
that lets you see
other computers remotely.
00:29:34
This is a computer in another room
that we've got going.
00:29:37
This is just the screen itself. I can
control it, do whatever I need to do.
00:29:40
I've already got a track here
to record into.
00:29:43
It just comes in AES into this
via an Apollo 16.
00:29:47
I got that all set,
Record Enable this track.
00:29:51
We use this feature...
00:29:53
I'm not sure what it's called.
00:29:54
Essentially, this lets this machine
become a slave via MIDI time-code
to this Pro Tools.
00:30:00
They are synced up using the Mac's
own internal Audio MIDI Setup
in this MIDI Network page.
00:30:07
You can connect one computer to another,
and now they are connected
via MIDI time-code.
00:30:11
That all just happens over the network.
00:30:13
So, then we go to the beginning
of our session,
to some time before the audio starts,
make sure that everything is locked,
and hopefully,
when I hit Play here,
it will now make this machine...
Once logged in, you will be able to read all the transcripts jump around in the video.
Software
- Avid Dyn3 Compressor/Limiter
- Avid Mod Delay III
- Crowd Chamber
- DMG Audio Essence
- Eiosis AirEQ
- Eventide Ultra Channel
- Fabfilter Pro-Q2
- Fabfilter Timeless 2
- Massey DeEsser
- Oek-Sound Soothe
- PSP MixGate 2
- PSP Mixtreble 2
- PSP Spring Box
- PSP Vintage Warmer
- SPL DrumXChanger
- SPL Transient Designer
- SansAmp PSA-1
- Softube Focusing Equalizer
- Sound Toys Crystallizer
- Sound Toys Decapitator
- Sound Toys Devil-loc
- Sound Toys Radiator
- Sound Toys echoboy
- UAD 1073
- UAD Cooper Time Cube
- UAD EP-34 Tape Echo
- UAD Fatso Jr
- UAD Helios 69
- UAD LA-2A
- UAD Neve 88RS
- UAD Shadow Hills Mastering Compressor
- UAD Trident A-Range
- Waves C1 Compressor
- Waves CLA Drums
- Waves L1 Limiter
- Waves Ouigtex EQP1A
- Waves RVox
- Waves s1 Imager
- iZotope Alloy 2
Hardware
- Ampex Mixer
- Aphex 204
- BASE Bedini Audio Spacial Enviroment
- Cooper Time Cube
- D.A.V. Electronics S.I.P.P.
- DBX "Disco" Boom Box
- DBX 160
- Dangerous BAX
- Dangerous Compressor
- Dangerous Liaison
- Distressor
- Dolby Model 365
- Electrodyne Compressor
- Focusrite Red 3 Compressor
- Maag EQ4
- Millennia STT-1
- Mo-FX
- PIE Limiters
- Pultec EQP-1A3
- Retro 1176
- Retro EQ
- Roland Dimension D
- SSL 4K
- Sony DRE 2000
- Teletronix LA-2A
- Teletronix LA-3A
- Universal Audio 1176
- VP28 Classic Preamp

F. Reid Shippen has made a name for himself through working with some of the world’s most respected artists across a wide variety of genres. Over his extensive career, Reid has mixed multiple platinum and gold records and hundreds of charting singles and albums, including ten Grammy Award-winning projects.
Known for his hybrid analog workflow, Reid has brought his signature sound to records for artists such as Death Cab For Cutie, Cage The Elephant, Neil Young, The Jonas Brothers, Backstreet Boys, Eric Church, Johnny Lang, Chris Tomlin, Dierks Bentley, and the list goes on.
Neil Young
The Jonas Brothers
Cage The Elephant
Death Cab For Cutie
Dierks Bentley

Dierks Bentley is an American country music singer and songwriter. In 2003, he signed to Capitol Nashville and released his eponymous debut album. Both it and its follow-up, 2005's Modern Day Drifter, are certified platinum in the United States. His ninth and most recent studio album, The Mountain, was released on June 8, 2018.
Drunk on a Plane
CLICK_HEREMusic CreditsDrunk on a Plane
By Dierks Bentley
Dierks Bentley is an American country music singer and songwriter. In 2003, he signed to Capitol Nashville and released his eponymous debut album. Both it and its follow-up, 2005's Modern Day Drifter, are certified platinum in the United States. His ninth and most recent studio album, The Mountain, was released on June 8, 2018.- Artist
- Dierks Bentley
Parts of this site and some files are only accessible to pureMix Pro Members or available to purchase. Please see below our membership plans or add this video to your shopping cart.
- FEATURES
- ABOUT
- SOURCES
- CONNECT