Starting every mix from scratch wastes hours of precious mixing time and keeps you from creating consistent sounding mixes. The key to efficient and creative mixing is to create a mixing template system that sets you up for success on every mix.
If you’re an engineer looking for a helpful starting point to use on all of your mixing session Grammy winner Fab Dupont’s mixing template is a great place to start.
Learn how Fab created a flexible and powerful mixing system that is optimized for modern music productions. The routing and effects that Fab uses as his starting point for mixes gives him the flexibility to work both in the box as well as with analog summing with no added hassle.
See how a professional mixing engineer utilizes advanced routing, effects sends, stem aux tracks, VCA groups, and master faders along with default plugin settings that save time and make getting a great sounding mix easy.
Fab shows you his entire mixing template setup using both 3rd party plugins and also the built in plugins. His mixing template is filled with clever tricks and effects presets that give you simple methods to accomplish complex mixing tasks in seconds.
After watching Fab explain his template in detail, you can then download his template for:
Pro Tools,
Logic,
Studio One,
Cubase,
Ableton
.
Use or adapt Fab’s mixing system for yourself and get better sounding mixes every time.
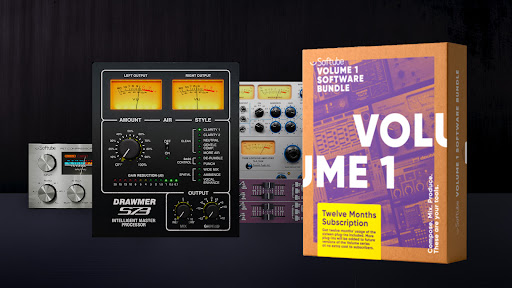
Avid Channel Strip
Avid D-Verb
Avid D3 Expander/Gate
Avid Distortion
Avid Dyn3 Compressor / Limiter
Avid EQ3
Avid Ensemble
Avid Filter Gate
Avid Mod Delay III
Avid Pro Expander
BF-76
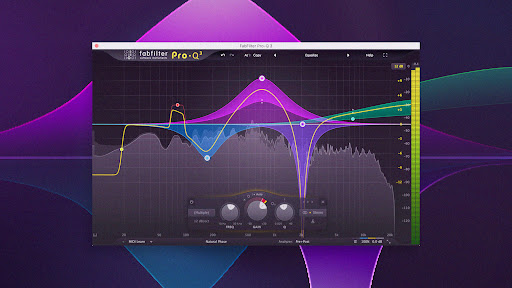
Fabfilter Pro Q-2
Pultec Pro Legacy
Sonnox Oxford Dynamics
Sonnox Oxford EQ
Sonnox Oxford Limiter
Sound Toys Echo Boy
Sound Toys Effect Rack
Sound Toys Micro Shift
Tape Head
UAD 1176LN
UAD Lexicon 224
UAD NEve 33609
XILS DeeS
5
48 reviews
scoop.b •Friday, September 23, 2022
I cant figure out how to add a section for the chorus vocals. This template only accounts for lead vocal and back up vocals. I need to separate the verse vocals from the chorus vocals and there is no routing for this.. Everytime I try to create the routing myself I lose all the audio routing to the main outs? Ive tried creating new bus, new master, new stem bus with no luck.. Anyone can help with this. I dont want to process the lead vocal with the same processing I am using for the chorus.
marcos.fe •Wednesday, April 13, 2022
But why are you sending the BD and Snare subs to the Drum Crush, and not to the BD Crush and Snare Crush?
rmvstudios2@gmail.com •Wednesday, November 17, 2021
Anyone knows how to use the limiter, do I bring the threshold down until I get a reduction ?
c
cash.high •Sunday, March 7, 2021
Nevermind after watching all the way through I figured out he was talking about string bass in the bass section. I routed the 808 through the electronic drum section and the rest of the kit through the acoustic drum section and it sounds great! Although I do often get sessions where the instrumental has been purchased as full "trackout" copy (all stereo sems) from the producer & I then have to mix raw vocals to the stems. I would love to see how Fab, Ryan or even one of the other mentors would approach a mix like this
Pearlpassionstudio •Tuesday, February 23, 2021
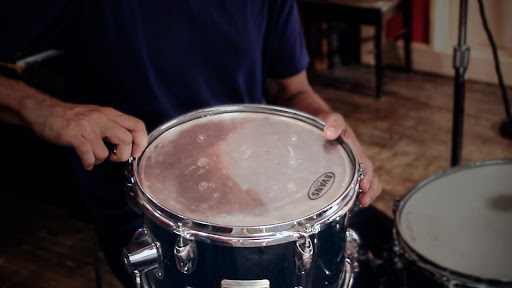
I use this template on every mix.. Especially having a large drum kit with 16 mics, if needed and the kit never moves. . The stem mixing is the only way to go. Have to try this great template. Fabulous tutorial too.
andrew.sm •Saturday, January 23, 2021
Thank you! what's the difference between tail and space?
mintyswirl •Tuesday, January 19, 2021
Who is this guy? He's really lazy. He emphasizes it many times. ;)
Rap Alliance Productions •Wednesday, October 14, 2020
I watched this video once, and now am unable to play it again...has anyone else had trouble wit this video??
dong.b •Monday, October 5, 2020
Would like to download the template for Studio One. Thks
Got the Template. It's in the Exercise files
koen.r •Thursday, September 3, 2020
Nice lesson! But where do i download the template for Ableton Live? Thanks
m
manubuntu •Sunday, April 5, 2020
Many thanks for this great explanation ! I have a question - on your template, you have 11 "MASTER" faders each set to -6 for mixing. I'm using LogicX and my template didn't come with these tracks. How do these 11 master tracks differ from the 11 stems tracks?
Merci beaucoup!
b
benzwerin •Friday, March 13, 2020
Great video, merci Fab!
One question though, I added the "stems" tracks to my template but when I send all my "subs" to the stems (and the Stems go to my Master), I don't hear anything. What am I missing? The Stems are Audio tracks, right?
B
Benn •Sunday, January 19, 2020
This is great Fab. How do I download the template for Studio One?
Thanks much.
Benn
c
charted-music •Saturday, January 4, 2020
In the Cubase Stock Plugin Template. There is a Flanger on the "01 BD Stem" Track. Why ?