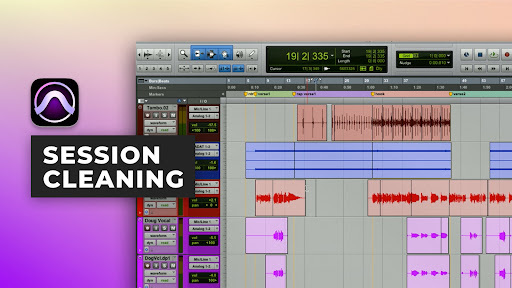
When you are done tracking and before you can actually start mixing, there is some cleaning to be done. It is not groovy and you want it to be quick.
In this video, Ben shows you how to speed this process up as well as dealing with clicks and pops and unwanted noises with keyboard shortcuts and the smart tool in Pro tools.
If you would like to know more about Ben Lindell, please visit: www.benlindell.com
Please do not forget to share this video on Twitter, Youtube and Facebook. The more visitors we have, the more free content we will be able to make!
00:00:09 Today, I'm gonna be showing you how to
edit and clean your tracks in Pro Tools.
00:00:12 This can be a tedious process
that's often overlooked by people,
but can actually have a direct impact
on how your final product sounds.
00:00:19 I'm gonna show you a few examples
where we're gonna remove unwanted noise
and get rid of any clicks or pops.
00:00:25 In order to speed this process up,
I'm gonna be using a lot of shortcuts,
I'll explain those as we move along.
00:00:30 Let's get started!
First thing I'm gonna do is change
my cursor over to the Smart Tool.
00:00:35 What this is gonna do is add a bunch
more editing functions to my mouse.
00:00:39 Secondly, I'm gonna turn on
Command Keyboard Focus
by pressing the a...z button over here.
00:00:44 What this is gonna do is add a bunch
more editing keyboard shortcuts
that are gonna speed things up.
00:00:51 The first shortcut I'm gonna show you
is to zoom in by pressing T,
and to zoom out by pressing R.
00:00:57 This is gonna help you navigate
through your sessions quickly.
00:01:01 Let's move on to our first example.
I'm gonna start with a lead vocal track.
00:01:05 As you can see, he didn't start
singing at the very beginning of the song,
there's a whole bunch of blank space there.
Let's zoom in and see what's going on.
00:01:12 To do so, I'm just gonna click here
and zoom in by pressing T.
00:01:17 So it looks like there's nothing there,
right?
Wrong! Let's zoom in vertically
and find out what's going on
before he starts singing.
00:01:25 Just as I thought,
there's a bunch of noise there.
00:01:28 Even though it's quiet, once you start
compressing this track,
it's gonna become more and more
apparent.
00:01:32 That could be anything,
like AC rumble, dogs barking,
police sirens, your wife yelling at you...
It doesnt' matter.
00:01:39 We don't really want that in our track.
00:01:41 To get rid of this, I'm gonna use
the Smart Tool to trim it down
and then add a fade to it.
00:01:46 To do so, I bring my cursor
to the left edge of the region
and the Smart Tool automatically turns
into the Trimmer tool.
00:01:52 So I click and direct that to just before
my singer starts singing.
00:01:57 And now I'm gonna make a fade.
00:01:59 I'm gonna do that by going to the top
left corner, and click and drag.
00:02:03 It's important to put a fade in and out
on every single region.
00:02:06 Because if we don't, when Pro Tools
jumps from nothing to some signal,
it's gonna generate a click,
and that's what we're trying to avoid.
00:02:13 Now I need to find
where my next edit is.
00:02:15 To zoom out quickly on a Mac,
I'll use Option+A,
or on a PC, Alt+A.
00:02:20 This zooms me out both horizontally
and vertically.
00:02:24 Now I can see that I have
the same problem here
as I did at the beginning of the session.
00:02:29 Let's zoom in and fix this one up
as well.
00:02:32 Click here, and press T to zoom in...
00:02:36 Alright! Same thing as the beginning,
it looks like it's fine,
but when I zoom in vertically,
you can see that there's some noise.
00:02:43 Once again, I'm gonna use the Smart
Tool, go to the right edge of the region,
it brings up the Trimmer Tool...
00:02:49 Pull that back to just after
where he stops singing...
00:02:52 Go to the right top corner...
Make a fade...
00:02:55 And there we go!
I'm gonna zoom out again using
Option+A, or Alt+A on a PC,
and find where my next edit is.
00:03:03 As you can see, between
these first two vocal regions,
it looks like there's an edit.
So I'm gonna click on that,
and zoom in, pressing T.
00:03:11 As you can see, we have two regions
right next to each other.
00:03:14 Here too, when going from one region
to another region,
Pro Tools may produce a click.
00:03:19 So to fix this, I'm gonna put
a crossfade in between the two regions.
00:03:23 To do this, I'm gonna bring my cursor
to the bottom of the edit,
and you see it turns into
a crossfade icon.
00:03:30 I just pull up to expand it out.
And there we go!
Ok, so I've shown you how to remove
unwanted noise,
and create crossfades
using the Smart Tool.
00:03:40 Now I'm gonna show you how to do
basically the same thing,
using just keyboard shortcuts.
00:03:46 We're back in Pro Tools, and now
I'm gonna clean up my Tambourine track.
00:03:49 I'm gonna zoom in on the first hit
by pressing T.
00:03:55 Alright!
To trim off this unwanted noise
using keyboard shortcuts,
I click where I want my region to start,
and I press A.
00:04:03 This is both on Mac and PC.
00:04:05 That removes all the region before
where I put my cursor down.
00:04:09 Now I'm gonna place my cursor again
and press D.
00:04:12 It automatically creates a fade-in
to that point.
00:04:16 I'm gonna zoom out a little bit
and find the end of this region,
and do the exact same thing.
To zoom out, I'm gonna press R...
00:04:23 and find where I'm gonna end my region.
Zoom back in.
00:04:27 To trim from the end of the region,
I place my cursor where I want
my region to end, and press S.
00:04:33 To create a fade-out, I place my cursor
again, and press G.
00:04:37 Once again, these keyboard shortcuts
are only working
because I'm in Command Keyboard Focus.
00:04:43 Now I want to remove all the noise
in between my tambourine hits.
00:04:46 So I'm gonna select from the beginning
of this tambourine hit,
all the way to the end of this
tambourine hit, and press Delete.
00:04:54 Now of course I need to create
fade-ins and fade-outs,
so I place my cursor and press G
to fade out.
00:05:00 I place my cursor here,
and press D to fade in.
00:05:04 Now you know how to clean a track
using both the Smart Tool
and keyboard shortcuts.
00:05:08 Now it's common in today's sessions
to find parts that are doubled,
tripled, or even quadrupled,
so they all need the same editing.
00:05:15 I'm gonna show you a way
to clean them all together.
00:05:18 Here we have two vocal tracks
that are singing the same exact part.
00:05:21 I'm gonna group them together
to make editing them even easier.
00:05:24 To do so, I select both tracks...
00:05:27 I press Command+G,
or Control+G on a PC...
00:05:30 Give them a name...
00:05:33 Now for the group type,
I'm gonna select Edit.
00:05:35 This will link the editing functions
together,
but leave the mixing functions alone.
00:05:39 I'll explain more about Mix groups
in another video.
00:05:42 For now, let's press OK.
00:05:44 Alright, so let's try that!
I'm gonna zoom in on these regions here.
00:05:48 I'm gonna press A to trim the beginning
of the region,
and S to trim the end of the region.
00:05:53 I'm gonna place my fades
using the Smart Tool.
00:05:56 As you can see, I was able to edit
both tracks simultaneously.
00:05:59 This is gonna save a bunch of time.
00:06:02 Now you know how to edit multiple tracks
at the same time using groups.
00:06:05 Now I'm gonna show you where the most
common sources of clicks and pops are.
00:06:09 That's where punch-ins are.
I've got a few examples pulled up here,
I'm gonna show you how to fix them.
00:06:14 Here we tried to punch in on a word.
00:06:16 Let's take a listen to what this
sounds like with no edit.
00:06:21 Did you hear that pop?
Listen to it again.
00:06:26 That's a pretty obvious pop.
00:06:28 To fix this, I'm gonna use the Smart
Tool to create a crossfade.
00:06:33 Let's take a listen to it now.
00:06:37 It still sounds a little weird.
00:06:39 That's because I put the fade
in the very middle of a word.
00:06:42 So what I'm gonna do is I'm gonna
move it around using the Trimmer Tool,
and see if I can find a better spot
for my crossfade.
00:06:52 Let's see what this sounds like.
00:06:56 Much better! Let's listen to that again.
00:07:00 So that's it!
Now remember, don't just put down
a crossfade and forget about it.
00:07:04 Listen to it and make sure
that it makes sense.
00:07:07 If it doesn't sound good, move it around
until you find a sweet spot.
00:07:11 Here we have a punch in
on my synthesizer track.
00:07:14 Actually, it looks like it should be okay
without any edits.
00:07:16 But let's listen to it anyways.
00:07:20 I think there might be a pop in there,
let's listen again.
00:07:24 Yep, that is definitely a pop.
00:07:26 I'm gonna show you another way
to make a crossfade.
00:07:29 I'm gonna select the area around
the edit, and press F...
00:07:32 to create my crossfade...
Now let's take a listen to that.
00:07:37 Mmm... It sounds a little weird to me.
00:07:39 Let me move it with my Trim Tool and see
if we can find a sweeter spot for it.
00:07:45 Let's take a listen to it now.
00:07:49 Yeah, that sounds pretty good to me!
Today, I showed you how to clean
your tracks using both the Smart Tool
and keyboard shortcuts.
00:07:56 Now I can't stress you hard enough
how important it is to fade in,
fade out and crossfade every single
region inside of your session.
00:08:04 I showed you some examples where even
though it looked like no fade was necessary,
we could easily hear a click.
00:08:09 So I'm sorry, it's just non-negotiable.
00:08:12 So, until next time!
Which I swear will be much more fun!
Once logged in, you will be able to read all the transcripts jump around in the video.
Ben is a NYC based producer/engineer who has worked with artists from MGMT to Soulja Boy, Bebel Giberto to Lloyd Banks, Ryan Leslie, Olivia, Tony Yayo, Red Cafe, Edie Brickell, Carole Pope and hundreds of other artists from around the world. He grew up in Iowa and then attended the University of Miami.
In addition to being a fantastic musician he is also a tremendous geek when it comes to anything technical, be it software, plug-ins, microphones or outboard gear. It's this marriage of musical creativity and technical know-how that makes him an in demand producer/engineer.
I would listen to any track I'm putting fades on to make sure I'm not taking out something I want. For instance, when you did the vocal fades you might have been cutting off breaths in the beginning or S's at the end. It never hurts to check it while you are doing it to be safe. One technique I use is to solo the tracks I'm editing and let playback run while I'm editing as it helps you hear anything that needs editing or any mistakes you made in editing. I try to keep the playback cursor to the left of my editing. It makes you learn to do it faster and let's you hear the edits.
timmix
2016 Feb 06
Stuff I needed to know. This was good and simple to grasp.
EJEMPLO MUSIC
2014 Oct 06
thankyou so much
coolandis
2012 Oct 09
Ben, If you group the clips that are adjacent, will the pop still be there? Vs the crossfade? In the past with my stuff I had a bunch of clips in a track, and I would just group them into one. I never heard any clicks anyhow, but just wondering. If you do a bunch of crossfades in a track, and then group it what happens to the crossfades? Sorry for the nube questions!
benlindell
2012 Aug 20
@emsrecords:
If I remember correctly this is a LE vs HD issue. HD records from the moment you press play on any record enabled track (hence allowing you to pull open more of the region) and LE doesn't start recording until you press record. I'm not sure if this is still an issue in PT9 and PT10.
emsrecords
2012 Aug 12
If you put the cross-fade at the exact point at which the punch in started recording, you would not be able to slide the region before that point in the timeline. Not sure how you did this... is there a setting within the pre-roll to achieve this?
Becky Jo Benson
2012 Jul 02
Ben, I have watched your video on cleaning tracks and Fab's video on shortcuts several times to let it soak in my brain.
This is SO MUCH EASIER and more FUN than reading the manuals! Thank you guys for all your help! Becky Jo Benson
reymusic
2012 May 09
Fab,
I master my track in protools in 48,24bit and use an external compressor and go back into pro tools also add the L2 Limiter plugin add the end of the chain..when I'm ready to print my track i dither the L2 in 16 bit and export the track in 16bit,44..do i need to dither in pro tools as well or dither the L2 in 16bit at the end of the chain will bring my tack to 44,16bit?
Jazzforano
2012 Apr 11
I love editing!
I need moooree!!! :)
surfz247
2011 Oct 06
Great videos. I kept wanting to hit command/save after you did an edit. lol Habit.
islandcode
2011 May 13
Thanks for this video. what a relief, I thought I was the only one in the world cleaning sessions before I mix... it's just part of the micx prep process nowadays - I thought high profile engineers like you would have a tech rider that specifies you will not accept "uncleaned" sessions., haha.
G.Chad
2011 Apr 24
Yes there is!
It is a bit different though as it will affect the height of the tracks. But it works!
MAC: Control + Option + Command + up/down arrow
PC: Control + Start + Alt + up/down arrow
Note that if you remove Option (alt), this will only affect the selected tracks.
Mr_Canto
2011 Apr 18
Great Vid! Is there a short cut to Zoom in vertically also?