Ryan West has worked with the biggest hip hop names in the industry including Jay-Z, 50 Cent, Dr. Dre, and Eminem.
This tutorial is your chance to see how Ryan mixes the song "Break Bread" by Dujeous and featuring vocals from John Legend from start to finish.
See how Ryan handles:
Acoustic and electronic drums
Tons of keyboard tracks
Live horns and strings
Processing rap vocals and sung vocals (featuring John Legend)
Ryan shows you how achieve a hip hop mix all in the box and make your mixes sound larger than life. He goes through every step of his mixing process and even takes the time to experiment and have fun with some of the plugins.
Parts of this site and some files are only accessible to pureMix Pro Members or available to purchase. Please see below our membership plans or add this video to your shopping cart.
00:00:08 Hi, I'm Ryan West. Today,
we're gonna take a look at a mix
that I did for New York City's Dujeous.
00:00:13 It's a song called Break Bread,
featuring John Legend.
00:00:16 We're gonna break down the mix
in a very simple way.
00:00:19 I'm gonna show you my thought
process behind how I set up a mix,
the kind of techniques that I use
for level and panning,
and gain staging
on the Master fader.
00:00:27 Finally, we're gonna look at
a verse and a chorus section
so that we can see
some transitions in the song,
and how we deal with the dynamics.
Then we'll play around a little bit
with the pan tools that I use
on the Master fader,
just to give you some sense
of how I put a mix together.
00:00:42 One of the very first things I do
when I begin a mix
is I listen to two different versions
of the song.
00:00:46 I listen to the rough mix that was
provided from the studio
where it was recorded,
and I also listen to the raw tracks
in the Pro Tools session.
00:00:54 That can give me a sense of:
#1: where the artist wants the mix to go,
and #2: what I'm dealing with in terms of
the way the tracks were recorded
or any problems
that I'm gonna have to fix
before I can actually start getting
creative with the mix.
00:01:08 So let's listen to the song from the very
beginning in its raw form.
00:02:29 I really like that song,
it's a lot of fun.
00:02:31 My first impressions are that I think
it was recorded really well,
even though it's very dry, but I think
that's also my vision for the song.
00:02:38 It's got a lot of different
elements in it.
00:02:41 I think I want to go for a dry...
00:02:43 concise, sort of a hard-hitting
hip-hop type of drums
because that's what the song calls for.
But I also hear...
00:02:50 that I really want to accentuate
the melodic vocals in the hook because...
00:02:54 I really think
that's the exciting part about this.
00:02:56 It sort of carries you through the hook,
and makes you kind of like
have this really positive vibe,
so I want to make sure that I keep
that in mind as I start to mix.
00:03:04 I don't hear a lot of problems
in the way that it was recorded
and that's typically the first thing
that I go for,
as I want to fix things
that weren't really done well,
but that's not the case here.
00:03:13 A lot of the work we're gonna be doing
here is shaping the sound of the mix,
making sure that the drums have
the punch and the impact,
and the density that we really need
in this type of song.
00:03:22 Then we're gonna make sure
that the lead vocal
really, really sings the way it should,
so that the hook carries the song.
00:03:29 Ok!
I hear a couple of things
that I want to work on first.
00:03:34 Normally, I try to keep the vocals in
as much as possible when I'm mixing,
because I think the context
is really important.
00:03:39 But at this point, I think
I'm gonna take the vocals out,
and just focus a little bit
on the rhythm section first,
and then fit the other instruments in
around it,
and see if I can get it to become
a little bit more cohesive.
00:04:04 In this case, it looks like they have
two different kick drums.
00:04:07 They've recorded a live kick,
but they've also added some synthetic
or sampled drums
in order to bolster the sound
that they were looking for.
00:04:14 Later on, I'll probably be making
the decision of how much of the live kick
and how much of the synth kick
that I really want in there,
to give me the sound
that I'm looking for.
00:04:30 It looks like they've done
the same thing with the snare.
00:04:32 They've put another lighter sort of
thinner-sounding electronic snare
underneath the live tracked
drum kit snare.
00:04:50 Ok. Like most live recorded drums,
we have a room mic setup,
and we also have
the overhead mics setup
to give us some sense
of the ambiance of the drum kit.
00:04:58 The next thing I really want to do
is to work on
both the room and the overhead mics,
so I can sort of expand the sound of
the room they were recorded in.
00:05:05 There's a lot of ambiance there
to take advantage of,
but I'm just not hearing it right now.
00:05:32 One of the things you really have
to remember to try to practice
and try to do all the time
is to level match the output
of things like compressors and other
dynamic controllers
because you want to make sure that
you're hearing the effect of the processor
and not just the loudness.
Loudness can really fool you
into believing that something
sounds better when actually it doesn't.
00:05:59 Ok, now I can really tell
what the compressor's doing.
00:06:02 In this case, I'm choosing
an 1176-type compressor,
actually this is the Universal Audio
1176 compressor,
because it has a variable attack
and release time.
00:06:09 It's really important to time it
correctly with the program material
because it has the effect of making it
breathe properly with the song.
00:06:16 You don't want it to pump, and too slow
of a rate, or two fast of a rate,
because it'll just sound out of place
with everything else.
00:06:23 I have to choose a compression ratio,
and in this case,
I kind of knew that I wanted
something a little bit more than 2:1,
so I chose a 4:1 ratio.
00:06:31 I may even yet revise that to 8:1,
because I just want to make sure
that I'm getting the right amount of gain
reduction to get the effect that I want.
00:06:38 Because it's really important to do
everything in context while you're mixing,
I'm gonna go right to the next phase
and get the overhead mics in there,
and then quickly fill in the close mics
and the electronic or sampled instruments,
so that I can hear the context
of the rhythm section.
00:07:05 I'm gonna go ahead and put a high-pass
filter on the overhead microphones,
because I don't want too much
low-frequency information
hitting the compressor and therefore
causing it to react differently.
00:07:14 Most of the time when something is
recorded from a live instrument,
whether it's a microphone
on an acoustic guitar,
a bass through a DI or an amp,
or even a kick drum or a snare,
there's a lot of low-frequency information
that gets transmitted
through the large diaphragm capsule
of your microphone
that doesn't really need to be there.
00:07:30 You may not notice it at first,
but trust me, it's there.
00:07:33 Now when you have all the tracks
playing together,
the sum of all that low-frequency
information that you forgot to filter out
can sometimes really take a lot away
from the dynamic energy of the mix,
and reduce the amount
of available headroom.
00:07:55 Ok, and again, I'm gonna level match
my compressor.
00:08:12 I'm gonna get the other instruments
in the rhythm section in there,
so I can hear it all in context.
00:08:33 In this case, we had two kick drums.
00:08:35 One is just a sort of a deeper,
duller sound,
and the other one has the snap and
the punch to the top end of it.
00:08:40 I think they were recorded well,
but for this type of music, I want to make
sure that the dynamics sit very nicely
and don't move around too much.
00:08:48 We need to have consistent volume
on that kick drum.
00:08:50 In this case, I'm choosing to use
the UA's SSL E-Series Channel Strip.
00:08:55 The reason why I'm using this is:
#1, that's very familiar to me,
I've been mixing on SSL consoles
for years,
but I like the Dynamics section
for this case.
00:09:02 It has a nice snappy sound to it, that
I can't really get on another compressor.
00:09:14 Ok, I'm just getting a little bit
of gain reduction,
and I'm starting to hear the attack of
the kick drum get a little bit snappier.
00:09:21 I'm also gonna adjust the Release time
so that the compressor lets go
before the next kick beat comes in.
00:09:27 Since this is kind of a fast thing,
and we have some doubled up kick beats,
I want that to be pretty quick.
00:09:40 Ok. And finally what I really want
to do here is to filter out
some of those subfrequencies...
Let's say below 40, maybe 35...
00:09:47 Most of that information takes up
available headroom in the mix,
so I don't want that.
00:10:02 Ok. I'm gonna go ahead
and bypass the plug-ins
so we can go back to where we started,
take a listen,
and then we'll put the plug-ins back on
so we can hear the result.
00:10:16 And with the plug-ins back in...
00:10:26 That's a good start. I think my kick drum
dynamic is tightened up just a little bit.
00:10:30 I hear more ambiance from the room mic
and the overhead mic.
00:10:32 I think I'm ready to maybe move beyond
just the rhythm section
and start adding in some instruments
so I can get a sense
of how those instruments are gonna work
with the rhythm section
that I've already started working on.
Now remember...
00:10:42 this rhythm section may evolve
even more over time.
00:10:45 I don't necessarily believe that what
I've just done here
is gonna be the way it's gonna be
in the finished product,
but I've just got it started so that
I can put the whole thing together
and get a sense of how the entire mix
is gonna come together down the road.
00:11:12 What I noticed here is that their bass
is recorded in stereo.
00:11:16 Knowing the way this producer works,
I know that they've recorded it in mono
and added an effect to it
that they really like,
and I think it was just
a really mild chorus.
00:11:24 Now I think one important skill
to learn as a mixer
is to learn that it's ok to undo
or walk back
some of the things that you did earlier
in a mix.
00:11:32 As you move through the mix,
you might realize
that a decision that you made earlier
doesn't necessarily work
or something else could work
a little bit better in its place.
00:11:39 In this case, I'm listening
to this bass track in stereo
and, first off it's not so stereo
until you pan it all the way out
to the left and the right, and then you
realize that the center sort of drops out
and it's gone.
00:11:51 I like to anchor the bass
in the center of the mix,
because when you're listening
on headphones, or off-axis,
that means not between two speakers
placed perfectly,
you'll hear things a bit differently and
you can lose the bass altogether
if it's not anchored in the center.
00:12:04 So I'm gonna collapse it into mono,
and hopefully what's gonna happen here
is it's gonna sit down
a little bit better in the mix.
00:12:10 I'll probably have to reduce the
volume a little bit, but let's try that.
00:12:28 That works a little bit better for me.
00:12:30 Actually the kick drum and the bass
work together ok already,
but there's some stuff in the low-mid
range of the bass
that we can probably pull out and just
make it a bit cleaner
and make it sit together with the kick
drum a little bit nicer.
00:13:37 Ok, now it's getting somewhere.
00:13:39 What we did is we filtered out all
that stuff that was below 38Hz,
and I took out a little bit of...
about 5.7dBs at 133.
00:13:46 To me, that's giving the bass a little
bit of a deeper quality
and a little bit of a smoother quality.
00:13:51 Now what I want to do is maybe
control the dynamics a little bit
so that it works with the kick drum
in a much smoother way
throughout the course of the song.
00:14:03 I really want to try to give this bass
a little softer and girthier quality to it.
00:14:07 A slower compressor like the UAD LA-2A
can sometimes give that quality,
so let's give it a try.
00:14:29 Let's listen to it in context and see if
it's really working with everything else.
00:14:57 As a reminder, this is where
we started with the bass
before we work with the EQ
and the compressor.
00:15:10 And after...
00:15:22 Again, I'm not sure this is the way
it's gonna end up in the final mix
but I'm starting to hear the rhythm
section come together in a way that I like.
00:15:29 So I'm gonna move on for the sake
of expediency
and to keep the sense of urgency
about the mixing process.
00:15:34 I think that's really important,
because once you start to lose the idea
or the original vision that you had
for the mix,
you maybe might take a few left turns
and paint yourself into the corner.
00:15:43 So I'm gonna move on quickly.
00:15:45 We're gonna start to work on several
of the next instruments
and what they do, I think, in this case
is provide some ambiance and some melody
that sort of lie underneath the vocal.
00:15:55 But also, I want to very quickly get
that vocal back in there,
so that I can make sure that what
I've done with the rhythm section
still works in context
with the entire song.
00:16:03 I'm just gonna mute a couple of the
smaller elements
and focus on a couple a little time,
so that I can just get the levels match
and quickly move on to getting
the vocal in there.
00:16:12 Let's jump ahead a few bars, where the
piano seems to be the dominant element.
00:16:33 I think the piano sounds pretty nice
already, but a little bit boring.
00:16:36 I'm hearing a little bit of low frequency
information,
rather than low-mid frequency information
in that piano,
that I think I might want
to take out a little bit,
to clean it up a little bit
and make it fit better.
00:17:21 That's a little cleaner. I'm also gonna
check with it in bypass
to make sure that what I just did
was what I was actually intending to do.
00:17:39 I like that. I want to reduce the amount
of dynamic range that this piano has,
because I think that in this song,
the piano works both
as a melodic instrument and as
a rhythm-type instrument.
00:17:50 It's just a meter that it's playing
in the song,
it sort of holds down the tempo
a little bit.
00:17:56 I'm gonna try to use
a UAD Fairchild compressor,
because it has a color of sort
of a softer quality.
00:18:01 I don't want to put a hard edge on this
piano,
but I do want to control the dynamic
a little bit.
00:19:06 I don't think this Fairchild plug-in
is doing what I hoped it would.
00:19:09 So I'm gonna try something else.
00:20:06 I think the 33609 is giving just a little
bit more excitement to the piano,
holding back down the dynamic
just a little bit more.
00:20:12 We can go ahead and move on. Again,
we may revisit this decision later on
to make sure that everything works
in context,
but I'm getting kind of happy with
the way things are coming together.
00:20:36 From here on out, it's gonna
kind of move pretty quickly
in terms of what instruments that I add.
00:20:40 There's a lot of synth sounds
that are also in this mix
and they're just little parts
that are coming here and there,
and I want to make sure
that I get them in there right now,
but I don't want to get too mired up
in the details.
00:20:50 I want to get that vocal in there
very quickly,
before I lose sight of what
my original vision for the mix was.
00:21:26 Those claps sound a little bit boring.
00:21:28 I'm gonna put a little bit
of a room reverb on it now
to see if I can get it to blend together
better with the rest of the kit.
00:21:33 I had a little bit of time earlier,
and I went ahead and set up
five Auxiliary returns in my Pro Tools
session all the way up here to the right.
00:21:40 And I put up some effects
that I kind of commonly use.
00:21:43 One is a shorter reverb,
one is a longer reverb,
and I have a couple of different
types of delays,
and I also have a Roland Dimension D
from Universal Audio
that I may use to put on the vocals later
to give them a bit of stereo spread.
00:21:55 In this case, we're gonna use
the really short reverb that I have.
00:21:58 I'm using the UAD DreamVerb,
because I like the way some of
the shorter room programs sound on this.
00:22:29 That's a good place to start.
00:22:31 I also think that clap by itself
is just a little bit dull,
it's not exciting, and it's such a huge
part in that section of the song...
00:22:38 so I think maybe we could try
a little bit of saturation or distortion.
00:22:41 There's a lot of different ways
to get that.
00:22:43 One of them is by driving the input side
of a compressor really hard
so you get the tone of the input section
of that compressor,
or you can use something
that's specialized for distortion.
00:22:51 In this case, I think I'm gonna start
with using the Soundtoys Decapitator
which has a couple of different options
the way you can add a distortion.
00:22:58 It also has importantly
a mix control on it,
so that I can add the type of distortion
that I want
and adjust the blend of it,
so I get just the right amount.
00:23:20 You know sometimes there are
processors or plug-ins
where pretty much as soon as you put
them on, they just sound good to you,
but I want to make sure I'm not getting
fooled by the level adjustment as well,
so I have to make sure I level-match it.
00:23:44 To my ear, that sounds a little bit
more exciting.
00:23:47 I'm gonna play with the Tone control
just a little bit
so maybe I can get a little bit darker
on the very top end,
but also I want to maybe center
the frequency
of this distortion a little bit higher.
00:24:11 In essence, what I've done here
is I've added a little bit of distortion
by increasing the Drive control
on the left hand side of the plug-in.
00:24:18 I also cut off some of the low
frequencies with the Low Cut control,
raised the center of the tone
using the Tone switch,
making it a little bit brighter
in essential.
00:24:27 I also used the Hi Cut to take off
the very top end of the spectrum.
00:24:31 In effect, I think what this does is
it's giving me a little bit more...
00:24:34 excitement, a little bit more attitude.
00:24:36 The last thing I'm gonna do is adjust
the Mix blend control
so that I have exactly the amount
of this effect that I want.
00:25:00 Ok! The Mix is at about 60% or so,
and then I brought the Tone down
a little bit
because it was a bit too bright
the way I had initially adjusted it.
00:25:07 I've got to adjust the Output level again
because the level match isn't quite right.
00:25:12 As always, I'm gonna listen to it in
bypass, and then put the plug-in back in
and make sure that it's doing
what I really want it to do.
00:25:25 And with the plug-in back in...
00:25:34 Ok, I think that sounds good to me.
00:25:36 I think the overall effect of adding
some of this distortion
is that it sort of smears the sound
just a little bit,
it makes it sound a little bit more
live and natural.
00:25:45 It gives it a level of urgency and
excitement that it didn't have before.
00:25:48 We're gonna keep moving on, start adding
more of the instruments as we go along.
00:26:42 Because a lot of these elements
were recorded really well
or they are sample sources
or keyboard sources,
I don't know how much I really want
to add to them
until I get further along down the mix.
00:26:51 I really want to get that vocal back
in there
so I'm gonna add the rest of this stuff
very quickly
and then turn the vocal back on
so I can listen to everything in context.
00:27:50 Mojo's vocal was recorded really well,
I don't really have too much to fix there.
00:27:54 But like everything else that's recorded
with a large diaphragm condenser microphone
like his was, I want to make sure that
I take out everything below...
00:28:00 let's say 50 or 60Hz to make sure
that there's no rumble underneath there.
00:28:27 One way that I like to use plug-ins
and even external processing
is to push the processor to its extreme
to find out what the outer edges
of the envelope of its capabilities are.
00:28:36 Now I know what these EQs can do.
00:28:37 But I want to really push this frequency
as high as I possibly can
until I can notice the difference,
and then back off just a little bit.
00:28:54 There really wasn't that much of a
difference until I got well above 100Hz,
which tells me that there's really
nothing below 100Hz that I want to keep.
00:29:05 And as always, check in bypass...
00:29:12 And back on...
00:29:17 It's difficult to tell the difference
individually,
but believe me, once you get to the end
of your mix, if you haven't done this,
you'll notice the difference
in the available headroom in the mix.
00:29:26 What I'm hearing when I listen back
to this vocal,
is it sounds like it was recorded
in a small space.
00:29:30 The reason I think that is because I hear
a lot of early reflections in the room.
00:29:34 That has a really specific sound to it,
and I've heard it a lot of times before.
00:29:38 What I'm gonna try to do is use
reductive equalization
to see if I can remove some of the
boxiness, or of the muddiness
in the low-mid range.
00:30:05 Ok. I hear some resonance right there
around 150 or 160Hz,
I'm gonna pull a little bit of that out.
But as I was sweeping the EQ around,
I also heard a little bit of a muddiness
around 270 or 280.
00:30:17 I'm gonna use another band of the same
EQ to pull a bit of that out as well.
00:30:35 And around 300...
00:30:37 Or just below it...
00:30:46 Ok.
00:30:48 I'll take a little bit of that out
as well.
00:30:51 And...
00:30:58 So we started here... And I bypass
the EQ so we can hear the original.
00:31:09 Now with the reductive EQ back in...
00:31:16 That's a good start.
00:31:17 The only thing I really want
to do with this vocal,
because of the type of song that it is,
and the type of mix that I'm going for,
is to bring the vocal forward
using compression.
00:31:25 I want the dynamic
to be really controlled,
so that I can get the same level
on that vocal
throughout the course of the verse.
00:31:33 When I'm going for an aggressive vocal
compression sound,
I like the 1176 because I can really
finely adjust the attack
and the release of the effect.
00:32:01 That's starting to sound more aggressive
and that's what I'm going for.
00:32:04 Now in this particular version
of the 1176 plug-in
from Universal Audio,
it has a ratio setting of 2:1,
while the other ones start at 4:1.
In this case, since it's a vocal,
I don't want to go too heavy
on the ratio to start with.
00:32:29 I just like the hardware units.
This plug-in version of the 1176
tends to thin the sound out just a little
bit, and make it a bit brighter
the more gain reduction and the more
input volume that you use.
00:32:39 Again I want to make sure that
I adjust the attack and the release time
to work with the tempo of the music
and the tempo of the vocal.
00:32:45 Obviously with this one,
the vocal's pretty fast,
so I want a pretty quick release time
so that the compression doesn't linger
to the next word or the next phrase.
00:33:05 You noticed as I brought
that release time down
the vocal actually sounded more
aggressive,
because the compressor was pumping
in and out with the timing of the vocal.
00:33:13 Most of the time with the 1176,
I start with a medium attack time
because I want to make sure the initial
envelope of the attack comes through.
00:33:21 That gives me a bitier and more
aggressive sound.
00:33:23 That's what I'm really going for
in this case.
00:33:35 Let's listen to it in bypass...
00:33:46 And with the compressor back in.
00:33:57 One thing I did and really noticed when
I was doing my reductive EQing
before I inserted the compressor
is that there are some frequencies
in the low or low-mid range
that are now causing the compressor to
compress a bit too hard in that range.
00:34:08 So I'm gonna go back to that EQ
and search for that frequency.
00:34:36 I think it's working
a little bit better now.
00:34:37 What I just did was I widened
the Q setting
on the reductive EQ that I was using
around 166Hz.
00:34:44 The next thing that I want to do is
make sure that I listen to this in context
because all these adjustments could
sound great by itself,
but in context with the rest of the mix,
it could not work,
or it could really work. I can't tell you
until I put it with the rest of the mix.
00:34:55 But before I do that, I'm gonna add just
a touch of brightness on the top end
because it does sound
a little dull to me.
00:35:05 I'm gonna add a little bit at 4.7k
and see if that makes the vocal
a little bit more intelligible.
00:35:21 I'm also gonna add a little bit of air
at maybe around 10 or 12k.
00:35:46 That might be a good place to start.
00:35:48 I also noticed I need a little bit
of de-essing
after I added that high frequency.
00:36:09 Ok, now let's listen to it in context.
00:36:28 In a real mix situation, I'd spend a lot
of time agonizing over these EQ choices
but I'm trying to do this mix quickly
just to demonstrate my technique.
00:36:36 Like we always do, let's listen without
all the plug-ins on it,
and then we'll put the plug-ins back in
and see how it fits in the mix.
00:36:51 That's where we began,
and here's where we ended up.
00:37:06 I think there's something
that's worth pointing out,
it's that in this particular type of mix,
for this particular genre of music,
we're not necessarily going for
the most natural sound possible.
00:37:15 We're trying to make it work
in the context
of all the other instruments and
elements that are in the mix.
00:37:20 In this case with really aggressive drums,
those vocals really need to compete.
00:37:24 I really wouldn't want to make
these vocals wet
or make them sound overly effected,
it just wouldn't work in this type of mix.
00:37:30 I wonder if that doesn't mean
I need to leave them dry.
00:37:32 I need to get them some dimension
so that they sound bigger than life,
they sound livelier
than they are right now.
00:37:37 What I'm gonna look at is try to add
some short delays
or possibly a really short reverb,
just to give some dimension.
00:37:43 I may also try adding a little bit
of an effect
from the UAD Roland Dimension D.
00:37:48 That's a stereo effect, something
between a chorus and...
00:37:52 an Eventide Harmonizer
pitch-shifting effect.
00:37:55 So first let's try
a really short reverb.
00:38:10 You noticed that you hear a lot of
this effect when the track is in solo,
but when I put it back into the mix,
the effect is gonna fade back
under the track a little bit,
and it's just gonna give us
a sort of a dimension.
00:38:37 I'm gonna bypass the reverb,
and I'm gonna put it back in
just to see what the change
really sounds like.
00:38:47 And with the reverb in...
00:38:54 I don't think that reverb really suits
the track, I'm gonna try something else.
00:38:59 I'm gonna set up a really short delay,
maybe a 16th note, or maybe even faster.
00:39:03 I want to give a little bit
of extra dimension,
a little bit of extra weight
to that vocal.
00:39:15 That's not it.
00:39:26 I definitely want it faster than that.
00:39:39 Ok, and in context...
00:39:52 I like that effect.
00:39:53 What I did was I used the LowCut
and the HighCut to shape this delay,
so that it sort of faded
in the background a little bit.
00:39:59 We can just barely perceive this echo,
but it does give dimension
to the lead vocal.
00:40:02 Without the effect...
00:40:10 And with the effect.
00:40:23 I'm gonna try adding some Roland
Dimension D to this
to see if I can add a little bit more
excitement to the lead vocal.
00:40:44 When I add effects,
I think it's important
to both listen to all the effects
combined together,
and then individually, to make sure
that it's doing what you want it to do.
00:40:53 So this is with only
the Roland Dimension D.
00:41:05 Like compression or EQ, I'm gonna
adjust it to its extreme parameters
so I can see what it's really doing, then
I'll pull it back until it's just right.
00:41:24 Ok, let's audition it without...
the Dimension D.
00:41:33 And with the Dim D...
00:41:43 Ok, I pulled it back
just a little bit more.
00:41:45 I'm gonna add that delay back in
and see what the combination
of these two effects gets me.
In solo...
00:41:59 I'm hearing a little bit too much
of the high end on the delay.
00:42:02 So I'm gonna bring that HighCut down
even more.
00:42:19 Now let's hear what it sounds like
in context,
put the rest of the mix back in,
and see if it fits.
00:42:47 Now I'm gonna remove
all those plug-ins and effects,
listen to the vocal in context
in its raw state,
and see if it's really doing
what I want it to do.
00:42:55 Remember I wanted it to become
more aggressive,
to be more exciting, and to become the
dominant element in that part of the mix.
00:43:00 The vocal is so important,
it needs to stand out
and really be exciting and aggressive.
00:43:19 And now with all the plug-ins
and effects back in.
00:43:38 I think we're getting there.
00:43:40 In a real mix situation, I would spend
an awful lot of time on these lead vocals
revising the EQs, maybe changing out
the type of the EQ,
revising the compression,
to get it just right.
00:43:51 I noticed that some of the instruments
were sort of fighting a little bit.
00:43:55 So I'm gonna revisit the panning
and the levels,
to make sure that I get things
out of the way of the lead vocal
to give it the room to breathe and shine
in the mix the way that it needs to.
00:44:04 Specifically, I heard that this organ
track is panned right at the middle
and is being buried by the lead vocal.
I want to be able to hear everything.
00:44:12 So I'm gonna use panning to move it
out of the way a little bit.
00:44:15 In this case, I think I'll pan it
a little bit right.
00:44:58 I've panned that organ right,
and it seems like it's getting
out of the way of the vocal.
00:45:02 But it could be a little bit
more dynamic.
00:45:04 Maybe I might try something like
a dynamic panning,
or even a modulation in stereo
so that I can push it further
out of the way of the vocal.
00:45:12 It may give a little bit more excitement
to the track as well.
00:45:15 Here's another Soundtoys plug-in
that I really like: the PanMan.
00:45:19 It has a lot of different settings,
but what it's meant to do
is emulate an old piece of equipment
we used to use a long time ago
called the Pan Scan.
00:45:27 What that does is it's just
an automatic panner that you can set
at different speeds
and in different widths
to make things move around
the stereo field of the mix.
00:45:35 I don't really want
any wild panning here,
I don't want anything to distract
from the lead vocal.
00:45:39 I just want to add a little bit of
excitement and movement.
00:45:43 I think the key to a good mix
is to have things evolve over time.
00:45:46 So I don't want to do anything too fast,
maybe something that evolves slowly
and pushes it off to the side,
and then back to the other side,
or maybe even something
that moves back and forth.
00:46:15 Ok. Now let's see
what that sounds like in context.
00:46:53 The PanMan kind of works,
it makes it fun to listen to,
but I'm not sure
if it's a little distracting or not.
00:47:00 And just for fun,
because I love doing this stuff,
I'm gonna try the Crystallizer too
instead of the PanMan,
and see if I can get an effect out of that
that makes it more exciting
but doesn't distract you too much
from the lead vocal.
00:47:15 On really specific effects like this,
I like to work in solo so I can really
hear what the effect is doing.
00:47:22 And then I add it back into the mix
to see if it's really working.
00:47:45 That's interesting.
00:47:46 Let's hear it in bypass,
and then we'll put the effect back in.
00:48:05 I like that, it's interesting,
at least in solo.
00:48:07 Now let's put it back
in the context of the mix.
00:48:26 I like that a lot better,
I'm gonna run with that for now.
00:48:28 But again, let's hear it in context
with the effect removed,
and then we'll put it back in.
00:48:44 Ok! And with the Crystallizer
chorus effect back in...
00:49:01 I also want to bring the volume
of that track down just a little bit,
because adding the effect actually
made it more prominent in the track.
00:49:26 Cool! I'm really starting to feel
the vibe of this track.
00:49:28 I'm gonna move on to the chorus. I noticed
there are a couple of new instruments
that come in in that section, so I want
to get those in there pretty quickly
and get the vocals in there pretty
quickly to get the big picture.
00:49:39 This Mellotron sound is gonna come in
just after the hook starts.
00:49:57 It's got a really cool vinyl sample
vibe to it,
I don't want to get rid of that, maybe
I might even want to enhance it.
00:50:02 But I surely want to make sure
it's part of the hook.
00:50:05 Let's hear it in context.
00:50:25 I noticed that I have to bring it pretty
high in volume
before I actually hear it in the hook.
00:50:29 It's because there's a little bit
of mud in the low-mid range.
00:50:32 I'm gonna remove
a little bit of that first.
00:50:56 And of course, I'm gonna do
my high-pass filter.
00:51:12 I'm gonna put it back in the mix
and see how it fits.
00:51:31 I think I'd like to pan it a little bit
to the right
because when it's in the middle like that,
it's sort of clouding the vocal a bit.
00:52:01 All the time when I'm listening, I'm also
adjusting the EQ just a little bit
and refining the levels
so that it fits into the track.
00:52:14 I think that's a good place to start.
00:52:16 In addition to that Mellotron sound
that comes in in the hook,
there's also a couple of extra
horn parts that come in at the end.
00:52:22 Right after the hook
is the bridge section.
00:52:24 And in that section, we have a couple
of other instruments,
and I'm just gonna go ahead and work
on bringing those into the mix,
and then we'll move on to the vocal.
00:53:04 I'm gonna add a little bit
of reverb to my horns
to give them some dimension and make
them fit in the room with the drum kit.
00:53:29 I used the same reverb
that I use on the claps,
because I want to make it sound like
the band is all playing
in the same room together.
00:53:56 At this point, I think my reverb
is actually a bit too short.
00:53:59 I'm gonna go back
and adjust that a little bit.
00:54:30 When we get to the bridge section,
we have four new instruments
that are coming in there.
There are two guitars,
there's a Rhodes type piano sound,
and there's also some cellos.
00:54:40 I'm gonna pop those into the mix quickly
and try to get their level set,
then we'll adjust them as we go.
00:55:11 Now that I hear
all those parts together,
what I really want is a little bit
of a longer reverb sound...
00:55:17 Not only on the claps,
but also on...
00:55:20 these cellos, and also on these guitars.
00:55:23 I want to elongate this part,
I want to make it sound more epic.
00:55:26 I need something
that's a little bit more distinct,
and I think I'm gonna try
a little bit longer reverb.
00:55:33 I like using this Lexicon 224
Digital Reverb from UAD,
because it's got a lot of the flavor
of the original unit,
and I've been used to the Lexicon
sound for years,
so this works perfectly for me.
00:55:44 I'm gonna start by adding that
to the claps,
and I'll adjust the length of the reverb
so that it's timed with the song.
00:56:11 Ok. That's a Plate sound, and
that's not what I'm going for.
00:56:13 I'm gonna choose a Hall setting.
00:56:34 I've set the Diffusion rate
on that reverb pretty high,
because I want it to sound smooth,
and not like a bunch of little echoes.
00:56:45 Notice how the decay of the reverb
almost completely disappears
before the next clap comes in.
00:57:00 Now we're gonna listen
to that longer reverb in context.
00:57:03 I want you to pay attention to the way
that that longer reverb
sort of changes the whole vibe
of that bridge section.
00:57:08 It's making me feel like I want
to add that
to the other elements that come in
in that bridge,
like the guitar parts and the cello.
00:57:31 I also think I want to come up with
a special effect
for the Rhodes keyboard part
that gets introduced there as well.
00:58:07 It's getting there, but I'm gonna work
on the balance just a little bit.
00:58:39 Ok.
00:58:40 I'm gonna try a really unique delayed
sound on that Rhodes part,
to see if I can make it just sound
longer, extend it a little bit longer,
to give a more epic feel
for this bridge part.
00:59:53 Now let's hear that in context,
that's a fun sound.
01:00:14 I think I want to make that Rhodes
sound a little bit more lo-fi.
01:00:16 So I'm gonna try
a little bit of distortion.
01:01:06 That's starting to sound really good
to me, I like the effect,
I think I'm gonna tweak it
a little bit more later,
but one thing that I did notice is that
my claps now sound pretty thin.
01:01:14 I'm gonna go back and work on those
just for a second.
01:01:49 Ok, that's starting to get there...
01:01:51 I hear that I want my cellos
a little bit brighter.
01:01:53 I want them to sound more realistic
than they do at the moment.
01:01:56 So maybe just a touch of EQ.
01:02:51 Now that I have all the instruments
in the chorus in,
I really want to get back to the vocal.
01:02:55 I'm looking for something
that sounds a lot more lush.
01:02:58 I want to add some effects like some
delay, and maybe some reverb,
I want the vocals to be a bit brighter,
and I want them
to be glued together more
so that the hook sounds cohesive.
01:03:20 In this hook,
we have three different vocalists.
01:03:23 Mojo is doing the lead line,
we have Niki who's doing harmonies,
and we have John Legend
who is doing a background vocal part.
01:03:30 I think I want to treat these
a little bit separately.
01:03:33 I'll probably go ahead and bus
Mojo's vocals together,
and process them in a way
that glues them together.
01:03:40 I'll do the same individually
for John Legend, and for Niki.
01:03:43 Then I'm gonna marry them all together
to make the hook cohesive as a whole.
01:03:47 That way I can play with the texture
or balance between their voices.
01:04:05 Mojo's vocals sound like they were
recorded pretty well,
but I think what I want to do is
I want to put a filter on each one of them
before I bus them together, so that
I'm not getting too much low-end
that's not necessary
at the compressor on the bus.
01:04:44 I'm not gonna treat his chorus vocals
exactly the same way
that I treated his verse vocals,
but I'm gonna use the same principle
of reductive EQ.
01:04:51 I'm just gonna find a few frequencies
that are bothering me
in the low-mid range
and in the mid range.
01:05:28 Ok.
01:05:29 I'm gonna apply that
to all of Mojo's tracks in the chorus.
01:05:36 Then I'm gonna bus them all together.
01:06:08 I grouped all of Mojo's hook vocals
together
so that I can control them more easily.
01:06:29 I'm gonna repeat the same process
with John's vocals
to separate busses.
01:06:33 I've also grouped John's vocals
together as well.
01:06:35 For some reason there are two vocal
tracks on a stereo track here,
so I'm gonna split those apart
so I can deal with them individually.
01:06:47 Let's listen to those in solo.
01:07:13 I think that also needs a reductive EQ,
there's some stuff in the low-end
that I want to take out.
01:07:18 So I'm gonna put a high-pass filter
on it to clean it up a little bit.
01:08:04 I'm gonna apply that
to all of John's tracks,
because I think it was just the result
of the microphone that he used
or the proximity
to the microphone itself.
01:08:33 Ok! So I want to listen to John's vocals
in context with the hook as well.
01:08:54 I'm already starting to build
the panning scheme
that I think I'm gonna use
for the hook vocals.
01:08:59 I think maybe what I want to do
is have John a little bit to the right,
have Mojo a little bit to the left,
and have Niki sort of a little bit
left and a little bit right.
01:09:08 We'll see how that works.
01:09:10 Finally, I'm gonna bus Niki's vocals
as well.
01:10:11 Niki's vocals don't really need
much correction,
but I'm gonna put
my high-pass filter on them.
01:10:27 Now I'm gonna listen to all three of
those vocals in context with the music.
01:11:02 I'm gonna go ahead and bypass all
of these high-pass and reductive EQs
to show you what the difference is.
01:11:09 Here's the bypassed sound.
01:11:40 And with the filters in.
01:12:14 It's not a huge difference, but what
you do notice is that it's cleaner
and there's more
available headroom in the mix,
and we're gonna need that
moving forward.
01:12:21 Like the vocal on the verse,
what I want to do now
is maybe try some compression to see if
I can get a little bit more excitement,
a little bit more aggression
out of these vocals.
01:12:30 Then I'm gonna add some effects
and make them blend in
with the rest of the tracks.
01:12:34 I want to apply some compression
to each one of these vocal groups
and make them sound individual
and distinct.
01:12:40 First, we're gonna work
on Mojo's a little bit.
01:13:13 Like Mojo's verse vocal, I'm gonna
start with a medium attack time,
a fast release, and I'll raise the input
until I get the kind of compression
that I'm looking for.
And then I'll level match it.
01:13:51 Now that I've got that working,
I'm gonna add a little bit of EQ on it.
01:13:54 I want to make it shine a little bit,
make it sparkle a little bit.
01:13:57 It is the hook,
so it's got to stand out.
01:14:30 I hear some mid-frequency
and some low-frequency stuff,
and I'm gonna go ahead and try to take
that out a little bit with this EQ.
01:14:37 The Cambridge EQ doesn't have
a whole lot of color,
but I can be very precise with it.
01:15:27 I also want to add some reverb,
maybe some delay,
and maybe even some of that Dimension D
to this vocal
to make it stand out and sound special.
01:15:56 In this case, I think the longer reverb
that we were using before
on the bridge section kind of works here.
So I'm gonna try it out.
01:16:02 I'm also gonna try adding a little bit
of delay to give some length.
01:16:06 I don't want it on every single word.
01:16:07 I'm just gonna use it on maybe
a couple of the last words for delay.
01:16:10 I'm gonna automate that really quickly.
01:17:03 I like the way that delay sounds,
but I want to make a few adjustments.
01:17:06 I'm gonna maybe cut some more
of the lows,
allow a little bit more of the high
frequencies to come out,
add some feedback, so I have
more repeats of the echo...
01:17:14 I'm gonna put a send to the reverb
on the output of the delay.
01:17:18 Basically what I'm doing is I'm just
adding a touch of the reverb
that we used on the vocal itself,
to the return of the delay.
01:17:42 Let's listen to all those adjustments
in context.
01:18:21 Now that we have Mojo's hook vocals
sitting a little bit better,
we're gonna move on and
do the same thing to John's vocals.
01:18:27 I'm gonna copy and paste some of
the settings I have for Mojo's vocals,
but I know it's gonna be slightly
different because of the gain staging.
01:18:32 So we'll go ahead
and tweak it afterwards.
01:19:14 Alright. Now let's hear that in context
real quick.
01:19:43 Ok! We're gonna move on and do exactly
the same thing with Niki's vocals.
01:19:46 And just tweak it.
01:20:35 Now I'm gonna listen
to all these vocals together,
still in solo, and see how they blend.
01:21:09 Ok. I want to listen to them in context,
and while I listen to them,
I'm gonna go ahead and balance them
just a little bit better.
01:22:03 Ok, we're getting pretty close, but
there's a couple of things that I noticed
that I want to take care of immediately.
01:22:07 One thing is that the overall hook
itself is a little bit thick.
01:22:11 I want to give it a little bit more of
a sheen, a little bit more excitement.
01:22:14 I'm gonna go one step further
and take the outputs of all the busses
we did for Niki, for John, and for Mojo,
and I'm gonna send those to its own bus
that I'll be able to process separately.
01:22:25 Probably what I'm gonna do is
use a little bit of EQ
to add a little bit of a brightness,
and also pull out some of the low-mids
so it's just a bit thinner.
01:22:33 It's a little bit too heavy
in the bottom end
and I want it to sit nicely in the track.
01:22:59 I'm choosing to use the Pultec Pro EQ
because it has...
01:23:02 first off the bands
that I want to control,
and also it has a little bit of sparkle
on the high-end
when you're adding some 5k, or 8k,
or even 10k.
01:23:11 We're gonna play around with those bands
and see which one suits the sound the best.
01:23:54 Now that the EQ curve of the hook vocals
is working a little bit more to my liking,
I noticed that it's a little bit sibilant.
I know it's unusual,
but I'm gonna go ahead and add
a de-esser after my Pultec Pro EQ,
and I think that because it does
a couple of things.
01:24:07 Most importantly, what it does
is it helps to unify these busses
and glue this hook vocal together
a little bit more.
01:24:13 I know it's unusual,
but stick with me here.
01:24:36 Ok, we're getting just enough de-essing
to pull back on the sibilants,
but not really to cut too much into
the high frequencies we want to keep.
01:24:43 Now let's listen to all that in context,
I'm gonna be adjusting the levels
to make everything blend,
as I'm listening.
01:25:38 I think that's working pretty well,
it's getting closer.
01:25:40 But as always, I'm gonna go ahead
and bypass it,
and compare the way it was before
I added the Pultec and the de-esser
to the way it is now.
So let's take a listen in bypass.
01:26:14 Ok. I'm gonna add the Pultec
and the de-esser back in.
01:26:41 Ok! I think that's working really nicely
and I'm happy with that result.
01:26:44 I think what really this does,
processing these vocals together
unifies these three different textures
that we have
from three different vocalists
and glues the hook together to make it
a cohesive unit.
01:26:54 It's almost like treating
a group of instruments,
say you would take a number
of different horn tracks
and marry them together on a bus,
and it unifies that section.
01:27:03 Now would be a good time to go back
and take a look at all the choices
that we made earlier in the mix,
and make sure that everything
is still fitting together right.
01:27:09 I think at this point, we could really
look at the kick drum and the bass guitar
because they may be a little bit heavy.
01:27:15 They seem to be overshadowing the vocal
a little bit, so let's look at that.
01:27:19 One of the ways that I like to consider
whether an instrument is helping or hurting
is just simply by removing it and
taking a listen to the mix without it.
01:27:27 Does the mix sound more cohesive? Does
it work better without that instrument in it?
If that's the case,
you've got some more work to do
to make it fit into the mix.
01:27:35 So I'm gonna go ahead and mute
our kick drum and bass,
and see how the mix is working now.
01:27:54 I really do think they were getting
in the way a little bit more,
but I also noticed that the snare
is a little bit loud.
01:28:00 Here is where you want to make
these really fine adjustments,
half a dB, a dB,
or maybe a dB and a half.
01:28:06 It can make the difference between
an instrument that fits in the mix
and something
that's just getting in the way.
01:28:12 I'm gonna bring
the snare down a little bit
to see if I can make it tuck
just underneath where the vocal is.
01:28:34 That's a little bit better.
Now I'm gonna put the kick back in.
01:28:37 I'm gonna adjust its level so that
it's fitting in the song
a little bit better.
01:29:06 I'm definitely happier with that.
We're gonna get the bass back in there
to make sure that
the low-end relationship is working.
01:29:35 Now that the drums are more in proportion
I hear a few other things
that are going on.
01:29:39 These horns at the end there
are a little bit too loud,
so I'm gonna bring them down
just a little bit.
01:30:08 It's at this point in the mix where
I could spend hours, and hours
readjusting equalizers and compressors,
rebalancing the levels,
and maybe even doing a little bit
more panning to get it just right.
01:30:18 But since we don't really have
another six hours for the mix,
I want to move on to show you a really,
really important part of the mix.
01:30:24 Some mix engineers like to do this
much earlier on.
01:30:27 I feel like it's necessary to wait
until a little bit later in the mix
to apply my processing
to the Master fader
because I want to have a general
picture of the mix sort of built already
before I start applying things
that affect the entire mix together.
01:30:43 I'm looking to glue the mix together
a little bit better,
so I'm gonna put my compressor
on my Master fader
and glue it together with just a couple
of decibels worth of compression.
01:30:52 There's a lot of different compressors
that people use on a 2-Track mix,
like the SSL G Series,
like the Neve 33609,
but I think on this one, I want to try
the Shadow Hills Mastering Compressor
from UAD.
01:31:05 I don't just think of compressors on
the Master fader as a dynamics control.
01:31:09 I also think of it
as a tone-shaping control.
01:31:12 Different compressors have a different
response to different kinds of mixes.
01:31:20 Now sometimes, plug-in presets
can be really helpful.
01:31:24 As a general rule of thumb, I don't just
choose a preset and leave it on,
I tweak it afterwards. In this case,
I want to choose a preset
that Universal Audio has included
called the Mastering Discrete Steel.
01:32:00 That seems like it's gluing the mix
together a little bit
but as always you want to hear it
in bypass, level match it,
and make sure it's doing the thing
that we really want it to do.
01:32:08 So we'll start with it bypassed, and then
we'll put it in after a couple of bars.
01:33:02 I think it's really working.
01:33:03 It feels like it's gluing the mix together
a little bit more
but more importantly, it's adding
another level of excitement.
01:33:09 I know it's subtle, but that's what
mixing is, it's all about subtleties.
01:33:12 It's the sum of all these subtle things
that you do
that makes your mix sound
the way it does.
01:33:16 Some people will argue that using
a compressor like this
in dual-mono mode like I am right now
can move the low-frequency information
around
between the left and the right,
and not keep it anchored in the center.
01:33:26 I don't think that's happening here.
I think what's happening here is...
01:33:29 because the left side is programmed
independent from the right,
it's giving me some distinction,
a little bit of a different movement,
and therefore it might even be
enhancing the stereo field a little bit,
while really not disturbing
the low-frequency information.
01:33:43 I am one of those mixers that believes
you really shouldn't do too much
to the 2-Track mix.
01:33:47 You can easily destroy your mix
by trying to overprocess it
with this EQ, or this M/S stereo...
widener unit or whatever you put.
01:33:56 I think if you've mixed your song well
to begin with,
you shouldn't need much of that.
01:34:00 I like to use the compressor because
I think it glues it together a little bit
and I don't really trust every mastering
engineer to get that just right.
01:34:06 So I want to give them something
that's a little bit more cohesive.
01:34:09 For right now, I don't think I'm gonna
add any EQ to my Master fader,
but I do want to try something.
01:34:14 In quite of a few mixes I've been doing
lately, I've been using
the UAD ATR-102 plug-in.
01:34:19 This is a simulation of a tape machine
that mastering engineers
and mixing engineers have been using
for many years to print their mixes to
and to deliver as a format
for mastering.
01:34:30 I've tried lots of different variations
of settings for this unit,
but I found that
the 1/4" 456 tape formulation setting
seems to be the most suitable
for the kind of mixes that I do.
01:34:43 What I'm hoping for is just a little bit
of tape saturation
and just a little bit more glue
from this.
01:34:50 I kind of treat this like another
FX processor
because it does really change
the way the mix sounds.
01:34:56 There are a couple of adjustments
on this plug-in
that can change the curve of your mix.
01:35:00 One of those adjustments is
the Repro head High Frequency control.
01:35:05 You can use it to make your mix
a bit brighter, a bit darker,
a bit more low-end,
or a bit less low-end.
01:35:34 I think I like what that's doing,
but again I'm gonna put it in bypass,
listen to it,
and after a couple of bars,
I'm gonna put it in,
and I'm gonna compare the two.
01:36:10 Alright, we're getting closer
all the time.
01:36:12 Of course, you want to go ahead
and bypass the plug-in chain
that we have on the Master fader
and see what the real difference is.
01:36:30 Ok. Now I'm gonna put my compressor
and our ATR-102 plug-in back in.
01:36:47 When I'm adding processing
to the Master fader of my mix,
I'm looking for cohesion.
01:36:51 Some people call it glue, some people
have other descriptors for it,
but I think what it's doing is it brings
all the elements of the mix together
so it sounds like a cohesive
piece of music.
01:37:01 The last thing I'd like to do
is go ahead and deactivate
all the processing
that I have on this mix,
take another listen to the mix
in the state that it was in
before we added anything.
01:37:10 Then we'll go ahead and put everything
back on, and listen to our final product.
01:38:22 Everything we did on this mix today
was to add drama and excitement
and refine the mix
so that it can compete
with all the other stuff
that's out there on the radio.
01:38:30 We worked on the vocals, the drums,
the effects,
and finally on the Master fader
processing.
01:38:35 All these things help
to bring the mix together
and make it as exciting as it can be.
01:38:39 Thanks a lot for spending some time
with me, and hope to see you soon!
Once logged in, you will be able to read all the transcripts jump around in the video.
Equipment & Software
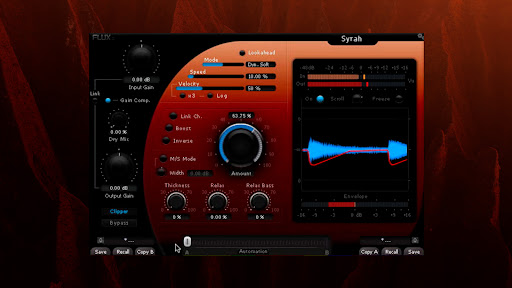
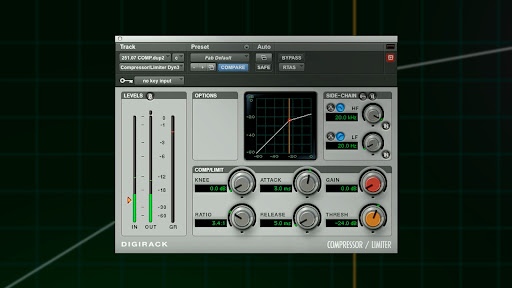
Universal Audio Neve 1081, Neve 33609, 1176AE, Pultec Pro, Fairchild, SSL E Channel Strip, Roland Dimension D, Lexicon 224, Shadow Hills Mastering Compressor, Ampex ATR 102
In addition to many Platinum, Gold and Diamond RIAA certifications, he's been twice nominated for the Album of the Year Grammy and has a further seven nominations to his credit as a mixing and recording engineer.
A skilled multi-instrumentalist and songwriter, Ryan also produces music for major label artists, film and television.
As of 2017, over 70 million albums have been sold worldwide that contain a credit to Ryan West. After moving to NYC from Youngstown, Ohio in 1997 he took a job at Sam Ash Music Store in Times Square where he began to buy recording equipment to record his own projects. A self-taught recordist, Ryan was approached by a music store client who needed help recording in his home. The client turned out to be an influential producer and A&R with Island Records. Over the following 12 months or so, he worked tirelessly to improve his abilities while recording Gospel artists like Dee Dee Warwick, Benjamin Love and others. At this time, Protools Digital audio Workstations were quickly gaining traction as the future of studio recording technology. From that early stage, Ryan developed an impressive level of speed and accuracy while recording and editing. He soon found out that those skills were exactly what the NYC hiphop community wanted and needed.
Taking the helm as chief engineer at the now defunct Soho Music Studios exposed him to top hip-hop artists and their production teams. For the next 4 years, he developed his skills as a recordist and mixer while he built relationships with artists and producers who were on their way to the top. One of those producers was Just "Just Blaze" Smith. Signing on with his management N.Q.C. Management in 2003, Ryan began a whirlwind of work with Blaze and some of the world's most successful artists and producers. He hasn't stopped working since.
Ryan helped forge the sound of hip-hop and rap music as we know it today by working with artists such as Eminem, Kanye West, Usher, Rihanna, Jay Z, Dr. Dre, Kid Cudi...
Parts of this site and some files are only accessible to pureMix Pro Members or available to purchase. Please see below our membership plans or add this video to your shopping cart.
Why didn't he show any of the vocal stack processing on the main vocal/verse?
Timmyb20
2020 May 16
I watched Ryan on the daily webinars that PureMix is doing during this quarantine time. After Ryan's interview, I signed up for a membership and this was my first stop. It was great to see you mix this track! My main take away was your focused vision. You knew what you wanted to achieve before you started mixing and made your moves to achieve that goal.
Thanks again!
Tim (Columbus, Ohio)
liamhickey@live.co.uk
2020 Feb 20
Whys it not loading???
AndresCoca
2020 Jan 11
"That's a great place to start" 1h in the tutorial haha
G.MICHAELHALL
2017 Feb 01
Thanks Ryan, knowing you're working fast in this to [mainly] demonstrate your techniques, it's impressive how even as you are just roughing it all in, it all begins to gel with great cohesion and depth. Really enjoyable track for a tutorial. An overview of your signal paths would have been really handy to see, but no matter, this tutorial has a lot to offer. Thanks again for sharing.
mike_strong
2016 Jul 19
Great vid but the camera poppin in and out of focus makes me nauseous.
JohnJones
2016 May 12
A very comprehensive mix tutorial working with world class acts and removing the illusion from the process at the same time. Its a pleaseure to listen to well recorded material and see how to work it all into a cohesive mix. I love hearing something in the mix that catches my attention and then seeing the instructor address that very thing. But its also great when I didn't catch something and they bring it to my attention like Ryan did many times here. It just adds to the way that I approach a mix. A+
PageBoy
2016 Jan 04
Ryan mixed it right before my eyes, and ears.
I feel like I just witnessed a magical illusion, except that I know it actually happened for real. So many elements tied together perfectly.
Whether you like hip hop or not, if you want to see someone mix something into an album/cd cut, sit back and enjoy.
Total mastery.
Subscribe, buy, and watch. You will learn mixing, and also humility.
Thanks Ryan, Fab, and Scheps and everyone here, for allowing me to see you work.
byron12
2015 Nov 22
Thanks Ryan!
Great Video, lots of info to digest.
ubirajaramoura
2015 Oct 18
Muito bom !
purecountry70
2015 Aug 18
is it possable to adjust a Rap Melody thats already been recorded , my client is rapping over a Melody thats already been recorded . But my Melody needs work
bdunn315
2015 Jun 12
fantastic as usual. Puremix.net...best money I've spent so far towards education. It's funny because some engineers are grabbing plugs from this company and that, and Ryan pretty much kept that to a minimum and delivered a great mix anyway. Just shows its about staying pure to the track, the overall song, and using the right tools instead of using tools for the sake of using them. Thanks again!
jeromewauk
2015 Mar 31
Wow , Ryan you are the man. What a wealth of info in how you think about a mix. Your practical use of plugins , and how to use them in itself was worth the price of admission. Thanks bro.
noisylingus
2015 Mar 23
I wasn't really excited by the beginning of the video. But when Ryan started to add eq and compress to the lead vocal and put everything back in... wow ! He blew me away.
I really appreciate his vision of a mix : very subtle and smart. Kudos mate.
axeljonssonstridbeck
2015 Jan 06
Ryan West! What a brilliant mixer and also seems to be a super nice, down to earth guy!
Pale Pyramid
2014 Dec 13
Thanks Ryan. You have a nice philosophy about the overall big picture and a solid ear. The summed large difference your series of subtle adjustments eventually add up to was quite revealing.
daniloco
2014 Nov 23
podrian agregar subtitulos en español, para este video ?
mattleigh
2014 Nov 14
Is there a reason why the session exercise files only include the verse 2 vocals, but there are 3 verses on the release?
Sonic Imagery Productions
2014 Oct 23
Error 0x80004005 with excercise file extraction. Checksum error in mixing_hip_hop_song_break_bread_with_ryan_west\Piano.wav. The file is corrupt. Can you make a fresh zip please? Thanks!
ryanwestmusic
2014 Sep 08
angeloboltini... I have not. Sorry. Been quite busy!
ryanwestmusic
2014 Sep 08
lwaidosch... It's been released for some time. There's even a video for it. https://www.youtube.com/watch?v=2d0eqsjtDY8
angeloboltini
2014 Sep 06
Hey Ryan, have you checked what mic and pre were used on John? Just started the video but it's already amazing!
lwaidosch
2014 Sep 02
Thank you Ryan for the great video! It's always amazing to have guys like you share their knowledge and experience! Really appreciate that!
One thing: Love the song! Is it released yet? :)
plays_gibsons
2014 Aug 29
Total master class with respect to the EQ and comps on the final vox busses thanks Ryan!
ryanwestmusic
2014 Aug 27
Recospok,
I used 8 channels of Dangerous summing on the original mix, but not for the video. There was no outboard gear used. Completely in the box! Thanks for watching!
Recospok
2014 Aug 27
Hey Ryan! Did you use any outboard gear for summing or anything?
ryanwestmusic
2014 Aug 18
That's exactly right, Jornarild. I like having the ability to judge each track. Kind of like working on a console.
Jornarild
2014 Aug 18
Thanks Ryan, great stuff!!
I didn't catch the reason for putting the low-cuts on alle the tracks in a group instead of having it first on the Aux? Is it to give you the ability to adjust them individually if needed?
ryanwestmusic
2014 Aug 13
Hi Gepe,
Thanks! I'm afraid that I didn't track John on this one so I'm not sure what was used. I'll ask the producer.
gepe
2014 Aug 12
Brilliant, Ryan!! Had real fun watchin' - and hearing John Legend bone dry ;-)
BTW: Do you know which mics/preamp were used for the vocals?
Cause, as you mentioned, the recording itself was very good and didn't need much treatment...
ryanwestmusic
2014 Aug 07
Thanks for the great compliments!
BillCammack
2014 Aug 07
Very well-explained, Ryan. :) Thank you.
You focused on "next level" elements of mixing, which is the feel, energy, and excitement of the individual elements and ultimately the finished mix.
I now have some great ideas for my next project, but more importantly, a better understanding of why a mixer whom I respect does what he does, the effect he's attempting to achieve, and the difference that his decisions make within the final product.
Cheers! :D
~Bill
not the mama
2014 Aug 04
Ryan West, you are a great teacher. I like how you break down and explain your approach before throwing plug-ins on tracks.
ryanwestmusic
2014 Aug 03
Some people find using color coded tracks much easier to use, but I organize my sessions in a way that makes navigation simple!
White Cat Studio
2014 Aug 02
Great video but, you don't use any color code in your session? I think it's difficult to navigate in a session like this without colors....