
Ryan West Mixing With Softube Plugins
01h 41min
(33)
Sponsored by Softube, receive this video for free when you purchase or subscribe to the new Volume 1 bundle - learn more about Volume 1 here
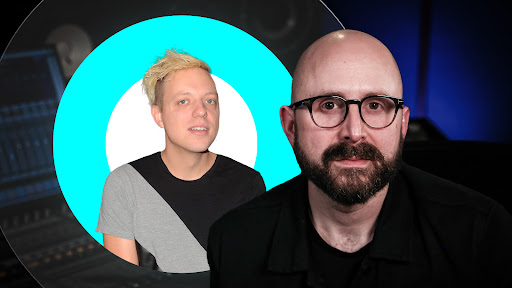
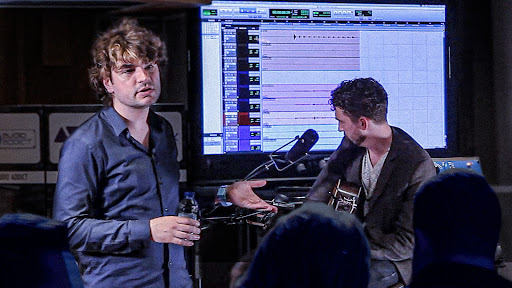
See how Ryan West mixes an entire song using only the plugins included in Softube Volume 1. He explains not just what he's doing but why, giving you insights as to how a Grammy nominated mix engineer approaches a mix.
He walks your through his entire mixing process and shows you how to:
- Continuously balance a mix and build the sonic landscape track by track
- Enhance badly recorded guitars
- Replace a plain sub bass track with a deeper and richer sound from Modular
- Create a soundstage around the vocal and place the acoustic elements in a complimentary space
- Use subtle EQ moves to create perfect spaces for instruments to sit together in the mix
- Set up the mix bus for the final touches before exporting the mix
Exercise Files Available In 5 Popular DAWs

Please login or create an account for FREE in order to be able to leave a comment.
Once logged in, you will be able to click on those chapter titles and jump around in the video.
- 00:00 - Start
- 00:0 - Introduction
- 02:12 - Adjusting Volume & Pan of Rhythmic Elements
- 06:30 - Quickly Building the Mix
- 07:09 - EQ & Compression on the Piano
- 12:29 - Adding Reverb to the Strings
- 18:46 - EQing to Make Space for the Vocal
- 26:13 - Filtering the Percussion Loops
- 26:52 - Adding in the Choir & Organ
- 33:06 - Organ EQ & Reverb
- 37:19 - Adding in More Elements
- 38:27 - Revisiting the Vocal Reverb in Context
- 52:22 - Full Mix Pass, Listing and Tweaking
- 56:45 - Acoustic Guitars
- 1:00:17 - Lead Vocal Processing
- 1:10:08 - Processing the Drum Group
- 1:15:07 - Replacing the Sub Bass
- 1:29:03 - Tweaking the Adlibs
- 1:32:17 - Changing the Electric Guitar Tone
- 1:34:01 - Bass Synth Tweaks
- 1:37:19 - Final Mix
00:00:08
Hi! I'm Ryan West, and we're at Dungeon
Beach in Williamsburg, Brooklyn today,
and we're gonna take a listen,
and take a look at a song
called "White Lines"—we're doing
a remix version—by Chansz Odero,
produced by JRuffalo and myself.
00:00:20
We're going to do this mix from scratch,
from the very beginning.
00:00:23
So let's get into it!
In the case of this remix,
what I'm hearing is,
is we've got lots of opportunities,
lots of little percussion things
to play with,
some really great acoustic guitars,
and some pad type sounds
that were created.
00:02:06
There's lots of opportunity to create space
in here and to start defining the mix.
00:02:10
I'm going to define
the rhythmic elements of the song.
00:02:14
In this case,
it's some of the acoustic guitars,
all those percussion elements
that are in there,
of course the kick and the snare.
00:02:20
Then I'm gonna start
building that as my base,
but I don't want to focus too long
on the rhythmic stuff.
00:02:25
I'm going to isolate those
for just a minute
and hear how those are
all working together. So let's do that.
00:02:59
The way this production was done,
the kick drum and the snare drum
are coming from
this HeartBeat plug-in from Softube.
00:03:06
Reverb was added in the plug-in itself.
00:03:09
If we're gonna adjust that, I'm going to
go ahead and adjust it right in the plug-in
and just keep everything
right in HeartBeat.
00:03:16
I'm going to just mess with the reverb
on that snare just a little bit.
00:03:35
It's still a big reverb,
but I like what it's doing here
so I'm going to run with that for now.
00:03:39
Let's take a listen to our percussion
stuff all together,
and just see how that's working.
00:04:02
I'm right inside the HeartBeat plug-in.
00:04:04
I just changed the EQ setting here and
boosted up a little bit of the high-end,
just making them a little bit brighter.
00:04:10
What I'm going to do right now is I'm
going to start adjusting some volumes.
00:04:34
For that percussion loop, I'm going to
bring those into the center a little bit
—that clap sound
is really, really stereo.
00:04:40
And I may actually let that out
a little bit more later,
but I want to narrow in
this percussion stuff just a little bit
to keep it defined
in the center of the mix,
so that I can use the rest
of the side space for other cool stuff.
00:05:09
I just took this little percussion thing.
00:05:12
I just took it and put it off
to the right just a little bit.
00:05:21
That thing's pretty stereo too,
that little kick drum thing,
but I think that actually changes
into a loop a little bit later
so let's take a listen to how it sounds
when it's playing the full loop.
00:05:40
I don't want to collapse that one,
that's got some cool stuff
that's happening.
00:05:45
We'll go back to that later
when we're deciding
where to put the other elements
that we want to occupy
the left and right side.
00:05:51
Let's take a listen to it
all together again
and make sure that everything
is working together and balanced.
00:05:56
Check it out.
00:06:17
Notice I'm not really doing anything
about EQ or compression right now.
00:06:21
I'm gonna address that later.
Perhaps I'll use it, perhaps I won't.
00:06:23
It really all depends on
what works in context
with the rest of the elements.
00:06:28
I'm gonna work quickly here.
00:06:30
I'm gonna start adding in
a bass and a piano,
2 of the other major elements
that are in here.
00:06:34
Pretty quickly I'm gonna
get the acoustic guitars in there.
00:06:37
I might even sneak the lead vocal
in there pretty quickly
because I want to hear
how it's all coming together.
00:07:10
What I'm hearing with this piano
is I don't think it's really fitting.
00:07:13
It's a little bit too bulbous
on the low end.
00:07:15
I want to thin it out a little bit.
00:07:17
I'm going to go
for a Channel Strip plug-in
because I'll probably want to do
a little bit of compression too.
00:07:22
I'm going to pull up...
00:07:24
Let's see...
The Summit Audio Grand Channel.
00:07:27
I have this circuit down here
on the bottom left of this plug-in
and I can use it in 2 different modes.
00:07:32
It's either a Low Cut
for the Detector circuit
on the TLA-100 compressor,
or—if I switch it to Input mode—
then it's really just a high pass,
and that's how I'm gonna use it.
00:07:42
I'm gonna go ahead and high pass
everything from 120-130, and below.
00:07:47
Let's listen to it real quick while I'm
doing that, so I can hear it in context.
00:08:08
I cut off everything below 100
and I think that's working for now,
but I'm also gonna take out
around 180 Hz too with this EQ.
00:08:25
It's definitely fitting
a little bit better.
00:08:27
I don't know
if that's going to be too thin,
but I can always go back
and revisit that later,
and make sure there's enough
of that low end on the piano
so it sounds natural.
00:08:35
I'm also gonna compress it a little bit.
Now with pianos...
00:08:38
I like to get the attack popping a little
bit so it sounds a little snappier.
00:08:42
I'm gonna start with a fast Release.
00:08:44
And a medium Attack.
And—I don't know, give it...
00:08:48
6, 7, 8 dB worth of gain reduction
and see if it's doing what I want it
to do. Let's check that out.
00:09:13
I think it really only needs
a couple of dB worth of gain reduction.
00:09:16
It's getting a little bit snappier,
but the more compression I put on
with this compressor,
it's getting a little too soft for me,
I'm gonna keep it light for right now.
00:09:23
I noticed I'll have to gain-match.
I've got to change my gain
so that it's the same loudness
with the plug-in bypassed
as it is with the plug-in instantiated.
Let's fix that real quick.
00:10:06
I'm gonna quickly start
getting some instruments in here
and just take a listen
as I start unmuting stuff,
and maybe finding a couple of places
to put things in stereo,
or I might adjust a few volumes here.
00:10:18
We'll just go a couple of minutes, take
a listen to as much as we can in context.
00:10:22
I'm gonna try as quickly as possible
to get that lead vocal in there,
because it's so important.
It's a big part of the song
and if we leave that out for too long,
we're gonna make decisions for the mix
that may not work with the lead vocal in.
00:12:09
I did some things pretty quickly here.
00:12:11
I wanted to move quickly to hear
more elements of the song.
00:12:14
I got the acoustic guitars in there,
they're doing this little strum thing,
they're panned off
to the left and the right.
00:12:19
There's this really
sort of eerie pad-type sound
that was created with the acoustic guitar
and I snuck that in there.
00:12:26
I'm starting to hear where things
I think should belong in this mix.
00:12:30
I unmuted the violas.
00:12:31
I heard right away that those sound
kind of thin, and they sound very dry.
00:12:36
Maybe what I'm gonna do quickly is
bring up some sort of verb,
or some sort of acoustic room simulation
so that I can put
the violas in a perspective
where they sound like
they belong with the rest of the mix.
00:12:47
I've already got a plate verb set up
and I'm gonna try it.
00:12:50
I don't know if it's what I really want.
00:12:52
I may also set up a room verb
so that I can maybe put those
in a little bit different perspective.
00:12:57
But let's try our plate verb.
That's on Bus 1 and 2.
00:13:01
There it is right there. Let's take
a listen to those really quickly in solo
and add some of that verb to them.
00:13:45
I just adjusted the reverb a little bit.
00:13:47
This may not be the final setting
that I'll leave this on,
but I'm just trying to get these violas
in a space that feels good to me.
00:13:53
You know really with mixing,
a lot of this is about feel.
00:13:56
I didn't necessarily know exactly
what I was going for,
I just dived right into the plug-in
and adjusted things.
00:14:01
I made it a little bit shorter,
I made it a little bit darker,
and I added
a little bit of predelay to it
so that I can make it feel more
like it was in a physical space.
00:14:10
That's my whole goal there
with the violas.
00:14:11
I want to make them sound
like they were performed
in a really great sounding room,
instead of being dry and sort of upfront.
00:14:17
What I'm gonna do next is grab an EQ,
because they are a little bit nasal
and bright.
00:14:22
I'm gonna try to reduce that a little
bit and see how they fit into the mix.
00:14:25
Again, I want to do this in context
to hear how it's working
with everything else,
so I'm gonna take them out of solo
while I EQ
and try to fit them in
where I think they belong.
00:16:05
This particular EQ that I chose is
from the Trident A-Range consoles.
00:16:09
It's a little bit of
an unconventional layout, because...
00:16:12
instead of knobs, there are sliders,
and there are 4 bands to choose
on this particular EQ.
00:16:16
It has a high pass and low pass,
like a lot of other EQs,
but it also has a Saturation knob,
which is kind of cool.
00:16:21
In this case,
I'm just using it as a basic EQ.
00:16:24
I didn't have to use
the high pass and the low pass.
00:16:27
Really all I did was
set this band to 3 kHz
and I pulled out just a little bit there.
00:16:32
This band is set to 1 kHz,
I pulled out just a little bit there.
00:16:35
And this last band is set to 150 Hz
and I popped up about 5 or 6 dB worth
of gain on that particular frequency
because I felt like it was going
to warm it up a little bit.
00:16:43
This is a very unconventional EQ, but
if you know what the controls are like
then you can operate it
just like any other EQ
and that's got
a really specific sound to it.
00:16:51
I'll go ahead and bypass
the EQ and the reverb,
listen to how it was before,
and then we'll put it back in
to see if we made a good decision.
00:17:35
I also brought the volume down
to set them back further in the mix.
00:17:38
This is not a featured instrument.
It's gonna be part of
a whole bunch of other stuff.
There's more strings to come in later.
00:17:44
For right now,
I think I'm happy with where it is.
00:17:46
I think moving forward is
the good thing to do, so let's do that.
00:18:10
The lead vocal has
a certain brightness to it,
and the way the rest of the instruments
are sitting right now,
there's so much high-frequency stuff
that the vocal is getting lost
in between all this stuff.
00:18:19
I think I'm gonna decide right now
to choose
a couple of these brighter elements,
and maybe some of this percussion stuff,
and maybe darken it up,
maybe do a little bit of
a low-pass EQ on them
so that I can create a space
for that vocal
to be upfront, center of attention.
00:18:33
Let's mute a couple of things
and see how it works.
00:18:46
Ah ha! Now listen to that.
00:18:48
I just pulled out that electric guitar
and I muted the violas
that we were just working on,
and then all of a sudden,
the vocal has a space for itself.
00:18:56
Now we can start to hear that there are
some elements that are too bright,
and those ones that I just muted
are prime candidates
for us to cut down
on the top end a little bit
to create that space for the vocal.
00:19:05
Also that percussion loop
that I just isolated
has got like this clicky stuff
that's happening on the top end,
and I think it's just a little bit much,
it's fighting the vocal a little bit.
00:19:18
Alright. So I'm gonna grab an EQ,
and I'm gonna pull out
a little bit of that top end.
00:19:25
We'll go back to the Trident A-Range,
it's a good all-around equalizer.
00:19:28
It's got a nice sound to it,
so why not?
As with everything,
we've got to hear it in context.
00:19:47
I just hit the low-pass filter down at 9K.
00:19:50
That seemed to take out
a lot of the clicky stuff on top.
00:19:52
Let's see how that works with the vocal.
00:20:15
I think that really helped a lot.
00:20:17
But I'm also gonna pull out
a little bit more I think.
00:20:21
I'm gonna use this band,
select it to 8 kHz
and then drop that back
a couple of dB and see where we end up.
00:20:26
Take a listen.
00:20:37
I'm also gonna put on
a 100 Hz high-pass filter
because I don't want
anything below there.
00:20:42
It's just gonna end up mucking up my mix
and I want that space
for more important stuff.
00:20:46
This little percussion loop
should be kind of small,
and not too clicky on the top end.
00:20:50
Let's take a listen to it
with the high pass as well.
00:21:16
I also brought it down
a little bit in the mix
and it now sits underneath the vocal,
where I want it to be.
I want it just to be a rhythmic element
that's pulling the song along further,
pulling you further into the song.
00:21:27
I'm gonna put
that other percussion loop back in
and take a listen to how it works.
00:21:38
We removed a bunch of the elements
that were in the high-frequency range.
00:21:41
I'm gonna start adding them back in
and see if there's anymore of that stuff
we can either pull back in volume
or we can maybe
take some of the high end out
so that the vocal stays upfront
where we want it to be.
00:22:04
I think it's a good candidate
to darken up a little bit as well,
so I'm gonna select the same EQ again.
00:22:09
Trident A-Range.
00:22:11
I think that's gonna be our favorite EQ
for this particular mix.
00:22:14
I'm gonna low pass that at 9K,
same ways I did with the other loop,
and see if that makes it
feel a little bit better.
00:22:20
I'm gonna listen to it in solo real quick
and then pop it into the rest of the mix.
00:22:44
That's definitely working for me,
but I'm also gonna add
a little bit of 3K,
just so I can get it to pop through,
underneath where the vocal is.
00:23:04
I'm cool with that
where that's at for right now.
00:23:06
We might go back and revisit that
once we get everything back in,
but I'm just making small moves right now
to start fitting everything together
so it starts to sound cohesive.
00:23:15
I'm gonna get other stuff back in there,
which is that guitar we took out,
and then we'll move on pretty quickly
to get the violas back in
and see where all that sits.
Here's the guitar.
00:23:57
What was the goal of all that?
We just wanted to make sure
that the vocal had its space to be in.
00:24:02
We're gonna get the bass in there,
we're gonna get the rest
of the acoustic guitars in there,
and then some effects,
and some more strings,
and we're just gonna keep
moving forward. Let's do it.
00:24:39
I don't know if you can detect this,
but the way I'm feeling right now
is that between the percussion elements
and the way those strings
that I just put in were moving,
the rhythm seems to be a little wonky,
and a little weird.
00:24:50
So I'm gonna go back and adjust
the balance between those things
so that it feels like it's moving.
00:24:55
I'm gonna take the lead vocal out
so that I can hear
just those things more clearly,
and then we'll pop the vocal back in
as soon as we get a chance.
00:26:14
I'm gonna do the same thing
with this particular loop
that I did
with the other percussion loops,
I'm gonna pull some top end out of it.
00:26:21
I think the hi-hat is driving the top
of the percussion mix
in a little bit of a weird way,
so I'm gonna try to deaccentuate
just a little bit.
00:26:47
Again with that 9 kHz low pass,
it took just enough of
that high-frequency stuff out of there
to let the hi-hat
sit back in the mix a little bit.
00:26:54
We've got a couple of sounds here
that only come in
in a few different places,
but I want to make sure
they're in there pretty quickly too.
00:27:00
We've got a couple of choir sounds
and an organ.
00:27:02
They mostly happen
in the beginning of the song,
but also during the bridge sections.
Let's go right to the bridge,
pop those sounds in
and see how they're working.
00:27:29
I'm gonna put
a Channel Strip on that one as well
because I want to pull out
some of the low-frequency stuff
so that it fits into the mix
a little bit better,
and I am gonna add some of that verb
that we added before on the strings
to try to put them in the same space
and make it sort of like
a pad sort of sound out of them.
00:27:45
I'm gonna go ahead and select
the Summit Audio Grand Channel again,
because it's got
all the controls I need on it.
00:27:51
I'm going to put that
into that Input Low Cut mode,
like I did before, and just pull out
a whole bunch there.
00:27:57
Let's check that out.
00:28:44
I know I did that really quickly,
but it's because I heard that it needed
some gain reduction,
and to be smoothed out a little bit,
so I added
some compression on the TLA-100
with a fast Attack time and fast Release.
00:28:55
I also took out
a pretty decent amount of 180 Hz
just to sort of thin that thing out.
00:29:00
Again,
we got to hear this thing in context
and we got to do our before and after.
I'll bypass and unbypass
so that we can tell
whether the decisions we made
were the right thing
for the composition or not.
00:29:33
Now that we gain-matched it,
we're still a little bit loud,
so I'm gonna pull that down.
00:30:00
I feel like
that needs even more compression.
00:30:02
I changed the Release
from fast to medium
because I felt like
it just needed to be a bit smoother.
00:30:07
I didn't want it to quite let go
of those transients so quickly.
00:30:10
And I'm getting even more compression.
00:30:12
Let's keep listening to this
till I feel like it fits.
00:30:15
I think the best way to do that is to
sometimes just go extreme,
and get a whole ton of compression
on there to see what it sounds like.
00:30:20
Then back it off until
you feel like it's in the right place.
00:30:45
I think that's definitely
in a better place.
00:30:47
I mean, sometimes you need
7 to 10 decibels worth of gain reduction
and sometimes you don't.
00:30:52
But let's keep moving on,
and make sure that we're working
towards the direction that we want.
00:31:08
I'm gonna do exactly the same thing
with these choirs.
00:31:10
It was recorded by the same people,
at the same time,
with the same microphone
in the same room, so guess what?
I'm gonna use the same plug-in.
Of course, we'll make sure we adjust it
because every track is different.
00:31:35
One thing I didn't do yet
on the other choir
was to add some of that reverb to it,
but I'm gonna do it on this one,
and then go right back to the other one
and add
a little bit of reverb to that too.
00:31:43
I want to put them in a space.
Choirs aren't really ever performed
or recorded in a completely dead space,
so we want to make sure
that they sound live.
00:32:38
Ok, back to the other choir.
00:32:40
I just want to get
a little tasty reverb on that sound.
00:33:08
That's better.
While we're at it, we're gonna pop
this organ track in that goes
to that same section in the bridge.
00:33:13
It's the only time it pops up in the song,
but let's go ahead and address it now,
since we've already got
our choirs starting to fit.
00:33:37
I think I want to put that organ
in the same space of the choirs,
and I'm gonna imagine...
like you know...
00:33:43
You had this pop track like this,
and then as an afterthought, maybe
we went recording a choir
and an organ in a great big church.
That's kind of how I'm feeling it.
00:33:50
Like I'm feeling like
the choir and the organ
may have been recorded together,
in the same space.
00:33:56
So again, I'm gonna go for
my go-to Channel Strip here.
00:34:02
Put it into Input mode.
00:34:04
Cut some of this low-frequency stuff.
00:34:07
Probably compress a little bit.
00:34:09
I like to have a fast Attack time
and a medium Release time.
00:34:12
Then I'm gonna adjust this couple
of bands of EQ up here to taste
as it's playing with everything else.
So take a listen.
00:34:39
I want to hear
the choir and the organ together
because those are the things
that have to fit, right?
Let's add some reverb to the organ.
00:34:47
And try to fit it together
with the choir.
00:35:12
The choir is a little bit left-heavy
the way it was recorded.
00:35:15
I'm panning the organ a little bit right
to give it some dimension.
00:35:18
I want there to be
some separation between those 2 things.
00:35:21
I may also try panning the reverb send
a little bit to the right
to see if I can make that organ
feel like it's coming from over here
and the choir from over here,
almost like as if we were
in a real physical space
where these 2 things happen
at the same time. A performance, right?
Check it out.
00:35:59
I guess that my goal was to try
to treat these things
like they were happening
in a physical space.
00:36:04
What we'll do as always,
is we'll take off the reverb
and we'll take off those 2 plug-ins
and see if we got that,
see if we made it more like
a performance than a dry recording.
00:36:13
So let's take it off. And take a listen.
00:36:17
This is dry, untreated.
00:36:52
I think putting performances
in a believable space
is not really a trick
that you play on listeners,
but you're asking them to come along
on a journey with you
to listen to this record.
00:37:03
If you don't put it in a believable space,
if it sounds unnatural in some way,
then I think people are a little off-put
and they really don't even know why.
00:37:10
That's your job as a mixer as to figure
out how to engage the listener.
00:37:15
And my decision in this case was
to put it in a physical space
to make it more believable,
and I think we did that.
00:37:20
So moving right along,
I'll keep adding the stuff back in
until we get everything in the mix.
00:37:28
Another little backward cymbal.
I think I'm gonna leave that dry,
but I want to make sure
I have it loud enough in the mix.
00:37:41
We've got a little bit more strings
to add back into the bridge section.
00:37:44
Let's take a listen to those.
00:37:47
That's a string and choir together.
00:37:59
I definitely want
some of my reverb on that.
00:38:01
I want that to sound really lush,
like this big performance
in like a huge church
or something like that.
It's got to sound epic, right?
Why don't we try some of that reverb
on the lead vocal
and see if that's the space
we want for the lead vocal?
And maybe we'll add a little delay,
maybe we'll create a whole new reverb
for the vocal, but let's take a listen
and see what that sounds like
with the verb we've got already.
00:39:03
That reverb is working really well
with the instruments
but I don't think it's exactly
what I want for the lead vocal.
00:39:08
At least I'm gonna try something else.
It never hurts to try something else.
00:39:12
I mean we live in DAW land,
and I can have 4 or 5 different reverbs
up if I want to.
00:39:17
There's no reason
I have to stick to just one.
00:39:19
I want a little bit different texture,
so I'm probably gonna try
something a bit longer,
maybe a little different diffusion.
00:39:25
Let's just play around
and see what we got.
00:39:27
I'm gonna play
with a couple of different settings.
00:39:29
I'm gonna try something
that has a longer time,
so basically, a longer reflection time,
so the reverb is gonna last
a longer period of time.
00:39:37
I'm also gonna play
with a couple of different settings.
00:39:39
I'm gonna change the Diffusion
so that it might sound like
a little less gritty,
or a little bit more gritty.
00:39:44
I'm also gonna be able to play with
the High Cut filter
and the Tone control
on this particular reverb
to make it sound darker or brighter,
which can push it further away
or bring it closer to you.
00:39:53
I'm gonna try a couple of different
things and see what sounds cool.
00:39:55
That's really what it's about anyway.
Does it sound cool?
To hear what happens with the Predelay
and how it can really change a reverb,
try really extreme settings.
00:40:12
Try zero Predelay, and then increase it
until it becomes longer,
and what you'll notice is that the
reverb sort of steps away from the vocal.
00:40:19
It keeps the vocal out front
without the reverb sort of
surrounding it and washing it out.
00:40:24
I like to do that
with the vocals, because...
00:40:26
The vocal is the most important thing,
I want it to be here,
I want to be really intimate.
00:40:31
So I want to find that right space
for the reverb
to sort of sit behind the vocal
and give it dimension.
00:40:36
A lot of times, I'll use
more than one reverb on the vocal too.
00:40:39
A lot of times I find myself using
a longer reverb like this,
and I might even set up a room reverb
to give it a little bit more
dimension, and ambience.
00:40:46
We'll try that too,
but first let's work with this one.
00:40:48
I'm gonna increase the Predelay time.
We'll have it set at zero to start
and I'll just keep pushing it.
00:40:53
Later, when the Predelay
goes past 30ms or so,
you're really gonna start
to hear the difference.
00:41:18
You hear what's happening there?
You're almost hearing
a little of the slapback
once we get past 30 ms or so,
because that amount of time
is really noticeable.
00:41:26
30 ms becomes the point at which for me
it separates the reverb
from the vocal itself.
00:41:31
Let's try even more extreme
and see what it sounds like.
00:41:34
Let's say... 75 ms. This is gonna be
pretty different now.
00:41:47
As a reminder,
this is what it sounds like at zero.
00:41:50
It's pretty different.
00:41:57
You hear how the reverb is responding
to the vocal like right away?
If I increase that Predelay time,
then it sort of gets away from
being right on top of the vocal
and sort of being behind it a little bit.
00:42:08
This will become even more noticeable
when I darken this reverb up a little bit
with the Tone control.
00:42:21
One of the things I always notice when
I increase the Predelay to that long
is that the reverb
all of a sudden sounds a lot longer.
00:42:28
And I always end up adjusting my Time
to be a little bit shorter for the reverb
because it doesn't need to be that long.
00:42:34
If it's too long,
it starts stepping on the vocal again
when the next vocal comes in.
00:42:38
So I would tend
to make that a little bit shorter.
00:42:40
Like I said,
I'm gonna darken this up as well.
00:42:42
I'm gonna take this Tone control,
slide it more towards the Dark,
and in effect,
what's that doing is it's kind of like
a multiple EQ move
where it's rolling off high end
and it's also ducking stuff that's
in the range of the vocal,
which is from, like 2K, no matter where,
at 5K, 6K, something like that.
00:42:59
I'm gonna darken it quite a bit
so the effect is extreme,
and then we'll go back
to this Neutral setting
and you'll hear
the difference between the two.
00:43:16
Ok, that's pretty dark.
I'm gonna put it back at Neutral.
00:43:18
Check that out.
00:43:27
That's pretty different.
00:43:28
What it also helps to do is it also
helps to push the reverb back a little bit
when it's darker,
and since there's not that many bright
reflections coming from the reverb,
it lets that vocal stand out front there.
00:43:38
You have to decide in your mix
what's gonna be the best thing.
00:43:41
Sometimes you want a brighter reverb
and to take up a whole bunch more space.
00:43:45
In our case,
we have a lush arrangement with strings,
and percussion parts,
so we do want to hear,
we want to get that ambience,
and the vibe of the reverb.
00:43:52
I'm gonna play around with that
and put that back to a darker position.
00:43:55
Then I'll play around
with the Time a little bit.
00:43:57
And I'll also use the High Cut
to take out even more high frequencies.
00:44:01
But I'm gonna wait to do that
until I put the vocal back in
with the rest of the track,
so I can hear it in context.
00:44:25
Ok, that's getting there.
Of course I want to hear it in context.
00:44:27
One of the other controls that you have
on a lot of reverbs
is a Density control.
00:44:31
I think it confuses a lot of people.
00:44:33
In plain English,
what it really does is it controls
how gritty or how smooth
the sound of the reverb is.
00:44:40
And it really is just sort of changing
the space in between
the reflections or the echoes
in the reverb itself.
00:44:47
Let's play with that.
Right now, it's at kind of a...
00:44:49
a medium-high, or almost a high setting,
so those reflections
are really close together
and kind of smear together a little bit,
so you hear less the little delays
and a smoother reverb sound.
00:44:59
So take a listen.
This is high Density right here.
00:45:13
Now I'm gonna go the opposite direction.
00:45:15
All the way down to Low Density.
00:45:18
Take a listen. You can hear
the little reflections in there.
00:45:30
It's almost like
little slaps you can hear in there.
00:45:32
I know it's kind of a subtle difference,
but it can make the biggest difference
in the world, especially on a lead vocal
where this effect is gonna be
kind of upfront and center.
00:45:40
But enough with playing around
with these little things out of context.
00:45:43
Let's take it out of solo,
put all the other stuff back in,
and listen to how it works
with the rest of the mix.
00:46:22
This mix is starting to feel
like it's coming together.
00:46:24
Now we have a long way to go.
00:46:26
However, it's starting
to feel like it's cohesive.
00:46:29
I'm gonna get the rest
of the background vocals in here.
00:46:51
I need to thin those out a little bit,
so I'm gonna go back
to my Grand Channel
and do a similar operation
to what I did before.
00:46:57
I'm gonna use
my Low Cut filter in Input mode
to take out some of that low end.
00:47:02
I'm gonna sculpt the low-mid range
with this band of the EQ,
and I'm gonna use
a little bit of compression.
00:47:24
Let's take a listen
to that background vocal in context
with the rest of the mix.
00:47:28
While I'm listening, I'm gonna go ahead
and bypass the plug-in
so I can hear it the way that it was,
and then I'll put it back in
so we can hear it with our processing.
00:47:36
Check it out.
00:48:07
I think that smoothed it out
and that's really what I wanted to do,
I just wanted to lay that background
vocal back a little bit
so the lead vocal comes through.
00:48:14
Now we should put our lead vocal back in
and make sure it's working that way.
00:48:36
I'm gonna continue on getting
these other vocals into the track.
00:48:43
I'll just sneak those in
right behind the lead vocal.
00:48:58
I'm gonna put the same reverb on those
as I have on the lead vocal
but I'm gonna give it
a little bit more reverb
so that I can push them back
a little bit behind that lead vocal.
00:49:24
Maybe we could do
something fun with those.
00:49:26
Maybe we could dirty them up a bit
so they sound almost like
a strange reproduction of the lead vocal,
kind of like an echo.
00:49:32
Let's play around with it.
I'm gonna go back to my Grand Channel.
00:49:35
I think I'm gonna make
some really quick moves here.
00:49:37
I'm gonna filter out
a whole bunch of low end
and even some high end.
00:49:43
Somewhere around there.
00:49:53
I want even more out of there.
00:49:55
Let's make this extreme.
00:49:59
I think I want some saturation there.
00:50:01
This is what this knob is good for.
00:50:03
Little texture differences
for things like this.
00:50:11
I'm gonna thin it out even further.
00:50:13
I want that to be
—not really a radio effect,
but I want it to be thinner
so it sits behind the lead vocal,
then we're gonna add
some more effects to that thing
and just sort of make it
it's own little thing.
00:50:40
Ok. That's pretty thin.
00:50:42
I'm gonna add
a little bit of extra reverb to it,
and of course,
we're gonna listen to it in context.
00:51:06
That's kind of where I want it to be,
but I don't want
to get too lost in there right now.
00:51:10
It kind of feels right, I'm sure I'll go
back and adjust more of it later.
00:51:13
Now I'm gonna get
this last little vocal in here
and guess what?
We got all our stuff in the mix.
00:51:17
We can go ahead and take a listen to it
from beginning to end
and get a real sense
of how the mix is moving.
00:51:25
That's just a little ad-lib
that pops up in a really quiet part.
00:51:29
Do we want to do anything with it?
Any reverb? Maybe not.
00:51:32
It could be a nice texture difference,
so we'll just leave it dry.
00:51:41
I'm gonna live
with that decision for right now.
00:51:43
I'm not sure that's gonna be
the way that it ends up in the mix.
00:51:46
But it's fun. I like it.
00:51:48
And fun is always good.
00:51:51
I do think I'm gonna adjust
this reverb a little bit.
00:51:53
Now that I'm hearing
all this stuff in context,
the reverb might be a little bit dark
and a little bit too short.
00:52:00
I'm just gonna change that
really quickly.
00:52:23
That's a little bit better.
00:52:25
Now is the time for us
to go back to the beginning of the song
and listen to the whole thing in context
from beginning to end.
00:52:30
I want to make sure
that it all feels right
because we made decisions in isolation
and in just certain parts of the song,
but obviously
it has to all work together,
that's really, really important
to get a cohesive mix.
00:52:40
We're gonna do that right now.
00:56:28
It's starting to come together.
00:56:30
I think it's still thick
in a couple of places
like, I think, one of the things that
I could pay attention to next
are some acoustic guitars that are
just a little bit too loud or too fat.
00:56:38
I made a couple of level adjustments
while we were listening back,
I don't know if you noticed,
but I brought a few things down.
00:56:44
I brought some of the strings down,
I brought the bass down a little bit
because it seemed like
it was taking up too much space.
00:56:49
We're gonna address
these acoustic guitars.
00:56:51
I'm gonna put them in solo
and listen to them before I do anything.
00:56:54
I think they're a little bit thick,
we can probably compress them.
00:56:57
I'm gonna make them sit in the mix
a little bit better.
00:56:59
Let's hear what they sound like in solo.
00:57:08
Even professionals
forget their guitar tuner sometimes,
but we're gonna work with this!
This is what we've got.
00:57:13
It's a little bit wonky, but...
00:57:14
I think when we take them in the mix
in just the right way,
you won't even notice it,
it's just there to add some texture.
00:57:20
I want to thin those out
just a little bit
and compress them just a little bit.
So guess where we're going?
Back to old trusty... the Grand Channel.
00:57:28
So again,
I'm gonna pull in my Input Low Cut.
00:57:38
Remember there's pretty much nothing
under 100 Hz on a acoustic guitar
or a vocal that you're ever gonna need,
so feel free to cut away.
00:57:44
I always do.
00:58:02
Alright. I'm gonna take a little bit
more of the low-mid range out of there.
00:58:06
And pop them right back
with the rest of the mix.
00:58:09
Let's see how that's working.
00:58:28
I think I want to hear
some reverb on those things too.
00:58:30
Let's try the first reverb
we have set up, the shorter one.
00:58:34
And see if that works.
00:58:41
That sounds a little sexy to me.
Let's see how that works in the mix.
00:58:53
I think I want to bring out
the string sound just a little bit,
so I'm gonna add a little bit of 2.2K,
with kind of a wide bandwidth setting
so it's not so focused narrowly.
00:59:04
So let's check that out.
00:59:19
Alright. I think I'm getting
a little bit more of that string sound.
00:59:23
I can hear the picking and the strings
just a little bit.
00:59:25
But I think I'm gonna bump it up at 2.7K
and see what that sounds like.
Think it might be the right place for it.
00:59:38
I want those to ring even more.
00:59:40
So I'm gonna give it a little bit more
of that, and a little bit more of verb.
01:00:12
That's a really good starting place.
01:00:14
We can always go back
and adjust those later
but they're starting to feel
like they belong there.
01:00:19
One thing we did not get to yet,
I did not add any processing
to the lead vocal
because I wanted to save that
until I had a bigger picture of the mix
so that I knew exactly
how that lead vocal was going to fit in.
01:00:29
I'm gonna jump right in and...
play that lead vocal back in solo,
and I want to listen
to the dynamics of it.
01:00:35
It may not even need any compression.
01:00:37
Sometimes I'll leave the compression
off the lead vocal
and I'll control the dynamics
and the volume just with automation.
01:00:42
Let's see what's happening with this one.
01:00:59
It definitely needs some smoothing out.
01:01:01
A gentle compression
could help there too.
01:01:04
I'm gonna do a trick
that I've done for years.
01:01:07
I'm gonna use
2 different compressors on this vocal.
01:01:09
At least that's what I'm gonna try
right away.
01:01:11
The 2 different types I'm gonna use
is more of a...
01:01:14
Opto-type compression
or a Tube-type compression
like we have on the Grand Channel,
and then I also want to use
a FET compressor.
01:01:21
On a lead vocal, a FET compressor
can be a really cool thing
to bring the vocal very far forward
and have it sit in front of everything.
01:01:29
Maybe that's what I want to do here.
01:01:30
I'm gonna try it anyway
and we'll see what comes out.
01:01:32
First, I'm gonna use this FET compressor.
01:01:34
You can change
the order of these things too.
01:01:37
If you want to use
the FET compressor first,
and then the softer compressor,
or Opto, or Tube compressor second,
try it!
It can work well either way,
it really depends on the song.
01:01:47
You'll have to swap them back and forth
and see which one works best for the song.
01:01:51
That's what we're gonna do.
I'm gonna try the FET compressor first,
and I'm gonna start with a 4:1 Ratio,
a medium/fast Release,
and about a medium Attack.
01:02:00
This particular FET compressor has
a couple of other controls on it.
01:02:04
In particular with this one,
you can change the frequencies
at which the detector cuts off.
01:02:09
What that means is
if I turn this knob up here to 200,
it means that everything below 200 Hz
is not going to trip the threshold detector
for the compressor.
01:02:18
If a frequency below 200 is louder,
then any of the frequencies
that are above 200,
and I have this set to 200,
it's not gonna trip
the detector on the compressor,
so it won't start compressing
until the threshold is breached
by anything above 200.
01:02:32
With a vocal, there is pretty much
nothing there below 100 Hz anyway,
so I'm gonna set this around 150 Hz,
just in case
something sneaks through the crack.
01:02:41
I don't want that tripping my compressor.
01:03:32
I would kind of like the way that
that's working right now,
but I want to try the Grand Channel
without the FET compressor on it,
just so I can hear
how that might compress the vocal.
01:03:42
It's really kind of key
to try these different things
to decide which one is really going
to work best for the song.
01:03:47
Don't be afraid to try.
I mean, we live in a plug-in land.
01:03:50
You could put 10 plug-ins up here
if you want to.
01:03:53
Just bypass the ones that don't work
and when you find the sound
that you're looking for,
just get rid of those other plug-ins.
01:03:58
We can save so many versions
in Pro Tools, or Reaper,
or Logic, or anything else that you use.
01:04:03
You can try endless variations.
01:04:26
In this case, I do want to use this
TLA-100 to smooth it out a little bit.
01:04:31
Then I'm gonna put the FET compressor
after it
and give it a little bit more push.
01:04:36
That's what a FET compressor
is really good for.
01:04:39
Whether use it on vocals,
or drums, or on a mix bus,
it allows you to sort of
push the sound a little bit harder.
01:04:44
I'm only getting a couple of decibels
worth of gain reduction
on both of these compressors,
but it's the combination
of 2 different types of compression
that gives me the sound
I'm looking for here.
01:04:53
This is a really good starting place.
01:04:55
I'm gonna keep working with
this compressor for just a second
and get it closer
to where I want it to be.
01:05:37
I think using
those 2 compressors together
gave me like
a nice dynamically stable vocal.
01:05:41
I don't want that vocal
to move around too much in dynamic.
01:05:44
This song...
She's not really singing that strongly.
01:05:47
It's not a big powerful vocal,
so I need to make it dynamically stable
and bring it forward just a little bit
so that it is the star attraction in the mix.
01:05:54
After all, the vocal is always gonna be
the star attraction, right?
Unless there's a guitar solo.
01:05:59
I'm gonna listen
from earlier on in the song
to make sure that the vocal is
sitting in a place that makes me happy.
01:08:03
What strikes me right now is that
there are sometimes where I want to
just bring some really kind of cool
delay effect in on that lead vocal,
to sort of extend the vocal
in the little blank spots,
in between the breaths,
the phrases, and the sections.
01:08:17
Really quick,
I'm gonna set up a delay here.
01:08:19
I'm gonna make 2 distinct mono delays.
01:08:23
And then we're gonna
pan them a little bit.
01:08:25
And I'm gonna make
sort of a spatialized delay effect.
01:08:28
It might be a really short one,
let's try a few things out.
01:08:31
So I've got 2 mono returns here.
01:08:34
And I'm gonna send
both of those to my mix.
01:08:38
I'm gonna pan one left, and one right.
01:08:40
It's just a starting position,
we might change that.
01:08:42
We could bring them in
just a little bit.
01:08:44
And I'm gonna give them both
mono bus inputs.
01:08:48
And we'll put
a Tube Delay on both of them.
01:08:51
Let's start with a faster delay.
01:08:55
And we're gonna go 8th notes.
01:09:01
And we're gonna make the Mix 100%.
01:09:05
And pull some of that low end out
like we did on the other one.
01:09:11
I want to send stereo from here.
01:09:14
Let's take a listen to that lead vocal
and see if we can make a delay
that gives us
a nice space behind the vocal.
01:10:04
I think I like that.
I'm gonna rock with it for now
It gives
a little more dimension to the vocal.
01:10:09
It makes it sound a little more exciting.
01:10:11
One of the things
I'm hearing right now though...
01:10:13
I think I want to group
some of my drums together
so that I can process them together.
01:10:17
I could maybe compress them a little bit
so that the loops kind of...
01:10:20
work the rhythm a little bit better.
01:10:23
I'm gonna take
these couple of percussion loops here
and I am going to add the clap to that,
and I'm gonna take all of these guys
and send them over to a bus by themselves.
01:10:35
Create a Auxiliary track here.
01:10:39
Assign that to my Mix.
01:10:42
And assign the Input.
01:10:45
So now, all these drum tracks
should be going through this bus.
01:11:00
I'm gonna try using this FET compressor
to kind of make these drums
move a little bit more.
01:11:07
I'm gonna do about a 4:1 Ratio,
a pretty fast Release,
and a medium Attack time.
01:11:12
I'm gonna start pushing the compressor
pretty hard, and see how it sounds.
01:11:16
Remember too, on this compressor
we have a Parallel Inject control here,
which means I can have it
completely compressed,
or completely dry,
or any setting there in between.
01:11:25
What I'm gonna do is I'm gonna adjust
the compression the way I like it
and then I'm gonna probably roll back
somewhere between compressed and dry
so that I can get the blend that I want.
01:11:34
That's basically parallel compression,
but you can do it
right here in this plug-in
rather than having to set up another
Auxiliary return
and then blend those together.
01:11:48
Remember I told you about
that control for the Detector circuit?
This is where that's really useful.
01:11:53
I don't really want
that compressor to respond
to that little kick drum
that's coming through right there.
01:11:59
So I'm gonna turn that up
to around 300 Hz or so,
and let the compressor
work on the stuff that's above it,
rather than
that kick drum that's coming through.
01:12:24
It's kind of pumping, like it's making
the drums move in a different way.
01:12:28
Of course we want to check this
in context with the mix
and make sure it's what we really want.
01:12:32
Then we'll be able to back off
the totally compressed signal
and add some of the dry signal back in
so we get just the blend we want.
01:12:39
I'm gonna pop
this stuff back into the mix
to listen to it in context.
01:12:42
I'll be able to bypass this,
and then put it back on,
tell really what it's doing,
whether it's adding something special
to my mix or not.
I think it's going to, but let's try.
01:13:08
It's doing something pretty cool there,
but I'm gonna back off
the compressed part of that mix
and add a little bit more of the dry
back in. Let's see how that works too.
01:13:34
It might be a little extreme,
so I'm just gonna...
01:13:36
adjust it just a bit here,
a little less compression.
01:13:57
I'd say it's definitely different.
It sounds more exciting to me.
01:14:00
There's a little bit
of a level difference there,
but can you hear how the claps
and some of the percussion stuff
seem to last a little bit longer,
and they seem to have
a little bit different snap to them?
That's where parallel compression for
drum groups can really work well,
especially if you're working
with live drums,
things like overheads, or room mics.
01:14:17
Using compression in this way
can sort of bring the energy forward.
01:14:38
While I was listening to that,
I was playing with the Attack
and the Release time of the compressor.
01:14:43
I want to time it
to how I want the rhythm to move.
01:14:45
You just have to listen to it,
open up the Attack time
and make it slower
so that the transient
at the beginning of the drum hits
comes through the way you like it,
and then play with the Release time
between fast and slow
to make sure that it moves right
with the rhythm of the song.
01:14:58
So I was both listening and watching
the needle at the same time,
and seeing it go back and forth,
and seeing the way
that it interplays
with the beat of the song.
01:15:06
After working on the lead vocal
and getting back into listening
to this track from beginning to end,
I'm hearing something
that I'm not quite sure I like.
01:15:12
This bass sound—while it's ok—
it's kind of dull.
01:15:16
Let's take a listen to it.
I'm gonna put it in solo.
01:15:33
It's kind of falling flat for me.
01:15:35
While there's some things that I could do
—you know, "tricks in the mix"—
I could maybe add some distortion
or some overdrive to it,
or maybe EQ it...
01:15:43
I think in this case what I'm gonna do
is just replace it with a better sound.
01:15:47
Sometimes, that's the best solution,
if you have the option to do it.
01:15:50
In this case, I have the MIDI track
for that bass here in the session,
and I'm just gonna find a better sound.
01:15:57
I am gonna pull up... Modular.
01:16:01
If you're really into this kind of stuff,
it's extremely flexible.
01:16:04
It's got all the different modules
where you can
add a VCO, you can add filters,
mixers,
and route it all kinds of different ways,
and create all kinds of different sounds.
01:16:12
I want something slightly more aggressive,
so maybe something
that's got a buzz on the top end.
01:16:17
But I also really want to keep
that really fat bottom,
that really big low end.
01:16:21
So right now we're gonna start off
with a basic sine wave.
01:16:25
Go over right there. That's pretty easy.
01:16:28
And let's just take a listen to it.
I'm gonna solo it for right now.
01:16:32
And I'm gonna mute the bass
that we had in there,
because it's just not working.
Bye bye, bass!
That's kind of cool.
01:17:09
But I think I'm gonna try a square wave.
Maybe that's gonna...
01:17:12
be something closer
to what we're looking for here.
01:17:14
So I'm just gonna open up that filter,
and put that one right there.
01:17:18
Let's see what that sounds like.
01:17:23
Definitely a lot buzzier,
but way too buzzy
for what I'm looking for.
01:17:27
Let's just try
filtering it out a little bit.
01:17:47
That's a little bit closer. I want to
let some of that top end back in there,
so I'm gonna open up the filter
a little bit more.
01:17:59
I want to hear that in context. It's nice
and thick down there in the bottom,
and it's definitely a fatter sound
to what I had before.
01:18:05
It's more lively, and more exciting.
Let's see if it works.
01:18:25
That's a heck of a lot better!
That thing sounds like
it has life to it now.
01:18:29
With the other bass, it was just
kind of dull and sitting there.
01:18:31
Not too exciting.
01:18:33
Now I'm gonna find the frequency where
it's kind of a little bit more aggressive
in the low mids,
and I'm gonna dial out that
just a little bit
so that the sub bass stuff
can come through a little bit more.
01:18:42
I'm also gonna compress it a little bit.
01:18:45
I'm going to use...
Summit Audio Grand Channel again.
01:19:11
Ok, I think that's right there
in that zone somewhere,
so I'm gonna put that on
subtractive gain.
01:19:35
That's already working
a lot better for me.
01:19:37
I'm gonna compress it a little bit.
And...
01:19:41
Well, actually,
I might compress it a lot.
01:19:54
Remember that function
we talked about earlier
where I can put this Low Cut filter
on either the Input
or the Detector circuit?
Here's a great place
to use the Detector circuit.
01:20:03
I don't want to compress
all that sub bass energy.
01:20:06
I want to let that through, I want that
to really sort of expand
and bloom when it hits that low note.
01:20:11
So I'm gonna cut that
all the way up to 80,
and let's check that out.
01:20:15
What's happening now is the compressor
is not going to reach its threshold
for anything below that frequency
that I just set up at about 85 Hz.
01:20:42
That's definitely smoothed it out.
01:20:44
I'm gonna listen to it one more time,
because I might even want
to compress that more. I want
that bass to sit solid, right there.
01:20:50
I don't want it to move.
01:21:28
Alright. The last thing
I'm gonna do with that bass
is dial in a little bit more
of that top end,
because I like the grit that's happening
right there, but I want more.
01:22:22
I'm really feeling good
about where this mix is,
and I think I'm gonna go ahead
and start playing around
with stuff on the Master Fader, just
to glue it together a little bit more.
01:22:31
I think on this mix, I want to preserve
as much of the initial transient attack
of the drums and the vocals as possible.
01:22:37
I need a compressor
that's flexible enough to do that.
01:22:39
That means
I need Attack and Release controls.
01:22:42
I'm gonna go for
a trusty old faithful FET compressor,
because
that's got all the controls I need on.
01:22:48
I'm gonna go with a modest Ratio,
somewhere around 4:1,
kind of a fast Release time,
and a medium/slow Attack time
so I let all those transients through.
01:22:57
I don't want to grab
those drum hits or the vocals
as soon as they come in, I want it
to smooth it out just a little bit.
01:23:02
Remember on this compressor,
we have this Low Cut for the Detector.
01:23:06
I don't want this compressor touching
anything that's below 100 Hz,
or maybe even a little bit higher.
01:23:10
I want that bass
to come through nice and lively.
01:23:13
So I'm gonna set that up to,
say 115 for right now.
01:23:16
I'm gonna play back a chorus of the song,
and I'll put it on loop,
so that we can sort of A/B this.
01:23:24
I'm gonna start
without the compressor on,
and then after a couple of bars,
I'm gonna put it in.
01:24:06
Do you hear how it brings it together
just a little bit more?
This is mixing. Mixing is
little subtle moves like this
where you can do
bus compression on your drums,
or you can do
bus compression on your mix,
and you can glue
certain sections together
and that's what makes a cohesive mix.
01:24:20
It makes it all come together
and sound like it belongs on the radio.
01:24:23
I still feel like, even though we don't
want to go to the Mastering stage
and try to get this thing loud,
I think there's another level
we can go with this mix.
01:24:31
That's something else that I'm also
gonna be using on my 2-Bus processing.
01:24:34
In this case, what I'm gonna reach for
is this Drawmer S73.
01:24:39
This is a pretty unique tool.
This is not something
that you'll find in any other plug-in
or any other piece of hardware.
01:24:46
This has a bunch of different
preset settings that are pretty cool.
01:24:50
I want to make this mix
a little punchier.
01:24:52
They do have
a preset in here called Punch.
01:24:55
And on this particular plug-in,
there's not a lot of controls.
01:24:59
It's got this Amount setting,
which is essentially
what percentage of dry and wet signal
that's passing through this,
and then it has this Air setting,
and we'll toggle that on and off
and you'll hear what I mean.
01:25:10
I've got the Amount set
all the way down to zero,
and I'm gonna turn the Air function off.
01:25:16
We also have a Mix blend control on this
just like the other plug-in.
01:25:20
I'm gonna turn that all the way to Wet,
because I want to hear exactly
what this thing is doing.
Then, of course, towards the end,
we can blend that back and put as much
Dry or Wet signal in this as we want,
and blend it in parallel
right here in the plug-in.
01:25:31
That makes it pretty easy.
01:25:33
I'm gonna play back the mix,
during the same chorus section,
and I'm just gonna go ahead
and start turning this Amount up.
01:26:07
I'm gonna probably keep this
around 30 or 40%.
01:26:10
Let's go ahead and bypass this
and A/B this a little bit,
and see if we like what it did.
01:26:43
Like I said, I always want to get my mix
as far along as possible
before I ever do anything on the mix bus
so I can have opportunities like this.
01:26:50
I can use processors
to give my entire mix a lift.
01:26:53
I kind of like that,
I'm gonna leave that there for right now.
01:26:56
Next, I'm gonna turn the Air button on.
01:26:58
It's gonna open up the top end
just a little bit,
and maybe add some harmonic excitement
to the sound. Let's check it out.
01:27:23
That definitely opens up the top end
of the mix.
01:27:26
Is it too bright? I don't think so.
01:27:28
I'm gonna balance the amount
of the first process that we put on,
which was that Punch control,
with how much Air I'm getting
when I turn that Air switch on.
01:27:37
So I'm gonna turn up the Amount
of that Punch control right there,
and then I'm gonna listen to it
with the Air,
and that Punch control turned up
to 35 or 37%, something like that,
and I'm gonna A/B that
and see if it's doing something I like.
01:28:11
I really like what it's doing,
but it's a little extreme.
01:28:13
Here's where
the Mix blend control comes in.
01:28:16
I can back this off and get just as much
of those 2 effects in balance as I like.
01:28:21
I'm gonna start with it Dry,
then I'm gonna add it in slowly
until I think it's hit the sweet spot.
01:28:52
I definitely feel like
it's giving my mix a lift.
01:28:54
I'm gonna do
just a little bit less of it.
01:28:56
And a little bit less of the Punch.
01:29:00
And see how I like that.
01:29:32
The mix is sounding
pretty cool at this point,
but there are a couple of
other things I want to address
before I call this one done.
01:29:38
There is a vocal ad-lib that comes in
and it's just totally dry,
there's no FX, there's no reverb on it.
01:29:44
There's no delay
or anything else like that.
01:29:46
I thought that was gonna be cool,
but it seems like
it's kind of sticking out a little bit.
01:29:50
I'm gonna go back
and address that again.
01:29:52
It's just this vocal right here.
I'm gonna play it for you.
01:30:03
Kind of cool,
but it's kind of out of place now
because we really messed with everything
else and we put really cool effects
on the vocals, so I'd like to try to do
something different with this one.
01:30:11
I'm going to play around with a plug-in
we haven't looked at just yet.
01:30:16
And that is the Fix Doubler.
This thing is pretty cool.
01:30:21
It's got a lot of different stuff on it,
but mostly, it is a doubler plug-in.
01:30:25
It includes delay and modulation,
and it's got
lots of cool different presets.
01:30:30
We're gonna play around with it
for a little bit.
01:30:31
It's got this Auto Double function on.
I'm gonna leave that on.
01:30:34
I'm gonna put this in Stereo
and see if I can get
a cool stereo effect on that vocal,
since it's sort of like really dry
and right in the center.
01:30:41
Let's see if we can
push it at the sides a little bit.
01:30:50
Even that default setting
is kind of cool.
01:30:52
I'm gonna stick it in Stereo mode
and see what it does.
01:30:59
I mean,
that's kind of interesting already!
Let's see what happens
when we change the Sweep.
01:31:11
I don't know how much
I really want to mess with that,
but I want to play with these knobs.
01:31:15
Let's see what
the Delay Offset will do to it.
01:31:28
Not too different, but...
Let's play around with these wave types.
01:31:42
I think that's pretty cool.
01:31:44
Almost immediately I liked what I heard.
01:31:46
Let's put that in bypass
and listen to the way it was before,
completely dry with nothing on,
it sounded really naked,
sitting there by itself.
01:32:03
That's pretty sexy!
I think I'm gonna run with that.
01:32:06
It's a really cool effect, especially
in stereo when you're listening
in your earphones, or your iPhone,
or your iPad, or whatever you have here.
01:32:11
It's gonna be a nice little surprise,
a little ear candy.
01:32:14
I want to hear it one more time.
01:32:21
Pretty cool!
One of the other things that I heard
in this mix, and I think could be
more interesting,
is we have an electric guitar
that plays a really simple line.
01:32:29
And it's nice, it's a good sound,
it was tracked well,
but I think we can make it
a little more interesting.
01:32:35
I'm gonna use the Vintage Amp Room,
and then I'm gonna select
their AC130 type model.
01:32:40
I know it's gonna be bright,
so I'm gonna turn down the Tone
and the Brilliance.
01:32:46
But what I'm really looking for here
is a little bit of this Tremolo.
01:32:52
Guess what we can also do?
We can also go here to our stereo delay
and add a bit of that.
Let's see if that works.
01:33:17
Ok. I'm liking where it's going,
but I think
I need to move that microphone
a little bit back from the cabinet.
01:33:21
I'm catching too many of the transients,
it's a little bit harsh.
01:33:24
One of the great things
about this plug-in is you can adjust
the position of the microphone
and find the tone that you want.
01:33:28
So I'm gonna play with that for a second.
01:33:40
Ok, that's a little further away,
and it sounds further away.
01:33:43
Let's hear
what it sounds like in the track.
01:34:04
I like that, that's a lot more viby!
Well, tremolo-y!
The last thing I'm gonna address
in this mix for now
is I have this sort of like
low buzzy synth patch,
but I think it could be even buzzier,
I mean, this is a pattern with me now.
01:34:17
I like to take these synth patches
and rough them up a little bit.
01:34:21
I'm gonna go
for a bit of saturation on it.
01:34:23
Let's listen to the way
the bass synth patch is right now.
01:34:38
I think we can get
a little bit rougher with that.
01:34:40
Let's throw this one down in the dirt.
01:34:43
I am going to take this Saturation Knob
and I think I'll leave it
on Neutral for right now.
01:34:49
Then I'm gonna start adding
some saturation
until it tastes the way I'd like it to.
Dirty.
01:35:09
That's definitely more exciting.
01:35:11
We don't have a gain match knob
on here,
so we're gonna have to work with it.
01:35:15
I'm gonna bring the fader down
a little bit, put it back in the mix,
and adjust to taste.
01:35:40
That's definitely giving me
some more attitude. Now I like it.
01:35:43
I'm gonna play the mix back
and adjust the volume
so that it sits
in the right place for me.
01:36:25
That's a lot more aggressive,
and it works really well, because
it's a completely different texture
than some of the really smooth stuff.
01:36:31
We've got these choirs, the strings,
and the acoustic guitars,
they're really beautiful and clean.
01:36:35
They've got this great
high fidelity quality to them,
and then there's this dirty little bass
just lurking underneath.
01:36:40
I like that kind of stuff.
01:36:42
It always seems to make
a mix sound more exciting
when you've got one or two elements
that are gritty like that
and you put them up against
nice pianos and choirs,
and organs, and strings,
and things like that.
01:36:50
I love contrast,
I think it makes a mix better.
01:36:53
If you take a look at this mix
—I'm just gonna scan here on my mix page—
if you can see,
not every channel has a plug-in.
01:37:03
Why is that?
Because not everything needs processing.
01:37:08
I'm making decisions
based upon what I think it needs,
not the idea that I have to put
a plug-in on every channel.
01:37:13
Sometimes producers—and a lot of times
producers—will give you
some really good sounding stuff already
and you don't have to mess with it.
01:37:19
One of the keys to a good mix
is knowing when not to do something.
01:37:22
That's just as important as
when to apply something.
01:37:25
As always,
we want to listen to our final mix
from the beginning to the end to get
a sense of how the whole thing moves,
and see if there's anything
that we haven't addressed
that we've got to take care of
before we put this thing to bed.
01:41:23
It sounds like a mix!
Thanks again for joining us
on this video. See you next time!
Once logged in, you will be able to read all the transcripts jump around in the video.
Softube Volume 1:
- Summit Audio Grand Channel
- FET Compressor
- Trident A-Range
- Drawmer S73
- Saturation Knob
- Vintage Amp Room
- Bass Amp Room
- Fix Flanger & Doubler
- TSAR-1 Reverb
- Tube Delay
- Heartbeat
- Modular

In addition to many Platinum, Gold and Diamond RIAA certifications, he's been twice nominated for the Album of the Year Grammy and has a further seven nominations to his credit as a mixing and recording engineer.
A skilled multi-instrumentalist and songwriter, Ryan also produces music for major label artists, film and television.
As of 2017, over 70 million albums have been sold worldwide that contain a credit to Ryan West. After moving to NYC from Youngstown, Ohio in 1997 he took a job at Sam Ash Music Store in Times Square where he began to buy recording equipment to record his own projects. A self-taught recordist, Ryan was approached by a music store client who needed help recording in his home. The client turned out to be an influential producer and A&R with Island Records. Over the following 12 months or so, he worked tirelessly to improve his abilities while recording Gospel artists like Dee Dee Warwick, Benjamin Love and others. At this time, Protools Digital audio Workstations were quickly gaining traction as the future of studio recording technology. From that early stage, Ryan developed an impressive level of speed and accuracy while recording and editing. He soon found out that those skills were exactly what the NYC hiphop community wanted and needed.
Taking the helm as chief engineer at the now defunct Soho Music Studios exposed him to top hip-hop artists and their production teams. For the next 4 years, he developed his skills as a recordist and mixer while he built relationships with artists and producers who were on their way to the top. One of those producers was Just "Just Blaze" Smith. Signing on with his management N.Q.C. Management in 2003, Ryan began a whirlwind of work with Blaze and some of the world's most successful artists and producers. He hasn't stopped working since.
Ryan helped forge the sound of hip-hop and rap music as we know it today by working with artists such as Eminem, Kanye West, Usher, Rihanna, Jay Z, Dr. Dre, Kid Cudi...
Eminem
Kanye West
Usher
Ritchie Havens
T.I.
Rihanna

Chansz Odero is a singer, songwriter, performer who has written songs for various artists and has set out a positive message for young people. She has recently finished her three hit singles, "I'm Not Waiting On You," "Do You," and "Planet Hero." Chansz has gained thousands of twitter fans who support her movement and her music has been featured on power 105.1 in NYC and thisis50.com.
White Lines
CLICK_HEREMusic CreditsWhite Lines
By Chansz Odero
Chansz Odero is a singer, songwriter, performer who has written songs for various artists and has set out a positive message for young people. She has recently finished her three hit singles, "I'm Not Waiting On You," "Do You," and "Planet Hero." Chansz has gained thousands of twitter fans who support her movement and her music has been featured on power 105.1 in NYC and thisis50.com.- Artist
- Chansz Odero
Please login or create an account for FREE in order to be able to leave a comment.
- FEATURES
- ABOUT
- SOURCES
- CONNECT