There are so many tools at your disposal when it comes time to put the finishing touches on a record. Do you know what they are? More importantly, how well can you use them?
Fab discusses the 8 tools essential to the art of mastering and shows you exactly how best to use them. This video is full of examples that are applied to a wide range of musical styles. You’ll gain a deeper level of understanding as he explains the theory and reasoning behind the application of every tool.
Tools covered:
The Studio
Metering
Compression (and parallel compression)
Multiband Compression
De-esser
Equalizers
Peak Limiter
Sum & Difference (aka Mid/Side)
Mastery of these tools allows you to enhance sonic characteristics while correcting mix balance issues, giving your recordings power, clarity, and focus.
Here’s just a taste of what you’ll learn:
Why the room is the most important tool in mastering, why your rooms probably sucks, and how to deal with a less than ideal room
The importance of great metering and why you NEED it
Understand and optimize a song’s dynamic range
How to make masters sound natural and maintain their artistic integrity
The different roles compression play in mastering
How to use parallel compression to add density to the track
The role of EQs in mastering and why many mastering engineers use two EQs
00:00:07 Good morning children! Today,
we're going to talk about mastering tools.
00:00:12 I mean, tools you use for mastering,
not being good at handling a drill.
00:00:16 Here we go!
Tool #1: You're in it,
you already own it.
00:00:20 Isn't that wonderful?
It's your room.
00:00:22 It's the most important tool
in mastering. Why?
Because what you hear
needs to be what you get.
00:00:28 It is most likely that your room sucks,
because most rooms suck.
00:00:33 Why would it be more of a problem
for mastering than for mixing?
Because mastering is the very last step.
00:00:38 After mastering, there's nothing either.
00:00:40 You can't really fix stuff
in the shrink wrap, or the download.
00:00:43 Consequently, you'd better make sure
that what you hear is what you get,
and, unless you're willing to drop
a million dollars in a special room,
with special floor, special walls,
special ceiling,
special treatment, special couch,
special everything,
the best idea is also to supplement
your speakers with headphones.
00:00:59 Good ones if possible.
Accurate ones.
00:01:01 Not the ones that come with your iPhone.
Why headphones?
Because the headphones get rid
of the room. So if your room sucks,
you can make sure that everything's ok
by listening to a good pair of headphones.
00:01:11 Of course, you also have to have
a great pair of speakers.
00:01:13 But frankly, a great pair of speakers
in a bad room,
is just a bad pair of speakers,
no matter what you do.
00:01:19 So, since it's way beyond the scope
of this video
to explain how to treat a room, and where
to place the speakers in a room,
we'll do that elsewhere,
we're gonna move on to #2.
00:01:29 Tool #2: Metering! I know, not sexy,
but very important.
00:01:33 You need great metering to know
how loud your record's gonna be.
00:01:36 Without a good meter,
you don't have a reference.
00:01:39 Let me show you a good meter.
00:01:41 There are a bunch of them around.
00:01:44 This is
the 
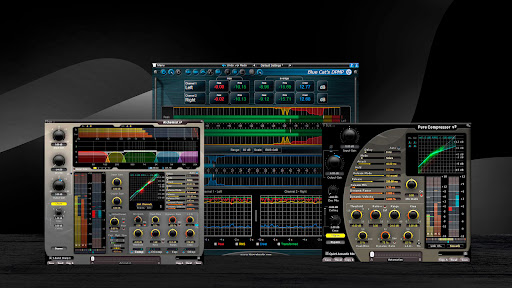
Blue Cat Audio DP Meter Pro.
00:01:47 What's good about it? It gives you
all the information you need
to be able to figure out
where you're at.
00:01:52 You have your peak levels,
and your RMS levels, on the same scale.
00:01:55 Check it out. I'm gonna play
some music, you can look at it go.
00:02:04 So...
00:02:05 the green meters on the outside,
labelled Peak, are your Peak levels.
00:02:11 The green meters on the inside of
the two Peak levels are the RMS levels.
00:02:15 And there's a cool thing at the bottom
here in blue, called the Crest factor.
00:02:18 I'll explain that.
00:02:21 And then here, you have statistics.
00:02:23 Not those kinds of statistics,
good statistics!
Here, it tells you that this track
has a max peak of 4.29dB on the left,
and 4.18 on the right,
and a max RMS of -13
on the left and right... ish.
00:02:38 And then,
you have your average levels here.
00:02:40 And then your Crest factor here.
00:02:43 As a reminder, average level
is how loud music feels,
they call it RMS too,
and the peak level is how loud
music is for your DAW.
00:02:51 The difference between the two
is your dynamic range,
or your Crest factor.
Let's play the track.
00:02:59 So now you see that your Peak is
indeed louder than your average, or RMS.
00:03:05 You can tell the difference between
the Peak and the average
by reading
the Crest factor right here...
00:03:09 about 8.5, or 9dBs,
depending on where you are.
00:03:13 That's actually a fairly
well-contained mix.
00:03:15 I think that it's very important
that you should educate yourself
about the average loudness
of the records you listen to.
00:03:21 So... what you should do is go online,
and download the latest
Katy Perry single, for example,
preferably from a legal source,
and say, the Britney Spears single...
00:03:32 Bad example,
she no longer has singles.
00:03:34 Just download something else,
something touchy-feely, like...
00:03:37 an old Sarah McLachlan record,
for example.
00:03:40 And then, compare the two on a meter.
00:03:42 You will notice that the Katy Perry
record is much louder...
00:03:45 meaning that the RMS level,
or your average level, is much higher
than say, the Sarah McLachlan record,
which is a little bit lower,
maybe by 4 or 5dBs,
which is quite a bit.
00:03:56 If you're looking for a range,
these days,
pop masters can be as loud
as -4dBs RMS,
meaning that the music
hovers around here, all the time...
00:04:10 during the whole record,
it's totally crushed.
00:04:13 And then, you know,
more sensitive pop artists
will have like a little bit
of dynamic left, like -6.
00:04:21 Around -8dBs RMS is about
where records start sounding
a little more natural,
and a little less crushed.
00:04:28 If you're really secure
about your manliness,
you could consider parking your record
around -10dBFS RMS.
00:04:34 It sounds great.
00:04:36 The lower you park it,
the more dynamic you have, right?
Because the zero is here,
the higher you get to zero with your RMS,
the less dynamic range you have.
00:04:44 This is the dynamic range left.
00:04:46 The lower you park your record,
the more dynamic range you have.
00:04:49 The compromise is of course this...
00:04:52 if this -10... average,
and this is -4 average,
you have to make a choice
where you park your record in there.
00:05:01 If you park your record
at -10, or -12,
that's gonna sound good, because
it's got a lot of dynamic...
00:05:06 provided it sounded good
to start with!
But can you stand your record being
a few dBs softer
than the next guy's record?
On the opposite range, if you park
your record right here,
at -4, or -5, or even sometimes -3,
I've seen it,
the question is: can you stand
the last year and a half of work,
and 20 hours worth of mixing,
being crushed to smithereens,
just to be able to compete,
and be louder than the next guy?
Make your selection, at any time!
So you can imagine
that having an accurate meter,
with a great Peak/Average reading,
is a good way to know
where you park your records.
00:05:41 I like this one, I use sometimes
hardware,
some people use the TT Meter,
they're available.
00:05:47 Make sure you don't travel
without them.
00:05:50 Tool #3: Compression.
00:05:52 I'm gonna keep the meter on,
so you can see what compression
does to the signal.
00:05:57 Today, I'm gonna use
the Flux Compressor...
00:06:00 Right here. Alright.
00:06:02 What is the role of compression
in mastering?
One of the obvious roles
is to add color.
00:06:08 I know a lot of mastering engineers
that park an API 2500
across their entire mastering chain,
to give that tone to it.
00:06:15 Or some people use some Shadow Hills
stuff that's really transformer-heavy.
00:06:18 You basically pick the color
for the mix.
00:06:21 You want it more vintage,
you want it more in your face,
it's a tone thing,
almost like an EQ.
00:06:26 Another obvious use of compression
in mastering,
is dynamic control, since that's what
compressors do,
with a sound design-ish
kind of element to it.
00:06:36 Meaning, the mastering engineer will
compress the track
to be able to bring the low levels up,
and add density to the track,
all the while, playing with the attack,
and the threshold together,
to modify the way the track hits
punch-wise.
00:06:49 Let me show you.
00:06:51 A good place to start
for mastering ratios is 2:1.
00:06:55 Why is that?
Because you don't wanna make it pump,
unless that's the style
you're looking for,
but most likely, you're looking for
something pretty discreet.
00:07:01 You're just doing
some enhancement here.
00:07:03 2:1 is a pretty soft ratio, it's not
gonna kill anyone.
00:07:06 Let's listen to the track.
00:07:38 So!
What I hear here, is that there's
a quiet verse, and a louder chorus.
00:07:43 If I'm thinking in mastering terms,
I know that that quiet verse is
potentially a liability.
00:07:49 So what I could do if I want
the whole thing to be in your face,
and louder, then I may have
to bring the verse up.
00:07:55 So I can either bring the verse up,
or I can bring the chorus down,
by compressing it a little bit.
00:07:59 So the trick here, my gut feeling,
would be to place the compressor
so that the threshold basically
compresses
the chorus quite a bit,
but doesn't touch the verse too much.
00:08:08 Let's see if we can do that.
00:08:21 Check it out!
Now, let's compare before and after,
level-wise, on the chorus.
00:08:41 It could use a little bit of gain.
00:08:43 Like 1dB.
00:08:45 You always wanna compare
obviously at the same level.
00:09:08 Listen to what the compressor does
to the tone and to the punch of the track.
00:09:12 The attack is at 10ms,
fairly fast,
so it's gonna catch everything,
and it's gonna put everything
kind of inline together. Check it out.
00:09:29 Without.
00:09:39 With, again.
00:09:47 It does this... thing.
00:09:49 it does this,
it kind of aligns things together.
00:09:51 Do we want that?
I don't know!
If you like it, you want that, if you
don't like it, you may want something else.
00:09:56 What else could you do?
You could open the attack.
Let me show you.
00:09:59 I'm gonna copy this setting to
the B setting on the Flux Compressor,
and then, I'm gonna open the attack
to 40 ms, for example,
just picking a number.
00:10:07 Now, the attack is slower, which means
the compressor is not gonna move as fast,
it's not gonna catch as much,
so it's gonna compress less.
00:10:13 So it's a good idea
to lower the threshold.
00:10:22 We were here on the previous setting,
on A.
00:10:30 And then B, with the open attack.
00:10:35 It needs a little bit of gain.
00:10:43 With 1dB of gain on the chorus,
and the chorus being at the same level,
that means that my verse
just came up 1dB,
which gonna reduce the difference
between the verse and the chorus,
and help me make a louder master,
without crushing it.
00:10:53 Listen to the position
of the bass drum,
regarding the snare and the guitars.
00:11:00 Alright? So, on A,
you might hear that this is this,
and on B, you might hear a little bit
of this going on. Check it out.
00:11:06 A first.
00:11:08 With the short attack.
00:11:15 B...
00:11:22 Because the attack is slower,
the compressor will let more
the bass drum go through,
you're gonna get more punchy
bass drum/snare drum thing going on.
00:11:30 It's pretty simple.
So how do you decide?
Well, say your track comes in
really punchy percussive,
with lots of dynamic range,
and it's a mess.
00:11:38 Then you're gonna use a shorter attack
and try and put it together.
00:11:41 Say your track sounds great,
or maybe is a little bit smothered,
then you open up the attack, use a little bit
of compression to bring the low levels,
and put some punch back into it.
00:11:49 It's a question of taste.
But these are the basic techniques.
00:11:53 No discussion about compression
in any style or technique
is ever complete without a discussion about
the ever mysterious parallel compression.
00:12:00 In mastering, parallel compression
is used to dense up your track.
00:12:04 Dense with an E, not with an A.
Let me show you.
00:12:08 So, if we go back to setting A
on the Pure Compressor,
and... let's just crush it.
00:12:22 Maybe slow the attack down a little bit,
so that I have more transients.
00:12:35 That's nice and crushed!
As a reminder,
my clean signal was this way.
00:12:40 As you can see, I'm turning
the Dry Mix all the way up,
meaning I have nothing but Dry,
meaning, uncompressed signal.
00:12:50 Now I'm gonna change the balance,
and add some of the compression,
tucked under the Dry signal.
00:12:57 As a reminder, the compressed signal
sounds like this.
00:13:07 Dry...
00:13:26 So the crushed signal, which is pretty
compact, because it's crushed,
comes in, and basically fills the holes
under the normal signal,
that's just wide open.
00:13:35 Of course, this is a mixed track,
so I already have some compression on it,
so it's not that wide open.
But you can tell the difference.
00:13:42 In this particular case, the best way
is to try and match levels,
and compare in bypass, otherwise
it's a mess,
and it's very difficult to figure out
what the track really does.
00:13:51 So let me match the levels,
and play you
what it's like, with and without
the parallel compressed signal.
00:14:15 I just matched it... ish.
00:14:18 Listen to the relationship between
the vocal and the rest of the track,
with and without
the parallel compression,
and also listen to the punch
of the rhythm section.
00:14:29 I start without.
00:14:49 Again.
00:15:04 With.
00:15:20 It works great.
It's a dangerous tool, be careful!
It's dangerous, but not as dangerous
as Tool #4...
00:15:26 Multiband Compression.
00:15:29 Let's switch music.
00:15:32 What's multiband compression?
It's a bunch of compressors that just
only work in certain areas of your signal,
going from low to high.
It's really not that complicated.
00:15:42 So, say you have a compressor
at the bottom...
00:15:46 You have a compressor in the middle...
00:15:50 And then you have
a compressor at the top.
00:15:54 What it is really, it's a bunch of filters
that separate your signal
in different little drawers,
and then you can compress
whatever is in that drawer.
00:16:02 So, for this track for example,
this is the whole song.
00:16:11 You get the full control
of a full compressor,
just for that one band, so if I listen
to the bottom in solo...
00:16:24 Hear how that bottom of that snare
is peaking through and being unpleasant?
So we can just compress that!
It's much smoother, right?
It doesn't do that ... thing as much.
00:16:46 I'll play it again.
This is without.
00:16:52 With.
00:16:57 Maybe a little bit of gain
to match the levels.
00:17:08 Now let's listen to that in the context
of the whole frequency range.
00:17:11 So what's going on is I'm compressing,
but just the bottom,
just what you heard,
everything else is untouched.
00:17:21 Without any processing.
00:17:30 With.
00:17:34 It definitely needs a little more gain.
00:17:36 I like the fact that it's more even,
but it needs more gain.
00:17:53 With.
00:18:01 It may not be as fat,
but it's smoother and cleaner,
which means now, I have
the perfect terrain to EQ it.
00:18:06 You can think of multiband compression
as a way to fix problems.
00:18:11 For example, you could use it
for de-essers, I'll show you in a second...
00:18:15 as a way to smooth out the dynamic range,
across the frequency range,
if somebody sent you a mix
that's not necessarily that tight.
00:18:21 And also to do some cool enhancement
tricks, like for example...
00:18:25 if I add two more bands to this,
I can solo this band,
the top band here.
00:18:33 I can say:
Why don't I take this "psss" thing,
compress the hell out of it,
so it's very steady,
and it doesn't do this as much,
and then raise it a little bit,
to see what it does.
00:18:44 So for example...
00:18:46 this, and this.
Let's just be wild!
As a reminder, without.
00:18:56 With.
00:19:01 Cool. Raise the gain.
00:19:04 In context.
00:19:13 Listen to the top, top transients,
all the way up there, above the vocal.
00:19:17 Now that they are compressed,
and raised,
they don't stick out,
they're there all the time,
It's subtle, but it gives a little more
sizzle,
and a little more bite
to the track, on top.
00:19:27 Start without.
00:19:36 With.
00:19:43 Listen to the tom attacks.
00:19:52 With.
00:20:00 So when you get your shiny new
multiband compressor,
and you click on the hyper-master
super-loud CD master-ish preset,
what's going on?
The guy who programs the preset,
is gonna - most likely - do this:
Enhance the super bottom,
that goes "Boom! Boom!"
Get rid of stuff that's in the way
for energy,
like the things that go "Mmm! Mmm!"
Which is different from "Boom! Boom!"
Tame the medium a little bit,
and do a nice shine on top, by either
expanding,
or compressing and raising
the upper mids, and the high end.
00:20:34 Basically, some combination
of the last two things I showed you.
00:20:37 You can use multiband compression
to either tuck things,
or compress and raise things
in a controlled manner.
00:20:45 The combination of all that stuff
tends to be a bloody mess
if you don't know what you're doing.
Should you do it anyway? Absolutely!
Try it! Nobody will die,
it's just music.
00:20:55 Side note on de-essers: you can have
a dedicated de-esser,
we have a video on that.
00:21:00 If it's a good quality, good sounding,
non destructive de-esser,
you can use it for mastering.
Or...
00:21:05 you can use your multiband compressor.
Because what's a de-esser?
It's a compressor that takes care
of only S's.
00:21:10 Since you know where S's live,
just turn that band on,
and compress those. Let's check it out.
00:21:15 Compression.
00:21:17 Let's bypass it,
and listen to the track.
00:21:26 We can try, it's pretty controlled,
but it'll work.
00:21:30 So, I'm gonna solo the band
that I think the S's might live around.
00:21:38 Then, you pick a Ratio,
probably brutal.
00:21:41 You lower the threshold.
00:21:46 Ok.
00:21:51 Without.
00:21:56 In context.
00:22:01 Without.
00:22:07 Et voilà!
Of course, it's always better if
the mixing engineer de-esses the vocal,
since he has control
over just the vocal, and you don't.
00:22:14 Whatever you do here will also affect
probably the top of the snare,
and stuff like that.
00:22:18 But you don't always have
that relationship with the mixing engineer.
00:22:21 I know that I scream at myself all the time
when I send myself bad mixes.
00:22:25 Tool #6: Equalizers.
What's their role in mastering?
The obvious thing is to fix stuff.
00:22:30 Somebody sends you a track
with +6dB at 60Hz,
because they don't hear it
in their room... you can fix it!
Somebody sends you a dull track...
you make it brighter.
00:22:39 A lot of mastering engineers
use two EQs in hardware.
00:22:43 One colored one,
and one clean one.
00:22:45 SoundTech is famous,
GML is famous for the clean ones,
and then maybe Pultecs,
or something like that,
or EAR EQs for the colored ones.
00:22:53 The idea here is: you fix,
then you give some vibe.
00:22:57 You use the colored one for the vibe,
and the clean one for the fix.
00:23:00 In software, you can do the same thing.
00:23:02 You can use the Epure, or the Sonnox,
or something like that,
to clean up stuff, and then use some
Pultec reissue to give it some vibe.
00:23:09 Giving the tone is one thing,
but let's not forget what the original
purpose of the equalizer was...
00:23:15 it's in the name:
Equalizer.
00:23:17 In mastering, you're gonna use
your equalizers
to match the tone of different tracks,
not just to alter the tone
of one track.
00:23:24 You're trying to make sure,
provided that's your bag,
that all the tracks in that record
sort of kinda sound the same.
00:23:31 These days,
since the process has changed,
that everybody is mixing in bedrooms
on headphones,
in bathrooms, in cars,
on tour busses,
not everybody is mixing their record
with the same person,
sometimes there's ten different people
mixing the record,
some tracks come in bass-heavy,
some top-heavy, some mid-heavy,
some don't match whatsoever.
00:23:50 So the mastering engineer will use
his equalizers to do that...
00:23:54 thing across the track.
00:23:56 So for example, on this "Colette" track
I just finished mixing,
bad me, bad me, I hear a little bit
of a nose on the bass drum.
00:24:20 Without.
00:24:25 With.
00:24:31 That's it! That little .85dB at 136Hz
did what I needed to do,
tuck that little nose thing
a little bit.
00:24:37 Now...
00:24:39 you may notice in mastering
that the settings are really minimal,
maybe 1dB here, 2dBs here,
provided the mix was ok.
00:24:45 If you find yourself adding 20dBs
at 60Hz, call the mixing engineer.
00:24:50 Tool #7: Peak Limiters.
00:24:53 In mastering, the role of the Peak limiter
is one, and one only:
to let you raise your RMS level so loud
that you can actually beat
the Katy Perry record, level-wise.
00:25:03 That's what it's for.
00:25:05 There are many brands that make many
Peak Limiters,
designed to do just that:
crush music.
00:25:10 There are even one or two analog boxes
that try to do that.
00:25:14 But it really is the realm of digital.
00:25:16 So how does it work?
Very simple!
You have no man's land at 0dBFS, right?
And then you have your music
dancing here.
00:25:23 This is your RMS level,
this is your peak level.
00:25:27 This is no man's land.
00:25:29 As you raise your level,
your input gain,
your RMS levels are raising, and your
peak levels are raising, they're happy.
00:25:36 They hang.
00:25:37 Once the peak levels start reaching
no man's land, where they can't go further,
then the limiter is gonna
tuck them in...
00:25:44 which will allow you to raise
your RMS levels further.
00:25:47 It makes sense?
So you tuck your peaks in, so you can
keep on pushing the input gain.
00:25:51 Of course there's a compromise:
you start crushing your music,
because the peaks
are the life of the music,
that's your dynamic range,
those are your transients.
00:25:58 So the higher you go,
the more damage you do.
00:26:01 That's the compromise
we talked at the beginning.
00:26:03 Katy Perry...
00:26:05 Beatles...
00:26:07 Everything in between.
00:26:09 So let's use the limiter that started
the whole trend: Waves L1.
00:26:13 Instead of doing this in this one,
you bring the threshold down.
This is the same vibe,
you're basically doing this, right?
You could do this...
00:26:20 or you could do this.
Same thing.
00:26:23 Let's go for it!
So, so far, nothing happened.
Why?
Because I'm just lowering
the threshold,
but nothing else happens, because
there's still headroom in my mix.
00:26:36 Where it gets interesting, is when
the threshold gets lower than the peaks.
00:26:41 Or, if you're using the Sonnox,
or the L2007,
or a down/up type of limiter,
when the peaks hit the ceiling.
Here we go.
00:27:10 I mean, check this out!
This is where we started...
00:27:17 Now, we're here.
00:27:22 Isn't that wonderful?
Not really! I mean,
if you check out at the same level,
there's a point where you're gonna
hit yourself in the morning.
00:27:31 This is without.
00:27:39 And with.
00:27:50 So, you could keep going, they actually
have a very neat Link thing here,
where you can see what it does
to your music.
00:27:55 So we start at, say... -7.
00:28:07 Recognize that sound?
Side note: if you were to do this
as a real master,
and Magda calls you and says:
"I want it to be really loud"...
Check this out!
You're about as loud
as the Katy Perry record right now.
00:28:39 Except that this record
wasn't mixed to do that.
00:28:41 Consequently, it's very hard to make it
that loud, without crushing it.
00:28:46 So that's the limiter. It will let you
get rid of the peaks,
so you can raise your RMS, and make
your perceived level louder,
your average level louder.
00:28:55 That's what people use and abuse.
00:28:57 Tool #8: Sum and difference techniques.
00:29:01 You may have heard of M/S miking
technique,
when you use one microphone
cardio in the middle,
one figure-eight on the side,
middle and sides.
00:29:08 Then you can decide the width
of the mid/side. That's for miking.
00:29:11 Now, in mastering,
there's the same circuit
that can be applied, and you can
separate the center and the sides.
00:29:17 Yes, you can...
Yes you can!
So you no longer think
left and right,
you think center and side.
00:29:24 Yes, you can!
Let me show you.
00:29:27 I'm gonna use the BX Digital EQ
on the UAD platform.
00:29:30 This is the whole track.
00:29:36 This is just the sides.
00:29:43 Meaning, only the information
that happens right on the sides.
00:29:46 And this is the middle,
just the mono signal in the middle.
00:30:03 That is true magic!
Imagine: say somebody sends you
a track with way too loud cymbals,
and they live on the sides of the mix
as they tend to live.
00:30:11 The vocal's fine, you don't wanna
touch that.
00:30:13 So you can't EQ the cymbals out,
because the vocal is fine.
00:30:18 But with an M/S, you can.
00:30:20 I can listen to my side signal,
and just touch that.
00:30:24 Check it out.
00:30:29 I'm high-passing
the hell out of the sides,
but I'm not touching the middle,
the middle is still tight.
00:30:38 And now if I have the two of them
together, it sounds like this.
00:30:45 So for example, if you wanna hear
something, I could take the sides...
00:30:59 And this is the whole signal,
with the sides boosted
on the high end, and slightly
high-passed.
00:31:10 Without.
00:31:25 Check it out again!
This is without.
00:31:27 Listen to the sides, and the high end
of the keyboards,
and that little ... thing.
00:31:41 With.
00:31:59 It's subtle, but it's cool,
and it lets you do pretty drastic stuff
without ruining the center of the record,
touching the bass drum or the vocal
if those are cool.
00:32:07 So it works for EQ, but it also works
for compression.
00:32:10 Check it out.
00:32:11 On Solera, for example,
you have an MS button.
00:32:14 If you click it on, instead of
functioning this way,
it's gonna function this way,
so you can compress the center
a little more,
or the sides a little more,
you can do whatever you want.
00:32:26 If you're gonna do mastering,
you're gonna need some sort
of a Sum and Difference system,
unless you're not trying to make
your records loud,
which makes you a better person,
but not necessarily competitive.
00:32:37 In summary, these are a few of the tools
that you need to own,
to be able to do a good job mastering.
00:32:44 Of course, and you noticed, these are
the same tools you just used mixing.
00:32:49 And they're kinda used
in the same kinda way.
00:32:52 It's just a question of spirit,
and it's a question of
reaching a different result.
00:32:57 Go master something!
Et voilà!
Once logged in, you will be able to read all the transcripts jump around in the video.
Fab Dupont is a award-winning NYC based record producer, mixing/mastering engineer and co-founder of pureMix.net.
Fab has been playing, writing, producing and mixing music both live and in studios all over the world. He's worked in cities like Paris, Boston, Brussels, Stockholm, London and New York just to name a few.
He has his own studio called FLUX Studios in the East Village of New York City.
Fab has received many accolades around the world, including wins at the Victoires de la Musique, South African Music awards, Pan African Music Awards, US independent music awards. He also has received Latin Grammy nominations and has worked on many Latin Grammy and Grammy-nominated albums.
Parts of this site and some files are only accessible to pureMix Pro Members or available to purchase. Please see below our membership plans or add this video to your shopping cart.
Genial ce morceaux! j'arrive pas a me concentrer sur le tuto :)
Bodry Johnson
2021 Feb 09
I like the way you teach, all the examples helps, thank you..
elliott.e
2020 Nov 19
3 years late and this finally makes sense! Fab you that guy! Thanks a million!
Kbmusiq
2019 Dec 10
This is great stuff, awesome!
beschornermusic
2019 Apr 06
This is for all people they think mastering is magic. Thanks Fab! Sounds great!
Chrisdmcc
2017 May 28
Any reason why the input gain is turned up on the multi to level match as opposed the output gain?
miguelroja
2016 Feb 26
Really good Fab, I am fascinated with this
steve2k2
2015 Jul 10
Thanks for your knowledge - I mirror Riko's comment. It would be easier for me to compare without the "with" or "without", especially if you close your eyes and try to tell the difference without the screen display.
1334
2015 Apr 19
I will answer myself, if somebody have the same question, there is an excellent thread in the forum about honestedat
1334
2015 Apr 02
Hey Fab, great video as always. One quick question, can you recommend us a good pair of headphones?
Thank you and congratulations for this excellent site!
Sheldon Cooper
2014 Dec 08
Basically you like to use different color of the same watch on different songs! :D
Riko
2014 Feb 03
Great video.
One suggestion please:
I would like you no to say "with" or "without" when you by-pass the plug in, because the comparison will be easier.
We see when the plug in is by passed.
Could you do that please?
xchrisxtopher
2014 Jan 13
The thing I appreciate most about your teaching style Fab is how easy you make everything sound. Speaking for myself, I think when I tinker and tinker I make things overly-complicated. The whole losing the forest for the trees. You bring it back to 50,000 feet by saying "look, it's not such a big deal."
Thanks!
hyphen
2014 Jan 05
this is really wonderful!!! thank you! (and the No man's land hand gesture metaphor are cool! haha)
rainbox
2013 Dec 08
In other words:
Basic level but realized and explained very well.
rainbox
2013 Dec 08
Realized and explained very well, but, with maximum respect and in my opinion, you should classify, in a numbered scale, how a course goes in deep, because this is a very, very basic level, it has been barely touched the surface of the topics.
Fabulous Fab
2013 Dec 06
@juancopro-flow: YOu can totally chnage the order. These are just pointers to give you a starting point. Try this chain. If you cannot make it work for you, swap it around. Limiter last is always a good idea though.
juancopro-flow
2013 Dec 05
Hey fab, great vid. Quick question, do you use these tools in ur chain in the same order u showed them here in the vid or is it different. If it is, can you share your change order. Thanks
P.s. those magda vocals sounded like they were floating in the clouds, freaking amazing. What reverb did you use to achieve that sound.
ortoPilot
2013 Dec 04
great tips. thanks!!
jasonxoc
2013 Dec 01
ohhh I've been waiting for a video like this :) Thanks Fab, you rock!!!
msloan
2013 Nov 30
WOW!!!!! great video! i am thrilled to see the new mastering videos! tons of great info in this one Fab!