Many top engineers use parallel compression on drums and other sources, but each has their own variations on setup and application. In this excerpt from “Adam Hawkins Deconstructing Robert DeLong,” we get a close-up look at the parallel compression techniques of a Grammy-winning engineer.
Side by Side by Side
Let’s start by looking at how Adam configured the parallel drum compression in Pro Tools. The multitrack drum tracks, except for the cymbals and some percussion, are being sent to an aux bus called DRUMS.
He added a master fader for the drum bus on which he inserted several effects: FabFilter Pro Q2, an equalizer; UAD API 2500, a compressor; and two Soundtoys distortion plug-ins, Decapitator and Devil-Loc Deluxe. We’ll get into the settings he uses in a bit.
In Pro Tools, master bus inserts are post-fader. That means that the fader comes before the insert effects in the signal chain. So depending on where Adam sets the volume fader on the master, he’ll be hitting the effects either harder or software. Particularly with compressors, that can impact the results quite a bit.
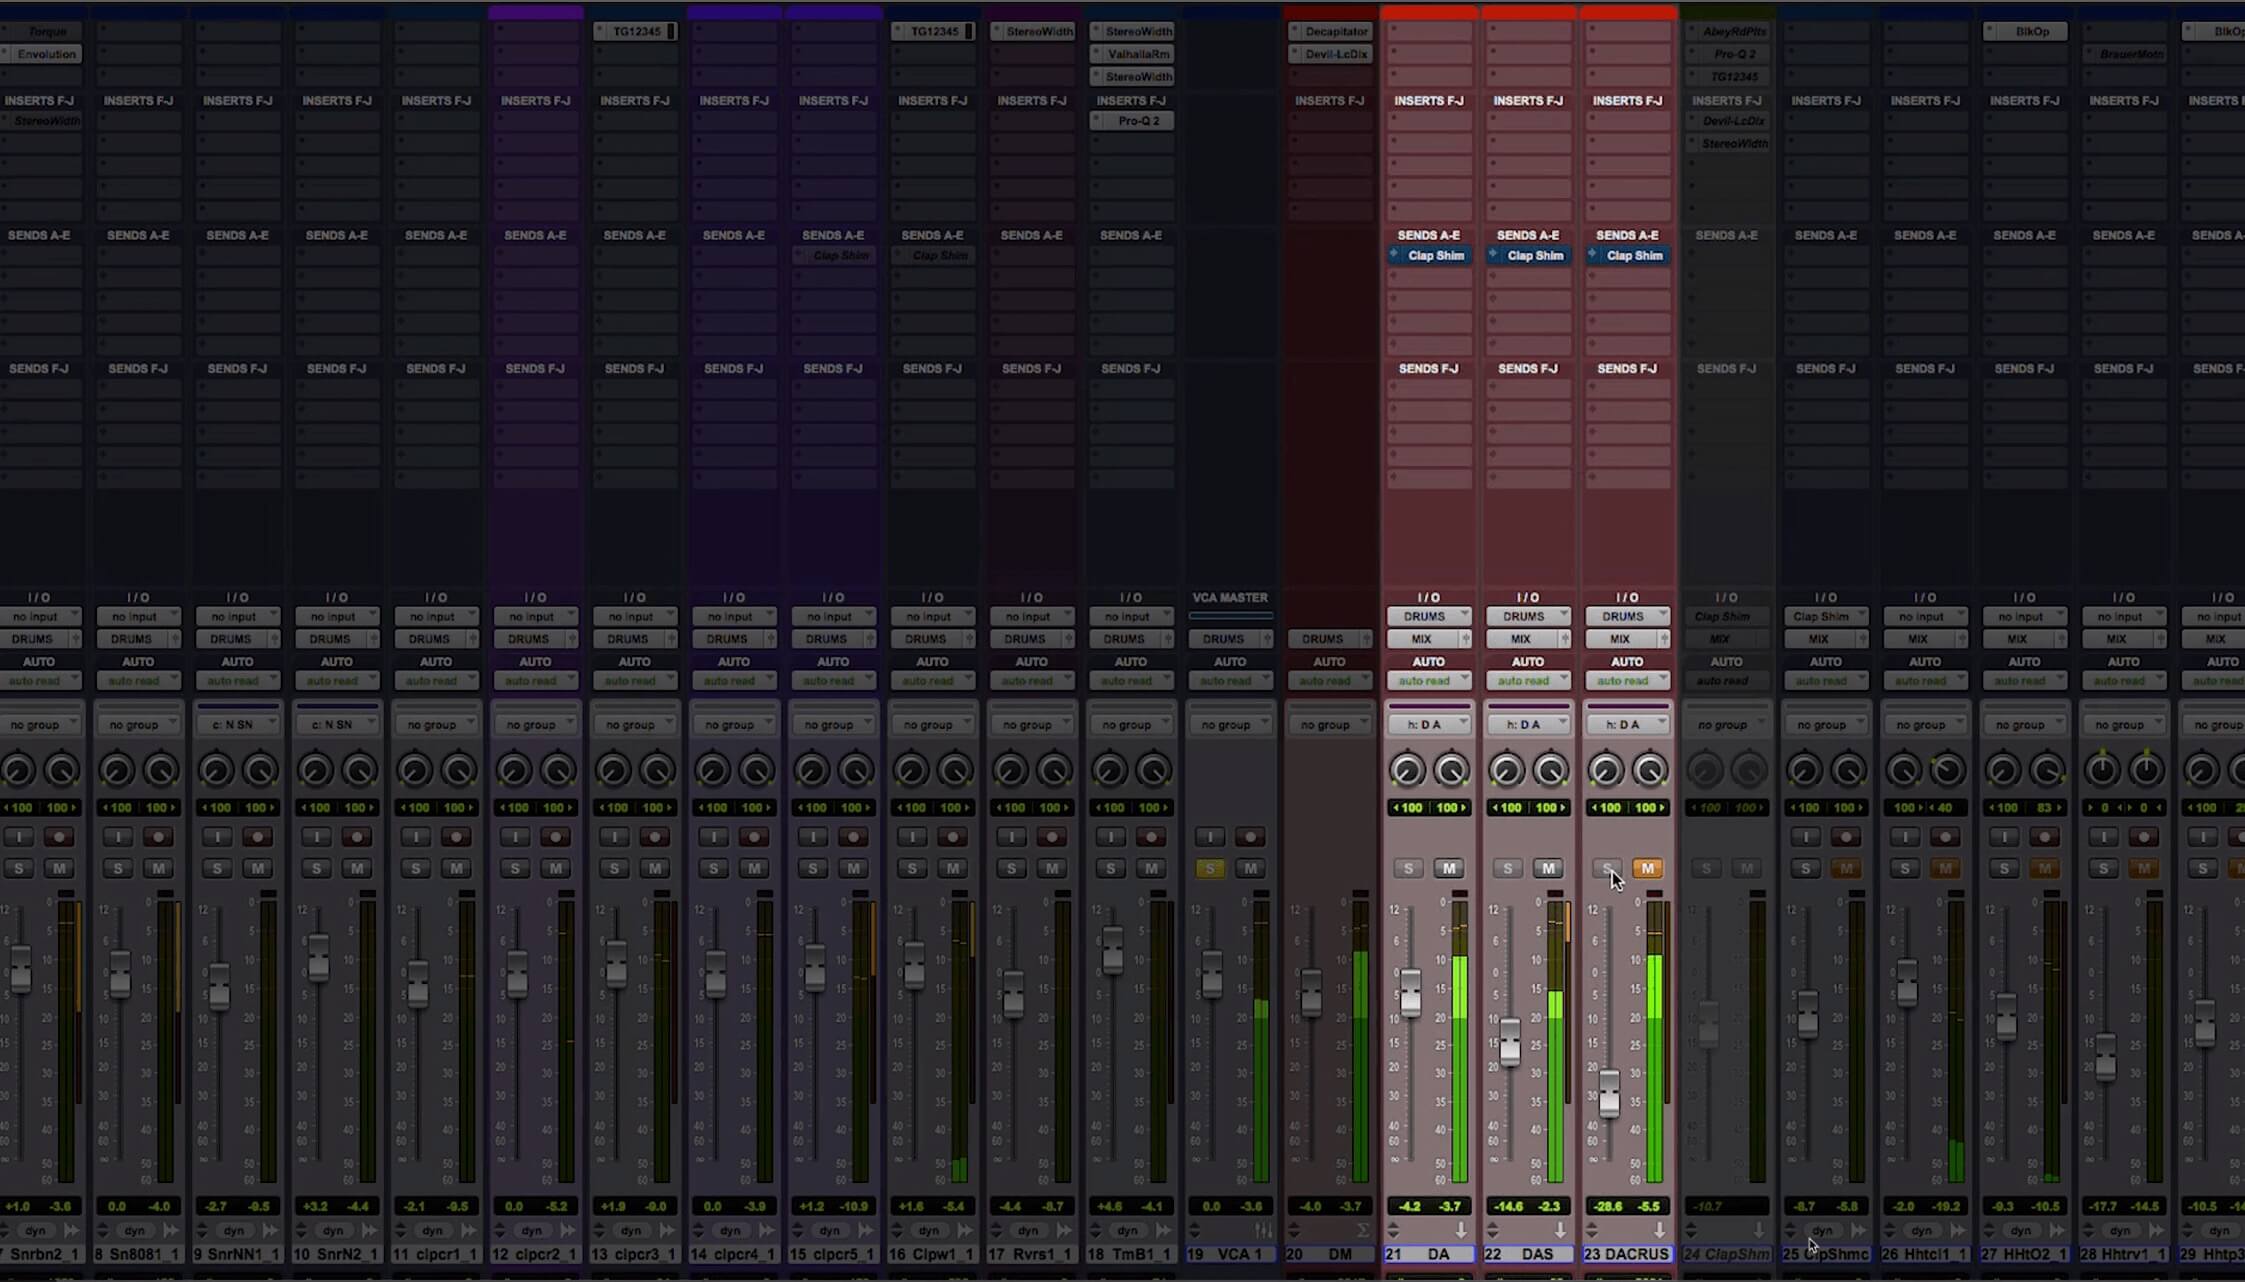
Adam’s parallel compression setup features three aux tracks (in red), two with compressors and one dry, all fed by a master drum bus and outputting to the main mix.
He routes the output of the master bus into three aux tracks, all with outputs to the main mix. One track, called DA, is the drum mix with no additional effects beyond what was on the master track.
On the second one, called DAS, Adam inserted a McDSP 6030 Ultimate Compressor plug-in, set to its D-357 module. On the third aux track, DACRUSH, he inserted an Eventide Omnipressor plug-in. Depending on how much of the two compressed tracks he uses, he can dial in more or less compression.
Settings and Such
Adam says that he’s using the parallel compression to modify the punch of the drums and the length of the reverb on the drum sounds. The reason he has to use compression for the latter is that the drum tracks he has for the mix already have the reverb already printed on them. As a result, he can’t just change the amount or type of reverb directly from a plug-in.
He talks about each effect he’s using and what it’s doing. On the DAS parallel channel, he says he’s using the McDSP D357, which is a pretty aggressive compressor, to adjust the attack and extend the decay. He says it’s also making it sound wider, because it’s reducing the main drum sound, and thus making the stereo reverb seem louder comparison.
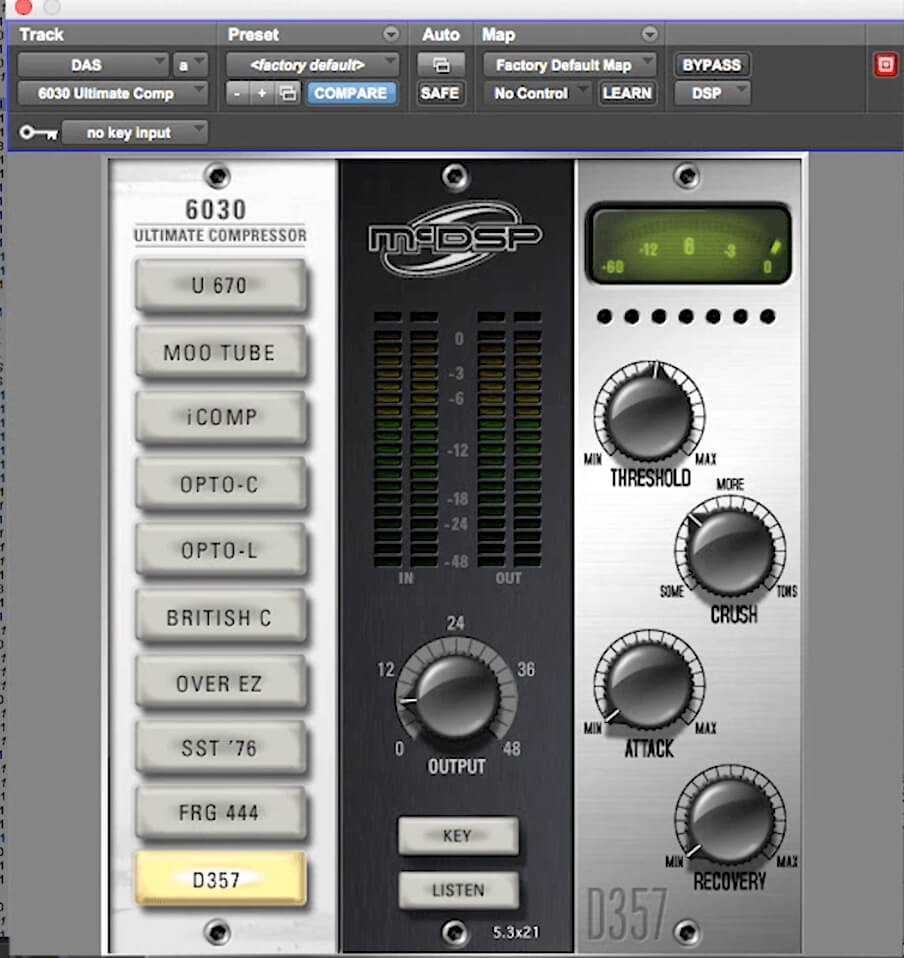
One of the two parallel compressors Adam uses is the McDSP D357, which can be fairly aggressive.
He sets fast attack and release times because the drum tracks are so sharp and bright, and he doesn’t want to enhance the attack by using a slower setting.
Crushing it
On the DACRUSH channel, with the Eventide Omnipressor. He refers to its sound as “crazy.” When he plays the drums through the Omnipressor only, you can hear what he means. It’s heavily compressed and creates a lot of pumping.
In the mix itself, he’ll only use a little of it, because its effect is so extreme. You can see that the level of the DACrush track is at -28.6dB, whereas the other compressor track with the McDSP D357 is at -14.6dB.
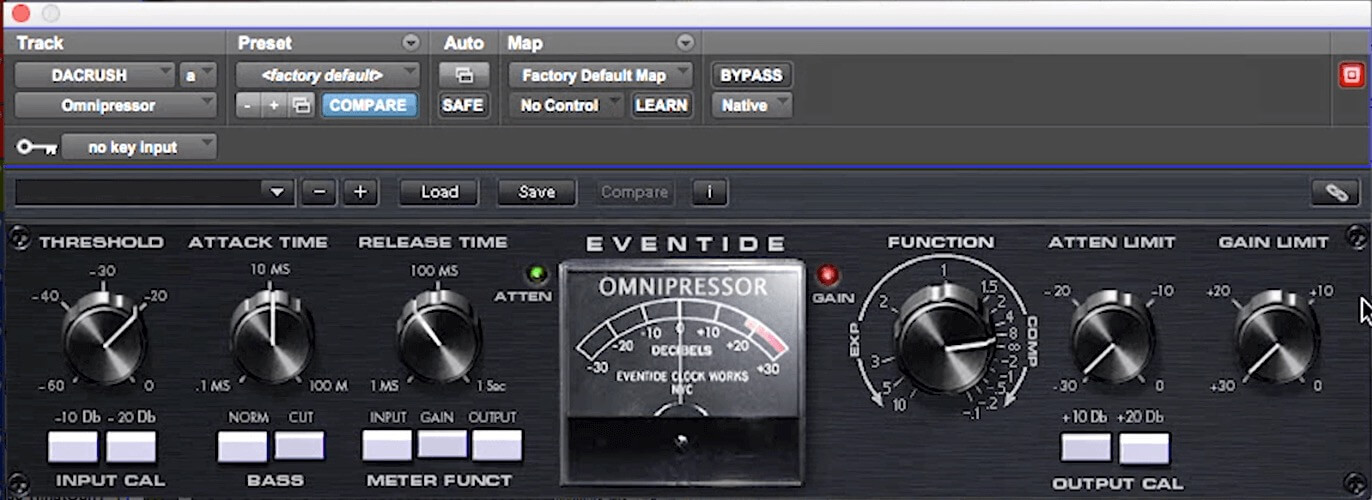
On the DACRUSH channel, Adam inserts and Eventide Omnipressor, which compresses so heavily that he only uses a slight amount on the drums.
He plays the drums soloed, first without both parallel compression channels muted. Then he turns on DAS and then DACrush, allowing you to hear the difference with one on and then both. Although the drums seem pretty processed to start with, you can hear the effect of each of the parallel compressors.
And Saturation, Too
Adam offers details on the plug-ins inserted on his drum master bus. The first one is a FabFilter Pro Q-2 with which he’s cutting at around 7kHz or 8kHz, with a reasonably wide bandwidth. He says the EQ helps the drums sit correctly in the mix.
Next is a UAD API 2500 Bus Compressor plug-in. He checks and it’s causing about 2dB of gain reduction. He says it’s mostly attenuating the kick, as well as adding a bit of attack and dynamics control. Because he inserted it on the drum bus and its mix control is at 100%, this compression is not of the parallel variety. If he turned the mix below 100%, he would be combining dry and compressed sound, which meets the criteria for a parallel configuration.
He also inserted a Decapitator on the drum bus and says it’s something he almost always puts there. He likes that it adds some distortion with some nice sub and high-end sparkle, which is a sound he can’t get from any other processor. He sets the Drive control at 3 and then compares the drums with and without it. The Decapitator makes it louder, so it’s bit hard to compare (because of the “louder sounds better” effect), but you can hear some additional high end in the snare, particularly, and some distortion.
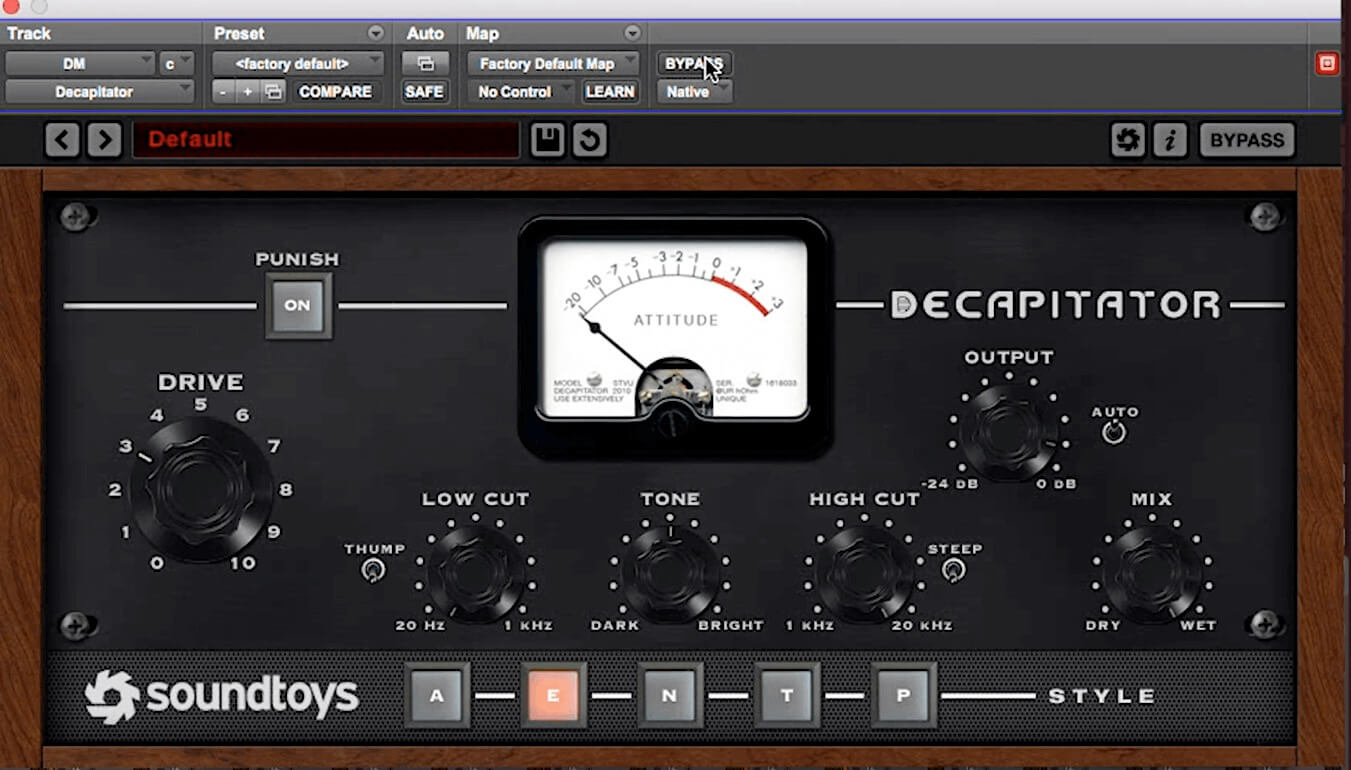
Adam used the Soundtoys Decapitator, a versatile saturation processor, on the drum bus.
Then he also brings in more saturation with Devil-Loc Deluxe. He only sets the mix control to 2% wet. But even at that minuscule amount, it has a strong impact, particularly in widening the stereo image. He shows what it would sound like with the mix at 100%, and it’s super crushed. “Ridiculous,” is how Adam terms it.
Different Ways
Whether you’re using compression or saturation (or both), you have several options for configuring them as parallel processors. Adam created his by routing the drum tracks to a dedicated drum master track and then routing its output to three aux return tracks, one dry and two with compressors inserted.
Particularly if you have multitrack drums in your mix, that’s an easy way to send them first through insert effects on the drum master and parallel effects on the aux tracks. In the following examples we’ll cover several different ways to apply parallel effects, using a simple funk piece featuring drums, bass and rhythm guitar.
First, you’ll hear the parts separately, with and without effects, and then you’ll hear the full mix. Keep in mind that when you’re coming up with settings for effects, it’s best to listen in the context of the rest of the tracks as you make adjustments. You can solo to check settings but always listen with the tracks on to be sure what you’ve set is working.
Instead of multitrack drums, this first example features Toontrack Superior Drummer 3, a stereo MIDI drum instrument. The routing and effects choices—including on the master bus are the same as Adam used except instead of having a McDSP D357 compressor, there’s a McDSP D359. It’s similar to the D357 but from a different modular plug-in, the McDSP 6060 Ultimate Module Collection.
EX 1a: Here’s the drum track without the parallel compression.
EX 1b: This time, the drums have the parallel compression. Particularly noteworthy in comparison to 1a is how the compression impacted the reverb, bringing it out more.
A simpler way to configure parallel effects is to send the source directly from the target channel (or channels) to a single aux track with the effects on it. Alternatively, you could duplicate each track you want to parallel process, and insert the effects on each track copy, keeping the original dry.
EX 2a: A bass with no parallel effects
EX 2b: A bass with parallel saturation added from an aux send going to an aux return channel with DevilLoc Deluxe and Waves H-EQ inserted. The EQ is cutting low end that was muddying up the sound from the DevilLoc’s distortion.
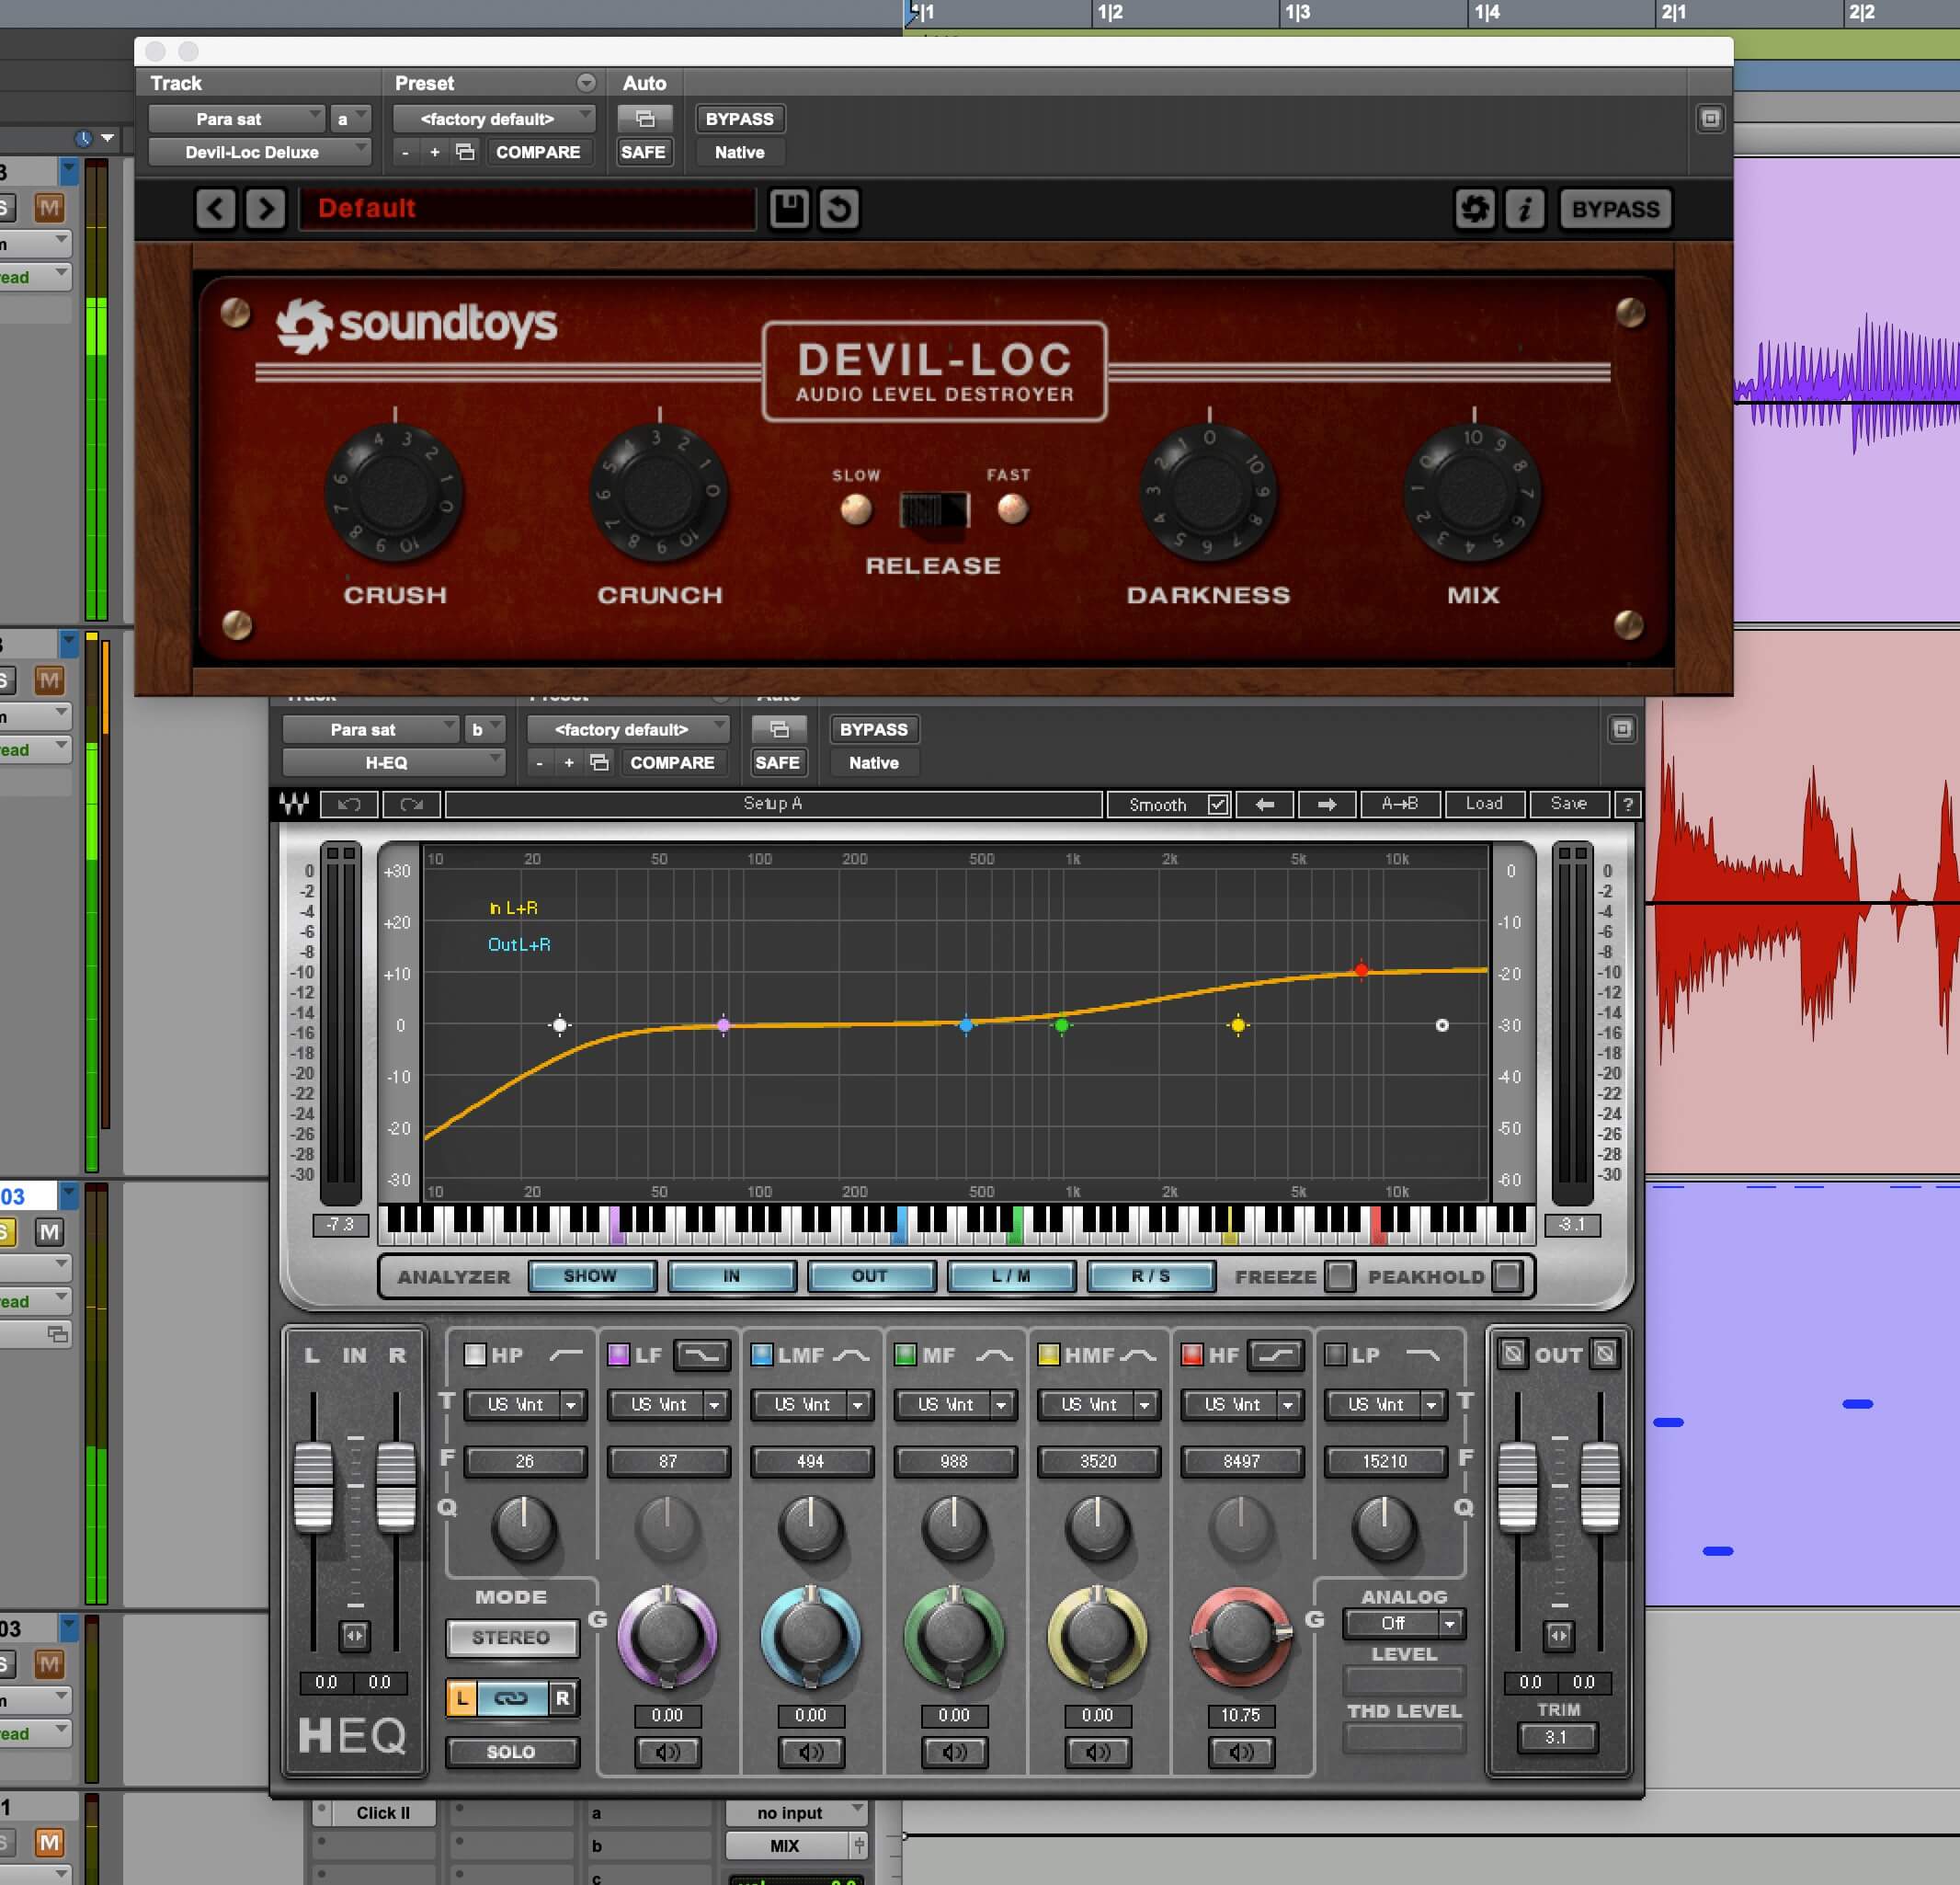
In example 2b, the bass signal was sent in parallel through a Devil-Loc Deluxe. A Waves H-EQ was inserted after it in the aux track to cut some of the lows from the saturated, parallel signal.
Another parallel-processing option is to insert a compressor or other effect on a track and turn its mix control down so that the dry signal is mixing with effected signal.
EX 3a: Here’s a DI rhythm guitar part coming straight out of an amp modeler (Scuffham S-Gear). Inserted next on the track is a Slate Digital Virtual Mix Rack with an FGS EQ module.
Ex 3b: This time, parallel compression and saturation were added. The former was from an FG-401 module in the Virtual Mix Rack, and the latter comes from another of its modules: New York Virtual Tube. The compressor’s mix was set to 44% wet and the tube module to about 59%.
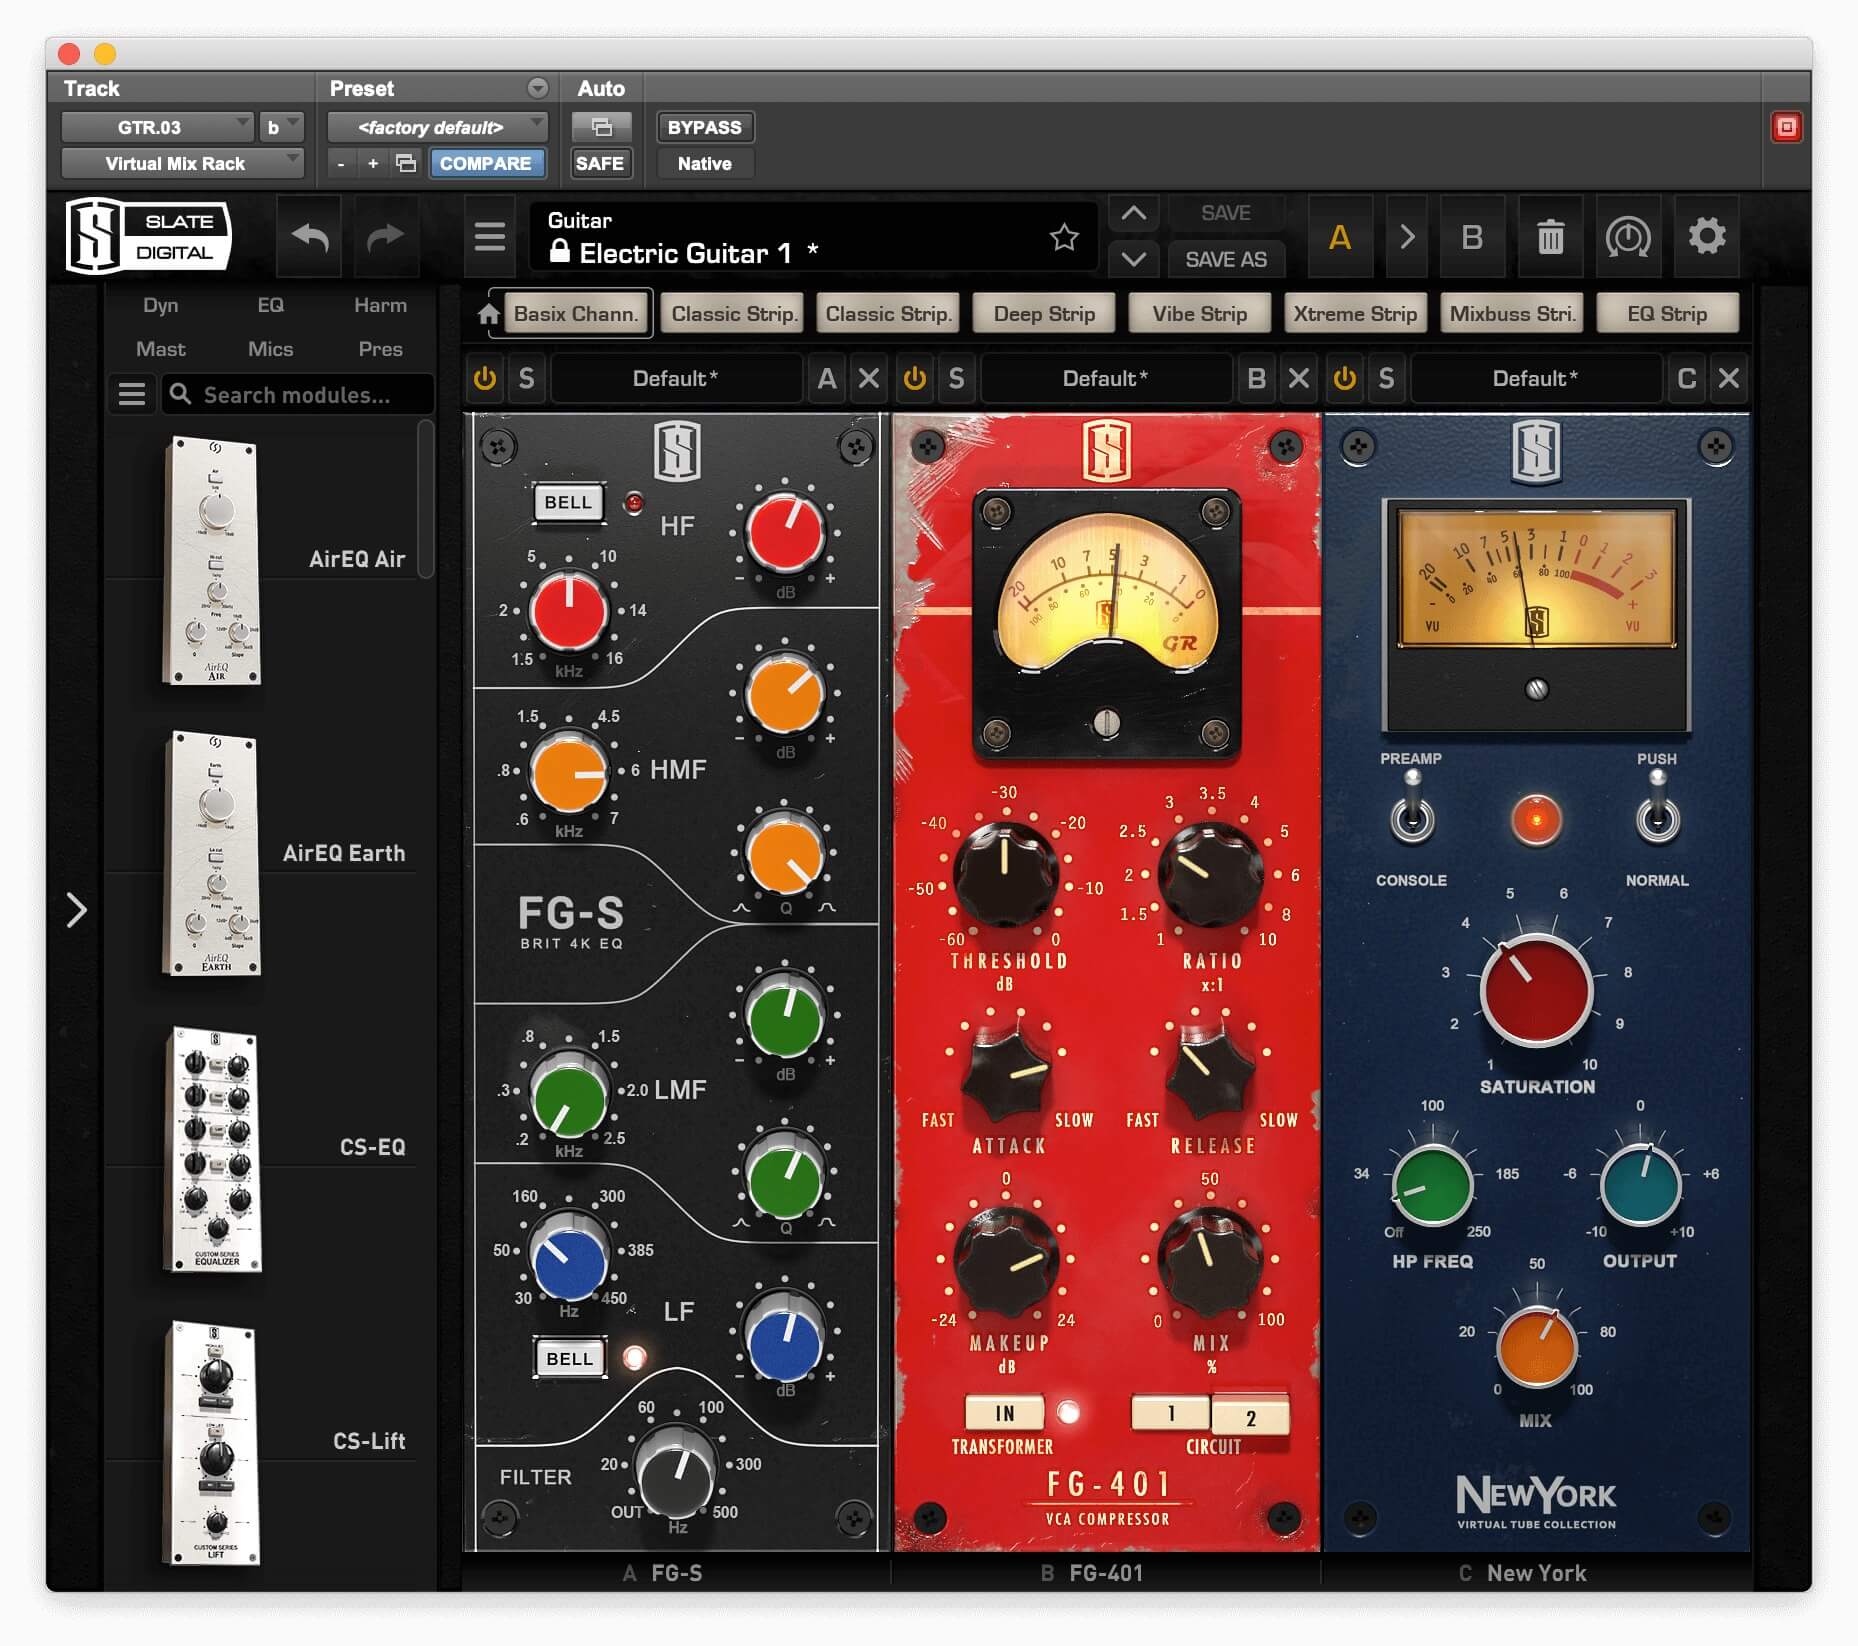
The modular Slate Digital Virtual Mix Rack plug-in, used in Example 3b.
Here are the three tracks together.
Ex 4a: This mix has none of the parallel effects from examples 1b, 2b, and 3b.
Ex 4b: This mix has all of the parallel effects.