
Distortion Techniques with Andrew Scheps
48min
(77)
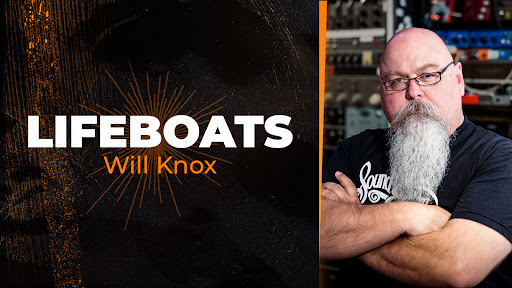
Distortion. Is it good? Bad? Right? Wrong? The answer is Yes.
Distortion comes in many flavors. It can be used to enhance sounds by adding harmonic complexity or as a sound design tool to create unique sounds. No matter how you use it, distortion is an invaluable tool to add to your arsenal.
Grammy-winner Andrew Scheps teaches you what is happening to your audio when it distorts and how to use that knowledge to your advantage. See how Andrew uses distortion to create interesting sounds and make elements sit into, or jump out of a mix.
In this tutorial, you’ll learn how to:
- Add the appearance of older recordings
- Add Length to sounds
- Morph distorted electric guitars with EQ
- Create space and depth on vocals with parallel distortions
Learn the many uses of distortion from the one and only Andrew Scheps.
Once logged in, you will be able to click on those chapter titles and jump around in the video.
- 00:00 - Start
- 00:50 - Lo-Fi on Kick
- 06:39 - Decapitator On Kick
- 11:38 - Devil-Loc Parallel Distortion
- 14:32 - Tape Distortion
- 21:14 - Learning To Use Distortion
- 23:17 - SansAmp On Bass
- 27:47 - FabFilter Saturn on Bass
- 33:22 - SansAmp on Acoustic Guitar
- 35:18 - EQ Distorted Guitar
- 38:11 - SanAmp on Guitar
- 39:11 - Lo-Fi on Guitar
- 40:22 - Lo-Fi on Vocals
- 41:29 - Decapitator on Vocals
- 43:13 - CLA-76 on Vocals
- 46:46 - Distorting a Mix
00:00:07
Hello children! We're back
and today
we're going to distort things.
00:00:14
We're not going to mix things,
we're not even gonna make things
that are appropriate for a mix.
00:00:18
What we thought would be fun is for me
to pull up a session,
never listen to the song, we take
some of the individual elements
and find different ways to distort
them.
00:00:28
And this is distortion that can be used
purely
as sound design to make a distorted
thing
or can be much more subtle
to give you length or the
appearance
of a sort of older-style recording,
that kinda thing, whatever.
00:00:41
So I'm going to be going through
and soloing up tracks,
we're using a song called 'Passerby'
from a great LA band 'Halloway',
you're never gonna hear the whole song
but you're gonna hear bits of it.
00:00:50
First thing we're gonna do
is work on kick drum.
00:00:54
I use Lo-Fi on kick drum
probably 100% of the time.
00:00:59
Let's just start with that.
00:01:00
We've got a Lo-Fi and for me
1.0 on the distortion knob, here,
is quite a bit
but let me play you what that's
doing to the kick
so let's go to this nice, busy
section here.
00:01:27
Lo-Fi is a clipper. What it does
is it
amplifies the waveform until it can
start shaving off the top.
00:01:34
Now..
00:01:36
..that's basically the simplest type
of distortion you can have
is to push the waveform up
or pull your rails down and I'm using
the word 'rails'
because voltage rails used to be
- in the analog world -
the loudest thing that could through a
piece of equipment was
determined by the power supply,
so
if you had +/-15V supply running
a piece of gear
if within the gear because of make-up
gain or something
you tried to create a voltage above
15V
or below -15V
it would just shave it off and be 15V.
00:02:07
Exactly the same thing in digital
when you run out of bits.
00:02:10
When all the bits are '1'
you can't describe a number that's
higher. Now,
there's another video which talks about
floating point
vs fixed point..
bla, bla bla..
00:02:19
In this instance we're pretending
everybody is fixed point,
we're pretending there is a maximum
level and we're gonna
push our waveform up until it shaves off
the top.
00:02:27
What makes different clippers sound
different, though,
is the shape as it turns that corner.
00:02:33
It can either leave it very,
very square
or it can round it off, it's kinda
like
the knee on a compressor
as you go from no clipping
to clipping, how harsh is it going
to be.
00:02:44
Lo-Fi acts
kinda like a 2-stage clipper
where it doesn't turning that corner
until the very last minute
but then it's nice and round. It's not
really a terribly square clip.
00:02:53
So what I'm gonna do is cranking
the distortion
and you'll hear
as we get into the sort of 3 up 8
how far this clipper can go,
but then
how, when I bring it back down
to 1 it acts
as much more of a subtle effect.
00:03:35
So you can hear as I can get up
into the really clipped
part of what this plug-in can do
it starts to ring a little bit, the
attack of the kick starts to go crazy
and that's something that will happen
with any type of distortion
we put on the kick drum.
00:03:47
So you can hear as I get up into the
sort of 7 or 8 range on the distortion
that's really starting to ring
and that is
kind of the type of artifact you would
get with analog distortion as well,
that sort of clipping.
00:03:59
You might ask: 'why would you wanna
clip a kick drum?'
For me,
a little bit of that clipping is
harmonic distortion,
it's exactly the same type of harmonic
distortion
you could get by running through
some transformers and tubes,
like going through an LA-2A
that isn't compressing,
going through a tape machine that
isn't recording,
going through a tape machine that
is recording.
00:04:19
All of those processes, because of just
the nature of the analog circuitry,
don't pass a perfect version of
the waveform through.
00:04:27
There's some sort of distortion that
happens along the way, and
if you look at the word 'distortion',
to distort something is to change
its shape.
00:04:35
Period.
It's not necessarily fuzzy
guitar distortion.
00:04:39
A lot of people think about distortion
as just
making stuff fuzzy but
all it means is you're changing
the shape.
00:04:44
Technically, a fast enough compressor
is distortion
and we're gonna see that in a second
using an 1176 to create what sounds like
fuzzy distortion
purely based on the fact that
we're over compressing.
00:04:57
And I use distortion to create length,
to create depth sonically,
and it's just a sound that I really
like.
00:05:05
It's not that I'm trying to recapture
something that I used
to get out of analog gear
and I don't get in digital gear,
everything has been recorded with
analog gear,
unless you're working from a
digitally-created sample in a soft synth
at one point it was analog through
a microphone
through at the very least a microphone
preamp.
00:05:22
Probably through some EQ and a
compressor.
00:05:25
All of that stuff could or could not
have
some harmonic distortion that goes along
with it
and I would use distortion on things
that
were recorded to tape just as often as
I would use them on things recorded
straight into Pro Tools.
00:05:37
This is not anything to do to make up
for the deficiencies in anything.
00:05:42
It is just trying to make the sound
more interesting.
00:05:46
The more harmonic distortion
you have,
the more harmonic content you have and
the thicker it gets.
00:05:51
Now, you can obviously go
too far,
make a kick drum so big you don't have
room for anything else in the mix, so
how to use this in your own mixes
is something that you've got to
experiment with and play with
and you really gotta learn the way
different distortion
works on different things,
and how it works in context
and that's
a phrase I use constantly when
talking about my mixes, but
that's the most important thing.
00:06:12
But the point of this video is to say:
'well,
there are a bunch of different
flavors of it
and let's hear what they sound like
and
some of these plug-ins are going to
be plug-ins that are free with
Pro Tools but don't exist anywhere
else.
00:06:24
Some of them could be paid plug-ins that
you could have in any format
but the idea is there are
lots of
flavors of distortion
and all of them
could either be the perfect thing
or the absolute worst thing
on any source.
00:06:38
Now what I'm gonna do is just
pull up another clipper
in the form of Decapitator which is
quite a fine clipper but it's actually
one that I don't use very often and
I don't know why that is,
I just never really got my head around
opening it up
but making it sound like something
I like
so what we're gonna do is start
with some presets
so I'm just gonna roll the kick drum
and we'll roll
some presets and when I find something
fun, then maybe we'll tweak a little bit
and see what some of the individual
controls do for you.
00:07:15
Ok, this is a really interesting
bit of distortion, which I like
quite a bit.
00:07:20
I would assume that the 'Punish'
knob is pushing the gain knob
internally in the circuit to give you
more clipping but then
it's also changing something about
the knee
of the clipping, 'cause this is always
much brighter
then if you just used the 'Drive'
circuit.
00:07:32
But, what this is doing is giving
you something which
almost sounds like Lo-Fi
reverb as well as distortion.
00:07:39
Let me bypass this a couple of
times and check it out
and you can get an idea of what
this distortion is doing
just see what each of the
individuals controls is doing.
00:08:00
One thing to keep in mind:
you hear how much louder the snare is.
00:08:03
This is an artifact of
any time you're distorting anything
by using dynamics
or clipping, which is basically the
hardest wall limiter you've ever used
in your life.
00:08:14
You're pushing the signal up against
the ceiling
and then stuff is getting shaved
off, which means that
the dynamic range
is starting to get less and less
and less the more you clip
so what's really cool about this
sound
is how long and grainy the kick drum
is
but you can also hear how much
the snare comes up
so now the snare bleed in the
kick mic
and this is the inside kick mic,
is gonna be part of the snare sound.
So again, you've
got to listen in context but this
is a very cool sound
so now, what I'm gonna do is start
messing with the tone and the high cut
and you'll see
how much of the really nasty part of
this distortion
this preset is getting rid of.
00:08:52
And how much they had to push it
to get
the really cool distortion that's there.
00:09:15
So as I moved the tone around you
can see how the resonance
changes and you can get this weird
sort of midrange but if you move it
high enough
you're into the place where you
don't have any
ringing tones in the drums
and you're just getting that great,
grainy
kind of extension to the sound.
00:09:32
You also hear how invasive
in terms
of the sound of this the distortion
is, which is quite cool
but what if you only wanna blend that
in: well you could set this up on a send
if you wanted multiple sources
to go it,
you could duplicate the track
and then make it inactive on
one of them and just
change the level or
- if you're using Decapitator -
there's actually
a Wet/Dry mix.
00:09:53
If I pull this all the way to 'Dry'
we're gonna have our clean kick drum,
same as bypassing.
00:09:57
All the way 'Wet' is 100% wet
but then you can dial it in
so let's check that out.
00:10:18
Just gives you a little bit of it,
lemme go through and get one more
preset on here
which is gonna sound different:
'High Crispy Mix'
so let's see what this guy does to
a kick drum.
00:10:47
This is much more of a traditional
clipper,
it's different than the Lo-Fi
but this is really using
a clipper as EQ
so what you're getting back is a lot
of top end but you're
keeping the transient of the kick drum
especially when we're mixed about
I don't know, 60-70% it looks like,
This is another way to use distortion,
you can actually just get top end
because any time a waveform moves
quickly, that's
high frequency information that makes
it do it, so
if you think about the difference
between a sine wave
and a square wave,
the square wave is turning corners
much faster than a
sine wave and the way it does
that
is by having upper harmonics, which are
higher frequencies than the fundamental.
00:11:25
The more high frequencies you have
the tighter a corner a waveform can go.
00:11:28
Which means,
if you make a waveform have
sharper corners
then you must be introducing
high frequency content
and that's what clipping does.
00:11:37
Which is why it's so awesome!
Let's move on to
a different way of implementing
something on a kick drum.
00:11:44
In this session, 'cause it's part
of my template, I've got
something called the Devil-Loc,
down here,
which is a very distorted compressor.
00:11:52
The original Shure Level-Loc was built
as a microphone level
compressor and it was actually built
for
department stores, for PA systems
so that someone could hit a little
button
be 25 feet away from the microphone
and yell: 'Clean up in Isle 3!'
And that would be the same level
as somebody
who had really good mic technique
and got right up on the mic
to tell you about the Blue Light
Special in Isle 2.
00:12:14
So, Chad Blake,
famously, has used this to record
drums
quite a bit. He would still a microphone
on the floor,
in-between the kick and snare
and then put it through the Level-Loc
and
just destroy it on the way in and it's
an amazing sound
so, this model
is of that compression circuit
but getting line level inputs.
It's a different thing but it's
still a super distorted compressor
and I've got it setup on a send in
my session,
there's a little gate before and
this is just
to get rid of bleed so I only have
the transients
of the kick and snare
going into it, because it's a very,
very dirty compressor
which means it brings up
all of the noise in-between
so while it's a really cool
distortion, sometimes
you need some to use some
traditional dynamics tools
to tame either what's going into it
or what's coming out of it
so let's see what happens
if I have this going on my kick
in this session and it's going on
parallel.
00:13:24
So you can hear it's a lot like second
preset
that we had on Decapitator, you're
picking up a lot of top end
but you're not necessarily picking up
a lot of what seems like distortion.
00:13:33
Now what we're gonna do is hear
the Devil-Loc
but it's a very different character
because there is actually dynamics
processing as well as straight up
distortion.
00:13:58
It's not subtle, at all, and
what the differences between this
and the Decapitator
is what happens in-between the
transients.
00:14:05
And you just need to play with the
controls on this, there's a slow and
a fast release,
there's how much crush vs how much
crunch, one on them is actually a
distortion circuit
one of them is a serious
brickwall limiter
that's set with very, very fast attack
and release times
so that you can get distortion as you
start to cross the threshold.
00:14:23
All three of those sort of give you
different characters
on a kick drum, one being subtle
and two of them being pretty full on
so let me get rid of that
send off to the Devil-Loc
and let's look at one other type
of distortion which is
really, just
basic tape emulation
and I'm gonna use the Phoenix for this,
where this is harmonic distortion
and it's just
meant to emulate the kind of harmonic
distortion
you get when you hit tape.
00:14:49
If you push it really hard you
start to get
some of the dynamics
processing that happens on tape
as well, there is
a huge amount of compression that
can happen on tape
especially on the low mids, low
end
depending on how hard you hit it
but this is really just supposed to be
about the harmonic distortion
which is really the inability of tape
to properly play things back.
00:15:09
Don't think of it as magic sauce,
think about it as stuff that's wrong
about tape
that can sometimes sound awesome.
00:15:16
This is 'things that are broken'.
00:15:17
There are five different
flavors of this
harmonic distortion
that are built in, these are basically
five variations
on a model and they respond differently
across the frequency spectrum
to different levels, that's basically
how they're described in the manual.
00:15:35
Then you can also decide: well, do you
wanna affect mostly
the low frequencies with Opal,
the full frequency spectrum with Gold
and the
top frequencies with Sapphire,
I'm gonna leave this
in Gold mode, just to get
the most out of it.
00:15:47
'cause we're not looking for subtle,
here, we're looking for you guys
to be able to hear what's going on,
so I'm gonna show you this Phoenix
plug-in on kick and snare.
00:15:55
I'm gonna take off all of the other
parallel stuff that's going, I'm gonna
mute sends to parallel compressors here,
so that we're really just hearing the
dry kick and snare
going through this Phoenix plug-in.
00:16:20
So you can hear on Luminescent mode
that we're
basically a slightly cleaner version
of the Lo-Fi plug-in. It's a little bit
of clipping,
a little bit of length, a little bit
of top end,
now I'm gonna switch over to
Dark Essence, which is the
furthest away from this,
this should start pushing the low
end a little bit more.
00:16:52
So you can hear this is a lot more
aggressive with the kick
but it's not fundamentally changing
the sound
and this is what a lot of the tape
emulation plug-ins
will do if you don't push them
too hard
and this includes any of the
Waves or UAD actual emulations
of tape machines
but what those have the added bonus
of doing and let's
just pull one of those up, real quick,
let's do the Studer 800!
One of the benefits of using
an actual
tape emulation plug-in as opposed to
something that's just giving tape
harmonic distortion
is they've given you the controls for
the tape machine and you can screw it up
you can actually make it much more
distorted than tape
ever would have, because you never would
have misaligned
your tape machine, this much.
00:17:32
So, now I'm gonna go ahead
and give you that same kick and snare
and I'm gonna start actually distorting
the tape machine.
00:18:20
You can hear how far you can go
just with tape emulation,
now, yes: we are clipping a plug-in
but unless the plug-in is really badly
set up
it's set up so that when I start
cranking
my record level
it's gonna start distorting inside
the plug-in's
model of the tape machine as opposed
to just clipping the output of
the plug-in. So this is very much
ultra tape saturation as well as
clipping the electronics of the
tape machine itself.
00:18:46
Now I'm gonna call one other tape
emulation program that has
an even odder way that you can tweak.
00:18:52
So here's one more tape emulation
plug-in called Satin
and this actually has even more control
where you can misalign the head stack
you can change the head bump, which
is
a low frequency bump because of the
gap
in the head.
00:19:06
I'm gonna start completely misaligning
this tape machine
and you'll hear how completely
messed up it can get.
00:19:53
I'll bypass this and I'm
what's going on down here in this
frequency response curve.
00:20:12
You can hear it's actually starting
to pull stuff
out of the drums and what's happening
is
I'm using this azimuth control
which is
doing the equivalent
of tilting
the playback head
so now in comb filtering
the output of the
head, because different frequencies
are at
different amount of out of phase
because
the head's laying
slanted this away, so as the
tape goes across
different frequencies are out
by a different amount
based on the physical problem
on the tape head..
00:20:41
..which..
00:20:42
..actually is an issue sometimes
when you're using tape machines.
You can have
someone align a tape machine
at too high a frequency
and they can be one cycle off
at 10k.
00:20:52
But that means they're
in phase at 10k but they're half a cycle
out at 5k.
00:20:57
And it can cause all kinds of
really weird
frequency response stuff, so..
00:21:01
..that's a totally different way to
think about distorting your signal.
00:21:03
'cause again: just changing it
is distorting it.
00:21:06
So you can do straight up just
overdrive but you can also
just misuse the hardware completely
even though it's just an emulation
of the hardware.
00:21:14
You've seen how many different
flavors of distortion are
just for kick or kick and snare
and now you might be thinking:
'ok, but..
00:21:21
..so what do I do with this
knowledge?'
And the answer is: I really have no
idea, but..
00:21:28
..here's the point:
you can either use distortion,
let's say like that first preset
I called up
on Decapitator, because you're going
after a very particular sound
that old-school '70s sound, it's a very
well-named preset,
it's a really good-sounding one,
so it could be that you're stylistically
trying to find
a specific sound
but more often than not when I'm
distorting drums
I'm doing it because I need the
drum kit
to do something and it's not quite
doing it, yet.
00:21:55
And the obvious tools for me would
be
parallel compression or
direct insert equalization.
00:22:01
And I use that quite a bit.
00:22:02
But there could also be something
that
distortion can help me with
and I can only find that out
by experimenting
and the biggest mistake you can get
is to
mess around with the drums in solo
and say: 'Oh, man! Now, that's
awesome!'
And then assume it's gonna work
with everything else.
00:22:19
If you're doing stuff, especially
if it's subtle, you've got
to make sure that it's better
in the context of the full mix with,
then without.
00:22:26
So, when you're learning to do this
don't let yourself just go down
one path:
do one thing that you think it's good,
bypass it and do a second thing that
you think it's good.
00:22:36
Then put all your other instruments in
and see which one's better
and what you'll do is you'll start to
recognize
what stuff should sound like when you
have it soloed so
so that it's going to work
in the context of the whole mix
and unfortunately
there's no magic formula for that.
00:22:50
That's just practice.
00:22:51
So, the more you practice, the better
off you are and if you think about it
distort the kick three different ways
on one mix
and you've just practiced three times
instead of one. So..
00:22:59
..I would say: at the beginning, vary
your tools
and always check stuff in context
to make sure it's better.
00:23:05
And by better I mean it feels
better,
the groove is better,
the song is more fun to listen to,
it doesn't distract your from the vocal.
That's pretty much what
I'm looking for when I'm thinking
about 'better'.
00:23:15
I don't even know what it sounds
like, it doesn't matter.
00:23:18
Let's move on to bass, 'cause it happens
to be next in my session.
00:23:21
I've got a little bit of EQ on it, which
actually let's just
get rid of that.
00:23:25
This is what the bass sounds like:
There's a little bit of dirt going on
but it's not
that dirty. So the first thing is,
let's do some insert distortion.
00:23:41
One of the first places I would think
of going would be Sansamp, it comes with
Pro Tools, it's one of the first
modeling plug-ins
done, it was part of the original
Bomb Factory bundle,
it's also great hardware.
00:23:53
The thing about Sansamp you need to
be aware of is, if
after watching this whole video you say:
'Yeah, I'm gonna use Sansamp
I'm gonna use it parallel and do all
this'
'cause you're gonna be such a master
of all the different ways to do this..
00:24:03
because of all the different distortion
circuits
there are lots of different crossover
circuits
inside of this model
which means it isn't phase coherent
if you use it parallel.
00:24:12
If you set it up on a send and blend
it
at the same relative level as your
dry signal
it will start to suck out certain
frequencies.
00:24:20
That might be ok. It's not necessarily a
terrible thing but you need to be aware
of it.
00:24:24
Which makes it very hard to use
on vocals unless it's a crazy distorted
effect
at which point there is really no
correlation between
the original signal and the
distorted signal
but if you're doing something subtle
and then try to blend it in
Sansamp could actually be a little
bit of an issue.
00:24:41
Just wanted to point that out.
00:24:42
What's cool about Sansamp is it's got
one, two, three, four..
count them four
completely different saturation
circuits,
it's got low and high tone
controls
then it's got a preamp control
which just is overall level
into the distortion
and then an output level control
so very, very simple, but
very versatile.
00:25:02
First of all, let's hear what the
factory presets sound like, on bass.
00:25:21
So you can hear it's a little bit
dirtier, it's not
that much different. Now, I'm just
gonna start
cranking around on this controls while
it's playing and you'll hear
how many different types of distortion
there are. And in fact, why don't I do
this:
I'll just do one at the time,
basically.
00:25:34
I'm gonna pull down the drive,
the crunch and the punch
and I'm gonna set the preamp
and the buzz
'till I start getting a lot of the buzz,
so you can hear that.
00:25:58
Now, contrary to popular belief
'Buzz', it turns out, is actually
focusing more on the low
and the low mids
so lemme take the buzz out
and let's do the 'Punch'.
00:26:07
And then, what you're gonna see is:
it's not
as simple as having four distortion
chains and then just
blending them, they all interact and
they do all kinds of stuff
so I'll show you individually,
I'm not gonna stop to talk, anymore.
Just watch the knobs go
and then I'm gonna start blending them
and you'll see that you can create
so many different bass tones just
within the one plug-in.
00:27:35
Pretty awesome. It does a lot, it's
definitely worth playing with
and it's free if you use Pro Tools!
Which is a great thing.
00:27:41
If you don't use Pro Tools
it's very hard to have this plug-in,
so let me just pull up another
stomp box one.
00:27:47
Here is another distortion plug-in
called the Fabfilter Saturn.
00:27:51
I have never actually used this
plug-in, before
and this is what is awesome about
plug-ins..
00:27:57
is:
you don't go out and buy a huge
amount of
hardware and then hope you can
figure it out.
00:28:02
You download the demo of a plug-in
and you check it out for 30 days
or maybe it beeps at you or
gets some white noise bursts,
whatever it is
there're very, very few plug-ins
that you can't
check out, first. So, let's check out
Saturn.
00:28:14
It has lots of different modes,
it has a tone section
which I like quite a bit.
00:28:19
It's got feedback, I don't even know
what that's gonna do but
it's gonna be awesome.
00:28:23
And let's see what we can do to
our bass!
Come on! Who doesn't like that!
That's awesome.
00:29:30
So obviously you can get some very
extreme effects, here,
which is what I am going for about
doing this video, 'cause
for me to just keep showing you
subtle stuff,
that's ridiculous, we're gonna put the
'B' back in subtle in all of this
but let me show you a more sort
of traditional tool
which would be using just a straight
up bass
amp simulator. So I'm gonna call up
the UAD Ampeg SVT, which is
an amp that a lot of people have used
over the years, it's a great amplifier
and not only does it do harmonic
distortion
just by being an amp model
but you can also get in
to a bit of drive, here, not
as much
as on a lot of guitar simulators
but you can actually pick up
some distortion, here.
00:30:08
Let's just start hitting buttons
and see what happens!
You can see, you can get pretty
nasty on this
and just get sort of a nice
amp tone and you'll hear the difference
between an amp simulator and
no amp simulator on this
particular bass track. Not necessarily
that it needs it
but that, how you can subtly change
things with distortion
that will just sort of change the feel
and this type of change is like the
Lo-Fi on the kick and snare,
it's a lot more subtle and it's a lot
more about how it's going to work
with the rest of the instrument.
So, in solo,
it's not necessarily the most
directly informative thing, but
just to get an idea of how it can change
and listen instead of listening
for the amount of distortion on
the bass,
listen for things like the length
of the bloom of the notes and sort of
how much room tone
it sounds like you're getting
and how far away
it sounds like the mics are, something
like that.
00:32:08
Now, this is something which could be
good
actually parallel. So let me
make a quick copy of this track
and I'm gonna kill on the Ampeg
on the first one.
00:32:18
What I've done is build just sort
of a boom track
for the bass
without using a crossover, just using
the EQ on the amplifier itself
and let's see what this sounds like
being blended in.
00:32:50
By using some harmonic shaping
and EQ on the amp I'm actually creating
a track that sounds like
the size of the room the bass amp
was in.
00:32:59
What this starts to sound like to me
is
bleed of the bass into other
microphones
which can be a really great sound,
actually
and if you've got a really sparse
track
like, let's say the drums are very, very
quite here
just a couple of hits and fills,
by bringing this sort of boom
on a bass
you can give the impression of everybody
tracking
in a room, even if that's not the case.
00:33:19
Let's move away from bass
and let's go to guitar!
I've got
some acoustic guitar so let's turn them
into really nasty electric guitars,
'cause that's always fun.
00:33:39
What I'm gonna do is I'm gonna start
with the Sansamp again
only because it's gonna show you
how different it sounds
with different input.
00:34:12
You might be saying: 'Well, ok, fine..
you just
distorted an acoustic guitar
and it sounds like a distorted acoustic
guitar.'
But what it can be really good for
is, you could layer some of this
underneath a clean acoustic guitar
when you get to the chorus
of the song.
00:34:25
And it lets you still have that
strum
but instead of having the strum,
the sound of the pick on the strings
and no notes anymore because
you've got
cymbals and electric guitars to
go along with it,
you actually give the acoustic
guitar some sustain.
00:34:39
Here: I'll make a copy. One again, just
the quickest way to do it.
00:34:42
Get rid of this and I'm gonna start
blending in
the distorted acoustic guitar.
00:35:07
There are a million things you could
on acoustic guitars or cleaner guitars
but it's all about what's gonna be
appropriate
for the song, so all the same tools you
saw on the drums and on the bass, they
could work, they might not work,
find something else..
00:35:19
..but what about if you've already got
a distorted guitar
and the way it's distorted isn't really
working for you? Well,
if you're lucky you've also got the
guitar DI
and then you can start from scratch
and reamp, basically
using plug-ins, using emulations, using
some of the stuff I've already used here
on this particular song, the guitar was
fine, but here's a
chorus distorted guitar..
00:35:49
It's very dirty and it's very mid-rangey
so let's say
that that was inappropriate. Now, the
first thing you can do
is actually you can do quite
a bit with EQ.
00:35:59
I'm gonna use an EQ3,
because it's a very simple
EQ to use
but it also has a great feature
which
the Fabfilter has, which Massenburg
has,
where you can solo
the band of the EQ to find the frequency
you're looking for,
it turns it into a bandpass
so what I'm gonna do is I'm gonna
search for that really boxy frequency
and then we're gonna suck a little bit
of that out
and then we're gonna add some
low end and see if we can
kind of revoice the distortion.
00:36:52
And then I'm gonna go looking
for some of that
fizz that's up top, I'm turning
my
high frequency band into a
parametric band, then I'm gonna see if
I can find some of the fizz.
00:37:14
Now, I'm not saying I necessarily like
that better but I just really
changed the character of the distortion.
00:37:20
You can also do this with other EQs,
let's just
add some EQ to it
and I'll do that with a Helios model.
00:37:27
I'm gonna add some resonance
using the low-frequency circuit
at either 60 or 120 which should give
me a little bit of
cabinet thump
and then I'm gonna actually
accentuate
the boxiness of it and you'll see how
much of that will change the distortion.
00:38:02
It's a much more ringing, open
distortion as opposed to this sort of
more closed, box distortion.
00:38:07
Now, let's see what it sounds like
to put the Sansamp on top of this
because it is a tool
that's voiced in a lot of different ways
for distortion
so it's a really good way
to just mess around with different
types of distortion, you'll hear
that it is possible to completely
revoice
the distortion on something
to a point
without having to go back to a cleaner
version of it.
00:38:58
So you can see I made it smaller,
I'm bringing out more of the sound
of the strings,
the fizz is almost completely gone
and now this would be more of like
a little
small combo amp recorded a couple
of feet away.
00:39:09
That sort of sound as opposed
to the original.
00:39:11
And you can also just do some
subtle shaping.
00:39:14
Lemme put a Lo-Fi on this and you'll
hear
the effect of just a tiny bit of
clipping
on top of a clipped signal and
again
this might be counter-intuitive but
you're gonna get some gain as well
but this will help
this guitar actually poke through the
mix, the same way a Phoenix would
or Heat,
or any of the just straight-up
harmonic distortion.
00:39:31
Tapehead is another great one
from Massey.
00:39:44
Each of the attacks of the strum has
a little more decay that
separates the strum form the steady
state distortions.
00:39:51
So, listen to that again as I bypass it.
And again this
is only on .2.
00:40:09
There are two sort of very broad
categories of distortion:
one would be the
'I'm mixing and I need some subtle
sound-shaping things'
and then the other would be:
'I'm creating a sound using the
distortion'.
00:40:23
So, let's go ahead and move on
to some vocals.
00:40:26
And you can hear
the crazy effects we can actually make
with vocals.
00:40:30
Just gonna use
four bars of the lead vocal, here,
I don't even know what the lyric is,
I don't know what the song
is doing at this particular point,
I don't even care.
00:40:39
And what we're gonna do
is I'm gonna start with some inserts
just
on the vocal itself and I'm gonna use
the same stuff we've been using
so let's start with Lo-Fi.
00:41:10
Subtle but again: it makes it have
a little more energy,
it's adding that little bit of top end
as we go through the clipper,
it's also bringing the level up
which
is not necessarily a bad thing,
it's hitting some compression
more downstream, but that's that
exact same
sort of subtle harmonic boost
that you get out of Lo-Fi.
00:41:29
Now, let's pop on a Decapitator
because that's
another one that's around a lot.
00:41:34
And we'll just flip through some
presets there, as well.
00:41:59
That might be not appropriate for
that part of the song but
that's just a little bit of clipping but
it's a much more obvious clipping,
there's a lot more top end to that
and let's check out 'MildTubeVox'
and see what that does.
00:42:28
We're picking up some
dynamics control because
we're clipping
and that just comes along with it
but you can hear the difference
between the
preset before and the preset we're
listening to now,
that one before was emphasizing
top end, almost fizz,
whereas this is really emphasizing
the sort of low mid push of the vocal
so the
vocal is actually resonating.
00:42:49
Which to me sounds to me
more like a
tube distortion with a little bit
of feedback, that kind of thing.
00:42:54
Just listen to the bottom
of the vocal, again.
00:43:06
For me
that's not the kind of distortion
I like on vocals
but is used quite often. So, it's just
another way you can get it.
00:43:13
Now I'm gonna show you how
you can
distort a vocal using nothing other
than a compressor.
00:43:20
'cause why not! So the first thing is,
you put the compressor out of spec
by using the 'all-buttons
in' mode, and what it does is
it changes the time constants
to something where you're basically
gonna start distorting.
00:43:32
I have the most luck with the attack
down here and the release here
but we can play with it while the
vocal's playing
and as I push the input we'll actually
get some clipping, 'cause I'm
actually clipping the circuit inside of
the plug-in that's been modeled
but we're also just gonna be
hitting that threshold
and the dynamics control part
of the circuit, a lot harder, so you're
gonna hear quite a bit of distortion
coming as we push this, too.
00:44:31
It's more of a subtle effect, but this
can really help
bring the vocal forward in the mix
so this is one, again, to listen to
in context
but be aware with all of this added gain
you're gonna start bringing up breaths
and little lip smacks and all of the
small noises within the vocal
so you've gotta be a lot more
careful.
00:44:49
You can always just put a gate
in front of this
and that will only let the vocal
through
when it's at a certain level, so if
you're fine loosing some details
then you can use this sort of dynamics
distortion but go ahead and keep
track of the noise.
00:45:03
So now let's do something that is
much less subtle.
00:45:07
What I'm gonna do now
is I've got a send, here,
and lemme make sure that
that send is not gonna get muted
by automation.
00:45:16
And this is to a spread, so this is
sort of a
straight micropitch/slap effect
that I use
and it's a Dual 910 down here
but I have a placeholder in my template
to put a Sansamp in front of it.
00:45:33
On screaming lead!
That's really over the top, as I pull
that down
you're gonna hear it starts to
blend into the background
and inside of a mix
you can get away a lot more of
this than you can think.
00:45:55
And it is a very cool effect because
not only
is it distortion
but because it's slightly pitch-shifted
and slightly
delayed, it's also incredibly
stereo.
00:46:05
So it leaves your dry vocal alone,
whether you've
distorted it or not,
in the middle,
and then adds this cloud of vocal
out to the sides. Now, it also makes
your mix very thick,
it's harder to hear guitars but it can
be a really cool effect.
00:46:17
And for a great example of this sort of
effect
check out a lot of the Deftones stuff,
I think they're the masters of it.
00:46:24
But this is the kind of effect this is.
00:46:40
That's an over-the-top distortion
used
subtly to give you an effect but it
leaves your main vocal alone.
00:46:46
And now, really quickly, lemme just show
you distorting a mix, 'cause why not?
Let's go ahead and put some Lo-Fi
on this mix.
00:46:53
I'm gonna play a bit of the verse which
should be quiet
and then we'll check that out!
So you've seen that there are tons
of different
types of distortion, different ways
to think about distortion and
certainly different ways to create
distortion and don't forget that
we've only looked at, I don't know,
six plug-ins, here?
There are so many other ways
that you can distort things:
every microphone preamp
will distort if
you push it hard enough and
that's a really
buzzy distortion that can be cool..
00:47:38
..there're lots of different amp
simulators, there're guitar pedals.
00:47:41
There's everything, so:
my advice to you is go out
and distort!
But then listen in context to make sure
you haven't just ruined the song.
00:47:50
But have fun and be creative and
most of all:
be awesome.
Once logged in, you will be able to read all the transcripts jump around in the video.

Andrew Scheps is a music producer, mixing engineer and record label owner based in the United Kingdom. He has received Grammy Awards for Best Rock Album for his work on Red Hot Chili Peppers' Stadium Arcadium, Album Of The Year for Adele's 21, and also Best Reggae Album for Ziggy Marley's Fly Rasta.
Andrew started as a musician, but found that what he enjoyed most was working behind the scenes. This led him to study recording at the University of Miami. After graduating, he spent some time working for Synclavier, and then on the road with Stevie Wonder (as a keyboard tech) and Michael Jackson (mixing live sound). But he found his home in the studio, and he honed his craft working for producers such as Rob Cavallo, Don Was and Rick Rubin.
Andrew collaborated with Waves in order to create his own line of plug-ins which include the Scheps 73 EQ and the Scheps Parallel Particles.
Andrew is one of the best known mixing engineers in the world, well-known for his Rear Bus mixing techniques that he developed working on his 64 input Neve 8068 console and his love for distortion of any kind. If you are watching pureMix videos you will see that he managed to carry his analog sound signature over to a fully portable digital rig. These days, Andrew mixes completely In The Box as it allows him much greater flexibility and the ability to work on several project simultaneously.
Beyonce
Lana Del Rey
Red Hot Chili Peppers
U2
Michael Jackson
Green Day
Parts of this site and some files are only accessible to pureMix Pro Members or available to purchase. Please see below our membership plans or add this video to your shopping cart.