
Inside The Mix: Robert DeLong With Adam Hawkins
01h 42min
(26)
Throughout the past ten years, Robert Delong has climbed to the top of the charts with his genre-bending electro-pop hits. When the time came to mix 2018's "Favorite Color Is Blue", Robert called upon Adam Hawkins to mix the hit single.
In this pureMix.net Exclusive, multi-award-winning mixing engineer, Adam Hawkins, returns to the original Pro Tools session of "Favorite Color Is Blue" to dissect the choices he made and explain the thought process, workflow, and techniques that helped this massive song explode across the world.
Watch as Adam:
- Discusses delivering mixes at loud levels when receiving a loud rough mix
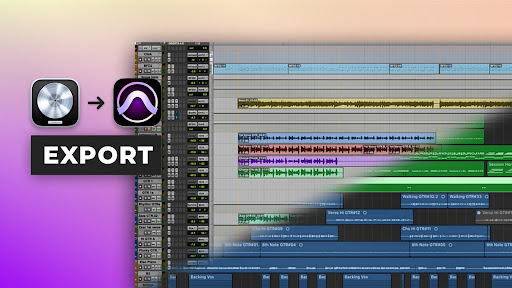
- Track Organization
- Explains how to deal with excessively bright tracks
- Deals with resonances on individual tracks that can mask and clutter a mix
- Uses various techniques to widen the stereo image
- Creates a multiple drum parallel busses to build a MASSIVE drum sound while preserving the energy and feel of the groove
- Uses compression and saturation to level out the synth bass and make sure it's always present in the mix
- Uses multi-mono eq fed into a stereo imaging processor to treat each side differently and expand the stereo width
- Modulates reverb to add a tail to the main hook vocal track
- Dials in sound effect tracks to make them support the transitions in the songs
- Uses multiple stages of compression on K. Flay to create a powerful, textured, and punchy and in your face vocal sound.
- Creates space and depth around the vocal with mono delays
- Manages chopped and screwed vocals, multiple doubles, chants, and adlibs to create a massive group vocal sound
Sit next to world-renowned mixing engineer, Adam Hawkins, and learn how he mixed the hit song, "Favorite Color Is Blue", by Robert Delong ft. K. Flay. Only on pureMix.net
Once logged in, you will be able to click on those chapter titles and jump around in the video.
- 00:00 - Start
- 04:06 - The Rough Mix
- 08:43 - Session Layout
- 12:02 - Drums
- 19:41 - The Importance of Mid-Range
- 28:43 - The Drum Bus
- 41:26 - Bass
- 46:47 - Guitars
- 52:09 - Synth
- 56:54 - FX
- 00:00 - Start
- 00:1 - K.Flay Vocals
- 20:20 - Robert Vocals
Part 1 | Part 2 |
00:00:00
Hi everyone, this is Adam Hawkins
here with a song from Robert DeLong
called 'Favorite Color is Blue'.
00:00:06
I'm gonna deconstruct this mix for you
so you can see a little bit
of what was going on in this.
00:00:10
I'll show you
some tracks exactly
how they came to me
and where I ended up processing them.
00:00:15
Somethings are pretty heavy-handed
and some things I left
as they were given to me.
00:00:19
So, I'll go through it
and show you all that.
00:00:28
So here's a little bit of the
mix where it ended up.
00:00:31
I'll start there.
00:04:06
Let's start with the rough mix.
00:04:08
I'll show you how
this song came to me.
00:04:10
It was already
in pretty good shape.
00:04:13
A lot of the sounds were really great.
00:04:15
It's a little bit on the bright side
so I ended taming that a bit
and enhancing the
low-end quite a bit.
00:04:22
It was also,
because it was on the bright side,
extremely hot.
00:04:28
Which makes my job harder.
00:04:30
I have to compete with that level
when I send the file back.
00:04:33
I don't know where
they're listening
but I'm pretty sure they're
gonna listen to their rough mix
and back to back with my mix
to compare and see
what the differences are.
00:04:42
And,
everyone's first thought,
when something is louder
is that it's better.
00:04:47
We all know that's not true
but it's
it's hard for the brain to think:
"OK, that sounds better because
I'm hearing it louder."
'I hear it more'.
00:04:56
I don't
understand the scientific
reasoning of that,
I'm not a scientific
engineer or mixer.
00:05:04
I do know that
I have to make my mix
that I deliver
pretty much as hot and sometimes
even a little bit hotter
than what I'm given.
00:05:14
So when I say hot
I don't mean that it's
just peaking right at zero.
00:05:19
Peaking at zero is
actually absolutely fine.
00:05:21
It's the dynamic range
and it's how we perceive
how loud it actually is.
00:05:27
You can look at this and see that,
I mean, my mix, I'm guilty.
00:05:31
Like I said, I smashed this one
to make it hot
and, like I said,
I had to go hotter than his,
you can see the valleys in here
are even not as deep as
the original rough mix,
that was already pushing things a bit.
00:05:43
So, I'll get to an improved mix
and make them happy
even though it's pretty smashed.
00:05:48
And then,
I either have to
hope that the master engineer
will take on the whole and say:
'Alright, this is cool but
we have to back this down'.
00:05:56
And the it's gonna be backed down
even more once it goes to streaming.
00:06:00
And the master engineer does
not like to have to do that.
00:06:04
I'm trying now to
make it part of my job
to watch the levels
and have
the client listen to
the different version within iTunes
with 'Sound Check' on.
00:06:14
That way they're gonna hear
a normalized version.
00:06:18
Even if I send something
that is printed at -14,
their levels are gonna
pretty much match
listening in iTunes when their's
is at -3.
00:06:27
It's just difficult to force someone
to listen within a certain app.
00:06:31
They wanna be able to
listen on their phone.
00:06:33
They wanna A/B really quickly
in their car on their phone,
playing it from an email
or from a Dropbox link
or however I send it.
00:06:42
So, trying to figure
out a solution to this,
talk about it here so that
rough mixes don't come in so hot
so that then the mix doesn't
have to be so hot
and the mastering engineer
doesn't have to yell at me.
00:06:55
And,
in the end, when it gets to
streaming services,
because we all know
that's kind of where it's going,
or vinyl these days...
00:07:05
it can sound the best
that it can sound.
00:07:08
Here's the rough mix,
and like I said, it's pretty good.
00:08:18
So I switched back and forth
a little bit there so you can
hear the difference.
00:08:21
There are moments
that the rough feels
louder than
the mix that I delivered.
00:08:27
And,
moments that
don't feel as loud.
00:08:31
It's creative choice
for me to push this one
because it made the song exciting.
00:08:36
But I also wanted to make sure that
transitions from part
to part of the song
were felt
and not just flatlined.
00:08:44
So, when I first get a session,
this one came to me in stems from,
I have a feeling that Robert
was using Logic on this.
00:08:50
I have to drop them all
into a Pro Tools session
and organize everything so
that it makes sense to me.
00:08:54
Color code,
some of these colors don't
really make sense to me but,
often times I keep my
drums always at the top
usually the main drums end up
being in dark blue color.
00:09:04
Kicks first, then snares,
then claps are all here.
00:09:08
There's a reverse stomp
that I included in that batch.
00:09:11
Because I wanted those
to go to my Drum Bus.
00:09:13
Then another Claps that I didn't
want to go to the Drum Bus.
00:09:16
Hi-hats,
and then Crashes.
00:09:19
Often times I will color
code this differently
but this was a little while ago
and maybe I wasn't
doing that that day.
00:09:27
Percussion comes next to me.
00:09:29
Bass
and Synth Bass, Bass is always brown.
00:09:32
Because Bass starts with the letter 'B'
and so does brown.
00:09:36
Than Synth Basses are always purple to me,
I don't know why.
00:09:40
Guitars, green, again.
00:09:42
'G', green.
00:09:43
That doesn't work
everywhere though.
00:09:45
Synths always get a
little blue, they come next.
00:09:48
And you can see here, this guitar comes
in first so it's first guitar track.
00:09:52
Then this comes in so that's
the next guitar track.
00:09:55
And it just progresses.
00:09:57
What comes first,
I wanna see first.
00:09:58
And get to first on my mixer.
00:10:02
So, I keep it going, all the way down
when something,
in each area of my setup,
as you move down the line
something else comes in.
00:10:11
Again, these
'Whalesongs'
or the sorted vocal thing,
that on is first
then that one comes in.
00:10:18
The same with the vocals.
00:10:19
These are separated a little bit
because this is two singers.
00:10:23
K.Flay is up here
and then Robert is down here.
00:10:28
But it's still
pretty much arranged
so that whatever comes in first
I see first.
00:10:34
There are some exclusions
because this looks like
probably was closer
to a lead vocal so
I wanted to keep it
within reach
and not mix it in
way here between
whatever was going on.
00:10:47
There always has to be an
exception to the rule,
but that's my basic session setup.
00:10:51
Following all the tracks
I always put in
my Aux returns
and then my Master.
00:10:59
These Aux returns
are kind of
default.
00:11:04
I import these in
most sessions I get.
00:11:06
Once I drag in all the files
and start organizing things
I'll import these
Aux returns and sometimes even
the Master Fader
so that I can start in a general area
that makes sense to me.
00:11:21
And I have to manually
insert all these
on every project.
00:11:26
I'll keep my rough mix
below that
and my most recent mix as well.
00:11:31
So that,
when I get asked to do
a revision
I can A/B it myself to make sure that
A, my revision is
enough of a change
to address the notes that I get
or the comments that I get.
00:11:44
And B, make sure that is sounds like
and improvement to myself.
00:11:47
I'll A/B back and forth a few times usually
and just make sure that
I like where it's going
after I make any adjustments.
00:11:53
Now that I kind of
went through that a little bit,
just to explain some things
I'm gonna go through part by part
and show you some of the
things that I did in this mix.
00:12:03
So, to start,
let me solo the drums.
00:12:05
I can bypass everything
to kind of show you
how they came in,
the levels won't really be the same
but you can hear some of the
processing that's happening.
00:12:12
Let me start where
everything is in.
00:12:35
So now let me play the section with
everything bypassed just so you
can kind of hear the differences
and I duplicated one track here
so let me make sure I muted it.
00:13:06
So, first thing you noticed
is I'm doing something that's
to me very difficult
when I have to do a mix.
00:13:10
Everything
is on the brighter side.
00:13:14
The snares, the kicks, everything
is really featuring the high-end.
00:13:19
And
one of the hardest things to do, for me,
is to dull
something and keep the excitement.
00:13:27
To the tame that harshness
and take away the high frequency
cause to me
that's where a lot of the energy lies.
00:13:36
And once you start pulling that away
you find that energy somewhere else.
00:13:38
So it's...
00:13:40
often times really difficult
to take a rough mix
that's really bright and then
deliver something that's not as bright,
sometimes not as as loud and say:
'But I think this is better'.
00:13:49
Let me go through some of the tracks
and show you where I did that.
00:13:52
So, we'll start just
going through the kick drum tracks.
00:14:02
So you can see
I've got this
brainworx SSL EQ
cutting some 8 kHz.
00:14:07
Also low passing,
let me see that, 9.5 kHz
and then I wanted to
take more high-end away
so I am now low passing it
at 6.4 kHz.
00:14:16
So without these,
there's a lot more high-end information.
00:14:26
And there's a lot of that going
on down the line in the song.
00:14:32
Boosting some low-end there,
a little bit of compression
to add some attack,
then cutting some more high end.
00:14:44
And to show you what the resonance is
let me solo this.
00:14:57
It doesn't seem like a problem
when it's in the whole mix
put once it's gone
you really notice
that it was a problem.
00:15:03
It's just hard to pick
those out sometimes.
00:15:05
Then I'm just gating it a little bit.
00:15:07
Next track,
again, it's a punchy
kick with a lot of low-end
but it had this really
spiky top end on it
that I low passed out.
00:15:29
So, a gate,
Torque, which I'll show you
in a second what's doing.
00:15:34
Boosting some
really low stuff and some 1 kHz.
00:15:40
Very subtle
boost of some low-mid
and a cut at 4 kHz.
00:15:47
And then another cut at 8 kHz.
00:15:49
Wow, I just was stacking up the EQ
as I was trying stuff on this.
00:15:53
Without those...
00:16:05
And part of what I was trying to do
affects the decay, the reverb
that's happening there.
00:16:10
So that it comes through
differently,
there are other kick tracks
in there,
this one is more of a crunch
around the other punchier kick track
and the reverb that's happening.
00:16:19
And I wanted to remove certain
frequencies from that reverb.
00:16:24
This Torque plug-in,
I'm not exactly sure how it works.
00:16:28
It's a pitch-shifter
for drums and rhythmic tracks
that can really rescue
a kick drum, or a snare drum or toms
that aren't just right for the song.
00:16:36
You can see here that
I'm taking it down
quite a bit, 1200 cents.
00:16:40
And I've set the threshold really
low so that's constantly working.
00:16:43
Here it is without.
00:16:53
And it feels like you're pitching it down
but the mid information
is kind of staying the same.
00:16:58
Then on top of that I added
one that I've brought way down,
I brought it down
2 octaves
to blend in underneath.
00:17:11
Some of that was to change the tone
of the reverb that's happening.
00:17:14
I high-passed it quite a bit
so that's not
blasting 20 Hz into the world.
00:17:19
A little bit of low-passing.
00:17:20
This plug-in is great for either
taking away
or enhancing transients.
00:17:26
I'm also shortening
or lengthening the sustain.
00:17:29
So, again, I pitched that down
to affect mostly the reverb
and I'm
increasing the apparent reverb
by increasing the sustain here.
00:17:51
And you can achieve that
with a standard compressor or limiter.
00:17:55
Sometimes it's just easier to go
with this plug-in
to play around with the attack
and release of something.
00:18:05
That track is a single snare drum.
00:18:09
It looks like I'm just taking
some sub info out of it
and some kind of resonance.
00:18:16
See what that resonance was.
00:18:41
So I have this gate,
I'm more of using it as an expander.
00:18:45
Bringing down the level,
18 dB
when it goes below the threshold.
00:18:50
Followed by
a radical looking EQ
and then this to
enhance the transient,
so let's see what these two are doing.
00:19:09
So, I'm trying to get more focus
on the mid-range
by taking away some of the top-end.
00:19:14
And, pushing 678, 1795 a bit.
00:19:20
Let's see what this resonance was.
00:19:34
I just really wasn't hearing
enough mid-range in the snare
so I wanted to
bring that out and it
was mostly apparent
after you've blended in
with everything else.
00:19:42
I tend to spend a lot of time
thinking about the mid-range of the song.
00:19:47
During the production, during the writing,
it's fun for everybody to focus on,
"Yeah, make it really bright!"
or
"I love the low-end,
let's add some more low-end!"
That often times leaves things
feeling a little scooped.
00:19:57
And,
the human ear
is more sensitive to mid-range,
that's where a lot of the
information lies in the songs
and music that we hear.
00:20:04
I like to
really focus on
that area to make sure that
nothing is stepping on anything else
and you're able to pick out
each individual element
going on in there.
00:20:17
I don't go through and be like:
"Well, this snare is pushing,
you can see that it's
mostly
affecting 1.5 kHz
so now let's make
this one 2.5 kHz."
I don't think about it like that,
I like to just listen to how
they interact with each other.
00:20:34
The bulk of music is happening
in the mid-range and
the bulk of playback systems
are focused on the mid-range.
00:20:41
Yeah, it's fun to get in your car
and crank up the bass but
if I already have that
bass cranked up in
here and you crank up
the bass in your car
it's gonna sound ridiculous.
00:20:49
And you're gonna need new speakers.
00:20:55
Alright, once again, I'm cutting
some high-end on this snare too.
00:21:07
A gate just to shorten
the decay a little bit.
00:21:15
It just tidies it up just a hair.
00:21:17
Interesting.
00:21:18
Two tracks with fills.
00:21:23
These fills are awesome,
I love that they're cranked up in the mix.
00:21:27
This one...
00:21:29
Wow!
It's crazy to back and see
something you did over a year ago.
00:21:44
It looks like I was trying
a bunch of
different things here but
then end up keeping all of it.
00:21:49
Or did I?
That's all active except for
one little resonance there.
00:22:00
Yeah, so there's like a little
spike at 9 kHz on there.
00:22:08
Or is it at 15 kHz?
But I'm low-passing,
which is gonna push that down.
00:22:16
Yeah, mostly just cutting highs
on these because it was kind of...
00:22:20
intense.
00:22:22
And some of that came in
to play with
this other track...
00:22:27
and how they were
working together.
00:22:28
This snare is a little bit more about
the sides and the distortion.
00:22:31
And...
00:22:34
So I even enhanced that by making it
wider in the stereo field
with this delay,
Air Stereo Width,
a stock plug-in in Pro Tools.
00:22:46
And then I put this one up in the middle
and it's focused in the low-end
and the attack of the snare drum.
00:22:52
A classic
909 snare,
or is that an 808 snare?
909 or 808.
00:22:58
Whatever it is it's cool.
00:23:00
And I'm boosting
the low-end there.
00:23:02
And also still taking
away some of the fizz.
00:23:07
The stuff that hurts.
00:23:12
A little clap guy here.
00:23:14
Probably, yep, low-passed.
00:23:19
That one was really bright.
00:23:32
Same thing there,
low-pass,
a little bit of a high-pass,
it looks like it had
a little bit of a rumble
happening in there.
00:23:45
So, I'm guessing, I probably threw this
on their first.
00:23:50
And I'm using this to widen it,
darken it,
and limit it.
00:23:54
Pretty extreme.
00:23:59
Just to give it more attitude.
00:24:03
And then I'm quite certain I would
have added this later on in the mix
pulling away the 2 kHz area.
00:24:11
Probably for the way that it
was sitting next to the other
claps and snares that are
happening at the same time.
00:24:21
There's another nasty resonance
I was getting rid of.
00:24:33
And it just makes that sound
so much easier on your ears.
00:24:46
A gate to control the reverb.
Wow, what was I doing...
00:24:50
to work on this guy?
Let's see what this sounds like.
00:25:23
I think I was just bored,
there's some resonances
in there that I hear but I think that was
kind of over-thinking it.
00:25:29
Don't do that.
00:25:41
A little bit of expanding going on here
so that the reverb
just gets shut down a little bit.
00:25:46
I'm not killing it,
we wanna keep the decay there
but I wanted to focus
more on the attack.
00:25:56
These changes are probably based on
how it sits with everything else,
which I'll get to once
I put everything back in.
00:26:14
I'm thickening it a bit,
widening a bit,
and it's funny,
I took away the
decay of the reverb with the gate
but then I kind of put it back
with the parallel compressor.
00:26:23
There's probably a reason!
Not really much happening with this,
just a high-pass, low-pass.
00:26:36
The 'Stereo Width',
what this does is
creates delay on one side
that's not on the other
so that it makes it
feel like it's stereo.
00:26:44
I can create some nasty problems
for mono compatibility
but for a reverse reverb
that's coming through
that's not gonna be missed
if someone is listening in mono,
I mean, it's crucial on the
rhythm section here but it's OK
to loose that a little
bit when you go to mono.
00:27:07
It adds a nice depth
to the whole thing.
00:27:12
The last one.
00:27:15
These toms...
00:27:17
I'm cutting some highs,
Renaissance DeEsser
and you see that I use this a lot
to remove attack on things.
00:27:24
Not just de-essing.
00:27:25
Drums, bass, guitars,
anything we have to cut off a
sharp click or attack on the top.
00:27:30
This is a great tool
for getting rid of that.
00:27:34
I sometimes use the 'Stereo Width' plug-in
as a way to automate pan.
00:27:38
With Pro Tools normally you'd have to
automate the pan,
on a stereo track you have to deal with
two separate automation parameters.
00:27:44
So,
it's easier for me to throw this plug-in on
and use one knob that I have to automate
to make these toms
kind of spread across.
00:27:57
Instead of being just in one place.
00:27:59
Like when you are at a drumkit,
the toms
move around you a little bit.
00:28:03
I follow that with a little bit
of a gated reverb.
00:28:06
So without that.
00:28:12
It's just a little Def Leppard for you.
00:28:17
Then I'm widening that a bit
so that the pan that I did,
I was probably too lazy
to go back and adjust the pan
and I just wanted to pan more
and added this so that
it makes the panning more extreme...
00:28:29
by adjusting the phase.
00:28:31
And then cutting some high top end.
00:28:40
That's it for the drums that I wanted
to go through my main Drum Bus
that gets hit with the
parallel compression.
00:28:46
Let me go over that a little bit.
00:28:48
Since these are the main drums,
the meat of what's happening,
I like to be able to tailor
the punch
and the length of
the room or the reverb that's going on
with parallel compression.
00:29:01
So here it is without.
00:29:29
Let me show you what these
are doing on their own.
00:29:32
There's this one that is a
McDSP 6030
the D357 model.
00:29:44
I use this usually to
enhance the attack
and extend the decay.
00:29:50
And it's also
making things feel a little bit wider
because it's enhancing the reverb
which is clearly a stereo sound
and knocking down the
main part of the sound.
00:29:59
So it's leaving with
the ambiance enhanced.
00:30:03
And blending it in with the dry signal
makes it appear to
be a little bit wider
and deeper and more distant
but without losing any of it's natural
dynamic.
00:30:13
Usually I'll use this with a little
bit of a slower attack to leave a pop
but I think because I was dealing so many
sharp attack and bright things
I moved this attack faster
to make sure
I wasn't enhancing that too much.
00:30:24
And then this one is...
00:30:26
This one is crazy.
00:30:28
I left the attack on a slower side
and the release is really fast.
00:30:33
Here it is by itself.
00:30:41
So, because this one is so extreme
and to not make it sound like
everything is crazy pumping
I barely blend this one in.
00:30:51
So, I'll show you as a I
add one after the other.
00:31:08
So, the way everything is getting to
these 3 Auxes
is I have here a bus named DRUMS,
then I create a master for that bus,
on that, a little bit of EQ that
I added probably after the fact,
once it was in the song
to make all these
drums sit properly.
00:31:24
A little bit of compression,
that's probably not doing a ton.
00:31:33
Mostly knocking the
kick back a little bit
and it does add a little bit of attack
and dynamic control.
00:31:39
Decapitator is almost
always on this bus.
00:31:42
Something about this adds a nice
sub and top end sparkle that
I can't really get with anything else.
00:31:50
And it does distort obviously.
00:31:52
But because of
the nature of this
song and the sounds already used,
a little bit more of distortion.
Why not?
Here it is without.
00:32:09
It's really hard to tell
because it gets a little bit louder
but if you listen past the volume change
you can hear the difference there.
00:32:15
And then I'm blending in a tiny bit
of even more distortion,
I've got the mix only at 2%
but this will usually enhance
the stereo imaging even more
and just add a little
bit of excitement.
00:32:27
Here it is without.
00:32:38
So that's just at 2%, if crank this
it's ridiculous.
00:32:52
So, this master
then feeds these 3 Auxes,
you can see the inputs here are DRUMS.
00:32:57
This let's me control the level
getting to this first Aux
that's not having
anything done to it
and then the parallel compression
Auxes that are following it.
00:33:07
And also,
inserts on the Master Fader
are post-fader so I can
pull this fader down
and adjust the level that's
getting into this plug-in chain.
00:33:19
It's just easier, I mean, yeah,
I could just turn the VCA down
but I like to be able to keep and
eye on it, separate from that,
I kind of used the VCAs
throughout the mix
to try things
I like work with it
mainly at zero
on this Drum Bus only.
00:33:37
And
if I'm experimenting
with different things
I'll move it around,
but know that,
its home is usually at zero.
00:33:45
It's just like a reference point
and part of how I build
the mix around the drums.
00:33:53
So now we've got some percussion
and hi-hats and crashes.
00:33:57
If I left these within
that parallel
compressed smashed world
they breath and pump too much
and kind of really ruin the vibe.
00:34:08
The hats
or crashes will jump up in between
the hits of the kick and the snare.
00:34:13
And it's a major distraction.
00:34:15
We wanna keep this kind of more constant
and not breathing against
the kick and the snare.
00:34:21
I guess as an example,
let me stick this through the Drum Bus.
00:34:25
And you can hear what the effect
of that would be.
00:34:29
So, I'll solo all the drums and then all
of all this high frequency information
through that bus and you'll
hear it pumping and breathing.
00:34:56
It's almost like the,
specially this long delaying crash,
every time the kick or the snare hits
it gets pushed down and you hear it
come back up.
00:35:03
Or the hi-hats that are hitting
on top of the kick and the snare,
they almost disappear.
00:35:08
And we wanna keep that
constant energy flowing
so I'll keep these on the main
Mix Bus.
00:35:28
As far as treatment to these,
let's see what I'm doing.
00:35:36
Just something is a hi-hat
doesn't mean you necessarily
need to add high-end to it.
00:35:41
I see it a lot where,
someone thinks:
"Oh, this is a hi-hat, this is a cymbal,
let me add some more sizzle to it."
Usually it's kind of already there
and you don't want
too much of it.
00:35:51
I'm actually pulling back
quite a bit of that on here.
00:36:02
And it's probably, again,
how it relates to the
other hi-hats in the song.
00:36:06
But I'm doing a similar thing on that one.
00:36:08
Let's see, oh!
And,
I put a Rat pedal
emulation on this one,
let's see what that's doing.
00:36:25
With that, I'm filtering it.
00:36:27
And
taking away the sharp attack,
it kind of just flatlines it,
makes it one long
sustained note.
00:36:34
That just sit better
in the track to me.
00:36:36
That's a sound that was
just asking for something
so I played around with some distortion.
00:36:40
I don't if I tried others
before I landed on this one
but I like where it ended up.
00:36:49
Again, just cleaning up some
of the super high-end stuff.
00:36:54
I wanted to bring this whole
song to a darker place.
00:37:07
And there I used the distortion again,
this time it seems like
maybe to thicken that sound.
00:37:12
Make it less of a pingy high-end
that was happening and more of a
thicker and more noticeable
part of the song.
00:37:29
You can hear
clearly what I'm doing here.
00:37:32
Getting rid of this
really high top end.
00:37:35
We don't need
whatever this that's
happening above 16 kHz.
00:37:39
I can solo what it is that I'm removing.
00:37:47
I'll me honest with you,
I can't hear 20 kHz.
00:37:49
You can't either though.
00:37:51
This was a visual move, a lot of it.
00:37:53
But it's preventing
trouble down the line
with robbing headroom
or it can cause distortion and something
else down the chain
so I wanna get rid of it,
specially since I see it there.
00:38:03
And there was this resonance
here, at 7 kHz.
00:38:13
Here's with that resonance back in.
00:38:21
It really softens the sound and makes it
just more pleasing.
00:38:43
This crash gong,
it's a big moment in the song
so I wanted to make
sure that it felt big.
00:38:49
Originally.
00:38:51
It feels kind of crackly,
not wide
and big and powerful
so I took some of the top end off.
00:39:00
Honestly, this probably
came from another track,
I probably just dragged
the plug-in over
and already had a high-pass there
but I can see that there's nothing there
and I can also hear that
there's nothing there
so I just didn't worry
about it and left it.
00:39:13
Also, though,
when I use this plug-in in limiter mode
and blend it in
with the mix here,
it will bring up
insane amounts of
anything low level,
because it's really digging in.
00:39:26
I could have done this
intentionally as a safe thing
to make sure that there wasn't
any really low level sub
info in there that this would bring up
and cause an issue.
00:39:34
It looks like I'm using this just
to add a little bit of attack
and lengthen that hit.
00:39:39
This plug-in has a stereo spread on it
to widen that a little bit,
to make it sit further
outside of the center.
00:40:00
It just really let's you hear
this
long long decay
over everything else that's
going on in the song.
00:40:13
Using this plug-in again
and you'll see that I use
this plug-in quite a bit
because it's great for bringing
out the low level information
but without really
stepping on the original
tone of what's happening.
00:40:23
Blending in
very small amount of the limited signal
just probably to enhance
the reverb a little bit
and then once again widening
the stereo image a little bit
to make it sit outside of whatever other
percussion is going on in the middle.
00:40:39
Cutting some top,
it's adding a little
bit of room reverb
to the shakers, to make it seem like,
kind of like you're in the room.
00:40:47
ValhallaRoom,
probably the default preset
that it opens up with.
00:40:51
And just cut the high end a little bit.
00:40:59
It's pretty subtle.
00:41:10
So, the percussion sound,
I though it could use a
little bit of room reverb.
00:41:20
It's panned pretty far to the right,
adding the room puts it
a little bit on the left
and just puts in inside of the space
like it's in a room.
00:41:28
Here's the main bass line.
00:41:42
So I kind of treated this almost like
it was an electric
bass instead of
treating it like a sub 808 bass.
00:41:47
Because it has a lot...
not a lot
but it has some high-end
and mid information in it
carries it along almost like
a distorted picked
bass would have been.
00:41:55
It's got the attack.
00:42:00
Limiting it with an 1176 in 20:1,
and that's probably to bring
that attack out even more.
00:42:07
Let's see what it sounds like without that.
00:42:15
It's also to make sure
that each bass note is heard.
00:42:19
When I bypass this
you instantly can hear
that it's a little bit too dynamic,
some of the notes disappeared.
00:42:28
Just the nature of
whatever synth that was.
00:42:31
So this kind of make sure
that you're hearing each note.
00:42:40
Getting rid of some of the click
with RDeEsser.
00:42:50
You can hear there's a little
bit of that click on the attack.
00:42:57
Just softening that a bit.
00:42:59
I'm not really doing anything here,
I'm just letting it run through it.
00:43:02
Let's see if it's making a difference.
00:43:13
A little bit of an enhancement
and a little bit of saturation.
00:43:16
It does add a little bit of punch
when this plug-in is on.
00:43:19
But didn't feel like it
was necessary to actually
adjust it at all.
00:43:24
Then adding some sub back in
because I think I probably,
yeah, I've high-passed it.
00:43:29
This SSL plug-in
and a lot of SSL plug-ins,
the high-pass is at 70 Hz,
it's probably more like 30 Hz.
00:43:35
If you're using a Pro-Q,
that's something about the slope
that it's definitely affecting
things lower than it says.
00:43:43
This is being sent to
what I labeled 'DIM',
and it is an
emulation of an old
Roland Chorus rack unit.
00:43:55
It was called the 'Dimension D'.
00:43:56
Universal Audio now
calls it 'Studio D'.
00:43:58
And it's truly a chorus effect,
not a lot of control,
it's 1, 2, 3 or 4
and then you can play
with combinations of
multiples all at once.
00:44:07
I usually just play around,
go through whatever sounds right to me.
00:44:11
I land on 3 quite a bit.
00:44:12
I'm sending this bass to this
so you can hear
a little bit of the chorusing.
00:44:25
You hear it more
straight up the middle.
00:44:27
This just adds a little bit of motion,
a little bit of stereo information to it.
00:44:31
But not enough to really
cause any major phase issues
where a sub is not gonna
reproduce the bass
when the sub is in mono.
00:44:57
So this sound is awesome.
00:44:59
I'm taking a little bit of the super,
all of the super
top end out of it.
00:45:04
Because it was probably just like a
hiss, let's see.
00:45:10
That's kind of gonna
compete with all
the cymbal information
that was going on
so I pulled that back.
00:45:15
I'm adding some sub,
again after this high-pass,
just boosting some 46 Hz.
00:45:20
In solo it doesn't really
tell us much about why
but probably,
the way it was interacting
with the kick drums and
all the other synths that
are playing in the section,
it was the main source
of sub and low end.
00:45:36
I'm just using this
width control once again,
you know,
I'm really not sure how these work,
I'm not smart
enough to know that.
00:45:44
It's either pulling
the center of the signal out,
like a mid/side kind of thing,
or it's just adjusting the phase
slightly of one side.
00:45:54
If you ever used a Waves S1
it's a similar thing,
this is just the stock version
that comes with Pro Tools.
00:46:01
And it's a quick
plug-in to be able to play
with this kind of thing.
00:46:06
You can pan things,
you can add delay to one side.
00:46:09
It doesn't tell you which side
but you can tell once
you've turned up the knob.
00:46:13
I don't remember which one right now.
00:46:15
Which side gets...
00:46:16
or what you hear later
is the one that got the delay.
00:46:19
And you can turn the process off
for various frequencies.
00:46:22
So if you're doing this width,
I'm actually kind of surprised I
didn't turn down the low end here.
00:46:28
Putting the side
slightly out of phase
and then expecting this
to go to a mono speaker
later
kind of could cause issues.
00:46:37
So I'm surprised,
normally I would have
turned this down so it's not really
affecting the low end.
00:46:42
And it's just the high-end thing
which you're gonna hear out
of the smaller speakers.
00:46:55
Alright, here's the guitars.
00:46:57
So on this guitar part,
it looks like
I started out by correcting a little bit of
EQ just on one side.
00:47:04
Let me play it without this.
00:47:16
I think I wanted it to
make it feel like it was...
00:47:23
Just less of this 3 kHz
on the left side.
00:47:26
And then put Ozone Imager
there to make it sound
very very wide.
00:47:40
You can see without the EQ
it feels centered wide.
00:47:49
Once I put this EQ on where
it cuts the highs on the left
it feels a little bit like
it's right off center.
00:47:55
But still pretty wide.
00:47:57
Then I follow that with a PanMan
that is panning it side to side.
00:48:02
And I think it keeps some
of that stereo width intact
as it goes back through
the center it gets wide.
00:48:08
It's kind of as it pans left
it gets narrower
and then it opens up in the center
and starts a little bit more right.
00:48:22
I was having fun play around
with how that
works in the stereo image.
00:48:39
I really like how Robert did this
he has his guitar bends looping
and you can hear the edit point
on the reverb
but it's really cool how you hear
them alternating
and the pattern that he
created by doing that.
00:48:52
I'm just cutting away some of the fizz
on there and thickening it a little bit.
00:48:56
Often times...
00:48:57
this has become a go-to for me
on so many tracks,
I love this plug-in
and it does great things,
it does horrible things
but on guitars I love putting it
on the compressor mode
and just blending it in a little bit
and it's kind of reminiscent
of what you'd get
from and LA-2A,
that nice attack that you'd get.
00:49:14
But it has a mix knob so,
even thought it's not
the same as an LA-2A
I get a similar vibe out of it
without having to compress
the entire signal
it's just a quick easy way
to control the dynamics
but keep some of the life
and some of the natural pick sound
and the sustain of the guitar.
00:49:29
I'll show you what
it's like without it.
00:49:37
And then with.
00:49:40
Now, this isn't a typical guitar part
but you can still kind
of see what it's doing.
00:49:50
I'm just cutting a little bit of high
and boosting a little bit of low.
00:49:54
And probably the same thing on this track.
00:49:57
Yeah, I probably just copied that over
because it's a similar thing.
And then this track too.
00:50:02
All the same thing, together they
sound like this.
00:50:38
So, on this one it looks like
I added some spring reverb
just to make it sit back.
00:50:52
I cut out a little bit
of that nasty 2.4 kHz.
00:50:57
And then copied over the same plug-in
but this time it's a stereo version.
00:51:01
And this time I'm using
the spread as a
way to make this stereo track that's
mostly panned to the left be more left.
00:51:08
Just an easy way to
quickly adjust that.
00:51:23
This guitar got this
'Brauer Motion' plug-in on it
and it's a pretty complex plug-in.
00:51:29
Honestly, I probably left it
pretty much default plug-in setting.
00:51:33
It's not the same as just auto-panning.
00:51:35
It's kind of front to
back and side to side.
00:52:22
See, I really like this plug-in.
00:52:28
I'm using it again to widen.
00:52:30
I have 2% limiting in there,
probably just to extend whatever reverb
was going on on that sound.
00:52:44
With this tied at 2% of
the limiting happening
as soon as that synth stops
you hear the reverb jump up.
00:52:50
And it just sounded more
interesting and exciting.
00:53:04
More high-pass, low-pass.
And then I'm using S1 here.
00:53:08
I'm not using it to widen,
I'm just using it to pan the stereo
image a little bit to the right.
00:53:12
So that synth line was sitting
not in the center, on top of the
vocal, a little bit off to the side.
00:53:18
So it could have it's own space
and still be
out front, along with the
vocal and not competing.
00:53:28
You'll hear the vocal in a second
and it's crazy wide and distorted
and crazy.
00:53:41
High-pass, low-pass.
00:53:42
Wow, I just kept dragging
the same plug-ins across the board.
00:53:46
Just widening a little bit.
00:53:47
So again, I could have just used
S1 for this but for some reason
I chose to insert this plug-in,
I probably played around with
some other settings at some point.
00:54:05
High-passing, low-passing
but it's almost outside
the range of anything
that's on the track.
00:54:09
I probably dragged it over,
let's see if it's the same.
00:54:12
No, it's not the same.
00:54:16
But it wasn't hurting anything
after I put it there
and I just left it.
00:54:31
Again, just cutting back on
some of the sharpness of that.
00:54:34
The attack was great so
I didn't mess with it
dynamically at all.
00:54:43
And nothing, I'm just sending
that to a little bit of reverb.
00:54:47
One of my go-tos
is the UAD EMT 250.
00:54:51
I use it quite a bit.
00:54:53
And mainly because it's easy
to adjust but it's also got a very
cool stereo image
and chorusing or something
going on behind the scenes,
it's just a really quick easy way to get
a great sounding reverb.
00:55:19
So, on this, they labeled this
'Whale Song',
it's vocal.
00:55:23
There's already some reverb
on there so I wanted to
bring that out a bit so
I'm using this limiter in parallel
to bring that up
and then widen it a little bit
just to make it larger than life.
00:55:34
I follow that with the shimmer plug-in,
my favorite to place to start
with this one is 'bigStereo'
and 'dark' on these modes
that you get to choose.
00:55:41
Probably not far off from default,
it looks like I adjusted the
size down a little bit and
brought the 'high cut' down.
00:55:49
Here it is without.
00:55:50
You can tell there's
already reverb on there.
00:56:10
It's just extending the decay.
00:56:11
This has a cool modulation effect
just pitching up and down as it decays.
00:56:17
I probably copied these
settings to this next track.
00:56:22
Probably the same thing but
it's on a different track.
00:56:36
And here's that synth I was
talking about where
I wanted it to be
not quite centered.
00:56:54
I just really wanted those
two parts to work together.
00:57:04
Nothing happening there,
just a reverse reverb
used as an effect to transition.
00:57:17
Again, more transition effects.
00:57:19
I don't really ever do a ton of this,
I look at the level,
if there's some, yeah, like,
rumble or high frequency,
again, I'll use that.
00:57:27
Oh, look at that.
00:57:28
Let's see what this was doing.
00:57:32
It's an EQ move but it's
more of a dynamic thing,
that last little frequency that
jumped out was kind of loud.
00:57:44
Instead of automating the level
I just found that frequency
and turned it down.
00:57:53
Microshift on this one to spread it out.
00:57:59
Probably... it adds a little bit of impact
to the transition effects right there
to be out in the outside
of the stereo image instead
of just up the middle.
00:58:08
So here's a section.
00:58:14
They are pretty buried in there
it's more of something you just feel
instead of really notice it
but if it's gone
it's not as interesting.
00:58:40
The transition or reverse effect
probably high-pass, low pass.
Yeah!
So I've heard about this Puremix's
'High-pass everything' stickers,
I'm gonna have to update those
to 'High-pass and Low-pass'.
00:00:00
Alright, so let's start
checking out this vocals now.
00:00:02
I'll start with K.Flay first.
00:00:05
K.Flay is the guest
performer on this song.
00:00:09
And I'm pretty sure she co-wrote this
with Robert as well.
00:00:13
Don't quote me on that though.
00:00:15
She's incredible
and
she's basically,
this has become
like a duet and they're
both singing lead lines.
00:00:25
So here's her lead line.
00:00:27
It's happening underneath him
but it's not really a background.
00:00:30
And here it is dry.
00:00:44
So it's really dynamic.
00:00:46
Kind of on the thin side.
00:00:48
And not super clear.
00:00:50
So we're gonna see what I did to
enhance that.
00:00:54
I cut some high-end,
mainly because of some sibilance.
00:00:58
So, I'll play
this line
and show you what this is doing.
00:01:10
You can really tell on the line 'socks'.
00:01:16
So I'm doing that
then hitting everything
with this compressor
kind of hard, all buttons in.
00:01:22
UAD 1176 blue stripe.
00:01:24
And it does a little bit of
de-essing when it's doing its job.
00:01:28
In all button mode it's
a little bit extreme
but it adds distortion,
it adds a cool character.
00:01:36
And really locks that level in.
00:01:46
You see it adds that attack
and makes the sound more powerful.
00:01:49
And then 'socks'
almost gets pushed back
a little bit too much,
it's gonna come back when I add
another stage of compression
with this dbx 160 emulation.
00:02:05
I usually use this
as just a tiny little bit
of polish on top of the already
hyper compressed signal.
00:02:13
I'm hitting it a little
bit harder on this one
in order to bring back
some of what's lost.
00:02:18
That's followed by a de-esser
just to take any of the super harsh
sibilance down.
00:02:30
And then that's followed by
a J37, and this is really
my go-to vocal chain in-the-box.
00:02:40
It varies here and there
but this is kind of good
starting point for me,
always, this little chain of plug-ins.
00:02:52
You could hear that there's
some slap delay on there,
I'm adding a 16th note slap
with the low's cut
and the high's cut, quite a bit.
00:02:59
So, it's really
just a little bit of
delay on the,
mainly the mid section
and
it makes it feel,
since there's not any top
and there's not as much bottom,
it makes it feel
like it's further
behind the lead vocal
and it just adds some space.
00:03:17
And this plug-in is also
adding a tiny bit of saturation
and a little bit of color.
00:03:22
I play around with
what formula tape it is, all the time.
00:03:27
And I play around with the 'bias'.
00:03:29
Basically the bias
it's darker to brighter.
00:03:32
And I just pick which
tape formula sounds best for that
particular moment,
this one happened to be
811, I really am not that familiar
with these tape formulas
or even this tape machine.
00:03:45
But, had I been born
40 years earlier,
well not 40 but,
20 years.
00:03:53
After that I'm sending to
what I tend to call a doubler.
00:03:58
It's not truly what it is,
it's more of a classic vocal effects
found from an Eventide
processor, the H3000,
it had a patch called micropitch
that became really popular.
00:04:09
And this MICROSHIFT
from Soundtoys is basically emulating that.
00:04:14
As well as some other
similar
processes doing the same thing,
there's a few different styles on here.
00:04:21
I think like one is the H3000,
one is the AMS DMX.
00:04:27
I'm not sure what
the other one is
but they're all similar things
where it's a slight delay on each side
and that delay is just modulating.
00:04:35
It's independent of each other.
00:04:37
So, that it's
adding some stereo effects,
it's almost like a chorus.
00:04:40
This is the stock patch
whenever you load this plug-in.
00:04:44
And it looks like I'm sending
quite a bit of signal to this
on this vocal.
00:04:49
So you can hear what
this one is doing.
00:04:56
You can hear it just spreads it out wider,
makes it sound
almost doubled
but not quite because the
timing is not changing
between the performance really,
it's just adding a
little bit of dimension.
00:05:07
That's followed by a send
to that EMT
250 reverb emulation that
I showed you earlier.
00:05:18
And it's little bit of a darker reverb
not super long.
00:05:22
And I'm not really...
00:05:24
you're not hearing a ton of it.
00:05:26
And that's followed by a send
to an Echoboy,
8th note delay
Echoplex setting
and just cutting a little bit of highs.
00:05:36
A tiny bit of feedback but not much.
00:05:46
So, between the slap,
this delay and the reverb,
it's adding some space
around the vocal
without stepping on it.
00:05:55
On these lead vocals
I'm cutting the high frequencies
in the S area
so the de-esser doesn't
have to work quite as hard.
00:06:03
It takes away a little bit of the air.
00:06:07
Again, there's two lead vocals
happening at the same time.
00:06:10
So,
and Robert is the...
00:06:13
the main artist so,
I wanted to keep his a little bit
in the forefront
and some clarity coming more from him.
00:06:21
That's why I'm cutting the S area
as well as de-essing.
00:06:26
Because of the amount of
limiting I've got going on on this vocal
I don't really have to go through
and ride various lines up and down.
00:06:34
It's a pretty consistently performed
and
pretty consistent
intensity
throughout the entire verse.
00:06:41
This is just a...
00:06:44
Interesting
little background effect that's added.
00:06:48
I did my usual Pro Q,
cutting some high end,
high-passing and then
a little bit of limiting and spread
to enhance the reverb that's
already on that track.
00:07:04
So now we've got this group of
backgrounds for the chorus
and I've cut the breaths
off of the background vocals.
00:07:11
It drives me nuts when I hear
like 3 different breaths
out of time from each other.
00:07:19
And I don't wanna loose them all
because then it would
sound unnatural
like it's not a human being singing.
00:07:23
So,
I'll leave
usually the lead
or one of them
and so that you hear a breath
but you're not
hearing
all of these different breaths
coming in at a different time.
00:07:34
It's one of those things that distracts me
and takes me out of
the moment of the song.
00:07:38
I turned that breath down too.
00:07:40
As I did
on the lead vocal.
00:07:43
I'll use the clip gain
to bring the breaths down.
00:07:46
They already cut out most of it I think
but whatever was there
I just turned down.
00:07:51
We have to breath,
I can't stand it when
you take them all out.
00:08:00
It looks like I grouped all of this
to process them pretty much the same.
00:08:05
This is a
compressor plug-in from Empirical Labs,
it's called Arousor,
it's kind of like the Distressor
but a modern day version of it,
it's improved a little bit.
00:08:15
I think.
00:08:16
You have the same basic
attack, release
In, Out,
the different ratios.
00:08:21
It doesn't have the
opto mode that the original Distressor had
but I don't miss that at all.
00:08:26
You have control of the high-pass
for the detector.
00:08:29
Attack modulation,
I very rarely change this from
this default setting.
00:08:34
Saturation on the output
stage so you can push that
and get some distortion
without have to add another
plug-in for the distortion.
00:08:41
Often times
on a vocal like this where
I want some distortion
I'd use Decapitator or DevilLoc,
something like that to add some
grit
but when I use this guy
it's already built-in
and it's easy to just add.
00:08:53
One thing I really like about this too
you can make this
de-ess as it's compressing
kind of like the 1176 already does
but this lets you
choose the frequency.
00:09:03
It defaults to 6 kHz and I leave it there
because it's a pretty good starting point.
00:09:06
And I play with boosting
until it's pushing the Ss back
enough till it feels natural
and
isn't really
getting too enhanced by the compression.
00:09:17
Because without this on,
when you compress as
heavily as I am on here
you usually will get
a bit too much of the S.
00:09:24
And that's a mix control but
the way I'm using it for this
I'm just doing 100%.
00:09:28
And these look like they're
all treated the same.
00:09:31
The background tracks,
there's a double and a triple
and they look like they're
panned left and right.
00:09:36
And I added a spring reverb
to those after this chain.
00:09:43
Just to give some more decay
and distance to
vocal takes on the sides.
00:09:49
And we get down to the...
00:09:51
this is the Bridge.
00:09:55
This is like the
rap section that comes in.
00:09:57
They go back and forth a little bit.
00:09:59
When she comes in,
what am I doing to the vocals?
Wow! A lot of wows in this song.
00:10:07
Let's see.
00:10:12
Yeah, this track which
was really bright.
00:10:25
So, I just wanted to thicken it a bit
and make it more commanding
and dirtier too.
Kind of lo-fi, kind of
indie sounding, not like full-on
pop vocal sound.
00:10:39
So a similar compression going on,
I'll show you the gain reduction,
it's kind of ridiculous.
00:10:54
It's not that ridiculous actually,
but 10:1 ratio,
I don't know, it seems
crazy to go that high
but I always kind of play around with
different ratios to find what
feels right for the performance.
00:11:08
I don't have a real explanation
for why I would choose 10:1.
00:11:12
I can show you its behaviour change
if I had chosen
6:1
per say, because I think that's
like the default with this plug-in.
00:11:35
It's definitely doing more work
and it's definitely
more destructive at 10:1
but I was kind of looking for that
character, that overly
compressed
enhanced attack.
00:11:46
A little bit
kind of
lo-fi, like I said before,
to just carry that attitude
forward on this song.
00:11:55
And I'm following it up with this.
00:12:00
Just touching a little bit.
00:12:01
De-esser again,
and J37 again with a little
bit of slap to sit it back.
00:12:07
And then no reverb on this
because it's more of a rap
thing and I didn't want it to be
swimming around in a reverb,
just a tiny bit of this doubler.
00:12:14
Or...
00:12:15
all of this doubler.
00:12:16
My send is on zero so it's got a lot of it.
00:12:31
Right here,
I did one of my favorite tricks.
00:12:35
I created a reverse reverb
going back into this
last little chorus
breakdown thing.
00:12:42
Let's see what it's like.
00:12:48
I noticed, when I got the song,
that they had this
swell in to the next section.
00:12:53
I played around with not
having that versus having that
and to me it was
just cool to have it.
00:13:00
I can quickly show you how to do it.
Let me see if I go back a playlist
if it's not there.
00:13:06
I'll duplicate this so I
can get back to it exactly.
00:13:10
So, originally
we just had this.
00:13:13
Where it just comes in.
00:13:16
'And now my favorite color is blue.'
I'll selected a fair amount of it.
00:13:22
I'm gonna cut this off and do little fade.
00:13:25
And...
00:13:26
choose a reverb plug-in
in Audiosuite,
Revibe usually is a good one for this.
00:13:32
I'll just keep it
set to default, except for the
mix, let's put it down to like...
00:13:37
30%.
00:13:39
There's this reverse
button right here.
00:13:43
You click that guy, let it do it's thing,
it basically
reverses the audio that you're
gonna do, applies the reverb
and then flips it back
with the reverb on it.
00:13:52
And you get this.
00:13:57
It kind of
gives you just a little
swell into the line
but you can tell that it's a vocal
by the tone of it.
00:14:03
So I usually do that
and just do cross-fade,
because I didn't do the mix at 100%
there is some dry signal in this
but I
mostly wanna switch to
the dry signal right as it
happens.
00:14:20
I'm leaving that overlap
so that you hear
the effect at the very top.
00:14:31
And that is the
reverse reverb vocal trick.
00:14:47
Audiosuite makes that really easy.
00:14:49
It didn't always have that reverse feature.
00:14:51
So it was a little bit more complicated.
00:15:09
Once again you can see on
this grouping of vocals
I cut the breaths out of
the background and just left
the breath on the lead
because it drives me nuts when I hear
multiple breaths coming in
and out at the same time.
00:15:21
I'm probably the only person in the world
that's distracted by that kind of stuff
but it really bothers me.
00:15:26
It looks like I did something in here
with Izotope Rx.
00:15:30
I'm not quite sure what.
00:15:33
And I did not save a duplicate
playlist so I can't go back.
00:15:36
I'm guessing
something along the lines
of a noise reduction
or... it does have
a de-breath feature
that sometimes works
and save me the trouble
of drawing the automation
or clip gain automation.
00:15:50
So, it could have just been
something as simple as that.
00:15:54
So I took this one
by itself, I'll solo it.
00:16:07
I treated it basically as a lead vocal,
I added this half-note
delay though to kind of
feel in this gaps
and
just kind of keep everything
kind of floating through this
dreamy section of the song.
00:16:21
And you go to this first
background track and
it looks like I slammed it
with Auto-Tune as an effect.
00:16:32
And, I'm transposing it.
00:16:35
It could possibly be the same
performance, I don't remember.
00:16:39
And,
slamming it with tune
to just add an effect
and make it sound like
another person singing along.
00:16:53
Then they already had
this one going with a
vocoder type of effect on it.
00:16:57
And I think I probably just kind of
treated this all
pretty much the same.
00:17:06
I EQed this one a little bit different,
I took some low-end out of the vocoder
so it didn't overpower.
00:17:13
Otherwise,
pretty typical.
00:17:17
On the
pitched up high vocal,
I wanted it to sound like
there were two of them
so I used this Waves ADT,
and it's
sort of like micropitch,
sort of like the others,
where it's delaying one side
a little bit and modulating it
and you can even see
where this is modulating,
this little tab moving side to side.
00:17:36
It's just a slightly different version
of that effect and it leaves
this source signal dry
on one side and you've got
the effected signal panned to the right.
00:17:47
It's totally a stereo
sound, if I put this on...
00:17:52
And just the single one
right up in the middle.
00:18:10
And let me show it to you
without the reverb effects,
I actually have an additional reverb
that I'll show you.
00:18:22
I'll add one at a time.
00:18:26
The doubler is really
kind of adding a new dimension
to all of three of this,
even though I've already
got that on here
and this is already a stereo vocoder sound,
a little bit more stereo
is more cool.
00:18:43
Back to the EMT 250 emulation.
00:18:51
Just way in the back with that one.
00:18:54
Here's the half note.
00:19:01
Let me show you what that is.
00:19:04
And that's and 'H Delay'
plug-in from Waves.
00:19:08
And just set at half note,
cutting some highs
and cutting some lows out of it
so that it's not exactly the
same as the source signal.
00:19:18
And a not a ton of feedback
but just a little bit
so that it keeps
repeating on top of the
next line a little bit.
00:19:25
And that's followed by
a chorus plug-in, this Roland Dimension D
to just make it modulate
a little bit in stereo
instead of just being right up the middle.
00:19:35
Because with this delay,
the options are either,
left to right,
out of phase
completely on one side
or right up the middle.
00:19:43
So I like to add something
to make it a little
bit more interesting.
00:19:47
So here's the delay by itself.
00:19:56
And then I'll stop it so you can hear
that decay like that, with it.
00:20:08
When I'm drawing attention
to it it seems kind of subtle
but when you're sitting here and
you're listening in the stereo field
it definitely spreads things out
and makes it a little bit more special.
00:20:22
Now we'll move down to Robert.
00:20:24
And
I guess I'll do the same thing,
let me show it to you dry.
00:20:30
I'll take all of the plug-ins off.
00:20:33
All the sends.
00:20:41
I'll just go that far.
00:20:43
EQing it to high-pass,
take away anything that's not
really necessary musically,
I don't wanna take away
the body of his vocal
but I wanna cut out any room noise,
chances are
they did this in a home studio, they're
not doing this in a professional studio.
00:20:56
And,
maybe there's cars driving by
or air conditioning rumbling or...
00:21:02
you never know what but
adding a little bit of high-end here
where I was taking it away from K.Flay
and boosting a little bit on Robert.
00:21:10
This is his record so I wanted
to feature him and have him be
the more present and
brighter feature here.
00:21:19
Following that with...
00:21:27
It looks like I'm boosting a
little bit more at 8 kHz with this
and
gentle compression
before I go to the major
compression on the next one.
00:21:36
I don't have an explanation for that,
I don't know what led me there
but
here's the next plug-in the chain,
the Arousor again,
I was on the Arousor kick.
00:21:51
You can hear the amount of attack
and punch that it adds to make
the vocal really jump out.
00:21:57
I mean, it's not the
slowest attack in the world
but it's slow enough to where the initial
vocal sound
takes a second before it kicks down
and gets pushed down
and that way you get a little
bit more of impact out of it.
00:22:08
And I copied this plug-in's settings so
I can paste them back
but I'll show you the difference
between a fast and
a slower attack.
00:22:14
I'm just gonna speed it up,
I'm gonna go all the way, at zero.
00:22:16
And you'll see how
it really flattens it out
and takes away all of the attack.
00:22:26
It also creates distortion
because of the speed of the attack.
00:22:30
That's 0.0.5 ms,
so that's insanely fast.
00:22:34
Somewhere between,
which may be more useful at some point.
00:22:45
I'm taking a big guess here
because I don't know the numbers
but I'm guessing that's
more along the lines of
one the slower
settings on an 1176.
00:22:54
I'm gonna push this
way back here and you're gonna hear
the initial sound of each
line really jump out.
00:23:07
And then somewhere in the
middle is about right.
00:23:10
This is exactly where I had it.
00:23:19
Also, I'm getting a fair amount
of distortion from this.
00:23:22
If I back off of that.
00:23:31
So this plug-in gives
you a lot of versatility.
00:23:33
I can show you the different feelings
too if I play with the release.
00:23:36
If I really pull it off
you're gonna hear it jump back
immediately
after it attacks and it's gonna bring
a lot more noise in-between lines,
probably it will feel more exciting
but probably also, distorted.
00:23:56
And then let's go this way with it.
00:24:07
That to me,
I mean, it makes it darker,
it is over-compressed,
and that's intentional,
but that makes you really feel it.
00:24:16
Instead of it
just being
like a tone controller it becomes:
"Wow, that's really compressed".
And you feel it
still holding notes down
as the next one begins, almost.
00:24:30
So, I always like to play
with finding the right
pace for the release
within the rhythm of the song.
00:24:45
So that's where I left it off.
00:24:47
Next in the chain was this,
we'll see if it's doing a lot.
00:24:54
Again, that's like
a little tiny
sheen that it adds.
00:24:58
Let's see if we can really tell.
00:25:08
Of course, it's making it louder
but you can match it.
00:25:13
Compare, it's just a tiny
tone change really.
00:25:18
De-esser.
00:25:23
And really just doing
its job in this case
where it's just knocking down the Ss
a little bit so it doesn't
sound too sibilant.
00:25:29
Of course you never
really wanna overdo that.
00:25:31
And then again,
a little bit of this tape,
it looks like I added it in the same place
with this formula and bias,
so, it's boosting a little bit of high-end
and just a slap to
add some space.
00:25:42
Doubler,
EMT 250 and 1/8.
00:25:53
And then so,
to put the two leads together
you can see where...
00:25:57
It was difficult to make
them not step on each other
and be clear
that they are both leads.
00:26:16
And they're not perfectly
in time with each other,
that would have just seemed artificial
had I really lined them up like that.
00:26:24
Here's Robert's rap section.
00:26:40
So I'm pushing the
mid-range a little bit,
which is just kind of more
aggression
and I guess a tiny bit
of compression, maybe.
00:26:51
I probably just copied this
down from the other lead track.
00:26:54
Let's see.
00:26:56
No, I changed the settings.
00:27:02
It looks like I sped up
the release a hair
and lengthened the attack a little bit,
probably to kind of
exaggerate the consonants a little bit,
the attack of each word.
00:27:12
Less distortion too.
00:27:17
Otherwise,
we are in the same exact
processing, really.
00:27:26
And then this guy
is a pitched down version of that.
00:27:42
And Robert did that.
00:27:43
I'm not sure exactly how he did it.
00:27:46
But I treated it pretty
much the same as the lead.
00:27:51
I come down here.
00:27:56
So here they are together,
and this pitch clearly is not a static
pitch down, it sounds like maybe
either he controlled
AutoTune with a keyboard
or something along those lines.
00:28:21
In other places I treated
this as a background vocal
and got the breaths out.
00:28:26
Also I kind of pictured
a pitched down vocal like this
kind of like a machine.
00:28:31
It's no longer human.
00:28:32
So I wanna get rid of the breaths
and I wanna to make it feel like
it's not just a human with
a pitched down effect,
I want it to be special weird.
00:28:43
He is going for robot and I'm gonna go
full robot, with no breaths.
00:28:48
'Thinking of changing my name'...
00:28:51
...and for go full robot.
00:28:57
Harmony vocal coming in for that
one section where K.Flay comes in.
00:29:01
The three of them together.
00:29:15
That's just a really cool part,
especially when it shifts and
they're doing different parts.
00:29:19
Different intervals I should say, right?
What's next?
Let's see, we've got this echo.
00:29:28
I didn't do much there, that's exactly how
Robert gave it to me.
00:29:37
I just took some top
end off of that.
00:29:39
Since it's an echo, again,
I wanna it to be in the distance,
I don't wanna it to be in the forefront.
00:29:43
And less top end
means further back.
00:29:52
Let's see these guys.
00:29:56
It looks like I did a little
bit of aligning to these.
00:29:59
I didn't want them to be perfect but
I just wanted them to sit
a little bit tighter together.
00:30:04
And,
I'm treating them
not so different
from the lead vocal
except I'm taking some
again,
less high-end, further in the back.
00:30:13
Or further away.
00:30:14
So, I just took some top end off of it.
00:30:21
And, any different?
no, same sends on them,
pretty much.
00:30:33
It's exactly how it was sent to me.
00:30:43
I'm treating that exactly like
the lead vocal too, pretty much.
00:30:47
Even though it's background,
let's see, am I leaving the high
frequency about the same?
I definitely low-passed that a bit
to make sure that
that because there are some Ss and
sibilance,
I just took away the high-end
so you're really just hearing the note
and the attitude that's
in that performance
but it's not stepping on the lead
and you don't notice the
timing discrepancies much.
00:31:11
Quite a few different
performance on top of each other for this.
00:31:15
So there's the pitched one.
00:31:20
There's a more...
00:31:24
country one.
00:31:31
Let's see all these different ones.
00:31:41
Yeah, he's got all kinds of
different characters in here.
00:31:47
And it kind of makes it feel
like a gang of different people.
00:31:57
And,
what else have we got?
We have these that
I really low passed.
00:32:03
And then the reversed one.
00:32:08
I really wanted this
robot guy to be upfront.
00:32:11
And lead the
screamy guys.
00:32:14
So I'm gonna add one by one
to this group and we'll see
what they sound like together.
00:32:19
There's different,
some are panned hard left,
some are hard right
and some are right at the middle.
00:32:28
So we've got that guy at the middle
and this one at the middle.
00:32:33
One more in the middle.
00:32:37
And then we start adding
the left and right.
00:32:45
Another left and right.
00:32:50
And then one more left and right.
00:32:58
And then the more screamy one.
00:33:03
Alright, so really,
this whole batch of them creates,
I mean, it sounds like a gang of people
singing it almost but it's all
Robert in different characters,
along with the robot.
00:33:20
I'm pretty sure that
that was already there
and didn't really need anything.
00:33:26
I took some low end out of it
to make sure it didn't take up too
much space and step on anything else.
00:33:39
Alright, so when we got this 'Oohs'
they were
already all summed together
and treated with some reverb
so I think I'm just doing a
little bit of level control
and taking some highs and lows always
to make them feel
more distant.
00:34:08
And because we've also got
K.Flay up here doing that
section.
00:34:18
These 'Oohs' were an
additional background vocal
to come in behind those.
00:34:23
Like 'the crowd starts singing along'
kind of thing.
00:34:52
This section,
there's just
everything mutes
and it's K.Flay and Robert on
top of each other screaming this.
00:35:03
Not screaming,
just distorted versions
of the line.
00:35:14
I feel like I had to do some kind of...
00:35:19
Yeah.
00:35:20
So, for this line, to make sure
that nothing was decaying over it,
I muted the
delays that would hang over
and
pulled back the reverb quite a bit
so that everything suddenly
stops and you get this
vocal as the only thing happening.
00:35:44
And then it explodes back
it to the final chorus.
00:35:48
These down here, I think these are
some effects that they had
going in their rough mix
that they gave to me and
thought they were really cool.
00:35:55
So I wanted to keep them
but I added a little bit of
dynamic control to them once again.
00:36:02
Some high-pass and low-pass.
00:36:03
And...
00:36:05
the doubler effect.
00:36:15
I thought that was gonna be reverb,
it's a low pitched down vocal thing.
00:36:19
So the reason I took away the
high-end was to make sure that
there's no crazy
overlapping sibilance or
airiness popping in
in random places on top of the vocal.
00:36:33
Let's see if we can hear.
00:36:36
You can kind of hear some
of that air that's there.
00:36:44
Just that little bit of low end
could make it a little bit muddy
on top of all the other vocals.
00:36:50
So I pulled that out
and I put the doubler on so that's mostly,
I think I probably got it, yeah,
it's at zero,
so it's sending quite a bit
of signal to that doubler.
00:36:59
It makes it sit mostly on the
sides, not in the center.
00:37:08
So, I'm blending that in with
both Robert and K.Flay.
00:37:25
I can hear this character in there.
00:37:31
And that's about it,
you can see there's
some other sections
where I muted the reverbs
to enhance the transition
from one section to another
like, let's see what this one is doing.
00:37:45
I let the reverb hang
over from the drums
but the delay,
I wanted to make
sure that nothing
was lasting too long.
The same here.
00:37:55
Except that I wanted the
'night' to repeat, on the vocal.
00:38:14
Basically the same thing
but more of a broken down version
and then the ending...
00:38:21
So that there's no reverb
tail at the end of the song,
I muted all but the chorus,
effects returns
to make that impact just off
or the vocal off,
you can still hear that there's like
some slap on the lead vocal
but it's these two tracks by themselves.
00:38:47
And everything just stops.
00:38:50
I like to end a song like that,
I went on and muted all
these different elements
in order to make it just stop.
00:38:58
Alright, so let's listen
through this one one more time
that you've seen all
the individual elements
and everything what it is.
00:39:07
There's a lot going on
but you've seen each individual
part now and you can see how
they add to each other
and where the impact
is coming from
in the drums
and some of the vocal effects.
00:39:20
Now that you've seen them individually
split up
it's kind of fun to pick them out
as you listen down through the song.
00:43:04
So there's 'My Favorite Color is Blue'
by Robert DeLong
featuring K.Flay.
00:43:07
I hope you enjoyed seeing
me pick through all the pieces
and show some of the
treatments that I added,
show some that
Robert had already created
I hope you learned
something from this.
00:43:18
It's fun to revisit
and see what I did,
I did this song maybe a year ago
or maybe even a little bit longer.
00:43:25
My work-flow hasn't changed that much
but there are some differences,
and it's just
cool to revisit.
00:43:31
Thank you so much
and see you next time.
Once logged in, you will be able to read all the transcripts jump around in the video.
Software
- AIR Stereo Width
- AutoTune 8
- Black Spring
- Black Op Distortion
- Bx Console E
- Empirical Labs Arouser
- FabFilter Pro G
- FabFilter Pro Q2
- IZotope Ozone 7 Imager
- McDSP 6030 Ultimate Comp
- Omnipressor
- Revibe II
- SoundToys Decapitator
- SoundToys Devil Loc
- SoundToys EchoBoy
- SoundToys MicroShift
- SoundToys PanMan
- SoundToys Radiator
- UAD API 2500
- UAD EMT 250
- UAD Oxford Envolution
- UAD Roland Dimension D
- UAD Studio D Chorus
- UAD UA 1176LN Rev A
- UAD UA 1176LN Rev E
- Valhalla Room
- Valhalla Shimmer
- Waves Brauer Motion
- Waves dbx-160
- Waves H-Delay
- Waves J37
- Waves RDeEsser
- Waves Reel ADT
- Waves S1 Imager
- Waves SSL Channel
- Waves TG12345
- Waves Torque

Adam Hawkins is a Grammy Award Winning Engineer based in Los Angeles, California.
Originally from New Jersey, he began playing guitar in bands and creating records at the age of 14. Adam got his start in the NYC recording scene, working out of Unique Recording Studios with artists like Big Pun, Rakim, KRS One, Kurtis Blow and more.
After moving to Los Angeles in 2001, he met Mike Elizondo and has worked closely with him as a tracking and mixing engineer ever since.
Adam has worked with artists such as Twenty One Pilots, Muse, Switchfoot, The Regrettes, K Flay, Robert Delong, Walk the Moon, Avenged Sevenfold, Gary Clark Jr., Regina Spektor, Tegan & Sara, Kimbra, L.P., JoJo, Mastodon, Michelle Branch,Keith Urban, Rilo Kiley, Alanis Morissette, Moby, Eminem, Maroon 5, Fionna Apple, 50 Cent, Rod Stewart, P!nk, Nelly Furtado, DMX, Eve, Jason Mraz and up and coming artists such as Half Alive, Call Me Karizma, The Score, and Winnetka Bowling League.
Adam spends most of his time mixing these days from his studio Acacia Sound in Thousand Oaks, California.
twenty one pilots
Muse
Switchfoot
The Regrettes
K Flay
Robert Delong
Parts of this site and some files are only accessible to pureMix Pro Members or available to purchase. Please see below our membership plans or add this video to your shopping cart.