
UAD Analog Classics Bundle Explained
44min
(41)
Dive deep into these essential UAD plugins
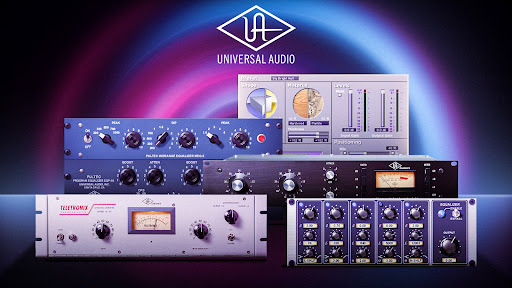
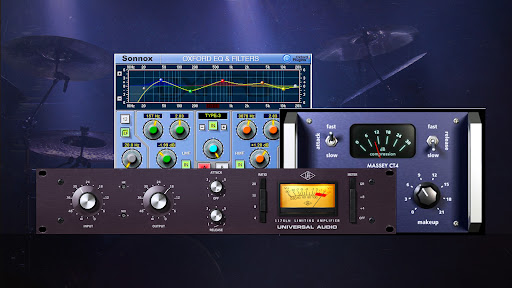
Universal Audio’s Analog Classics bundle is the essential set of tools offered with every Apollo or UAD system. Now it's time to get to know them a little better and realize the power you've been given.
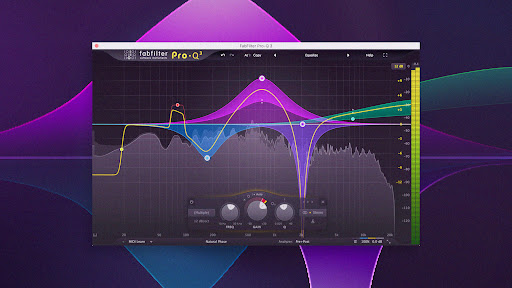
Fab demonstrates how to work with these industry standard compressors, EQ’s, and FX while also explaining a brief history about the gear each plugin was modeled after.
Master the UAD Analog Classics bundle and bring new dimension to your mixes.
Once logged in, you will be able to click on those chapter titles and jump around in the video.
- 00:00 - Start
- 00:56 - Pultec Pro EQ
- 04:20 - Pultec on Vocals
- 06:01 - Pultec on Bass
- 08:35 - Pultec Pro on a Mix
- 11:23 - LA-2A Compressor
- 15:27 - 1176 Compressor
- 20:16 - 1176 SE Compressor
- 20:36 - CS-1 Channel Strip
- 21:17 - CS-1 EQ
- 23:08 - CS-1 Compressor
- 27:08 - CS-1 Delay Modulator
- 31:14 - CS-1 Reflector
- 35:20 - RealVerb Pro
00:00:08
Good morning children, today we are going
to look into the mouth of a given horse.
00:00:12
Namely, we are going to explore and learn
the Analog Classics bundle that came free
with your Universal Audio
Apollo Interface. Enjoy it.
00:00:20
The Analog Classics bundle features a bunch
of great plug-ins from UA including
Pultec Pro EQs, LA-2
and 1176 compressors,
a nice channel strip called CS1 and a reverb
called Real Verb Pro, that's all pro.
00:00:35
Let's look at the
Pultec Pro first.
00:00:38
Ever since it was invented in the fifties
by a company called Pulse Technology,
also know as Pultec because
Pulse, Tec, Pultec.
00:00:46
Every studio worth their salt is supposed
to have a bunch of Pultecs in their racks,
and now you do too,
in your virtual rack.
00:00:53
Now, what's special about a Pultec EQ?
Let me show you.
00:00:56
The main reason why the Pultec Pro has been so
popular for so many years is because of the sound.
00:01:01
The transformer-tube-transformer
design is actually so smooth
that it is hard to screw up when you
eq something with a Pultec Pro.
00:01:09
The ease of use is
the other feature.
00:01:11
The plug-in that UAD gives you
in the Analog Classics bundle
is actually a combination of two
pieces of hardware emulations.
00:01:18
There is the MEQ-5 and the EQP-1A.
00:01:21
The MEQ-5 was a standalone piece of
hardware designed just to eq mid-range.
00:01:26
And then EQP-1A was for
the highs and the lows.
00:01:30
UA smartly put it
together into one plug-in
so you can eq the whole range
with just one piece of gear.
00:01:37
For those of you haven't used a real Pultec
or haven't used the Pultec plug-in before
it can be a little confusing as to
what does what, where, when, why.
00:01:46
Let me show you.
00:01:47
The top half of the plug-in
is the mid-range MEQ-5.
00:01:51
Here, the two controls on the
left are actually the low boost.
00:01:55
Most EQs you may
have used so far
will let you cut and boost
with the same controls.
00:01:59
Here no, it's different. Here you have
a peak control and a dip control,
which you can use at the same time,
which means you could theoretically
boost and cut the same frequency
at the same time. It's fun to do,
you should try it.
00:02:12
So here on the left
we have the peak,
you can choose your
frequency here,
very broad range.
Here's your dip,
200, 300, 500, 700, etcetera.
00:02:22
And here on the
right is your peak.
00:02:24
So this two work together,
this two work together,
and this two work together.
00:02:30
So, low mids peak,
a dip control that you can
range between 200 and 7k.
00:02:35
And a peak control
for the upper mids,
1.5k to 5k.
00:02:41
That's the MEQ-5.
00:02:43
Let's look at the bottom half of the
plug-in, the EQP-1A.
00:02:47
First, bypass button right here.
00:02:49
This is different from here because
this only bypasses the mid-range
and this bypasses
the low and highs.
00:02:55
And here, this
bypasses everything.
00:02:58
Important to know.
00:03:00
The EQP-1A controls
are slightly different from the MEQ-5
controls otherwise it would not be fun.
00:03:06
These three controls here are for the
low end, you pick your frequency
and you boost it or you cut it.
00:03:13
As opposed to the MEQ-5 where you
can pick a frequency for peaking
and you can peak a
different one for dipping.
00:03:21
Here, you just pick one
frequency and you boost or cut
from the same frequency.
00:03:27
It has interesting
results, I'll show you.
00:03:29
That's the low end right here.
00:03:31
For the high end
it works this way.
00:03:33
These three controls
work together.
00:03:35
You pick a frequency, you choose
how much you wanna boost it
and you choose how wide the
bandwidth of the boost is.
00:03:42
This is a Q system just
like on a parametric EQ.
00:03:45
You see the size of the bell on a parametric
EQ, this is kind of the same thing.
00:03:49
They call it bandwidth because
they want to confuse you.
00:03:51
This is from the
fifties, don't forget.
00:03:54
And these last two buttons
are the high end cuts.
00:03:57
You choose your frequency
and you can attenuate it.
00:04:01
So this is not related
to this knob here,
it's related to this knob.
00:04:06
To summarize.
00:04:08
These three work together to
boost or cut you low end.
00:04:12
These three work together
to boost your high end,
and these two work together
to cut your high end.
00:04:19
Isn't that wonderful?
While Pultecs have been considered to
be great on everything, most people
particularly like them on vocals, bass and
full program material meaning, mixes.
00:04:30
So for example here's a wonderful bridge by
Will Knox, sound's a little bit like this.
00:04:46
So it sounds good but maybe
it's a little bit dull
and a little boomy.
00:04:50
What can we do? Very simply,
the way you think
about it is: "OK...
00:04:55
it's a little dull maybe I'm gonna
add a little bit of high end."
So maybe in the 10k range.
00:05:00
Medium bandwidth to start.
00:05:02
And then,
pick a number out of somewhere.
Here we go.
00:05:09
Without.
00:05:13
So easy.
00:05:14
How about a little 5k shine?
Like this.
00:05:22
Without.
00:05:26
With.
00:05:31
OK, now there's a little bit of
a mask in the nose down there,
maybe we're gonna cut a little
bit of 300 with the MEQ-5
and then compensate that adding a
little bit at the very bottom.
00:05:40
And it would sound like this.
00:05:49
Without.
00:05:55
With.
00:05:59
Easier would be painful.
00:06:02
Pultecs are also great to make
something that's not so fat
more fat.
00:06:06
Or fatter if you have proper English.
For example, this bass.
00:06:16
Recorded direct, not super exciting.
00:06:20
Can chose 100 Hz band on the EQP-1A,
the bottom part, and just raise it.
00:06:36
Without.
00:06:40
With.
00:06:44
It doesn't require
a PHD in science.
00:06:46
However, here's
where it gets fun.
00:06:49
I just boost in 100 quite a bit.
00:06:51
What happens if I play
with the attenuation?
If you listen to the result
of the boost of the 100,
you get the fat that you want but you
also get a little bit of the 'mmm' thing.
00:07:00
Check it out.
00:07:04
A little bit of cotton right?
Check out what happens if I
play with the attenuation
at the same frequency since, if you remember,
these three controls are tied together.
00:07:23
As a reminder, we started flat like this.
00:07:31
We are here now.
00:07:40
With just the boost it sounded like this.
00:07:46
And with the boost and the attenuation at
the same spot.
00:07:58
Quick easy way to take a direct
bass and make it sound fat.
00:08:02
And you can do the same
with all the instruments,
bass drums also benefit
greatly from this trick.
00:08:06
Even some male vocal
you could boost the very bottom and then use
the attenuation to do a little bit of a cut.
00:08:12
The curve looks a
little bit like this.
00:08:16
The best way to function when
using a Pultec EQ is like this.
00:08:20
Pick a frequency, boost it.
00:08:22
Like it, or not?
If you don't like it, pick
another one, move on.
00:08:26
There's nothing complicated about
it and that's the beauty of it all.
00:08:29
Also there's no graph,
there's no visual of what it does which
means you're forced to listen to it.
00:08:35
That's even better.
00:08:36
Another great way to use the
Pultec is on the Full Mix.
00:08:39
To make it sound a
little more spruced up.
00:08:41
Even when you use it in stereo you only
get one set of controls for both sides.
00:08:45
So whatever you do is applied
to both sides exactly the same.
00:08:48
For example on this track
I hear a little bit of mud. And I hear a
little bit of lack of joy in the high end.
00:09:14
So, let's put some joy in the high end.
I'm gonna pick 16k,
full bandwidth because I
want it pretty broad gentle,
and I'm gonna boost it, gently.
00:09:28
Maybe 16 is too high. How about
we go down to 10 for example?
Without.
00:09:42
With.
00:09:47
It's starting to sound a little more opened.
00:09:49
I'm lacking a little bit of that shine
in the top of the vocal. So maybe
a little 5k would be nice.
Check it out.
00:10:00
That's nice. Without.
00:10:07
With.
00:10:13
I'm digging this. And maybe a little bit
of the super bottom. Check it out.
00:10:34
So, I pick 20, boosted it to really get
the vibe for it, didn't work, pick 30,
dug that, that was too much.
00:10:41
Put it back down
and used the attenuation knob
to try and do that little
cut and boost at the
same time trick.
00:10:48
So I get the boost in the super lows
but I get a little bit of relief
in the low mids area.
00:10:53
So we started with the
track sounding like this.
00:11:05
And now we are here.
00:11:16
Very simple. Three or four moves and
you go from dull to nice and palatable
that you can send to your mother or girlfriend
or dog depending on who you hang out with.
00:11:24
Next in line in the classics
bundle is the LA-2A
which is a compressor that's been
around for longer than I have,
you have and we all have
put together collectively.
00:11:33
What's so special about that?
Well, like a Pultec, it's easy
to use and it sounds great.
00:11:39
Again, transformer-tube-transformer
design with a little bit of a twist.
00:11:43
In the LA-2A the gain reduction
is actually achieved by a light.
00:11:47
The brighter the light gets the
more gain reduction you get.
00:11:50
I know it sound weird but it's true.
Look it up, it's called a T4 cell.
00:11:54
What is great about the whole light thing
is that it gives the LA-2A a certain sound,
a certain attack and release characteristics
that are perfect for bass and for vocals.
00:12:02
Isn't that wonderful?
The original designer,
Jim Lawrence,
was only looking to make
something that would allow him
to not have to ride a fader all day
long while working at a radio.
00:12:11
I don't think he was planning to make the an
all vocal compressor for the next fifty years.
00:12:15
But here we are anyway.
00:12:17
Here's how to use an LA-2A.
00:12:19
First listen to your track raw, in this
case we have the Pultec from before.
00:12:23
Check it out.
00:12:29
Select the LA-2.
00:12:31
He comes up. Default setting. Press play.
00:12:38
Without.
00:12:42
With.
00:12:47
As far as I'm concerned this is
actually a little too much compression.
00:12:50
So let's look at the controls.
00:12:52
We have two controls.
00:12:54
One on the left called gain, one on
the right called peak reduction.
00:12:58
It may be a little confusing if
you are from the western world
and you read from
left to right since
in most fashions first
you reduce the peaks than you
compensate that adding gain.
00:13:07
Which is the principle
of compression.
00:13:09
The original designer decided to put the gain on
the left and the peak reduction on the right.
00:13:13
We love him nonetheless.
00:13:16
Here's how you thing about it.
You want less compression,
take this knob down.
00:13:24
More compression, you guessed it.
00:13:30
So, of course, the principle if
you're gonna over compress like this
is to compensate by
raising the gain.
00:13:36
Sounds like this.
00:13:42
Without.
00:13:46
With.
00:13:52
As you can see, it's hard to screw up,
Even with this insane amount of
compression it still sounds palatable.
00:13:58
Friends don't let friends compress
that much.
00:14:00
There's no reason for it. Unless you’re
looking for a special effect.
00:14:04
I would say, for vocal for example,
3 to 10 db of compression depending
on how uneven the original take is.
00:14:12
It's acceptable. Anything beyond that is a
matter of taste, you have yours I have mine.
00:14:20
Will provide you with
endless amounts of ABing,
meaning listen to one or the other and
wondering why you can't hear a difference.
00:14:25
And that's OK.
00:14:18
This button right here on the left
Until you have the supersonic ears that
will let you hear the difference between
3:1, 20:1 in conditions where there's
really not that much of a difference,
leave it in compress.
00:14:37
Before we move on let me return the settings
to something a little more reasonable.
00:14:42
Default gain.
00:14:44
Too much compression obviously.
00:14:49
Still too much.
00:14:54
I kind of dig that.
00:14:55
Check it out without.
00:14:56
'Till the daylight' and then 'I dance with
your ghost' gets a lot louder.
00:15:00
This is without.
00:15:05
Right. You hear the difference in level
between the two.
00:15:08
And now with the compression.
00:15:13
It's a little too quiet so I'm gonna add
some gain so you can compare
with and without, at the same gain.
00:15:18
Without.
00:15:22
With.
00:15:28
The next plug-in in the
analog classics bundle
is the 1176, which is also a compressor.
00:15:33
What's so special about the
1176 that's worth knowing?
Number one, it's from the late 60s.
Peace man.
00:15:38
Number two, it's solid
state, not tube.
00:15:41
Number three, it's
very very fast.
00:15:43
Meaning, it moves fast and it catch
transients and attacks very well.
00:15:47
Which is why people love it.
Let me show you.
00:15:49
The 1176 functions very differently and
has a lot more controls than the LA-2A.
00:15:55
In the case of the 1176,
you get more compression
by raising the input level
into the processor.
00:16:02
The more level you give,
the more compression you get
because it's a fixed threshold.
00:16:07
So your threshold is here and then you
raise your level into the threshold.
00:16:11
You also have ratio controls.
00:16:14
4, 8, 12 and 20.
00:16:16
The thing that is tricky here
is that even though the 1176 is build as
a fixed threshold compressor, it's not.
00:16:23
The threshold changes
when you change the ratio,
because otherwise it
would be too simple.
00:16:28
Basic understanding of
threshold, ratios
and all the concepts like that
are better explained elsewhere.
00:16:35
What I'm trying to
do here is show you
how to make the most of these particular
plug-ins for special situations.
00:16:41
If you raise your
level into the box,
even though you're gonna
get some compression,
you will have to adjust
the output level,
so that you don't blow the next
processor out of the water.
00:16:50
So here's how I usually use it.
00:16:52
I listen to my track flat.
00:16:58
Then I turn it on with
the default settings.
00:17:04
So that's obviously too much compression.
00:17:07
How do you think about it?
Very simple. Since
you get more compression
if you raise the input into the box,
obviously, you're gonna get less compression
if you lower the input into the box.
So let's do that.
00:17:23
Without.
00:17:27
So obviously now
the uncompressed signal is louder
than the compressed signal.
00:17:31
Let's compensate for that.
00:17:36
Without.
00:17:41
OK, I'll play it again.
00:17:42
Listen to
the raw vocal and the difference
in level with and without.
00:17:46
First without.
00:17:52
With.
00:17:57
With it's nicely pinned and
placed and doesn't move much
which is what we are looking for from
a compressor on a vocal for example.
00:18:03
The other thing that's cool is
it adds a little bit of a color.
00:18:06
A little bit of a tone,
a difference in tone.
00:18:08
The reason for that is that this plug-in
is emulating a piece of hardware
and that piece of hardware
had transformers in it,
on the input and the output.
00:18:15
And transformers are very much responsible
for the color of a lot of boxes.
00:18:20
The other controls you
need to be aware about are
the attack and release
and ratio controls.
00:18:26
Attack and release kind
of speak for themselves
except there's a
little of a twist.
00:18:30
Very fast attacks
will let you catch
all transients,
kill the top of a snare or
really keep something in place.
00:18:36
Of course it will sound
like you are compressing.
00:18:39
If you want to have less
of an obvious compression
you're gonna slow the attack down to
let some of the original sound through
and give it more presence.
00:18:47
The twist within the 1176 is that
7 is the fastest
and 1 is the slowest.
00:18:52
That makes no sense but it makes sense.
Same for release.
00:18:55
Now, how does one think about setting
attack and release on an 1176
if you are not quite sure?
It's pretty simple.
Don't touch it.
00:19:03
That said, if you have a vocal
that's a little spitty,
a little too present. Or a snare
that has too much attack,
you can speed the attack up
by going towards the seven
and it will catch more
of that initial attack.
00:19:14
If you want more presence and
let more of the sound through
than you go towards
the one on the attack.
00:19:19
Same spirit for the release.
00:19:21
If you want the compressor
to let go faster,
so the sound is more natural,
go towards the seven.
00:19:27
If you want the compressor to
try and do some level control,
then go towards the one.
00:19:33
In this case,
I like the attack and release on the vocal.
The default is pretty nice.
00:19:37
Let's talk about ratio.
00:19:40
You have four and eight, which
are considered compression,
and then 12 and 20 which
are considered limiting.
00:19:45
As a rule of thumb, if you
want something more gentle,
use compression. If you want
something more drastic,
use limiting.
00:19:53
For a very detailed overview
of all the settings
I recommend you watch the
dedicated 1176 video.
00:20:00
As always, you can use
this on the way in.
00:20:02
Now you gotta be careful.
00:20:04
It is very easy to overdo
it within the 1176.
00:20:07
So if you're gonna
record with it,
make sure you are always in
gain reduction mode here
and keep an eye on that needle.
00:20:14
If your needle hangs out most of the
time at minus 20 you're screwing up.
00:20:17
Also part of the
bundle is the 1176 SE.
00:20:21
Which is, the same controls,
the same principles, the same
emulation, it's just coded differently
so it's more efficient with DSP so you
can use more of them with your Apollo.
00:20:31
I personally wouldn't say that one
sounds better than the other,
but they do sound a little different
so you must listen carefully.
00:20:37
Next in the fantastic list is the
little know CS-1 Channel Strip.
00:20:42
When you first open the CS-1 it
can look a little overwhelming.
00:20:45
Specially considering all the controls
there are and what the presets sound like.
00:20:51
But fear not, we can do better.
00:20:53
First I recommend you turn off
the delay modulator, here,
and the reflector. Here.
00:21:00
And now it sounds like these.
00:21:03
Ah!
So, what is this plug-in?
Think of it as your channel of a console.
That's really what it is.
00:21:10
You get an EQ here on top, than
you get a compressor here.
00:21:14
And then you get some cool
special effects after that.
00:21:17
Let's go over the EQ first.
00:21:19
This a 5 band fully parametric EQ
that's very transparent. Very clean.
00:21:25
Every band has full control,
gain
frequency,
All the bands overlap.
00:21:32
Which means that if you
want all five bands
to hang out in the
60 to 80 Hz range
you can do it.
00:21:37
I wouldn't do it, but you could.
00:21:40
Things to know:
Every band has an on/off button.
00:21:45
Make sure these are on otherwise you're
not hearing anything that you're doing.
00:21:48
Also,
the bottom band here can
be a high pass filter
which is practical when
you're tracking vocals,
you can remove the bottom
rumble end stuff like that.
00:21:56
This is really great.
00:21:58
When you're in high pass mode
obviously the gain does nothing
because you're just filtering. It's
no longer an EQ, it's a filter.
00:22:04
The top band can be
a low pass filter,
which also can be very useful
for very bright things.
00:22:09
And some of these bands can
be turned into shelving.
00:22:12
So for example, the bottom
band is now a shelf EQ.
00:22:16
What I would recommend you do
is probably use the bottom band
as a high pass filter
and the second band here
as your shelf EQ. As they
allow you to do very smartly.
00:22:26
So you have five bands,
which you can configure for very
practical tracking or mixing setup,
of a high pass, low
shelf, mid parametric,
high shelf and low pass.
00:22:35
Each band having it's
own bypass button,
and a general bypass
for the entire EQ
with an offset right here.
The offset is great.
00:22:45
A lot of EQs don't have offset.
00:22:47
Say you boost a lot
inside the bands,
you're gonna end up with a lot more level.
How do you compare at the same level?
Well, you could use
this Output offset
and this Bypass button to
compare at equal level.
00:22:59
Same if you cut a lot, you can
boost the output. That's great.
00:23:02
Also,
this output button,
makes sure that you
don't have to kill
the input of the compressor
if you do a lot of equing.
00:23:09
Next is the compressor.
00:23:11
It's not trying to be an LA-2
or an 1176
or any existing hardware compressor.
It's its own thing.
00:23:17
It compresses. If the signal
is too loud it brings it down.
00:23:20
This is how it works.
00:23:21
The first thing to do
is to set your ratio.
00:23:24
I recommend you try 3:1.
00:23:26
Because 3:1 never killed anyone.
00:23:28
Ratio is how much compression is gonna
happen when you are compressing.
00:23:33
Then set you threshold based
on your signal level.
00:23:36
The threshold decides
at which level
the compressor is gonna
stop compressing.
00:23:40
So the ratio decides how much compression
is gonna happen, when it compresses,
and the threshold decides at which
level it starts compressing.
00:23:48
Which is different from the
LA-2 and the 1176. Right?
LA-2, you just decide how
much compression you want.
00:23:56
1176, you raise the level into the
compressor to get it to compress.
00:24:00
Here, you lower the threshold until you
hit the point where you want compression.
00:24:04
You get the hang of it.
00:24:06
This compressor is a little different
because it has auto-gain built-in.
00:24:09
And you can't turn it off.
00:24:11
What is auto-gain?
Auto-gain is your compressor
automatically compensating
for the amount of gain you're
losing because of compression.
00:24:18
Think about it for a second.
00:24:20
Yes.
00:24:21
So.
00:24:22
It's different from
traditional compressors.
00:24:24
Think of it as one less
knob to worry about.
00:24:27
Before we go any further let's start processing
Will's vocal with just the channel strip.
00:24:33
I'm gonna turn the bottom
band into a high-pass.
00:24:40
And then I'm gonna remove
a little bit of the mask
at 200 I think.
00:24:48
That's too much.
00:24:52
Without.
00:24:54
With.
00:24:56
I little bit of shine on top.
I'm gonna turn this into a shelf.
00:25:00
Right here. And make it shine around 20k.
00:25:09
I'm gonna low pass at 20k to make sure
there's nothing garbagy up there.
00:25:16
Without.
00:25:20
With.
00:25:24
That's acceptable to me.
00:25:26
Then we're gonna turn
the compressor on,
switch to 3:1,
and lower my threshold until
I hit just what I want.
00:25:32
You see it with the
needle moving.
00:25:38
So I think it needs to start
compressing at lower levels,
a little bit, just a few dB.
00:25:47
Let's go crazy.
00:25:52
You will notice that even though I'm not
at 17 dB on the threshold control,
the level is not lowering
like it was with the LA-2.
00:25:59
That's because of the
auto-gain feature.
00:26:01
Let's go further.
00:26:07
I'm starting to hear unnatural
sounds on the breaths. Check it out.
00:26:14
Without.
00:26:19
I'm gonna, probably be less brutish.
00:26:27
That's acceptable to me.
00:26:28
Just like on the 1176 you have
attack and release controls,
same principle.
00:26:32
Except here faster is to the
left, slower is to the right.
00:26:36
Leave them as default until
you really get a feel for it.
00:26:39
But again, more presence,
slow the attack down.
00:26:43
More clamping down the
transients and the fast attacks,
speed the attack up.
00:26:48
Why, might you ask, is there
and output knob if there's
an auto-gain feature?
Very good question,
thank you for asking.
00:26:55
It's because A, the auto-gain feature
is not necessarily perfect.
00:26:59
Two, that let's you control the
gain stage of the entire compressor
and the entire chain so far
into the next module which is,
the delay.
00:27:10
Next is the delay modulator.
00:27:12
Which should be called
delay and modulator or,
actually more accurately, delay
or modulator. Let me show you.
00:27:18
Let's turn it on.
Sounds like this.
00:27:22
But it could also be useful if you
tweak it a little bit. Check it out.
00:27:26
It has several personalities
just like your ex girlfriend.
00:27:29
Chorus, Chor180, QuadChr, Flanger,
Flanger, Dual Delay and Ping Pong.
00:27:33
So, right now we are
hearing the Chorus.
00:27:35
But we're also hearing some
delays at the top of the chorus
and it's all kind of complicated.
This is how you think about it.
00:27:42
First things first,
if you're gonna
be in Chorus mode
make sure you lower the delays here
so that you can hear what's going on.
00:27:51
Ah, Chorus.
00:27:52
Then, if you are in chorus mode,
you have the rate.
00:27:57
And the depth.
00:28:03
Super pleasant.
00:28:04
If you wanna get really tweaky
you can actually change
the shape of the waveform
that is the modulator.
00:28:09
But we're not that kind of girl.
00:28:12
Here's our thought process.
00:28:13
A, pick your effect. You want a chorus,
you want a delay, you want a flanger.
00:28:18
Second, make sure that, if
you are not using delays,
that delay settings are short enough
that you actually hear
the process that is supposed to be.
Like I showed you earlier.
00:28:26
Third.
00:28:28
Choose your wet to dry mix.
So, what does that mean?
How much of the effected
signal do you want.
00:28:35
Versus the dry signal.
00:28:38
Now, what's this negative
wet/dry signal about?
It's the same, it's the ratio
of wet versus dry but,
the wet signal has it's
polarity inverted.
00:28:48
And I'm sure you can find
some use for that one day.
00:28:52
Next, you notice here that we have left
delay right delay, left pan right pan.
00:28:56
That's because this plug-in
also works in stereo.
00:28:58
In this case it's a vocal
so it's just mono.
00:29:00
But, if you were in stereo you could
choose the width of these effects. Also,
here you have something
called 'Recir'.
00:29:07
It's not french, no no no,
it's called recirculation,
which most other
people call feedback.
00:29:12
So the recirculation control is
the feedback control you know.
00:29:16
And then 'Damping'. That's pretty cool.
Let me show you on a delay.
00:29:20
The delay mode is called 'Dual Delays'.
So you guessed it, we have two delays.
00:29:25
The time for the first delay is here,
the time for the second delay is here.
00:29:28
As I just mentioned, if you
work in stereo you could choose
the left and right
pans for those delays.
00:29:33
Now check it out.
00:29:34
For vocal I like shorter delays to try
and create a little bit of a balance.
00:29:40
Maybe shorter.
00:29:43
OK. And then, less of the mix.
00:29:50
That's interesting.
00:29:52
The damping
is really a way to darken
every other occurrence
of the delay.
00:29:58
Meaning, as the delays repeat
they get darken and darker
like the old tape delays did.
Check it out.
00:30:05
This is wide open.
00:30:08
And this is very dark.
00:30:11
You almost don't hear it.
If you go in between.
00:30:16
You get that space
but you don't get the brightness
and the annoying repetitions.
00:30:21
Without.
00:30:24
With.
00:30:26
Maybe a little more opened.
And a little shorter.
00:30:30
And this is all built-in
within the plug-in so you
can make yourself a preset
that you track through in real time
and have all this all ready to go.
00:30:40
As a reminder we started
with the vocal here.
00:30:46
Now we are here.
00:30:51
And of course this is a little quieter
than the raw signal so I can use the...
00:30:55
offset gain here to compensate.
00:31:06
I strongly urge to explore this menu.
00:31:08
Because it is rare to be
able to have modulation
and delays built-in
in a channel strip.
00:31:13
And it's very practical
if you are mixing fast.
00:31:16
Last but not least,
the Reflector.
00:31:19
Let's turn it on. I'm gonna turn
the modulator delay off
so you can really focus on
the sound of the Reflector.
00:31:30
The Reflector is a great
early reflection module.
00:31:33
It let's you mimic the
characteristics of a small room.
00:31:37
Not the 'shhhhhh' tail,
famous in the eighties
and Enya records,
but the sound of the room,
like are you in the kitchen,
are you in the garage,
are you in the bedroom?
And it's very useful to create
space around instruments.
00:31:49
Especially these days,
when most people record everything
way to close to the microphone
and there's no
space behind them.
00:31:55
So having the Reflector on every channel
can be great to give depth to your mix.
00:32:00
Here's how to think about it.
00:32:02
The default is
actually pretty cool
just to put space
into something.
00:32:05
The first thing you should do
is decide of the wet/dry mix,
just like you did
with the delay.
00:32:10
With this plug-in, you
could also go into
a polarity inverted mode
which you will also find
a proper use for one day.
00:32:17
Here let's go around... 8. Let's
play without as a reminder.
00:32:23
With.
00:32:26
You can hear this cool
space around the vocal.
00:32:28
I'm gonna exaggerate a little
bit so you can really hear it
while I design the process them bring
it back to something more useful.
00:32:34
Let's put it at say 40%.
00:32:36
Without.
00:32:39
With.
00:32:41
You can really feel this happening, right?
So.
00:32:44
You have the wet/dry mix.
00:32:45
If you are working in stereo
you have your pans right here.
00:32:47
We're in mono so everything is
default in 100% to
the left as default.
00:32:52
And then, you have...
00:32:55
the size.
00:32:58
Let me exaggerate a little further.
00:33:02
Smaller size.
00:33:04
You can really hear the
room getting smaller.
00:33:07
Very, very small.
00:33:09
Or huge.
00:33:12
Then you can choose the
shape of the room.
00:33:14
Every room has a
different shape.
00:33:16
So of course, if you
click on the menu
it's possible that you have a
small heart attack.
00:33:20
Do not have a heart attack.
Just pick one...
00:33:23
listen to it, if you
don't like it move on.
00:33:25
There are no dying
consequences of not knowing
in advance what the shape
is gonna sound like.
00:33:29
I don't, nobody does. Except maybe
the guy who designed the plug-in.
00:33:33
We are on the corridor,
let's listen to the cube.
00:33:37
Corridor.
00:33:40
Corridor is a little lighter.
OK.
00:33:42
How about... Dome.
00:33:48
I don't know, I think I
like the cube better.
00:33:52
How about a smaller cube?
That's usable.
00:33:57
Next control. Recirculation.
00:33:59
Feedback, right? So more of it.
00:34:03
And damping.
00:34:06
So you can make the room darker
and have more reflections.
00:34:09
All these nuances become clearer
and more intuitive over time.
00:34:12
Using presets is totally fine and
nobody will sue you over it.
00:34:16
Let me tweak it a little further
so that it sounds better.
00:34:33
Very often you know
you are there
when you're no longer sure if
you have a process on or not.
00:34:38
That means this is
integrated in the track
and not calling attention to
itself like for example now.
00:34:42
This is with processing.
00:34:45
And this is without.
00:34:48
Everything feels very forward
without, very dry and very demoey.
00:34:51
And with you have a
little more of a space.
00:34:57
And with we add the delay
modulator back on.
00:35:04
That's nice. All in one,
EQ, compression, a
little bit of delay,
a little bit of early reflection
to give a it of vibe.
00:35:10
All in one plug-in,
this track will now fit nicely
into the bed around it.
00:35:15
Last but not least, the RealVerb Pro.
Let me show you the controls.
00:35:20
This reverb attempts to
recreate real spaces.
00:35:23
With a twist.
00:35:25
You have a shape control
and a material control.
00:35:28
Shape is the shape of the room,
material is what covers
the walls of the room.
00:35:32
To give you more control they
let you mix and match shapes...
00:35:36
and mix and match materials because
no room is perfectly square
and no room is made
entirely of gold.
00:35:43
So.
00:35:45
To keep things simple, I
recommend you start by using
one shape and one material.
00:35:49
For example, let's pick this
shape, and this material.
00:35:55
A reverse fan...
00:35:57
and hardwood.
00:35:59
These two controls here
relate to the different shapes.
00:36:03
The top size control relates
to the size of that reverse
fan and the bottom size control
relates to this one but we're
not using it right now.
00:36:11
Same for material, this is the
thickness of the hardwood.
00:36:14
And this would be the
thickness of the marble
but we are not using the
marble this very minute.
00:36:19
This is what a reverse fan room,
of size 56 meters, with 81% of
hardwood thickness sounds like.
00:36:30
OK. This is what it would
sound like if it was marble.
00:36:36
So apparently marble is thicker
sounding than hardwood.
00:36:39
Over time you can
learn that stuff.
00:36:42
As I said before,
if you are designing your
reverb from scratch,
it's easier to use one shape
and one material and
than go from there.
00:36:50
But you can also use presets.
00:36:52
It doesn't hurt. Let's
use a preset here.
00:36:54
There's one I like called Theater.
Check it out.
00:36:59
That's nice and I can play with
this and show you how to tweak it.
00:37:02
So this is a Fan and an A Frame,
and some plaster
and some drapes.
00:37:05
The plaster sounds like this.
00:37:09
And the drape sounds like this.
00:37:12
A lot darker as you would expect.
The mix of the two is interesting.
00:37:17
Fair enough.
00:37:18
Next, in the positioning section,
here's what you need to know about.
00:37:22
The mix is the mix of wet/dry
just as we saw before.
00:37:25
So less would be
nice in this case.
00:37:29
As a reminder we started here.
00:37:32
With.
00:37:34
That's nice.
00:37:36
Distance is a very proprietary
system that let's you
actually alter the feeling of distance
between the subject and the reverb.
00:37:43
You can play with it, it's not
a crucial setting for now,
but you can play with it if you
wanna get really really tweaky.
00:37:49
And you have pan controls,
or width controls.
00:37:52
For the early reflections
and for the late reflections.
00:37:57
Let me show you the
difference between early
and late reflections so you can
wrap your head around that.
00:38:02
Early reflections, as I have explained
before, are the sound of the room.
00:38:06
Because when you are in
the room and you speak
your voice hits the wall
and gets back to you.
00:38:10
The ceiling, the floor, the
side walls, everywhere.
00:38:14
The sound of these reflections
get to your ear and your brain
imagines what kind
of room you are in.
00:38:20
That's why you can tell where you are in
your house even with your eyes closed.
00:38:24
Your brain reconstructs
what room you are in
based on the early reflections.
00:38:30
So in this case,
I'm gonna lower the level
of the late reflection
and we are gonna to listen to
only the early reflections.
00:38:36
Which is this engine right here.
00:38:42
You can choose how late they are.
00:38:46
As a reminder, this is flat.
00:38:49
With.
00:38:51
I'm gonna put a little more
reverb so it's easier to listen to.
00:38:58
Now you can hear there's
a little bit of a space,
just like we heard on
the channel strip.
00:39:06
You could choose how dense they are,
how delayed they are,
and how loud they are.
00:39:14
And then you have
the tail also know
as late reflections.
00:39:18
I'm gonna turn the
early reflections off.
00:39:21
And this is the late reflections.
00:39:26
So as you noticed,
this is your level.
00:39:28
This is your distance.
00:39:31
Very straight forward.
00:39:32
Same here, this is your level
for the late reflections.
00:39:35
This is the delay, this is how
long it takes before they hit.
00:39:38
And this is how long they are.
00:39:40
If you want a really
long reverb you do this.
00:39:49
Tripy.
00:39:50
So, the combination of
early and late reflections
lets you really shape
the reverb you want.
00:39:56
I don't think we're gonna
keep the 18 seconds reverb.
00:39:59
Let's start with
two seconds, ish.
00:40:07
I wanna put less of the
combination of early and late
so it's more realistic.
00:40:16
It sounds super natural.
00:40:17
If you remember, I mentioned
earlier you have
early and late reflections stereo
width which means you could have
more centered early reflections
and very wide late reflections.
00:40:27
All that stuff is very subtle
and all the parameters kind
of interact with each other
so it can be overwhelming.
00:40:32
What I recommend you do is
start with a preset you like
and just tweak things a little
bit until you get the feel for.
00:40:38
There are more a few couple things you
need to know about RealVerb Pro.
00:40:41
For example, what is
that resonance control?
Well, that is more of an EQ than
anything else. Check it out.
00:40:47
You can change the range
of the EQ like this.
00:40:51
You can dampen the high end which is very
useful for reverbs to make them more discrete.
00:40:55
You can dampen the low end which is very practical
to clear the mud from the mix like this.
00:41:00
And you can also add or remove some mids
and really shape the tone of the reverb.
00:41:04
So don't let the word resonance confuse
you, it's really and EQ, check it out.
00:41:09
Right now, it's really dark.
00:41:14
Or brighter.
00:41:19
Of course I can hear you think from here.
"Wait, wait, wait!"
"I can also change the color
with the material here,
and then I can change
the amount here,
and I can change the early reflections
and the late reflections."
Yes, I know. That's
what presets are for.
00:41:33
Two more things.
00:41:34
One, Morphing. What's that?
This reverb lets you morph,
basically seamlessly transition
between two presets.
So for example
a small room and a
really big room.
00:41:45
And you go from the small
room to the very big room
by sliding the slider here. And there's
no artifacts, it's pretty cool.
00:41:51
Let me show you.
00:41:52
So let's pick a couple of presets we
like, for example, Large Bathroom,
and... Jazz Club.
00:42:00
That's a nice transition right there.
00:42:02
So, we start with Large Bathroom and
we transition to a Jazz Club somehow.
00:42:06
Here we go.
00:42:20
That is one large bathroom.
00:42:23
Two.
00:42:24
Last but not least.
00:42:26
As you've seen, I've been using the
RealVerb Pro straight on the vocal track.
00:42:31
And using the mix ratio right here to
decide how much of it I wanna hear
versus the dry signal.
00:42:36
Another option is to not
use it on the track itself
but put it on an Aux,
on a different track.
00:42:41
And send to it.
00:42:44
Here's my send.
00:42:46
And here's my reverb.
00:42:47
What you need to
know in this case
is that you have to have
the reverb 100% wet
so you only hear the
reverb on the Aux.
00:42:54
You can also use this cute
little 'w' button here
that makes it 100% wet
automatically.
00:42:59
This is how it works.
00:43:09
The main benefit of putting the reverb on
an Aux as opposed to directly on the track
is that you save DSP.
00:43:17
And also you can send multiple
instruments to it since
it's a Send system so
you can send the reverb
and the guitar and the
vocal to the same reverb.
00:43:25
Which gives a certain
ensemble vibe to the sound.
00:43:29
Using it on a single
track keeps it simple.
00:43:32
That's the reverb for the vocal and you
don't have to worry about anything else.
00:43:35
Your mileage will vary.
00:43:38
So there you have it,
Pultec Pro, LA-2A, 1176,
CS1 Channel Strip and
the RealVerb Pro.
00:43:45
Everything you need to mix a record or
track a record with your Apollo Box.
00:43:49
We just skim the surface,
if you wanna see more
in-depth mixing videos
or tracking videos look
elsewhere on the site.
00:43:55
Thank you.
Et voilà!
Once logged in, you will be able to read all the transcripts jump around in the video.
- UAD 1176 LN Black Face
- UAD 1176 SE Silver Face
- UAD Pultec Pro EQ
- UAD Teletronix LA-2A
- UAD CS-1 Precision Channel
- UAD RealVerb Pro

Fab Dupont is a award-winning NYC based record producer, mixing/mastering engineer and co-founder of pureMix.net.
Fab has been playing, writing, producing and mixing music both live and in studios all over the world. He's worked in cities like Paris, Boston, Brussels, Stockholm, London and New York just to name a few.
He has his own studio called FLUX Studios in the East Village of New York City.
Fab has received many accolades around the world, including wins at the Victoires de la Musique, South African Music awards, Pan African Music Awards, US independent music awards. He also has received Latin Grammy nominations and has worked on many Latin Grammy and Grammy-nominated albums.
David Crosby
Queen Latifah
Jennifer Lopez
Mark Ronson
Les Nubians
Toots And The Maytals
Parts of this site and some files are only accessible to pureMix Pro Members or available to purchase. Please see below our membership plans or add this video to your shopping cart.